Removal Procedure
Caution: Refer to Gasoline/Gasoline Vapors Caution in the Preface section.
- Drain the fuel tank. Refer to Fuel Tank Draining .
- Relieve the fuel system pressure. Refer to Fuel Pressure Relief .
- Remove the exhaust system. Refer to Exhaust System Replacement in Engine Exhaust.
- Remove the propeller shaft. Refer to Propeller Shaft Replacement in Propeller Shaft.
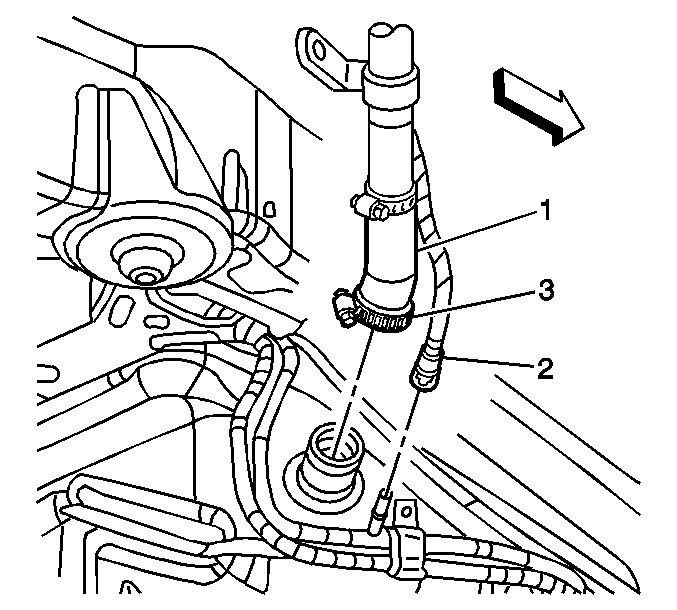
- Disconnect the filler hose (1) from the fuel tank.
- Disconnect the filler vent tube (2) from the evaporative emission (EVAP) hose. Refer to Plastic Collar Quick Connect Fitting Service .
- Refer to Metal Collar Quick Connect Fitting Service or Plastic Collar Quick Connect Fitting Service in order to disconnect the following from the chassis bundle:
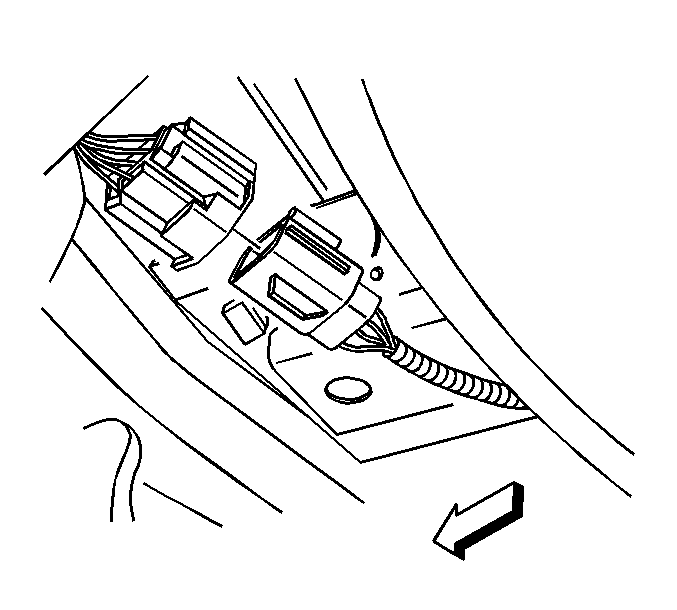
- Disconnect the fuel tank electrical connector.
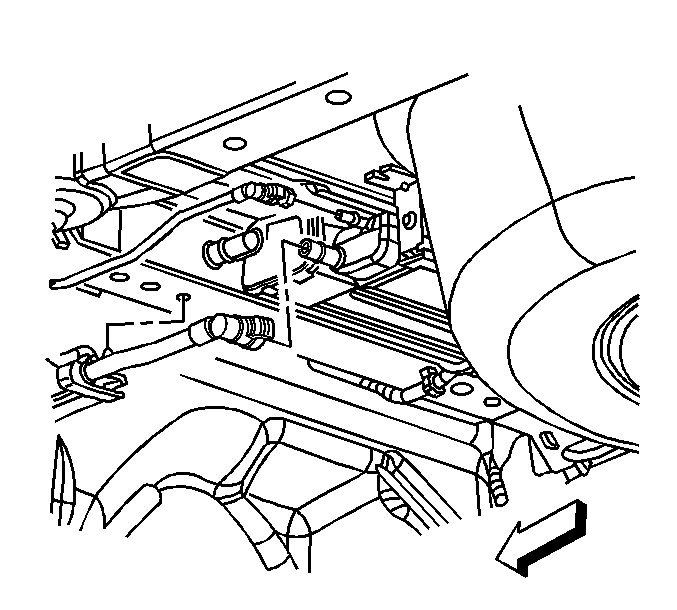
- Disconnect the EVAP hoses from the EVAP canister.
- Pull outward on the retainer tab in order to disengage the retainer from the chassis.
- Disconnect the electrical connector from the EVAP canister.
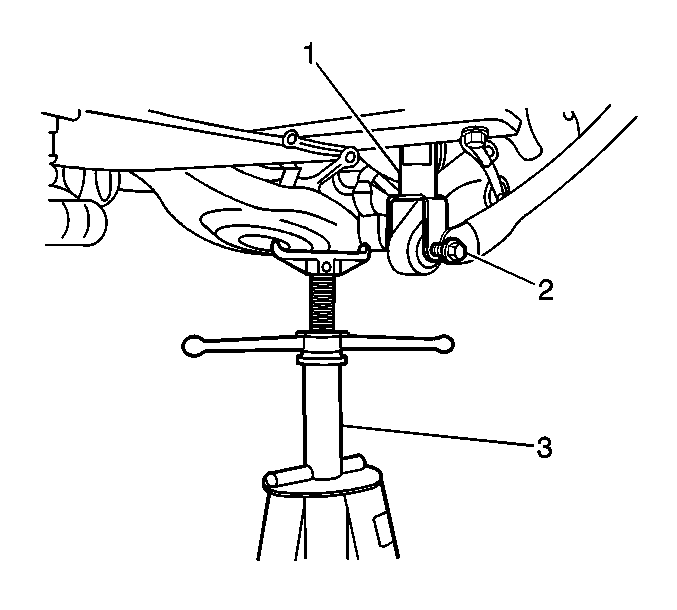
- Raise the lower control arms using a suitable screw jack (3) in order to remove the load from the lower shock bolts (2).
- Remove the lower shock bolts (2).
- Remove the screw jack (3).
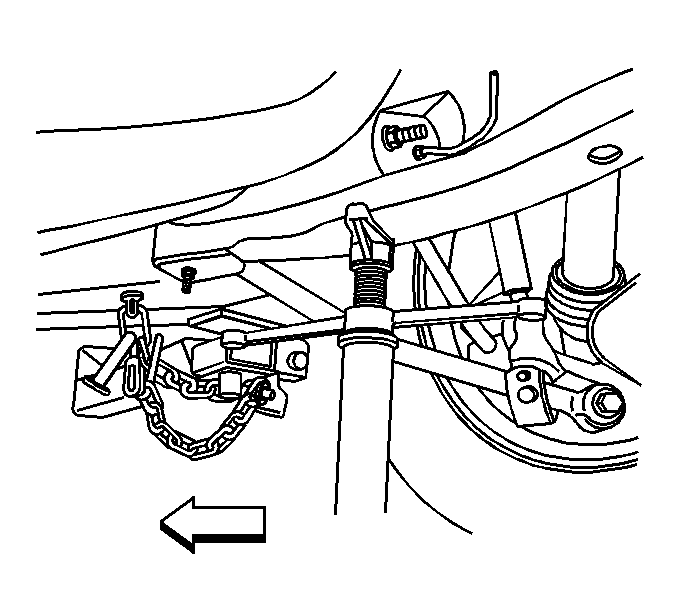
- Position the screw jack under the rear frame near the adjuster tie bar, in order to support the front of the rear frame.
- Remove the 2 front bolts from the rear frame.
- Lower the screw jack until there is approximately 50 mm (2 in) (a) between the front mounting surface of the rear frame and the chassis.
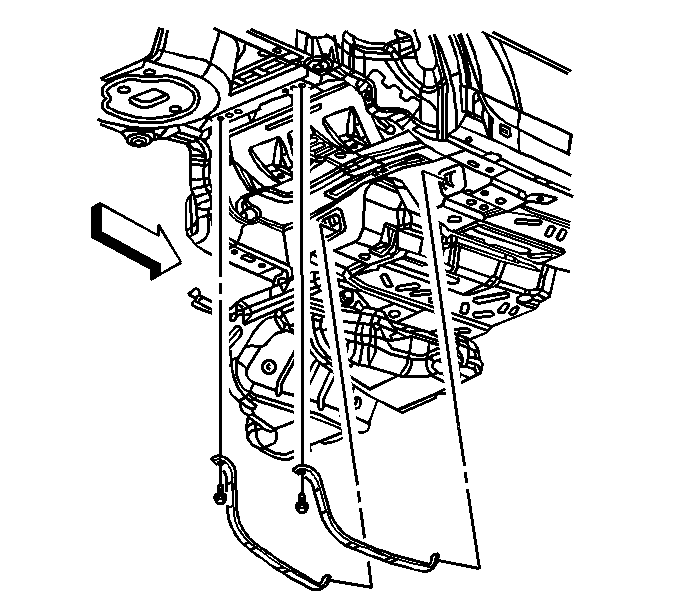
- Remove the fuel tank strap bolts.
- Position the fuel tank straps downward around the rear frame.
- Carefully bend the fuel tank straps ONLY enough to allow the fuel tank to be removed.
- With the aid of an assistant, carefully lower the fuel tank from the vehicle.
- Remove the following components if replacing just the fuel tank:
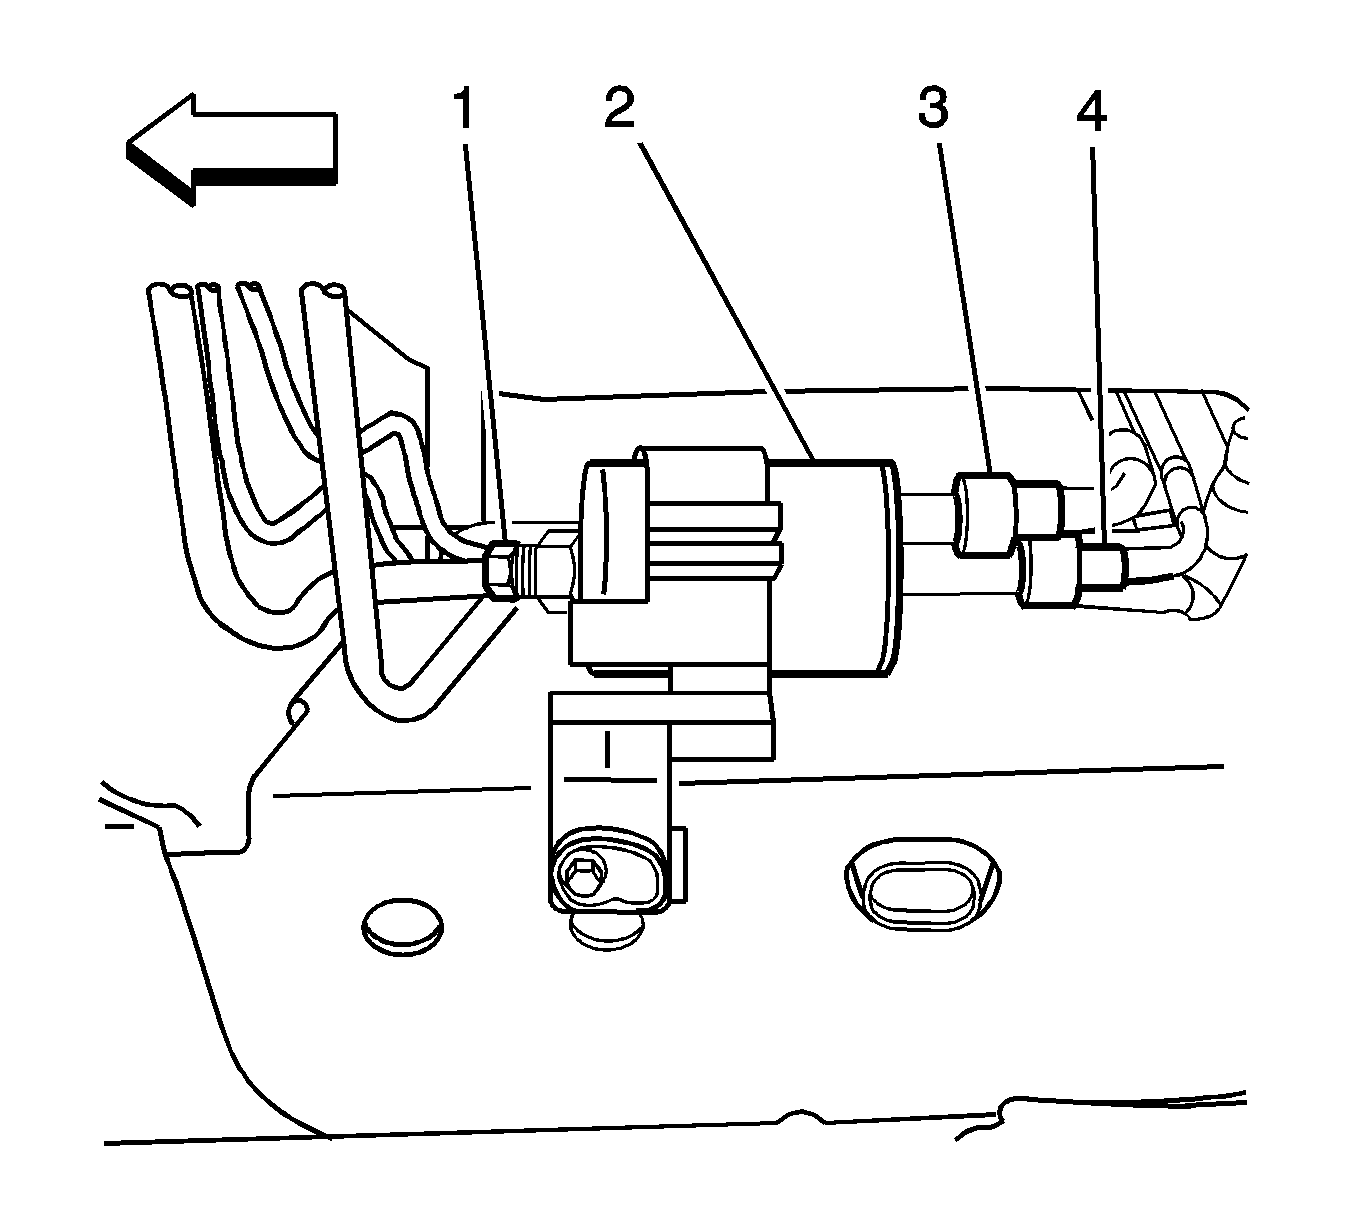
| • | The fuel feed hoses (3 and 4) |
| • | The fuel EVAP hose |
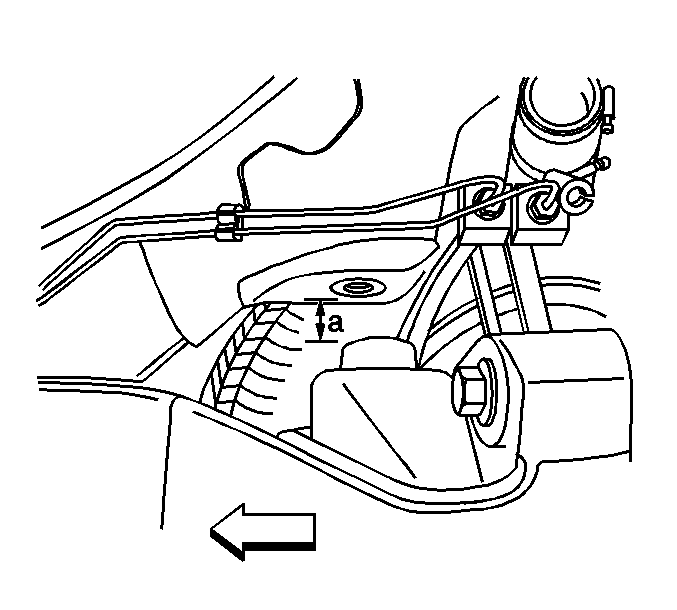
Important: Use care not to over extend the rear brake hoses.
This will allow clearance to access the fuel tank strap bolts.
Important: Ensure the following are free from the surrounding components while lowering
the fuel tank:
• The fuel tank wiring harness • The EVAP wiring harness • The EVAP hoses at the EVAP • The fuel/EVAP hoses at the chassis pipes
| • | The primary fuel tank module--Refer to Primary Fuel Tank Module Replacement . |
| • | The secondary fuel tank module--Refer to Secondary Fuel Tank Module Replacement . |
| • | The fuel tank pressure sensor--Refer to Fuel Tank Pressure Sensor Replacement . |
Installation Procedure
- Install the following components if fuel tank replacement was necessary:
- With the aid of an assistant, carefully raise the fuel tank to the vehicle, aligning the filler neck with the filler hose.
- Carefully bend the fuel tank straps back to their original form.
- Position the fuel tank straps around the rear frame and upward into position, aligning the holes in the straps with the threaded holes in the chassis.
- Install the fuel tank strap bolts.
- Connect the filler hose (1) to the fuel tank.
- Connect the filler vent tube (2) to the EVAP hose. Refer to Plastic Collar Quick Connect Fitting Service .
- Connect the EVAP hoses to the EVAP canister.
- Insert the retainer into the chassis and press inward on the tab to engage.
- Connect the electrical connector to the EVAP canister.
- Connect the fuel tank electrical connector.
- Refer to Metal Collar Quick Connect Fitting Service or Plastic Collar Quick Connect Fitting Service in order to connect the following to the chassis bundle:
- Raise the rear frame using the screw jack.
- Install the 2 front bolts to the rear frame.
- Remove the screw jack.
- Position the screw jack (3) under the lower control arm in order to raise the lower control arms (2).
- Install the lower shock bolts (2).
- Remove the screw jack (3).
- Install the propeller shaft. Refer to Propeller Shaft Replacement in Propeller Shaft.
- Install the exhaust system. Refer to Exhaust System Replacement in Engine Exhaust.
- Refill the fuel tank.
- Inspect for fuel leaks.
| • | The primary fuel tank module--Refer to Primary Fuel Tank Module Replacement . |
| • | The secondary fuel tank module--Refer to Secondary Fuel Tank Module Replacement . |
| • | The fuel tank pressure sensor--Refer to Fuel Tank Pressure Sensor Replacement . |
Important: Ensure the following are properly routed while raising the fuel tank:
• The fuel tank wiring harness • The EVAP wiring harness • The EVAP hoses at the EVAP • The fuel/EVAP hoses at the chassis pipes

Important: Ensure the fuel tank straps are not pressed into the fuel tank.
Notice: Refer to Fastener Notice in the Preface section.
Tighten
Tighten the fuel tank strap bolts to 50 N·m (37 lb ft).

Tighten
Tighten the fuel filler tube hose clamp (3) to 3.5 N·m (31 lb in).


| • | The fuel feed hoses (3 and 4) |
| • | The fuel EVAP hose |

Tighten
Tighten the rear frame bolts to 265 N·m (195 lb ft).

Tighten
Tighten the lower shock bolts to 150 N·m (111 lb ft).
