Squeak/Creak Type Noise From Front of Vehicle When Braking or Turning (Install Front Lower Control Arm Rear Bushing Spacer)

| Subject: | Squeak/Creak Type Noise From Front of Vehicle When Braking or Turning (Install Front Lower Control Arm Rear Bushing Spacer) |
| Models: | 2003-2006 Cadillac CTS |
This bulletin is being revised to change the labor operation number in the Warranty Information. Please discard Corporate Bulletin Number 06-03-08-008B (Section 03 -- Suspension).
Condition
Some customers may comment on a squeak or creak type noise coming from the front of the vehicle. This noise typically occurs while braking or during slow turns, like parking lot maneuvers.
Cause
The cause of this noise may be due to a worn rear bushing on the front lower control arm rubbing against its outer rate washer.
Correction
Diagnostic Tip
This noise can be isolated, as lubing or wetting the rear bushing will temporarily eliminate the noise. While this noise can be irritating, it poses no durability or functional concern.
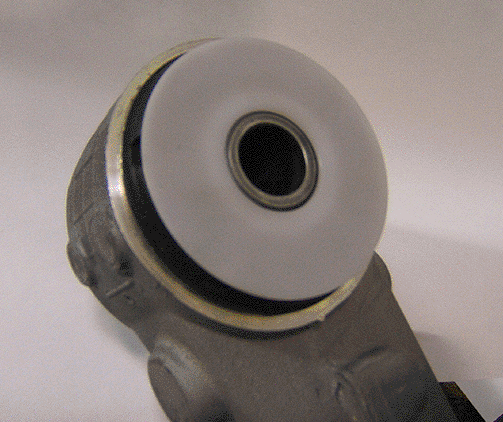
Install an plastic insulating spacer between the rear control arm bushing and the rate washer using the procedure listed below. This plastic insulating spacer is part of the kit listed below.
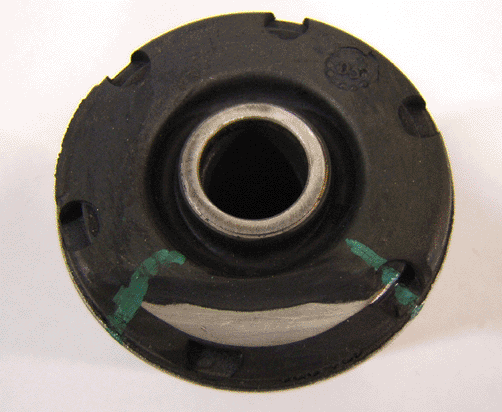
Important: Spacers should only be used on old bushings that exhibit the metal-to-metal wear condition as pictured in Step 3. DO NOT use spacers on new parts or on lower mileage vehicles that do not have this wear condition or a squeak will result due to insufficient clearance.
- Remove the front lower control arm. Refer to the Lower Control Arm Replacement procedure in SI.
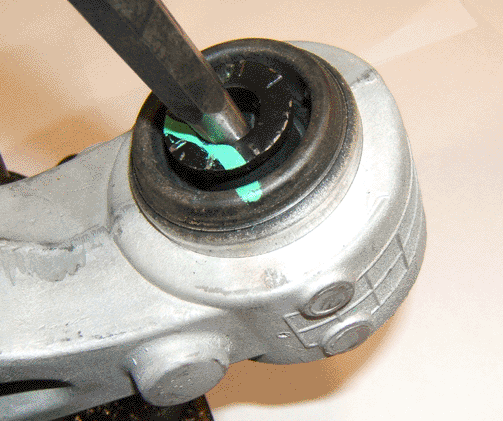
- Remove the rear bushing rate washer using a punch. Discard the washer.
- Inspect the bushing for tears. If there is any evidence of a torn bushing, DO NOT proceed with this bulletin. Replacement of the lower control arm is required.
- Install the new insulating spacer onto the rear bushing.
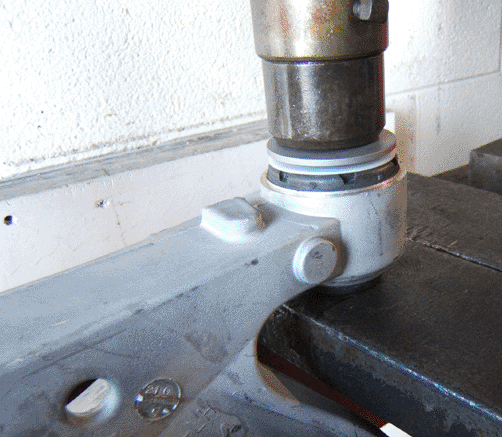
- Using an arbor press, install the new rate washer to the rear bushing.
- Reinstall the front lower control arm. Refer to the Lower Control Arm Replacement procedure in SI.
- Repeat steps 1 through 6 for the other side of the vehicle.


Scuff wear to the bushing, as shown above, is the condition this bulletin addresses.


Parts Information
Part Number | Description | Qty |
|---|---|---|
19150047 | Bumper Kit, Front Lower Control Arm | 1 |
Warranty Information
For vehicles repaired under warranty, use:
Labor Operation | Description | Labor Time |
|---|---|---|
E9465* | Install Front Lower Control Arm Rear Bushing Insulating Spacer and Replace Outer Rate Washer (Both Sides) | 2.0 hr |
* This is a unique labor operation number for bulletin use only. It will not be published in the Labor Time Guide. | ||
