For 1990-2009 cars only
Battery Tray Replacement LHD
Removal Procedure
- Remove the battery. Refer to Battery Replacement .
- Remove the right air inlet grill panel only. Refer to Air Inlet Grille Panel Replacement.
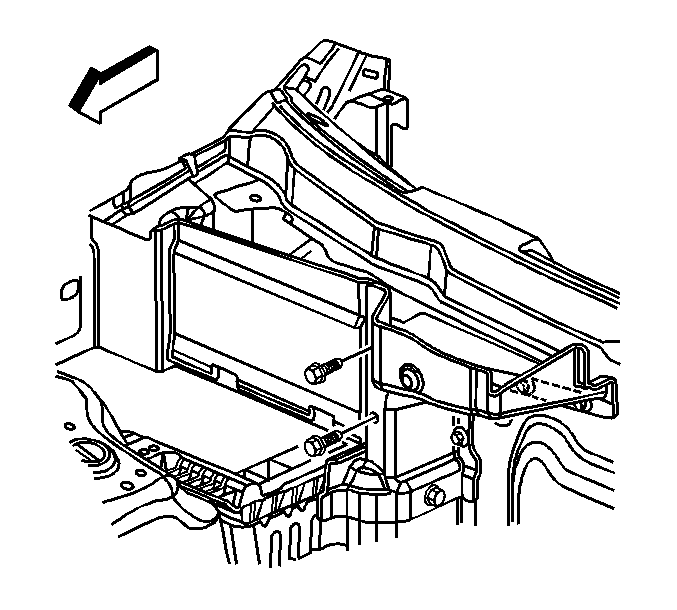
- Remove the 2 bolts securing the front air inlet panel assembly to the battery tray.
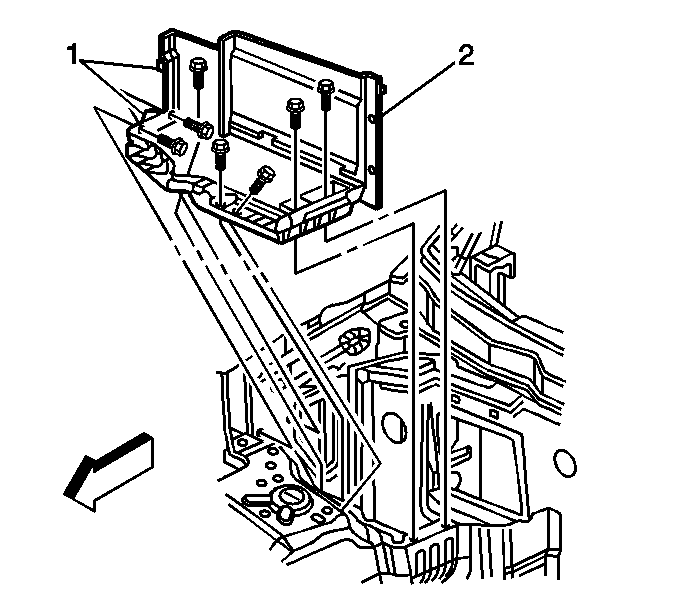
- Remove the battery tray bolts from the following:
- Remove the battery tray (2) from the vehicle.
| • | The inner fender panel |
| • | The shock tower |
| • | The lower air inlet panel assembly |
Installation Procedure
- Position the battery tray (2) to the vehicle, locating the alignment datums (1) with the holes in the inner fender.
- Install the battery tray bolts to the following:
- Install the 2 bolts securing the front air inlet panel assembly to the battery tray.
- Install the right air inlet grill panel. Refer to Air Inlet Grille Panel Replacement.
- Install the battery. Refer to Battery Replacement .
Notice: Refer to Fastener Notice in the Preface section.

| • | The inner fender panel |
| • | The shock tower |
| • | The lower air inlet panel assembly |
Tighten
Tighten the battery tray bolts to 6 N·m (53 lb in).

Tighten
Tighten the front air inlet panel assembly bolts to 6 N·m (53 lb in).
Battery Tray Replacement LS2
Removal Procedure
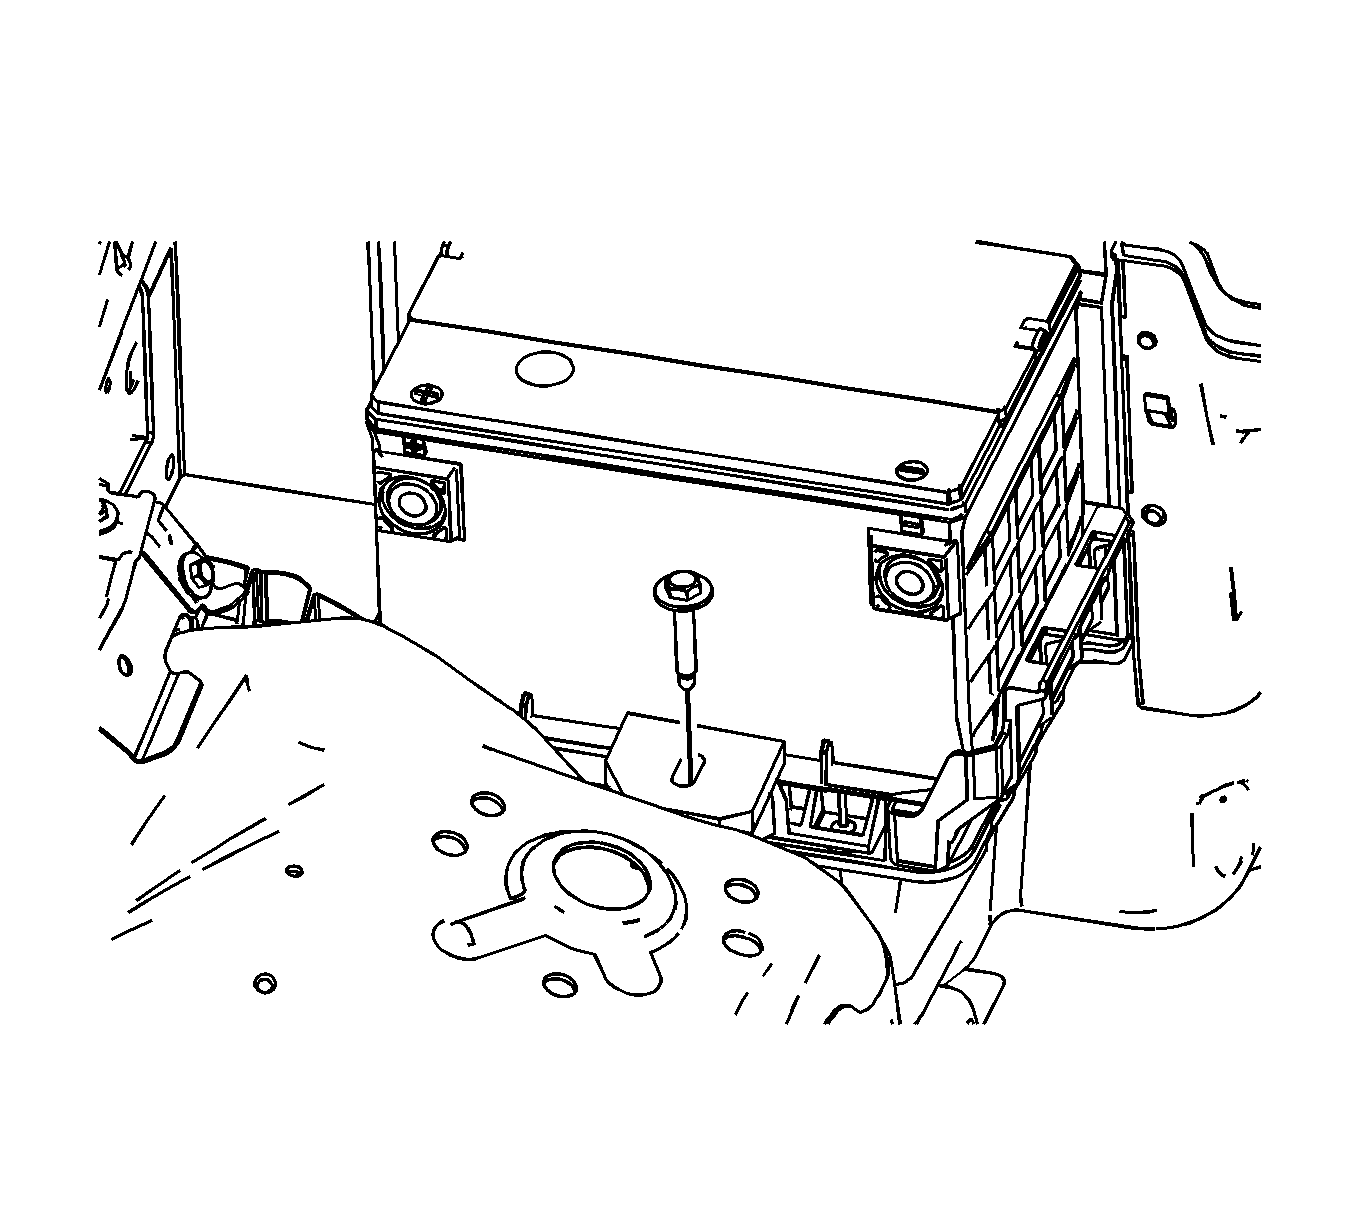
- Remove the battery from the vehicle. Refer to Battery Replacement .
- Remove the right side air inlet grille panel. Refer to Air Inlet Grille Panel Replacement .
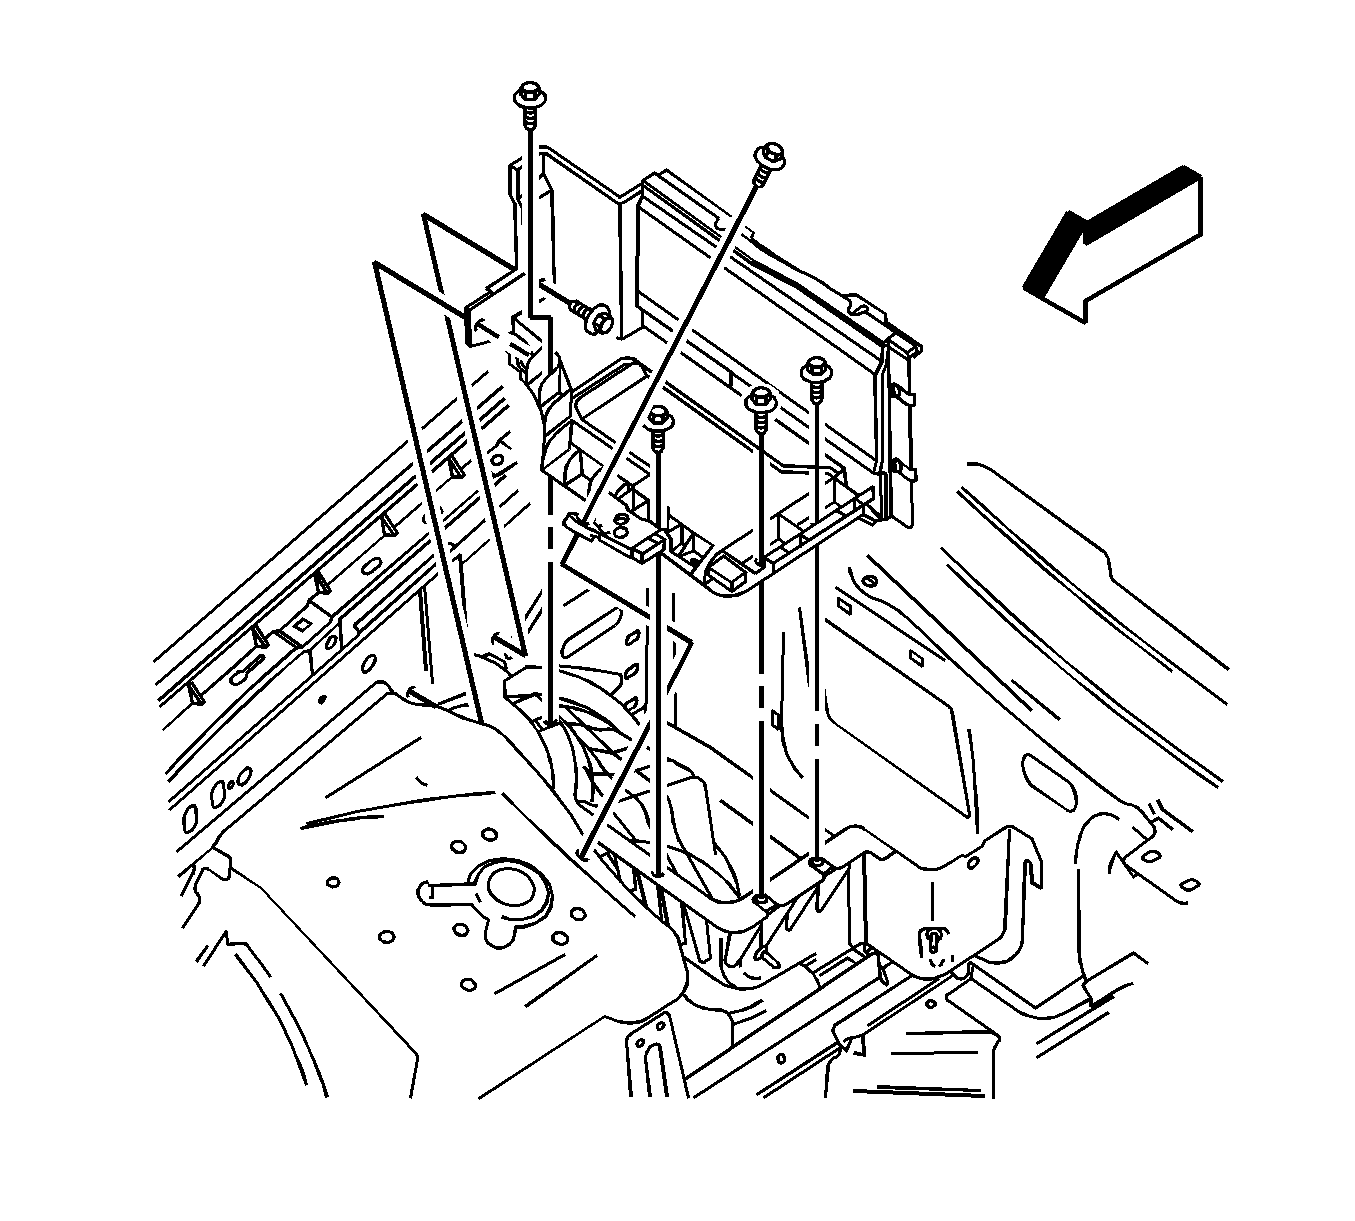
- Remove the bolts from the battery tray.
- Remove the battery tray from the vehicle.
Installation Procedure
- Install the battery tray into the vehicle.
- Install the battery tray bolts.
- Install the right side air inlet grille panel. Refer to Air Inlet Grille Panel Replacement .
- Install the battery into the vehicle. Refer to Battery Replacement .

Notice: Refer to Fastener Notice in the Preface section.
Tighten
Tighten the battery tray bolts to 6 N·m (53 lb in).

Battery Tray Replacement RHD
Removal Procedure
- Remove the battery. Refer to Battery Replacement .
- Remove the left air inlet grill panel only. Refer to Air Inlet Grille Panel Replacement.
- Remove the 2 bolts securing the front air inlet panel assembly to the battery tray.
- Remove the battery tray bolts from the following:
- Remove the battery tray (1) from the vehicle.
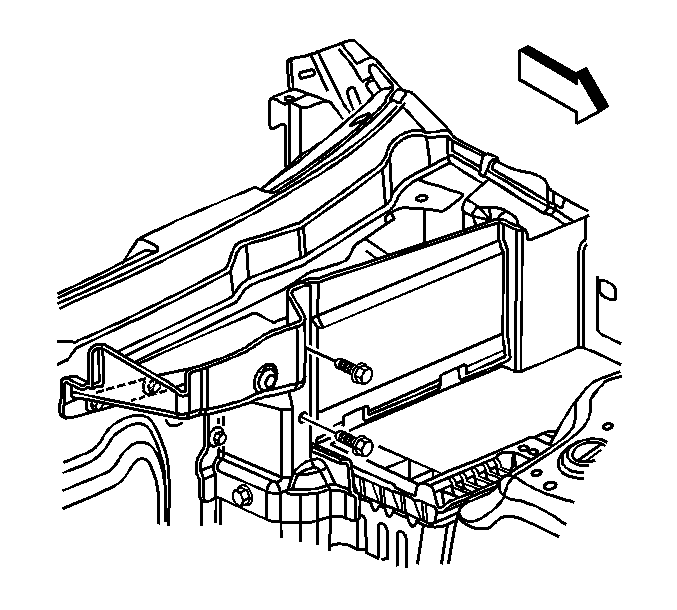
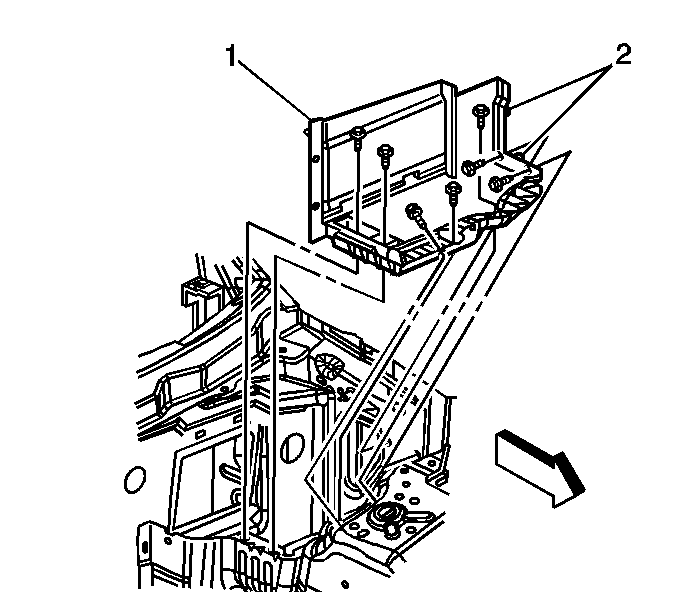
| • | The inner fender panel |
| • | The shock tower |
| • | The lower air inlet panel assembly |
Installation Procedure
- Position the battery tray (1) to the vehicle, locating the alignment datums (2) with the holes in the inner fender.
- Install the battery tray bolts to the following:
- Install the 2 bolts securing the front air inlet panel assembly to the battery tray.
- Install the left air inlet grill panel. Refer to Air Inlet Grille Panel Replacement.
- Install the battery. Refer to Battery Replacement .
Notice: Refer to Fastener Notice in the Preface section.

| • | The inner fender panel |
| • | The shock tower |
| • | The lower air inlet panel assembly |
Tighten
Tighten the battery tray bolts to 6 N·m (53 lb in).

Tighten
Tighten the front air inlet panel assembly bolts to 6 N·m (53 lb in).
