For 1990-2009 cars only
Removal Procedure
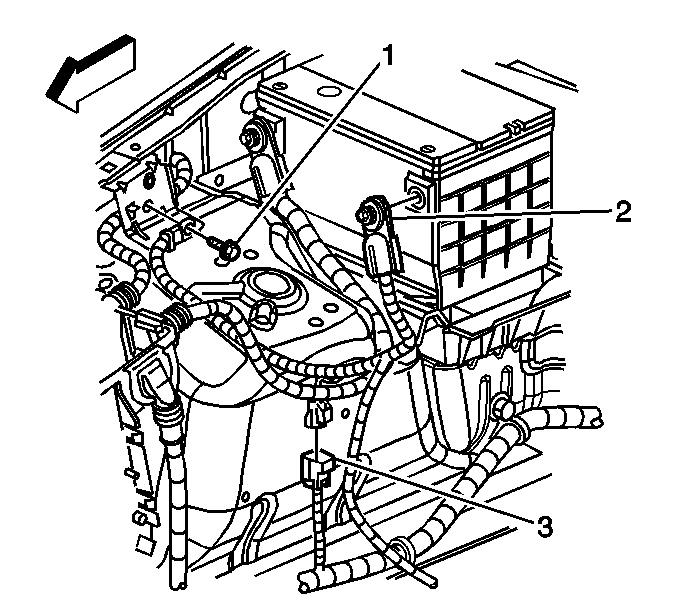
- Disconnect the negative battery cable (2). Refer to Battery Negative Cable Disconnection and Connection .
- Remove the engine sight shield. Refer to Upper Intake Manifold Sight Shield Replacement .
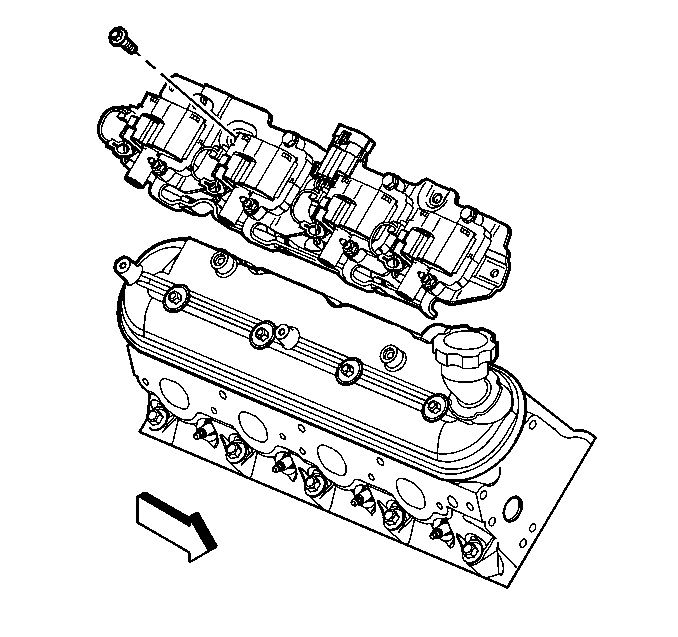
- If replacing an individual coil, disconnect the wire harness at the coil. If removing the coil assembly, disconnect the main coil harness connector.
- Disconnect the spark plug wire at the ignition coils.
- If replacing an individual coil, remove the ignition coil mounting bolts and/or nut that retains the coil to the coil bracket.
- If removing the coil assembly, remove the bolts securing the coil bracket to the valve rocker arm cover.
- Remove the ignition coil or coil assembly.

Caution: Unless directed otherwise, the ignition and start switch must be in the OFF or LOCK position, and all electrical loads must be OFF before servicing any electrical component. Disconnect the negative battery cable to prevent an electrical spark should a tool or equipment come in contact with an exposed electrical terminal. Failure to follow these precautions may result in personal injury and/or damage to the vehicle or its components.

Important: The ignition coils can be removed individually or as an assembly, depending on the repair being performed.
Installation Procedure
- Install the ignition coil or coil assembly.
- Install the ignition coil bolts and/or nuts.
- Connect the spark plug wires at the ignition coils.
- Connect the individual ignition coil or main coil harness connector.
- Install the engine sight shield. Refer to Upper Intake Manifold Sight Shield Replacement .
- Connect the negative battery cable (2). Refer to Battery Negative Cable Disconnection and Connection .

Notice: Refer to Fastener Notice in the Preface section.
Tighten
| • | Tighten the ignition coil-to-bracket bolts/nuts to 12 N·m (106 lb in). |
| • | Tighten the ignition coil bracket-to-valve rocker cover bolts to 12 N·m (106 lb in). |

