For 1990-2009 cars only
Engine Flywheel Installation Automatic Transmission
Tools Required
| • | EN 46106 Engine Flywheel Holding Tool |
| • | J 45059 Angle Meter |
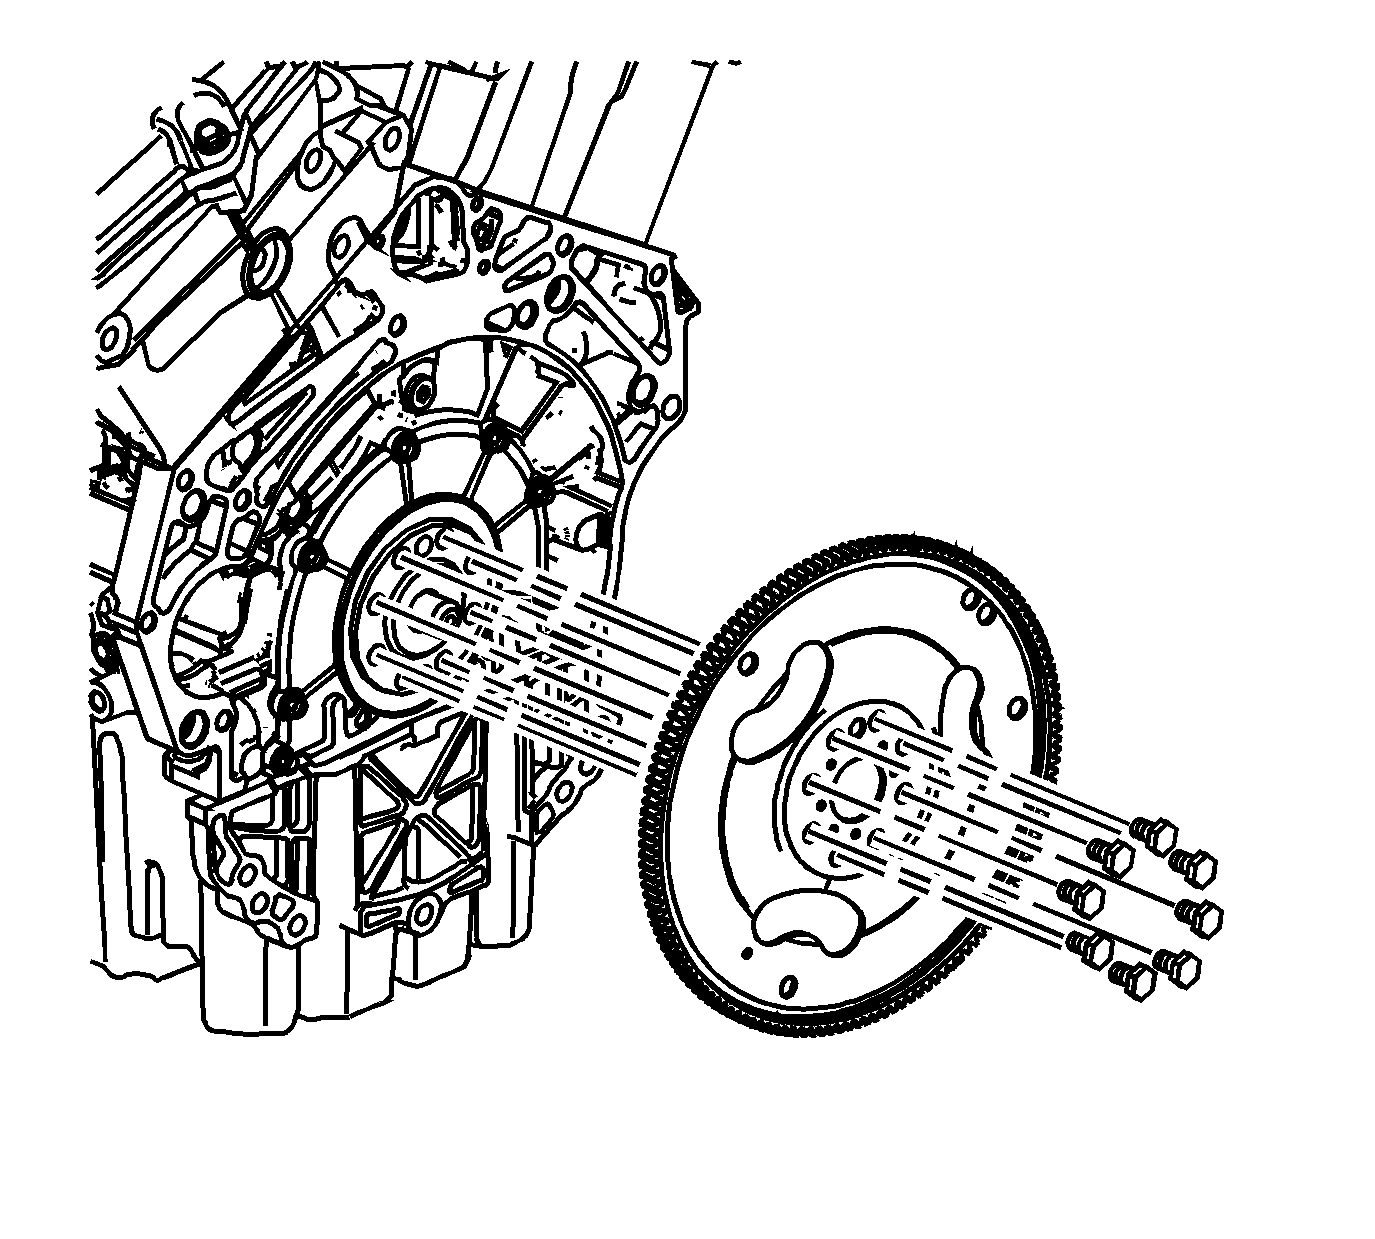
- Place the engine flywheel in position on the crankshaft.
- Install 2 NEW bolts in location at the top and bottom of the engine flywheel bolt pattern allowing the engine flywheel to hang in position.
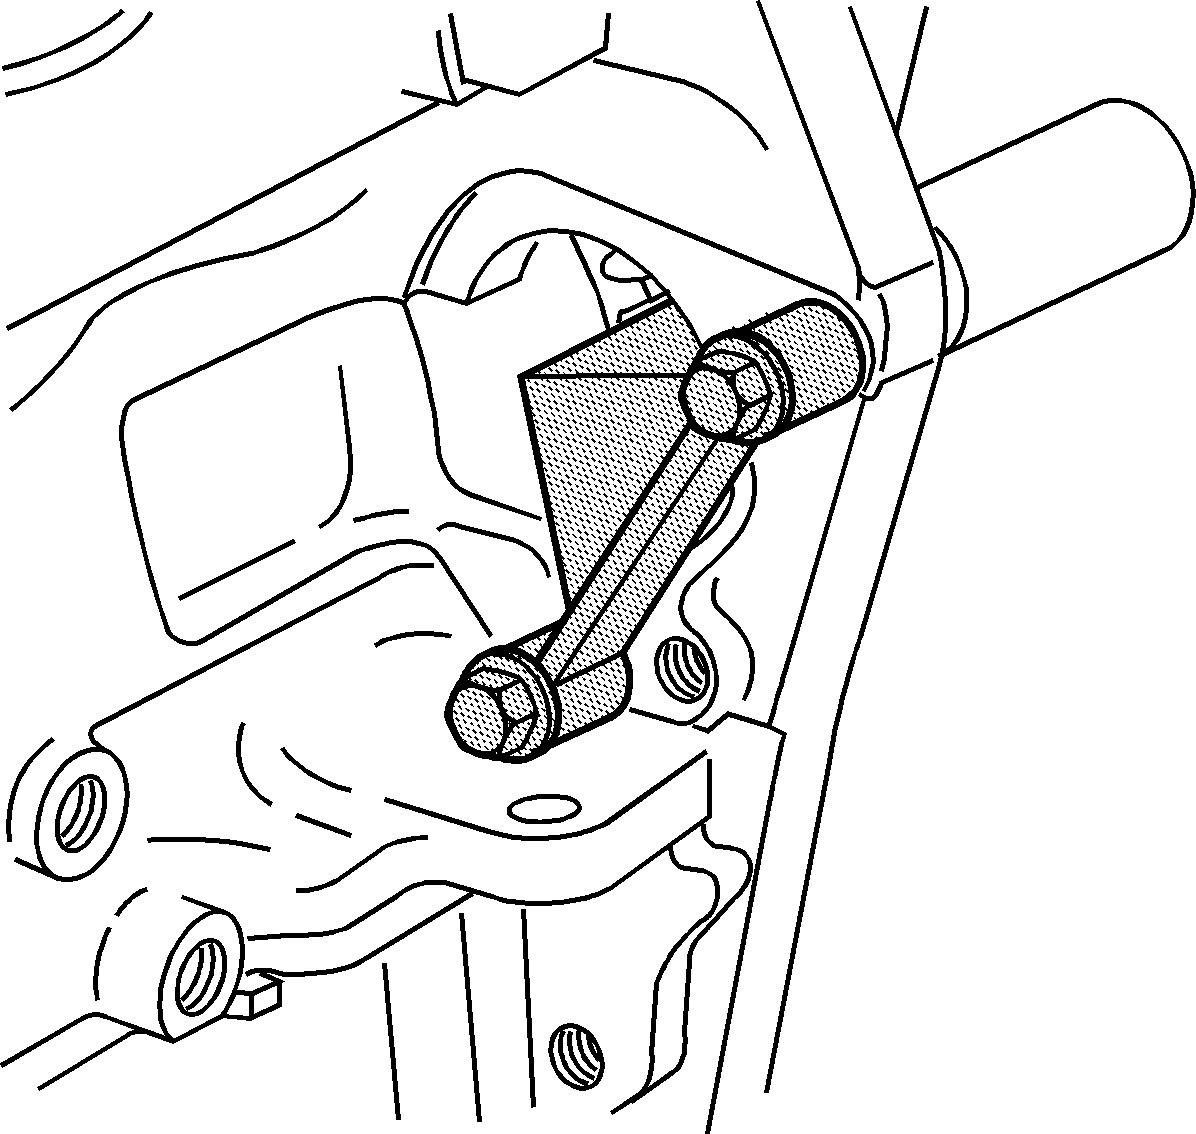
- Install the EN 46106 .
- Install the remaining NEW engine flywheel bolts.
- Tighten the NEW engine flywheel bolts to 30 N·m (22 lb ft).
- Tighten the NEW engine flywheel bolts an additional 45 degrees using the J 45059 .
- Remove the EN 46106 .
Notice: Refer to Fastener Notice in the Preface section.
Tighten

Engine Flywheel Installation Manual Transmission
Tools Required
| • | EN 46106 Engine Flywheel Holding Tool |
| • | J 33169 Clutch Alignment Tool |
| • | J 45059 Angle Meter |
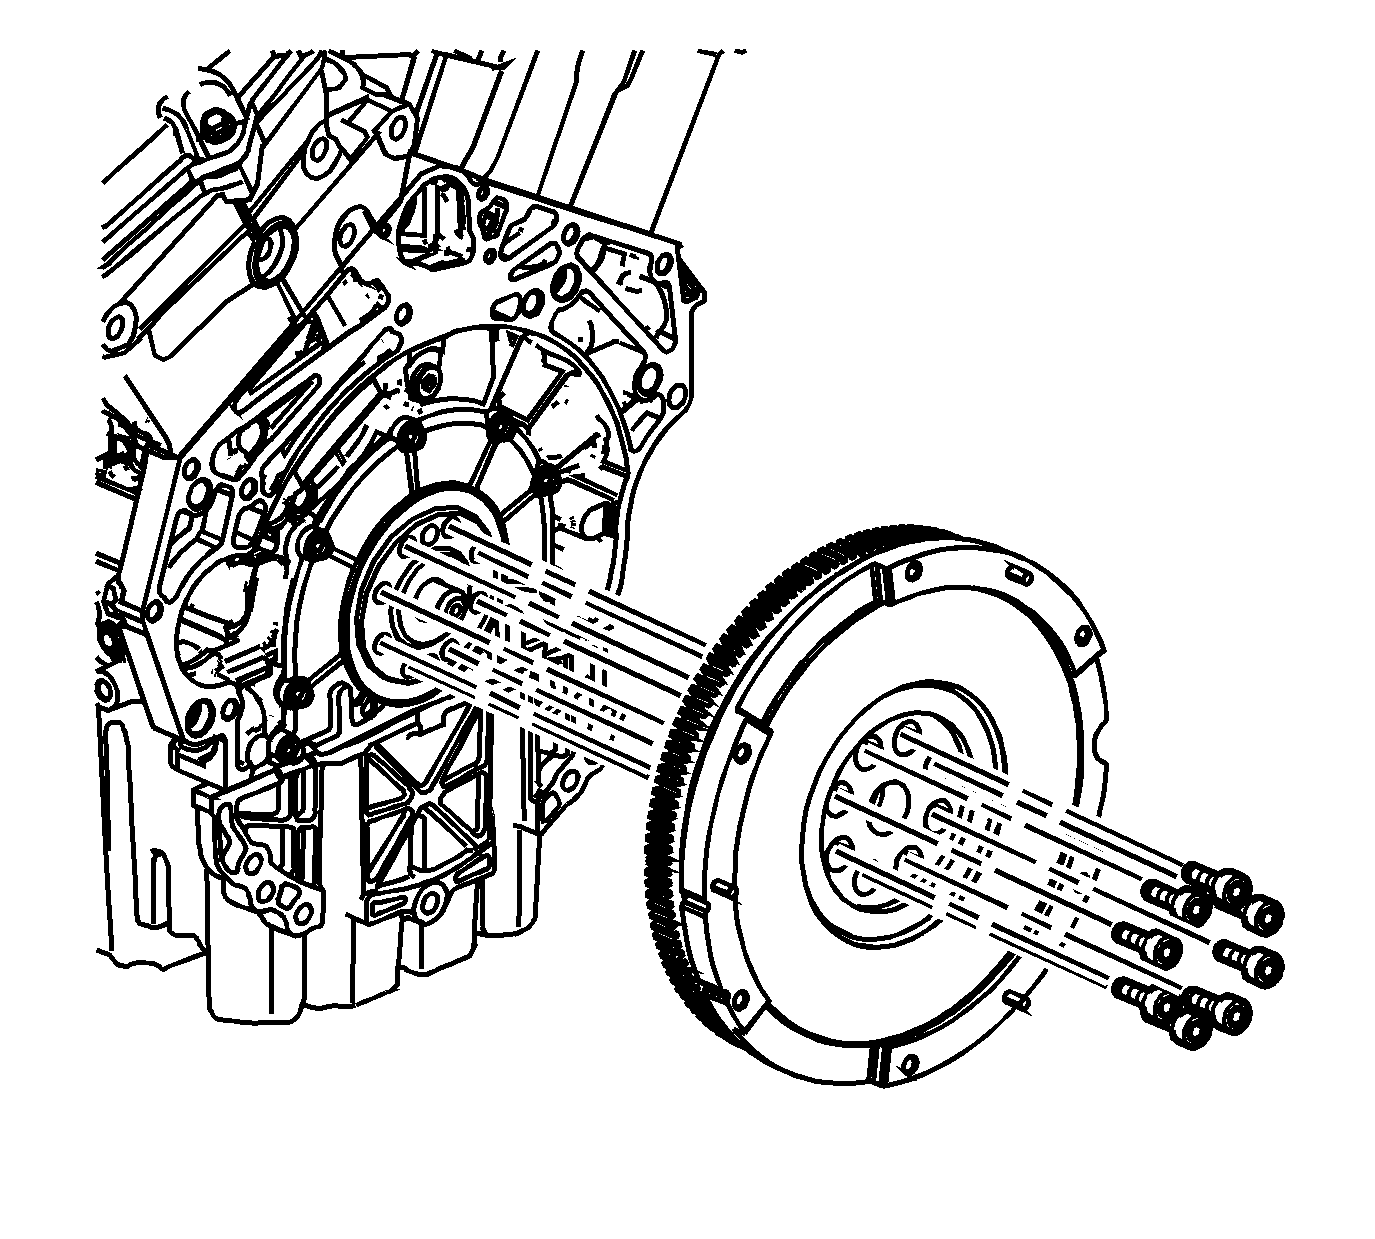
- Place the engine flywheel in position on the crankshaft.
- Install 2 NEW bolts in location at the top and bottom of the engine flywheel bolt pattern allowing the engine flywheel to hang in position.
- Install the EN 46106 .
- Install the remaining NEW engine flywheel bolts.
- Tighten the NEW engine flywheel bolts to 30 N·m (22 lb ft).
- Tighten the NEW engine flywheel bolts an additional 75 degrees using the J 45059 .
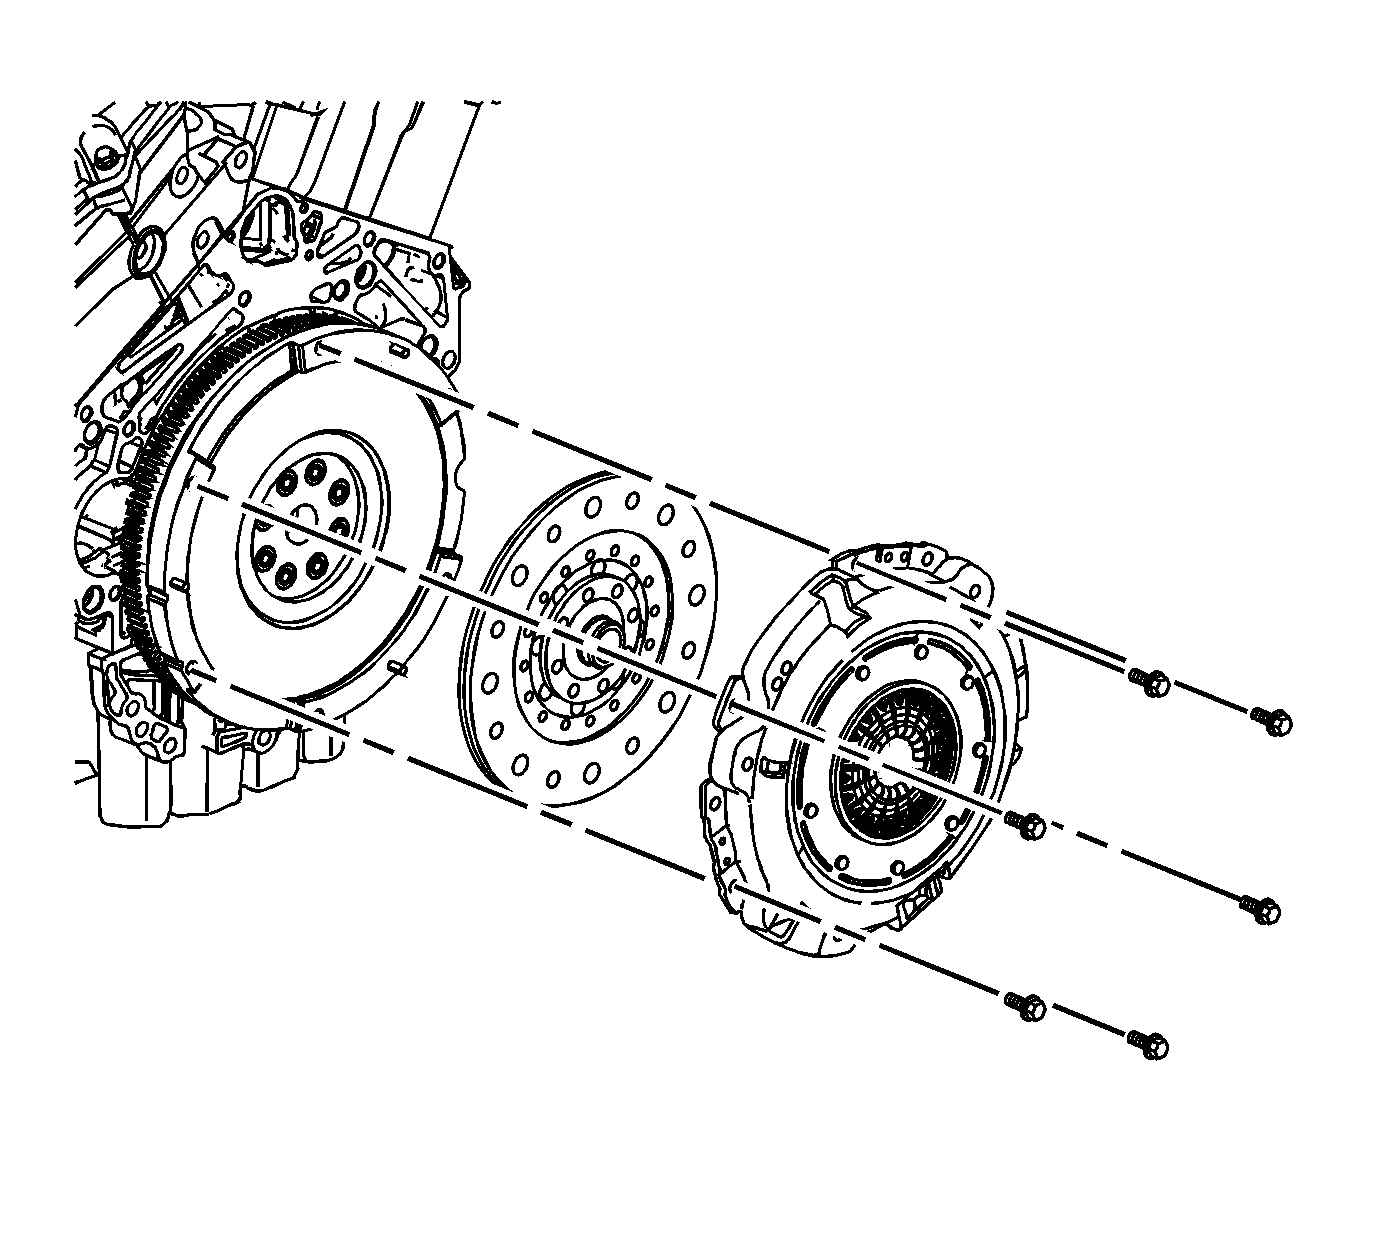
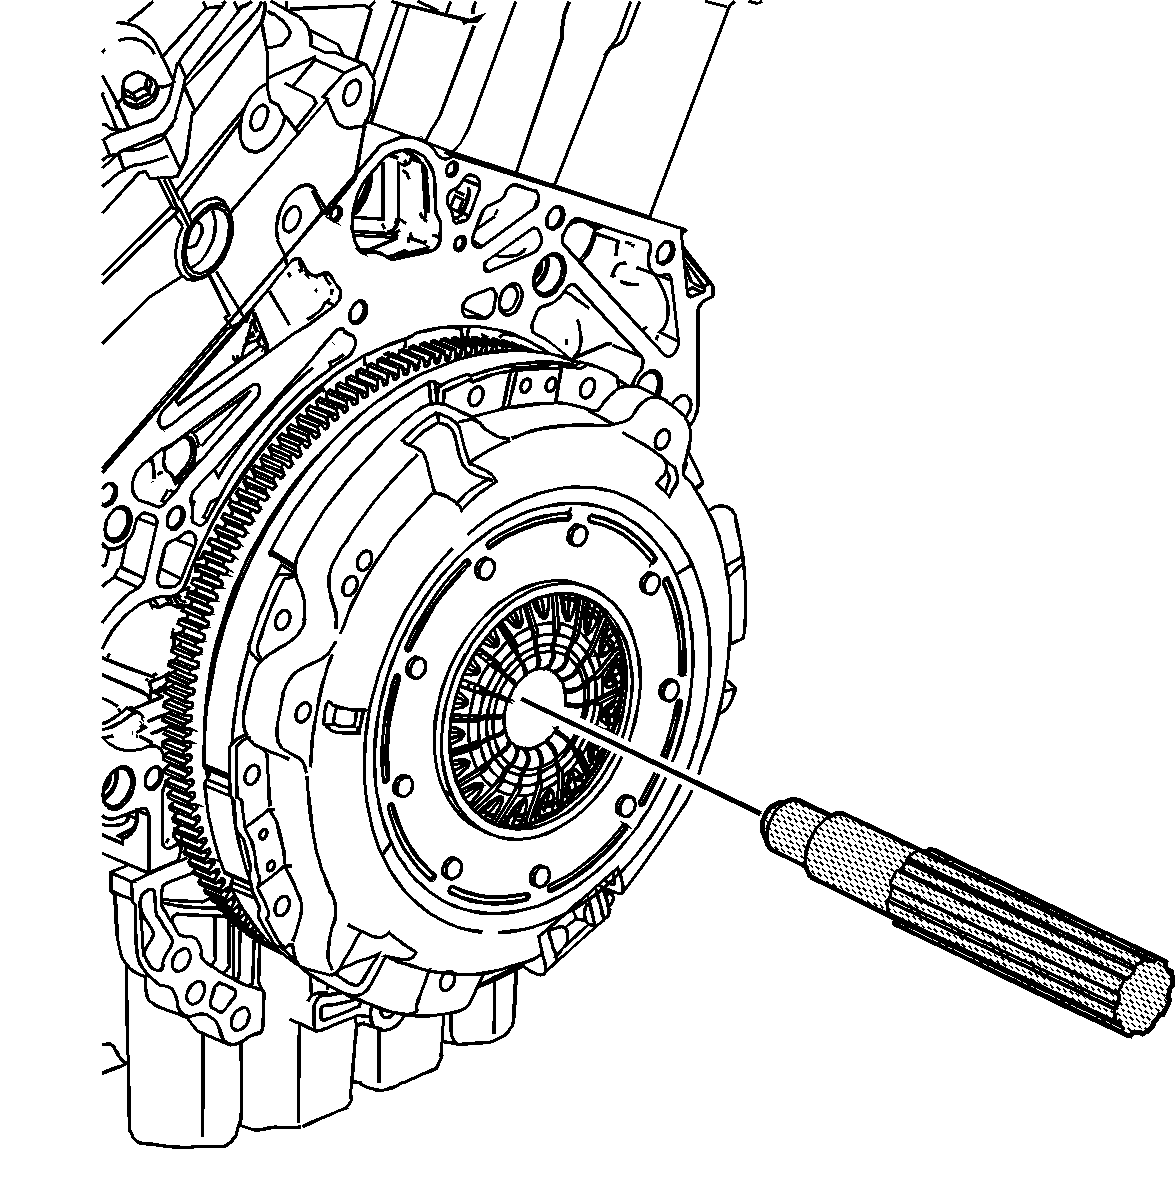
- Install the clutch driven plate disc and the clutch pressure plate to the engine flywheel. Ensure to align the clutch pressure plate to the pins in the engine flywheel.
- Loosely install the clutch pressure plate bolts.
- Install the J 33169 through the clutch driven plate disc and into the end of the crankshaft in order to align the clutch driven plate disc.
- Tighten the clutch pressure plate bolts.
- Remove the J 33169 .

Notice: Refer to Fastener Notice in the Preface section.
Tighten
Tighten
Tighten the clutch pressure plate bolts to 23 N·m (17 lb ft).
