For 1990-2009 cars only
Tools Required
J 39637 Wiper Arm Puller
Removal Procedure
- Set the wipers in the Park position.
- Open the hood assembly.
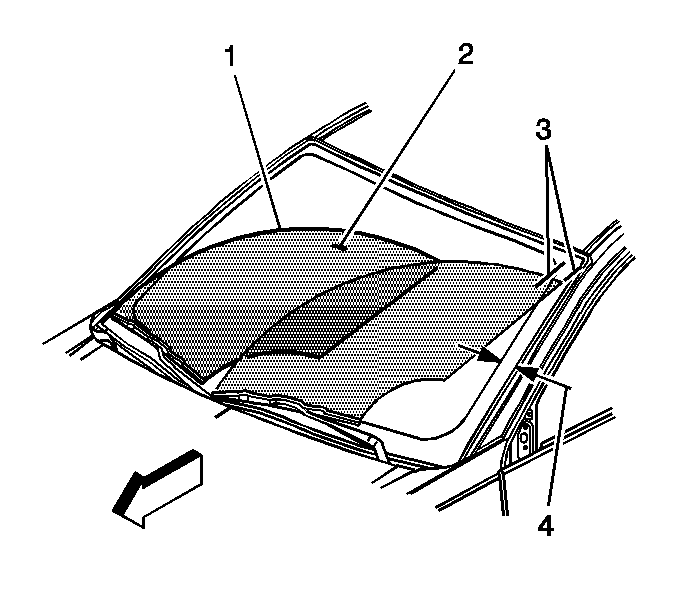
- The driver side wiper aligns with an orange dot at the tip of the wiper blade located at the center lower windshield blackout.
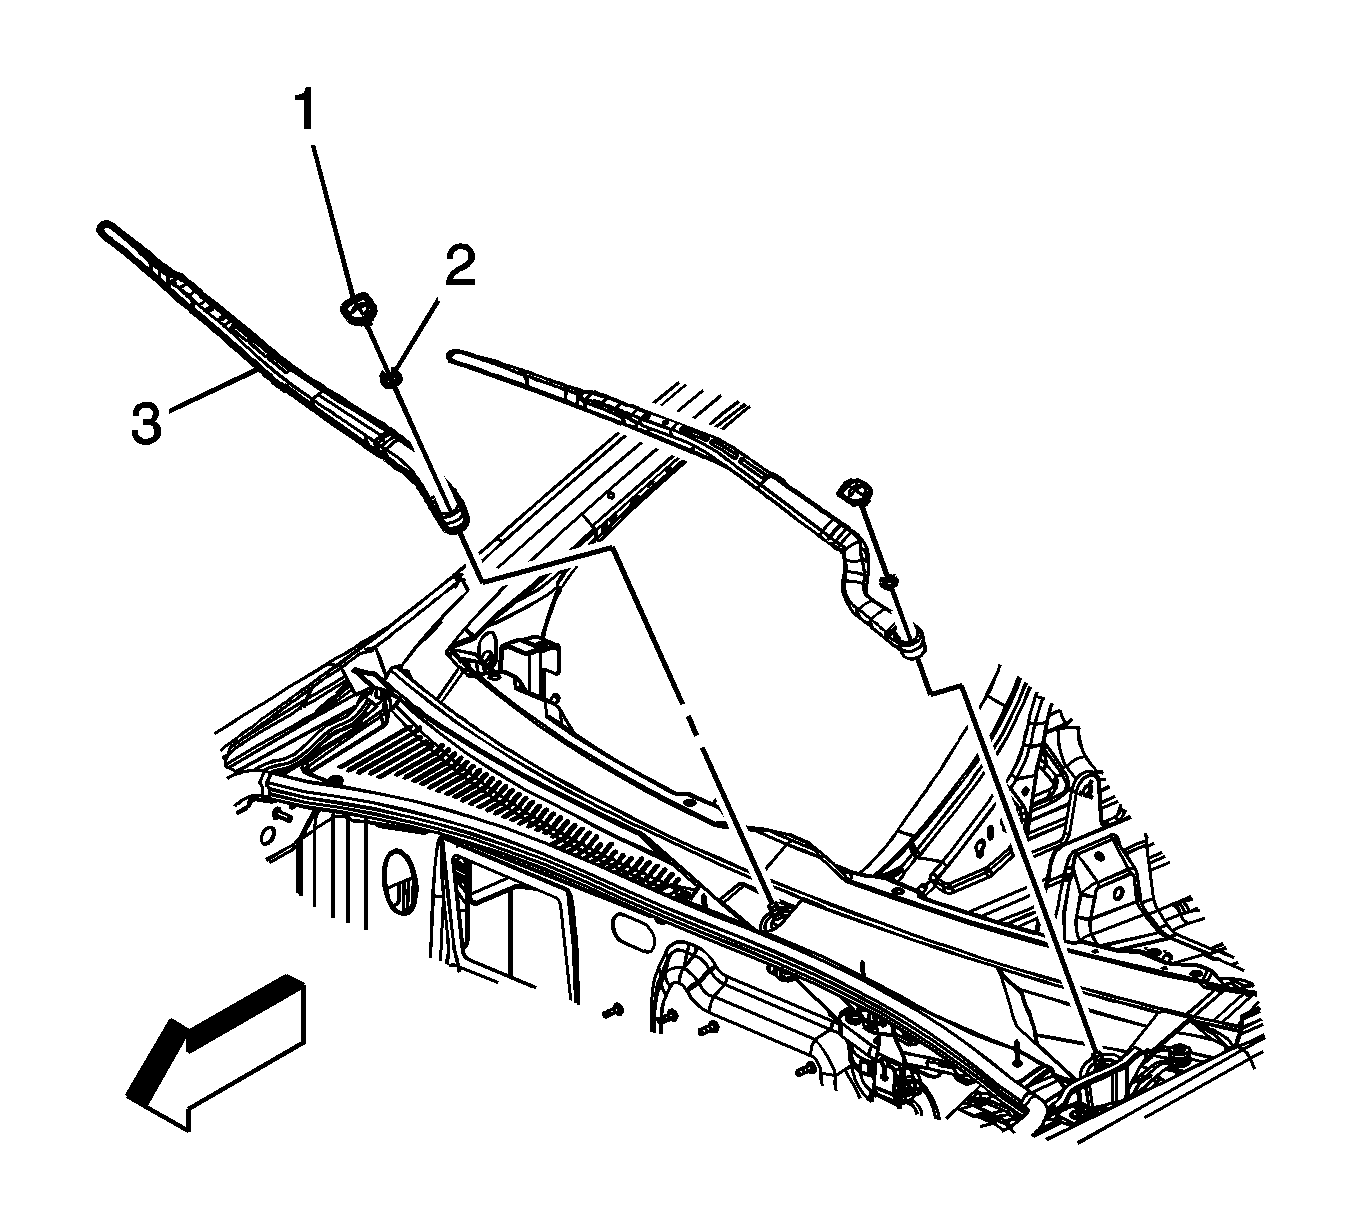
- The passenger side wiper (3) aligns with an orange dot approximately 50.8 mm (2 in) in from the tip of the wiper blade located on the right lower side of the windshield blackout.
- Remove the windshield wiper arm nut caps (1) from the wiper arms.
- Remove the nut (2) from the wiper arm drive pivot shaft.
- Remove the wiper arm from the wiper arm drive pivot shaft.
- Clean the wiper drive pivot shaft knurls with a fine wire brush.
- Remove the wiper blade from the wiper arm. Refer to Windshield Wiper Blade Replacement .

Important: Use the J 39637 in order to remove the wiper arm if the wiper arm fails to loosen from the wiper arm drive spindle.
Installation Procedure
- Install the wiper blade onto the wiper arm. Refer to Windshield Wiper Blade Replacement .
- Install the wiper arm onto the wiper arm drive pivot shaft.
- Position the passenger side wiper arm so the wiper blade tip aligns with the orange dot on the lower outer edge of the windshield.
- Position the driver side wiper arm so that the wiper blade tip aligns with the orange dot on the lower center of the windshield.
- Install the nut (2) on the wiper arm pivot shaft.
- Install the windshield wiper arm nut caps (1).
- Operate the wipers and wash pattern (2) in order to verify the operation and park position of the wiper arms.
- Verify the driver side wiper does not exceed the wipe area (3).

Notice: Refer to Fastener Notice in the Preface section.
Important: Hold the wiper arm into position while tightening the nut.
Tighten
Tighten to 32 N·m (24 lb ft).

