For 1990-2009 cars only
Special Tools
| • | J 37088-A Fuel Line Disconnect Tool Set |
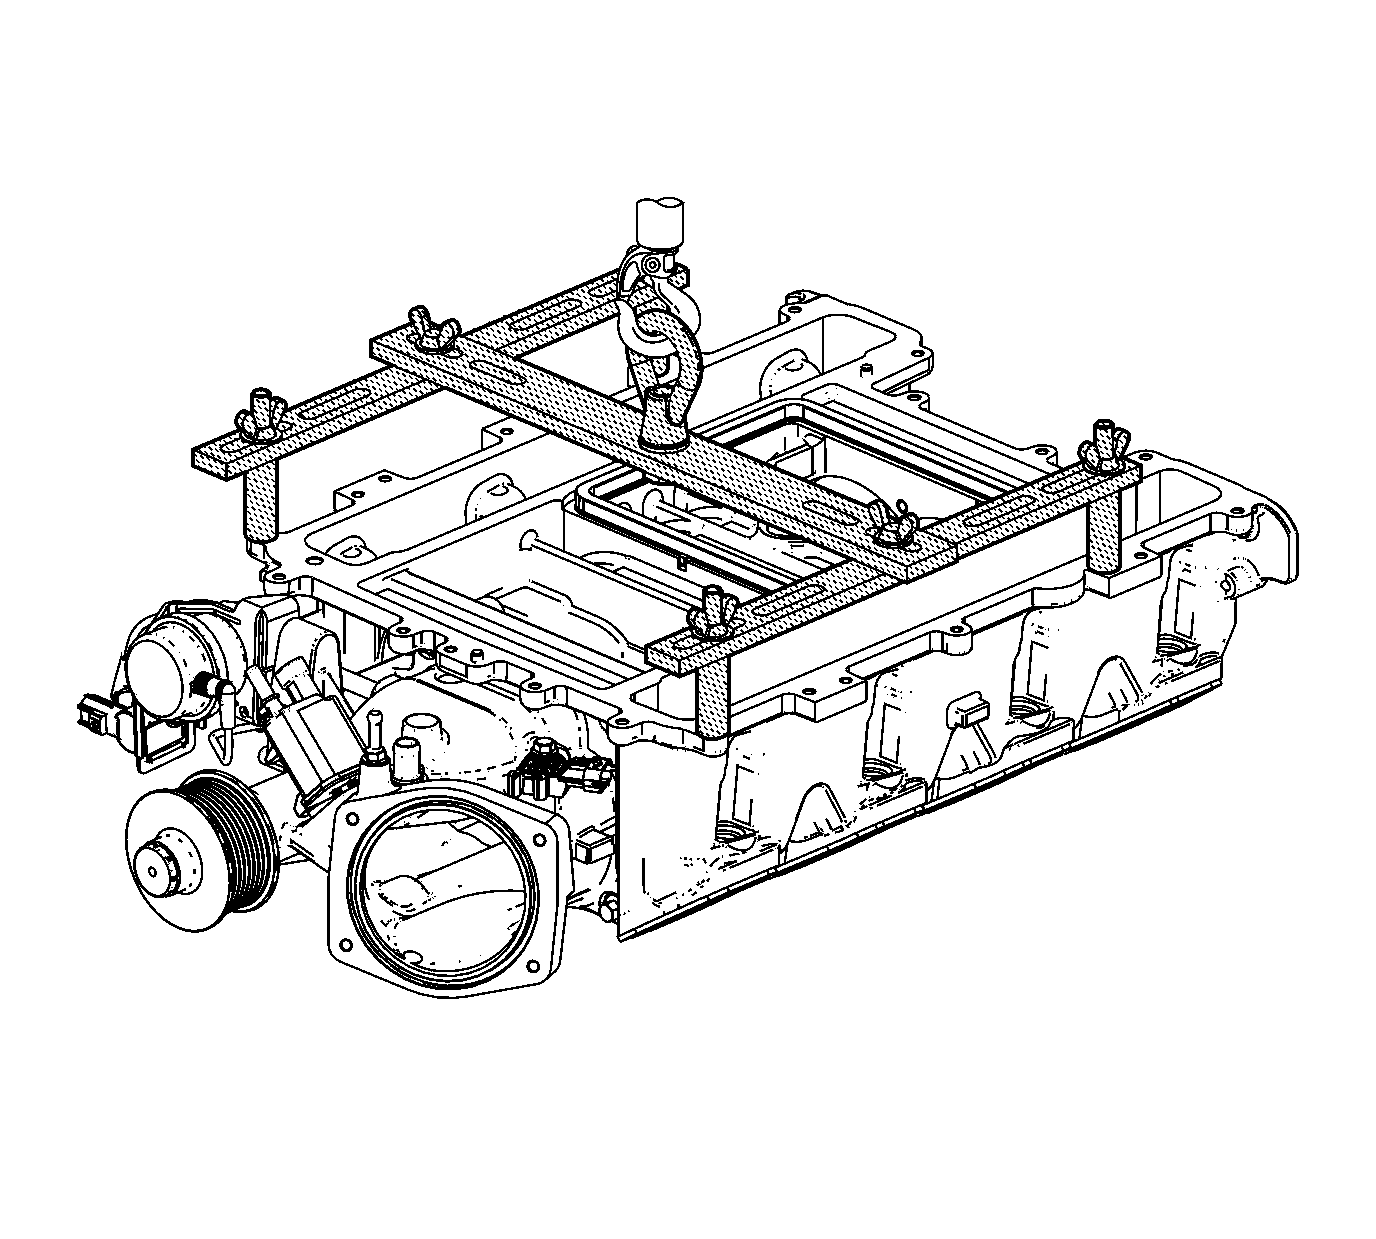
| • | Supercharger Lift Fixture Supercharger Lift Fixture |
Removal Procedure
- Remove the supercharger belt. Refer to Supercharger Belt Replacement.
- Remove the barometric pressure sensor. Refer to Barometric Pressure Sensor Replacement.
- Remove the fuel injection fuel rail assembly. Refer to Fuel Injection Fuel Rail Assembly Replacement.
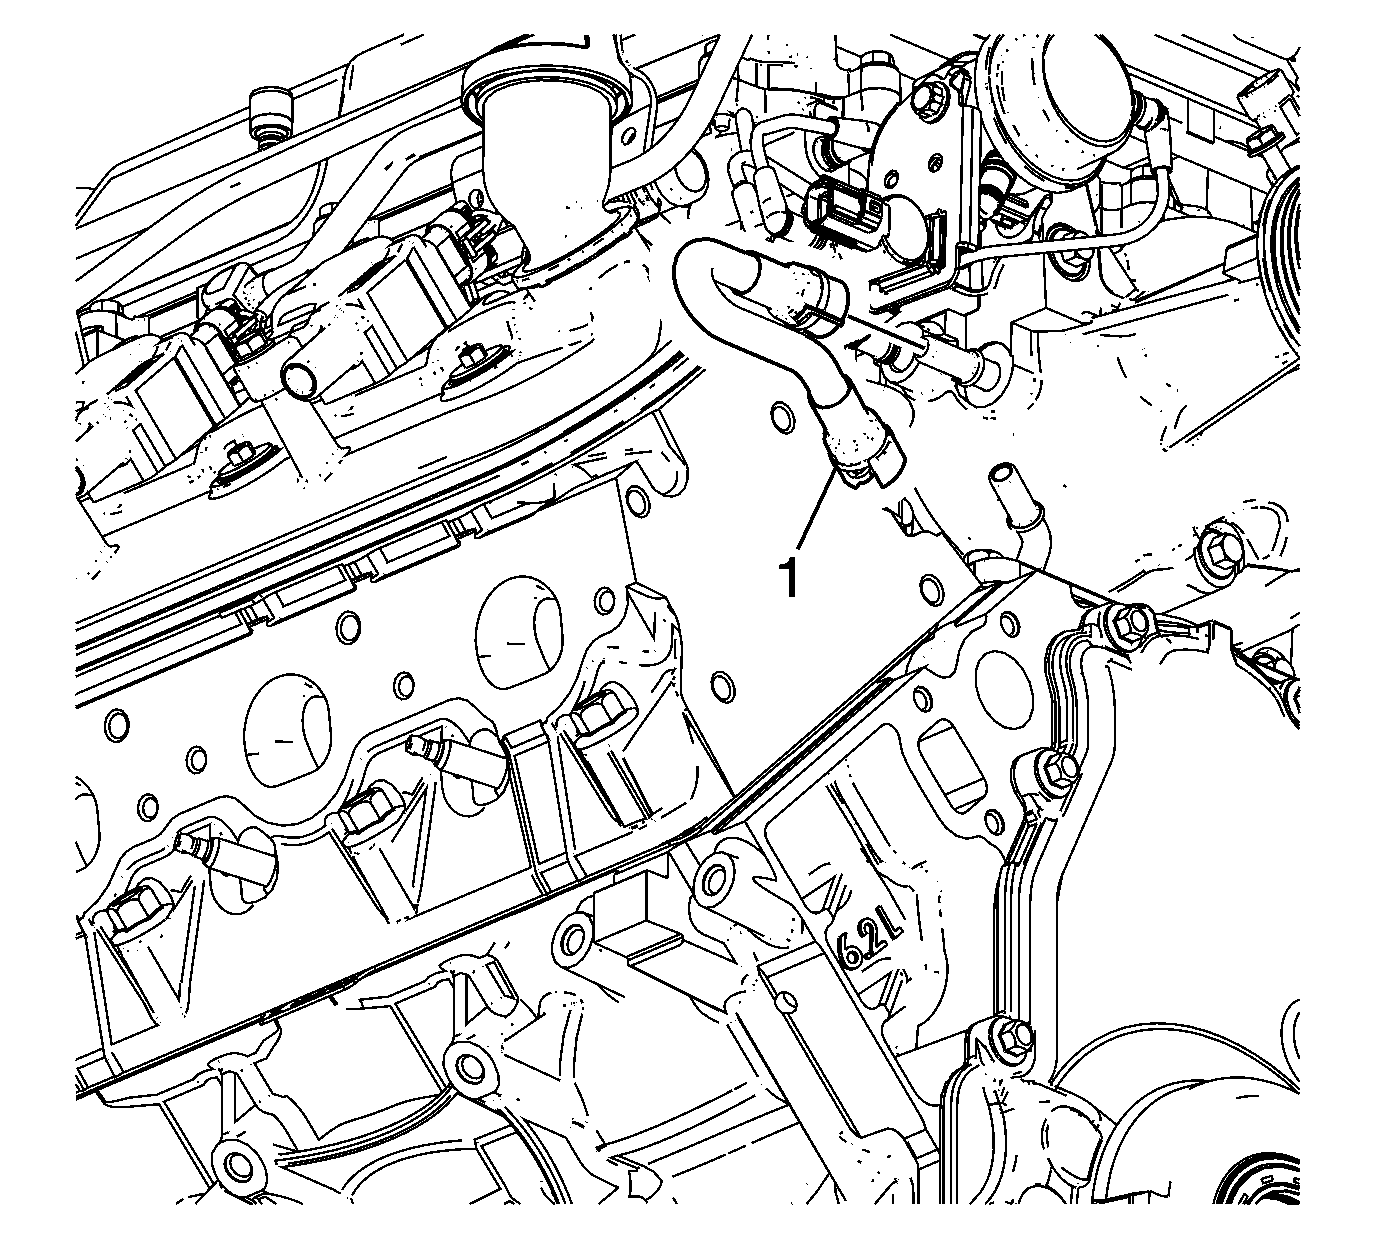
- Remove the positive crankcase ventilation (PCV) dirty air hose (1) from the valley cover and supercharger.
- Remove the charge air cooler cover. Refer to Charge Air Cooler Cover Replacement.
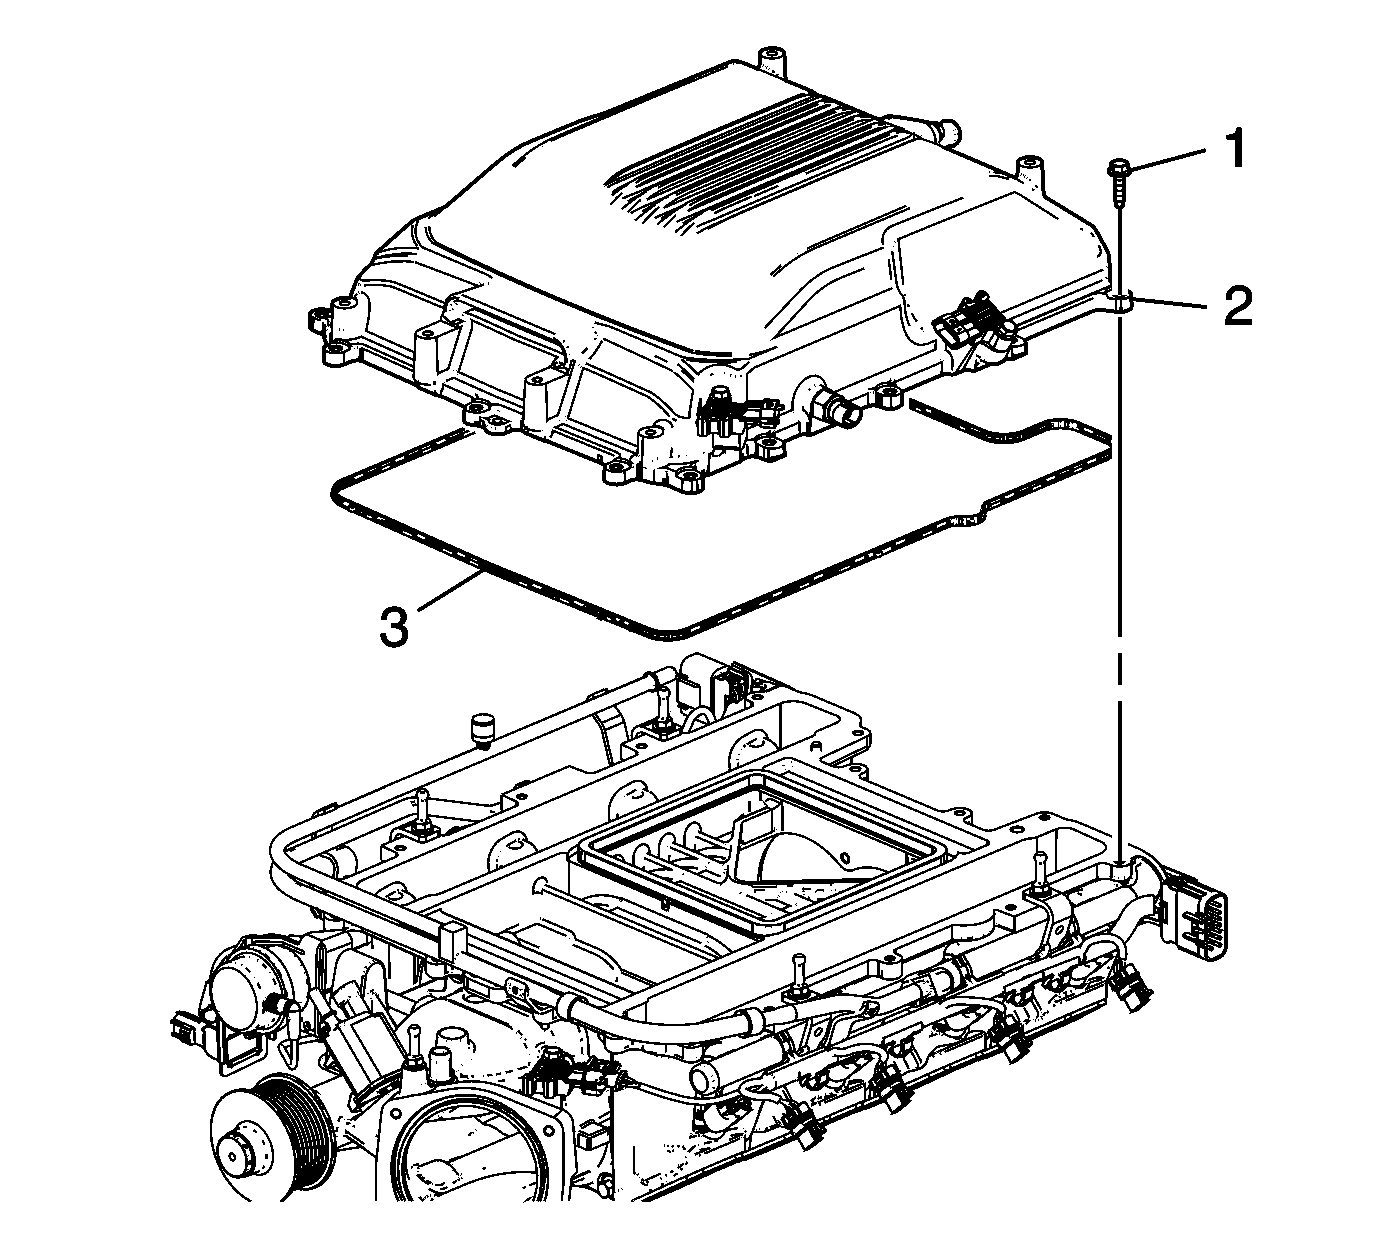
- Remove the charge air cooler cover seal (3).
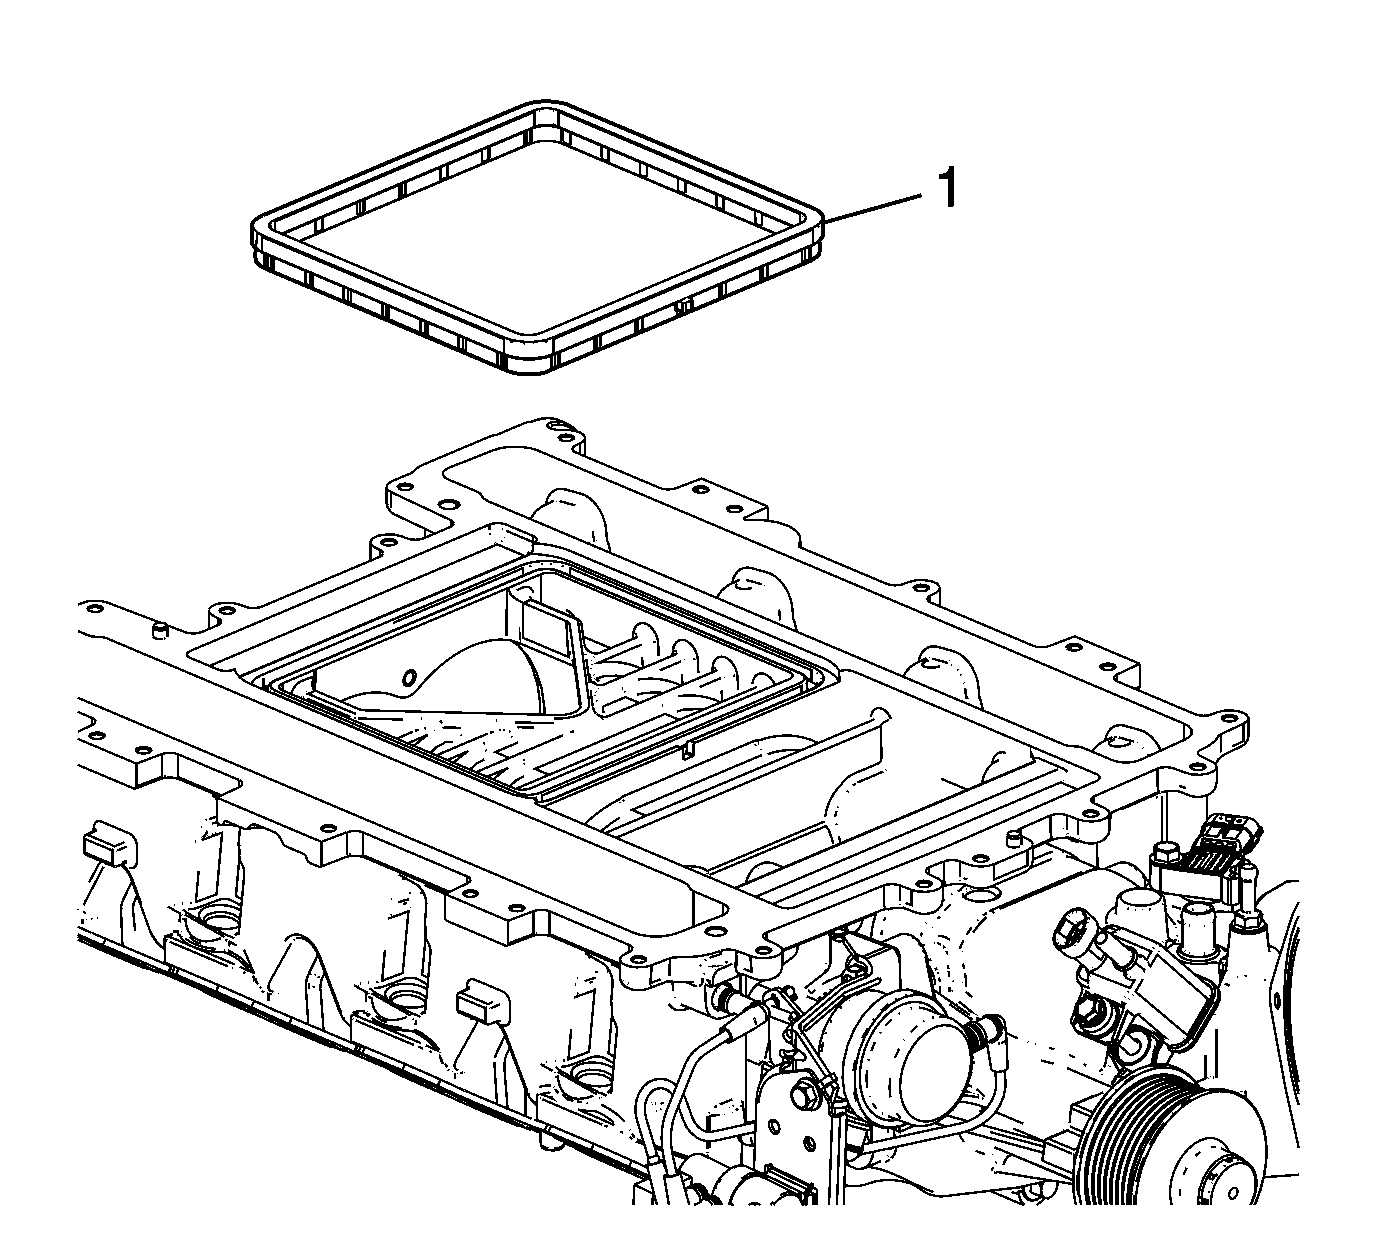
- Remove the charge air cooler insulator (1).
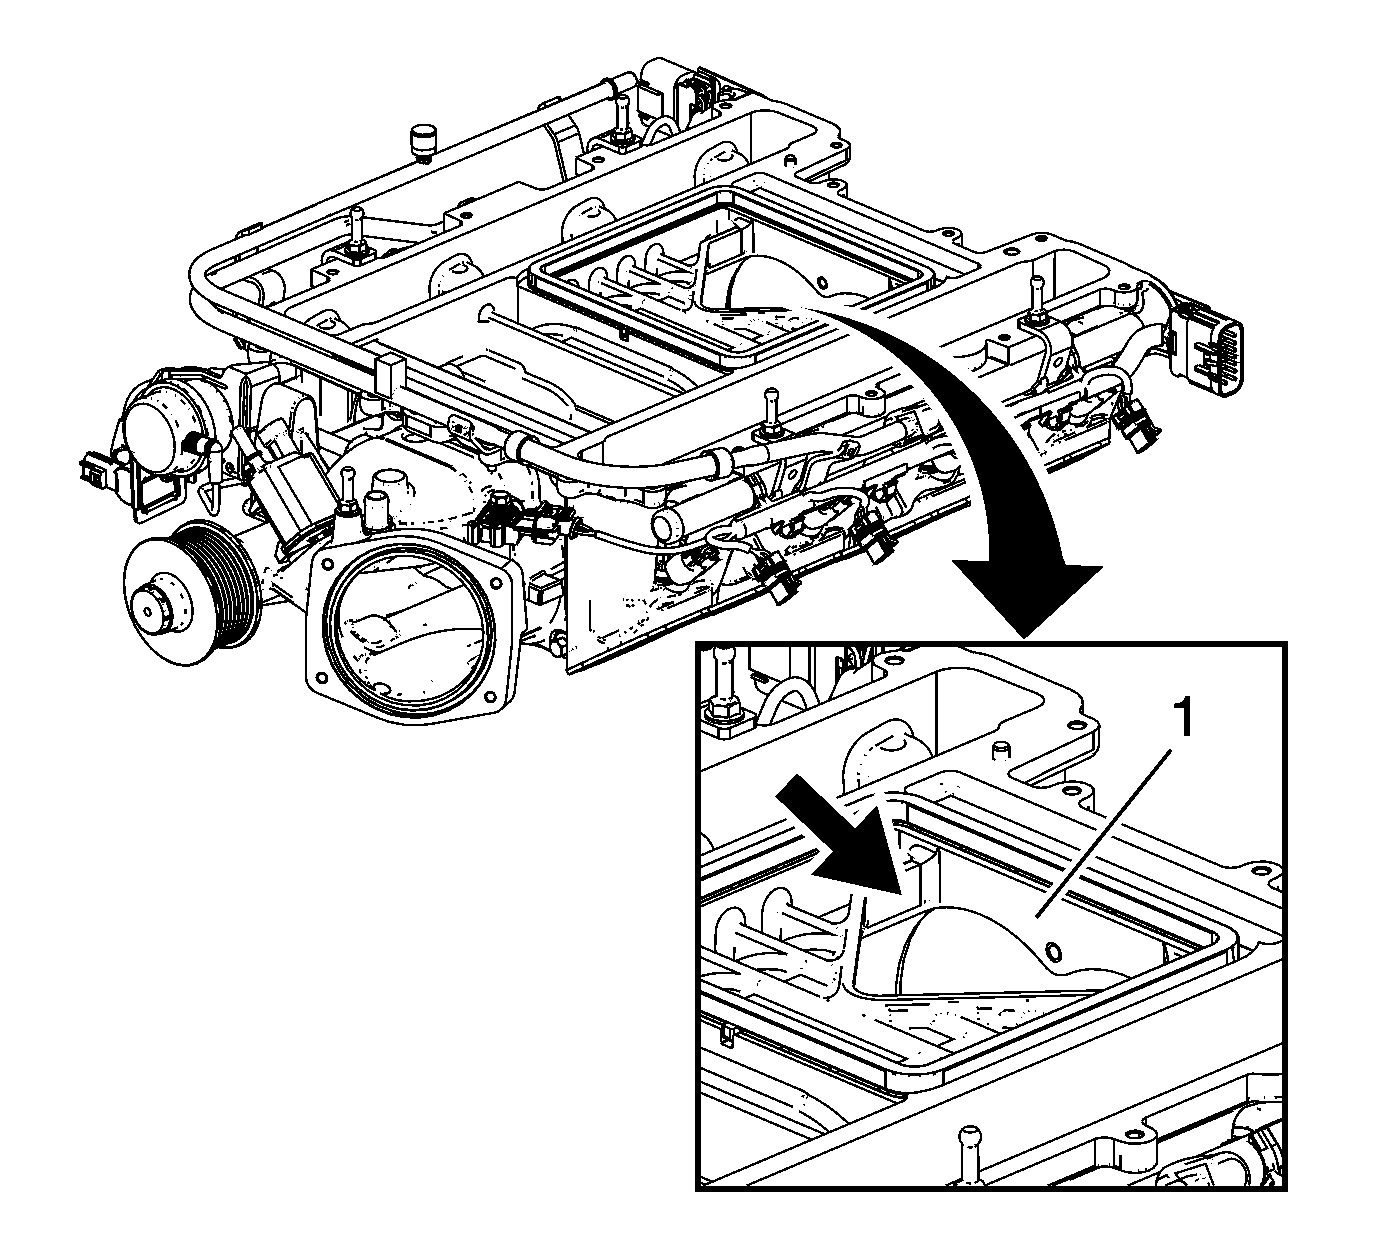
- Cover the supercharger rotors area (1) to prevent dirt or debris contamination onto the rotors.
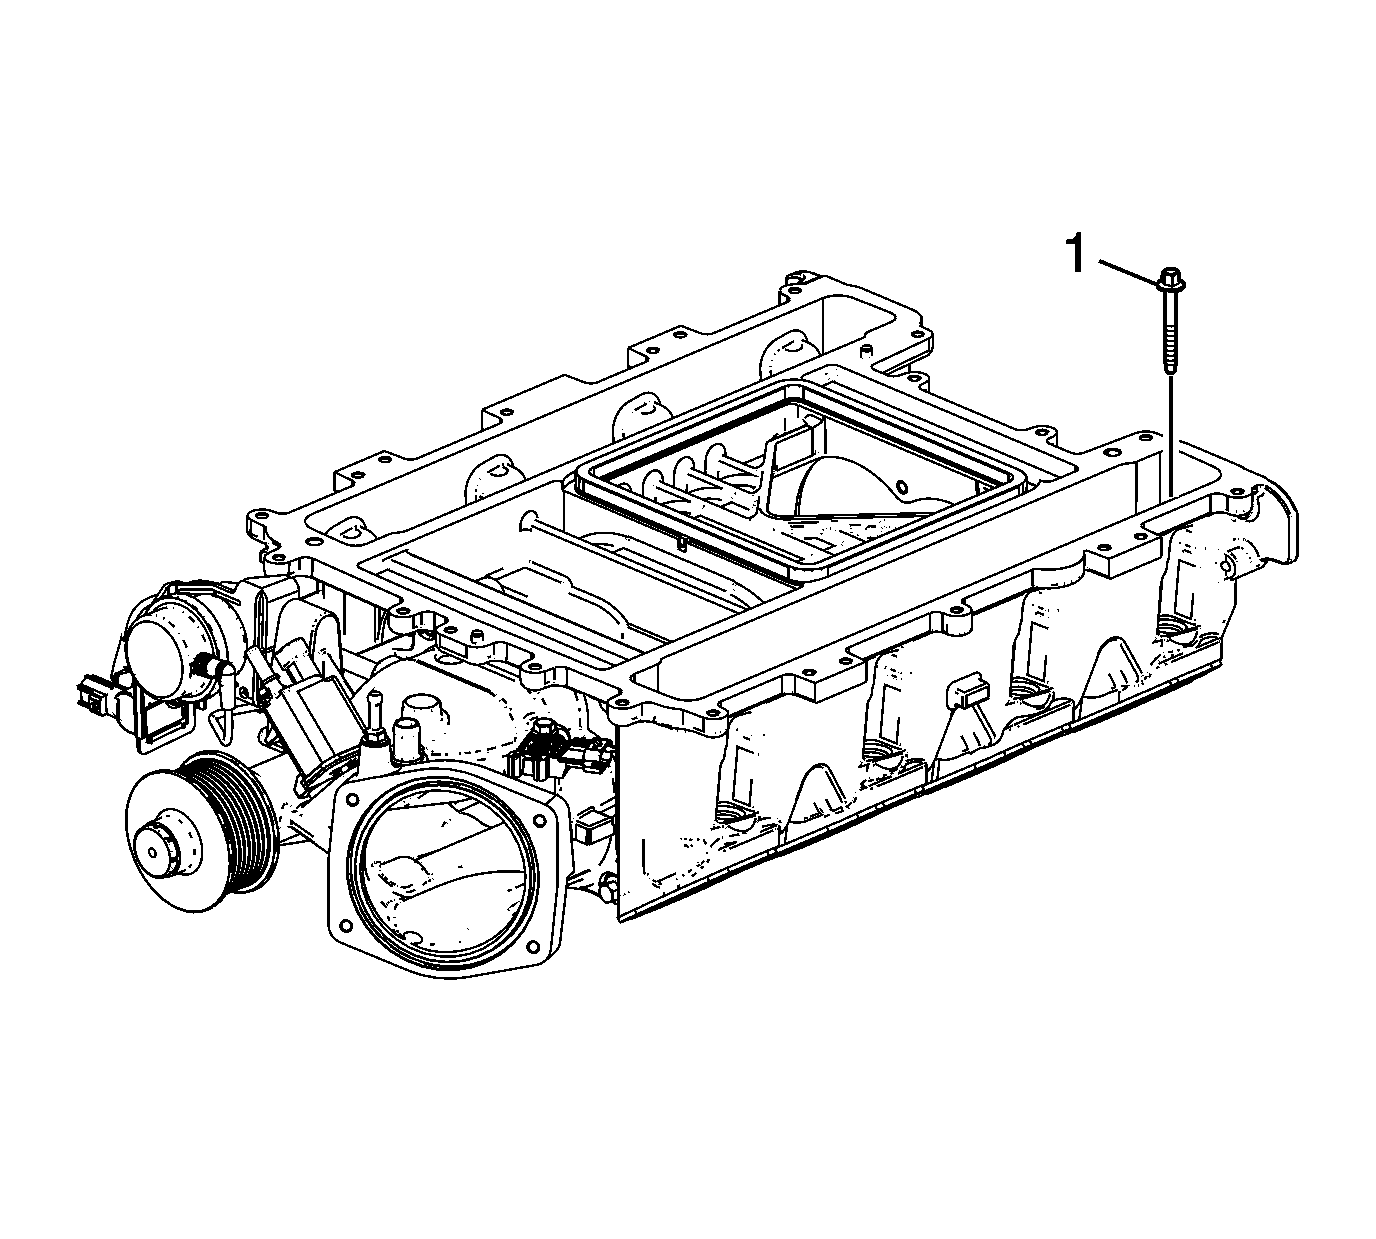
- Remove the supercharger bolts (1).
- Install the Supercharger Lift Fixture to the supercharger (1) and tighten the Supercharger Lift Fixture fixture studs and nuts until snug.
- Using a lifting device, remove the supercharger from the engine.
Note:
• The supercharger, throttle body, fuel injection rail and fuel injectors may be removed as an assembly. If not servicing the individual components, remove the supercharger as an assembly. • Cover the inlet area of the supercharger (1) to prevent dirt or debris contamination onto the rotors.
Installation Procedure
- Cover the supercharger rotors area (1) to prevent dirt or debris contamination onto the rotors.
- Install the Supercharger Lift Fixture fixture to the supercharger (1).
- Tighten the Supercharger Lift Fixture fixture bolts and nuts until snug.
- Using a lifting device, install the supercharger onto the engine. Align the dowel pin at the right front of the supercharger to the cylinder head.
- Apply a 5 mm (0.2 in) band of threadlocker GM P/N 12345382 (Canadian P/N 10953489) or equivalent to the threads of the bolts.
- Install the supercharger bolts.
- Tighten the bolts.
- Install the charge air cooler cover seal (3).
- Install the charge air cooler cover bolts (1) and supercharger cover (2).
- Tighten the bolts.
- Install the PCV dirty air hose (1) to the valley cover and supercharger.
- Install the fuel injection fuel rail assembly. Refer to Fuel Injection Fuel Rail Assembly Replacement.
- Install the barometric pressure sensor. Refer to Barometric Pressure Sensor Replacement.
- Install the supercharger belt. Refer to Supercharger Belt Replacement.

Note:
• The supercharger, throttle body, fuel injection rail and fuel injectors may be removed as an assembly. If not servicing the individual components, remove the supercharger as an assembly. • Cover the inlet area of the supercharger (1) to prevent dirt or debris contamination onto the rotors.


Caution: Refer to Fastener Caution in the Preface section.
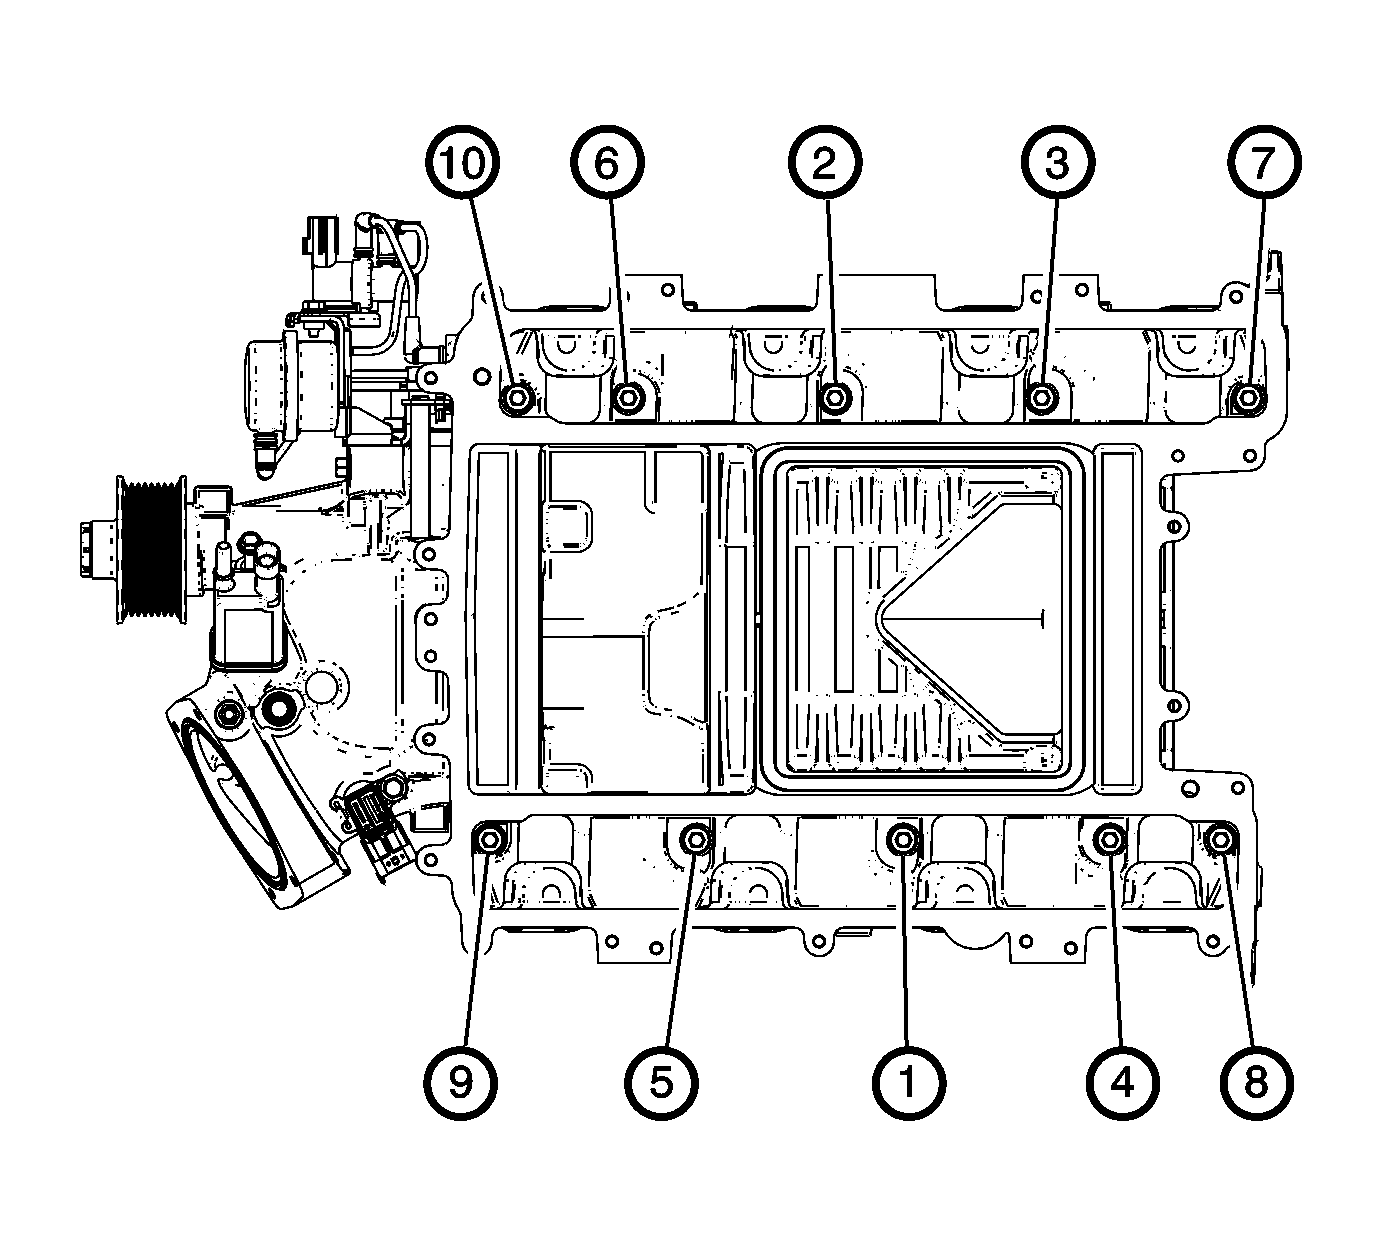
| 7.1. | Tighten the bolts a first pass in sequence to 5 N·m (44 lb in). |
| 7.2. | Tighten the bolts a final pass in sequence to 10 N·m (89 lb in). |

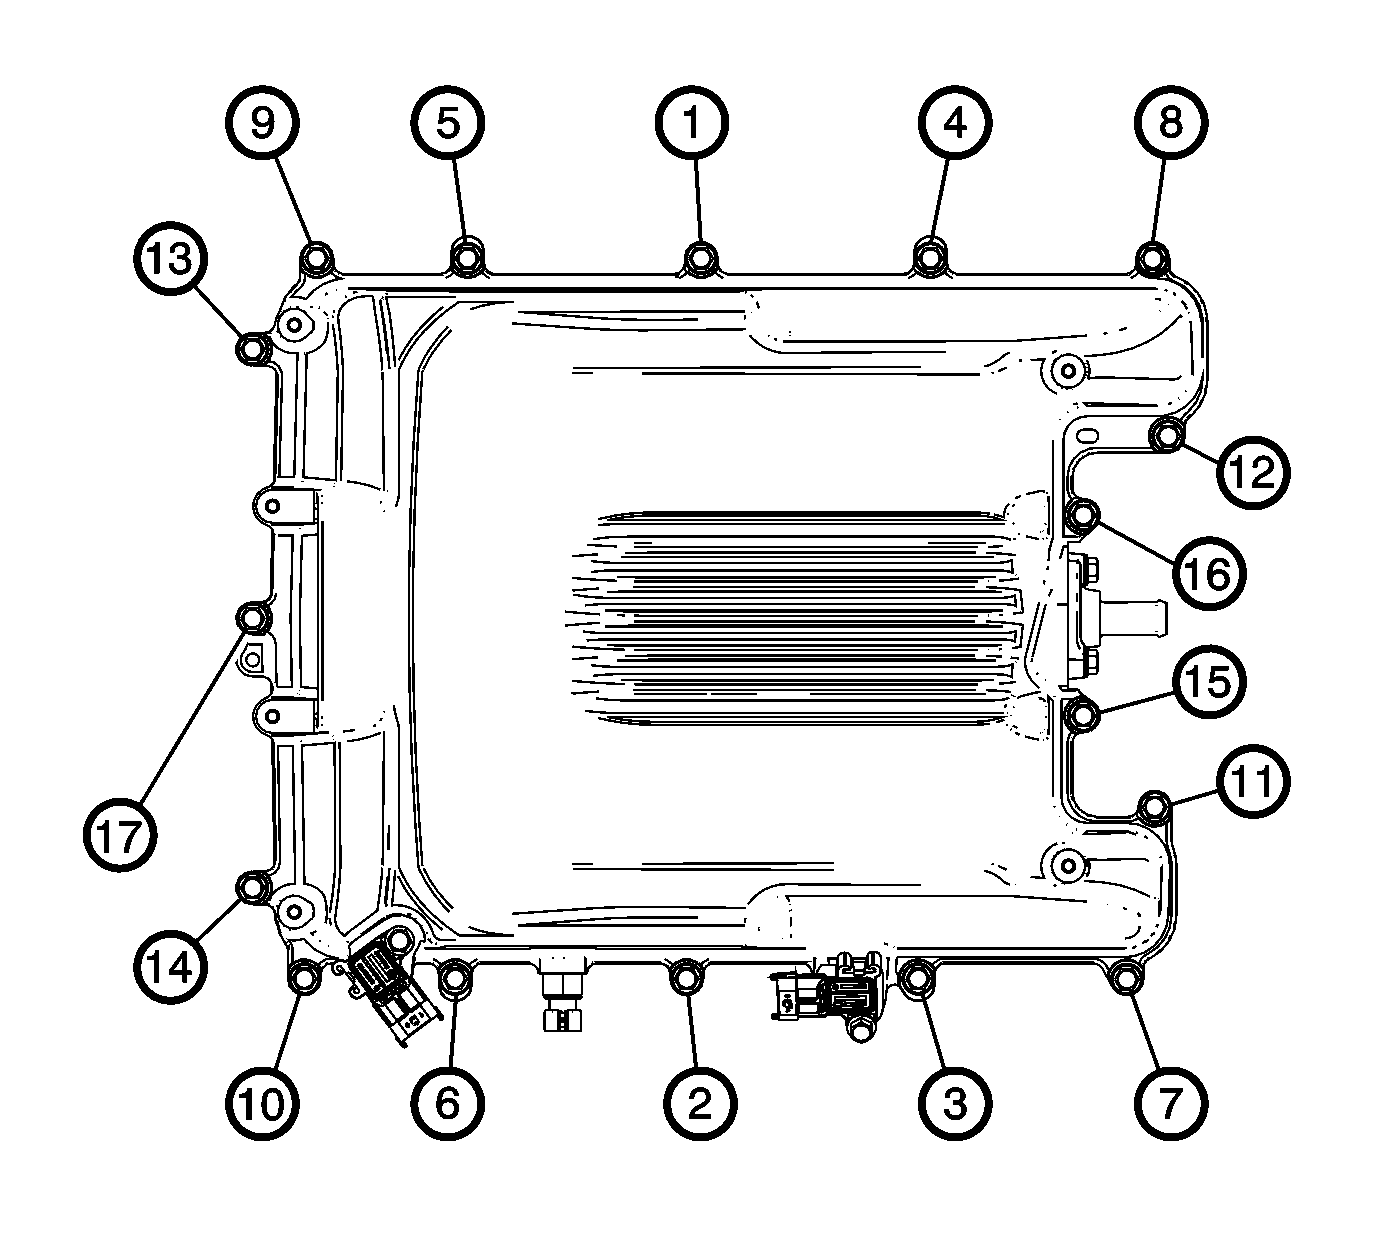
| 10.1. | Tighten the bolts a first pass in sequence to 5 N·m (44 lb in). |
| 10.2. | Tighten the bolts a final pass in sequence to 10 N·m (89 lb in). |

