For 1990-2009 cars only
Speical Tools
J 45859 Axle Shaft Remover/Installer
Removal Procedure
- Raise and support the vehicle. Refer to Lifting and Jacking the Vehicle
- Remove the tire and wheel assembly. Refer to Tire and Wheel Removal and Installation.
- Remove the rear wheel speed sensor. Refer to Rear Wheel Speed Sensor Replacement.
- Separate the wheel drive shaft from the wheel bearing/hub assembly. Refer to Rear Wheel Drive Shaft Replacement.
- Remove the rear brake rotor from the wheel bearing/hub assembly. Refer to Rear Brake Rotor Replacement.
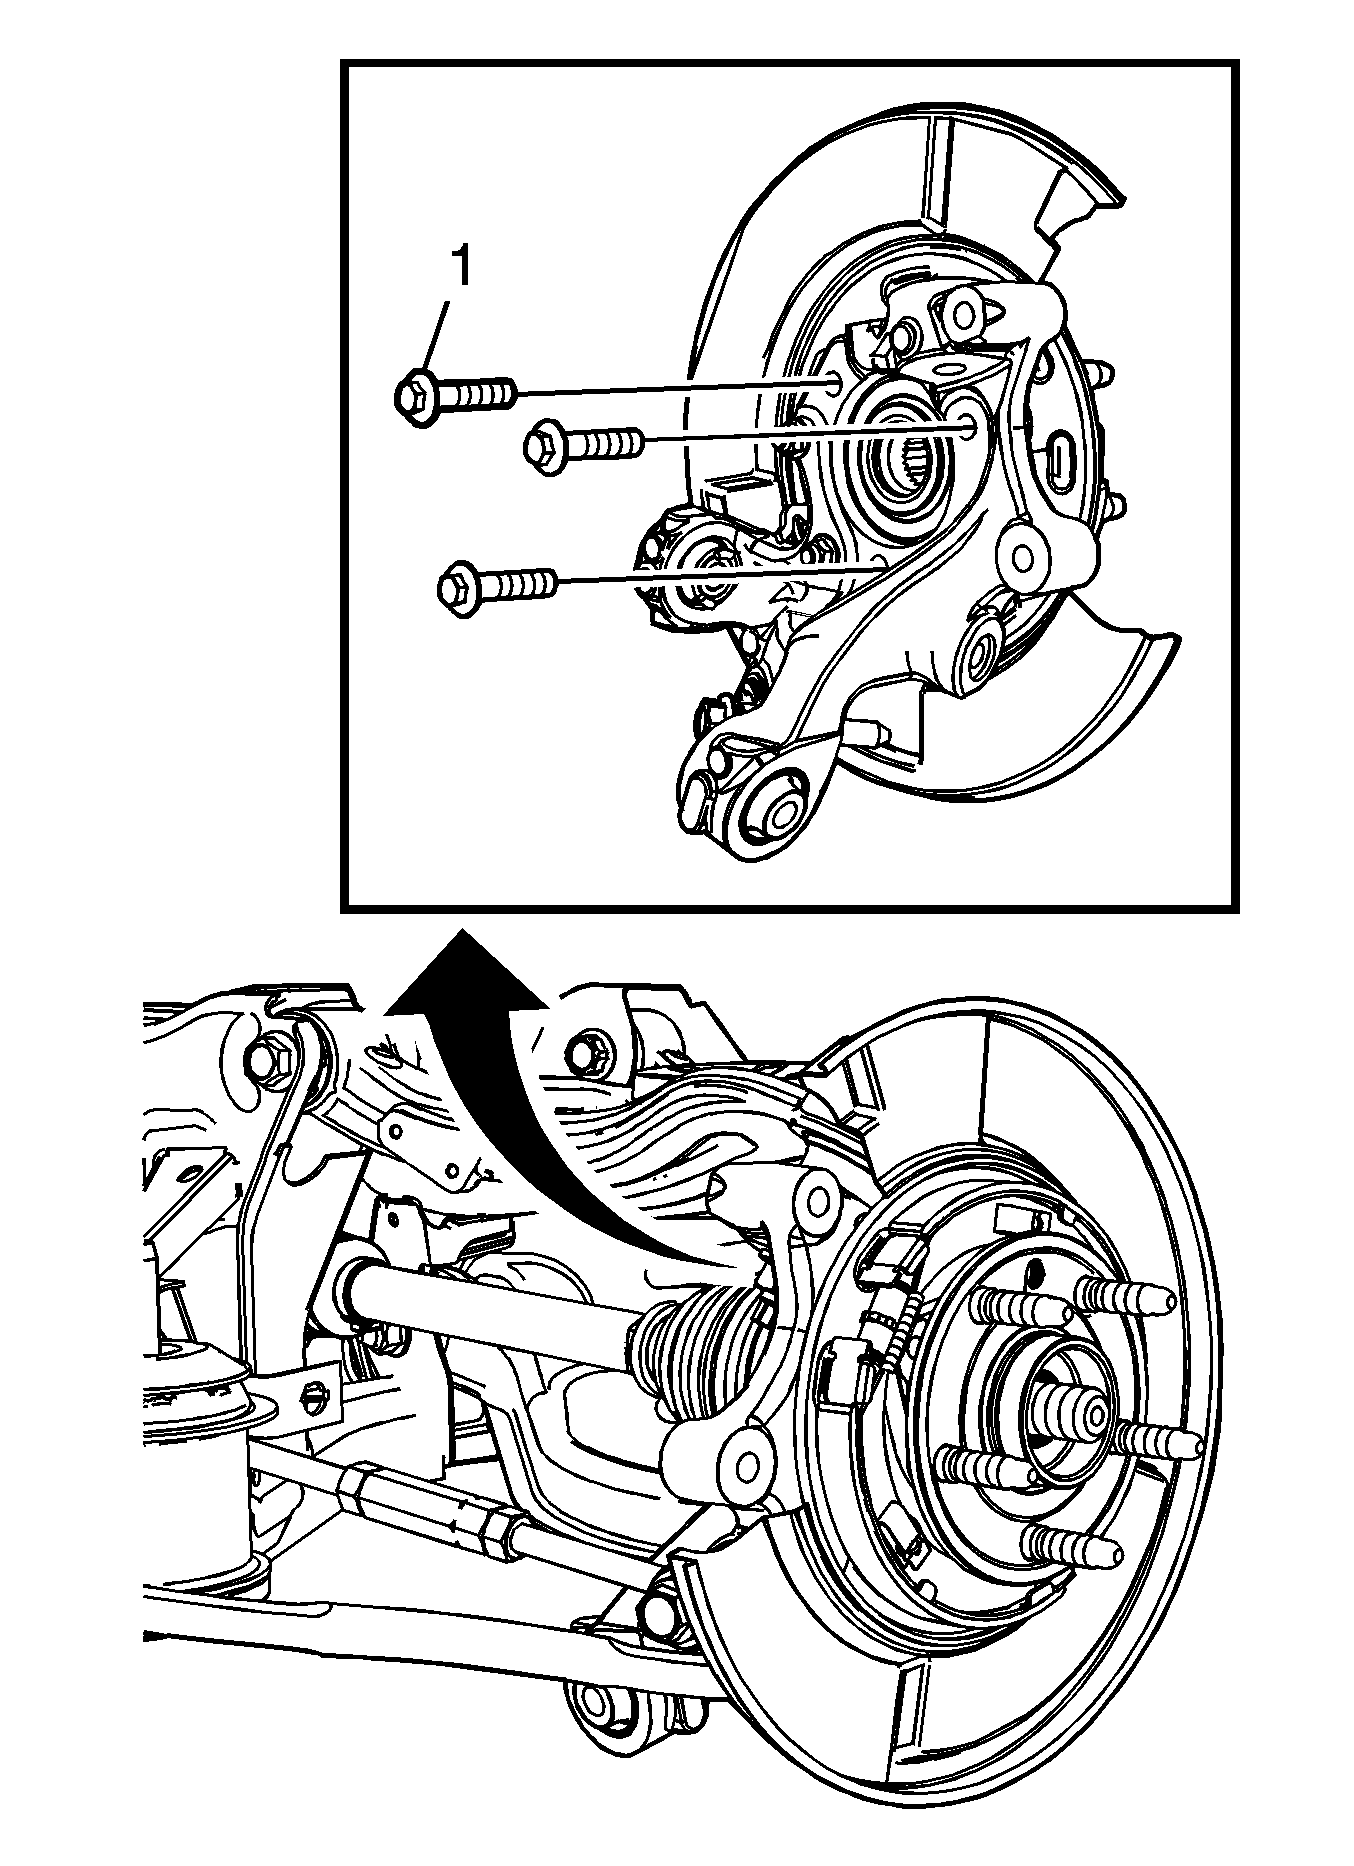
- Remove the mounting bolts (1) for the wheel bearing/hub assembly.
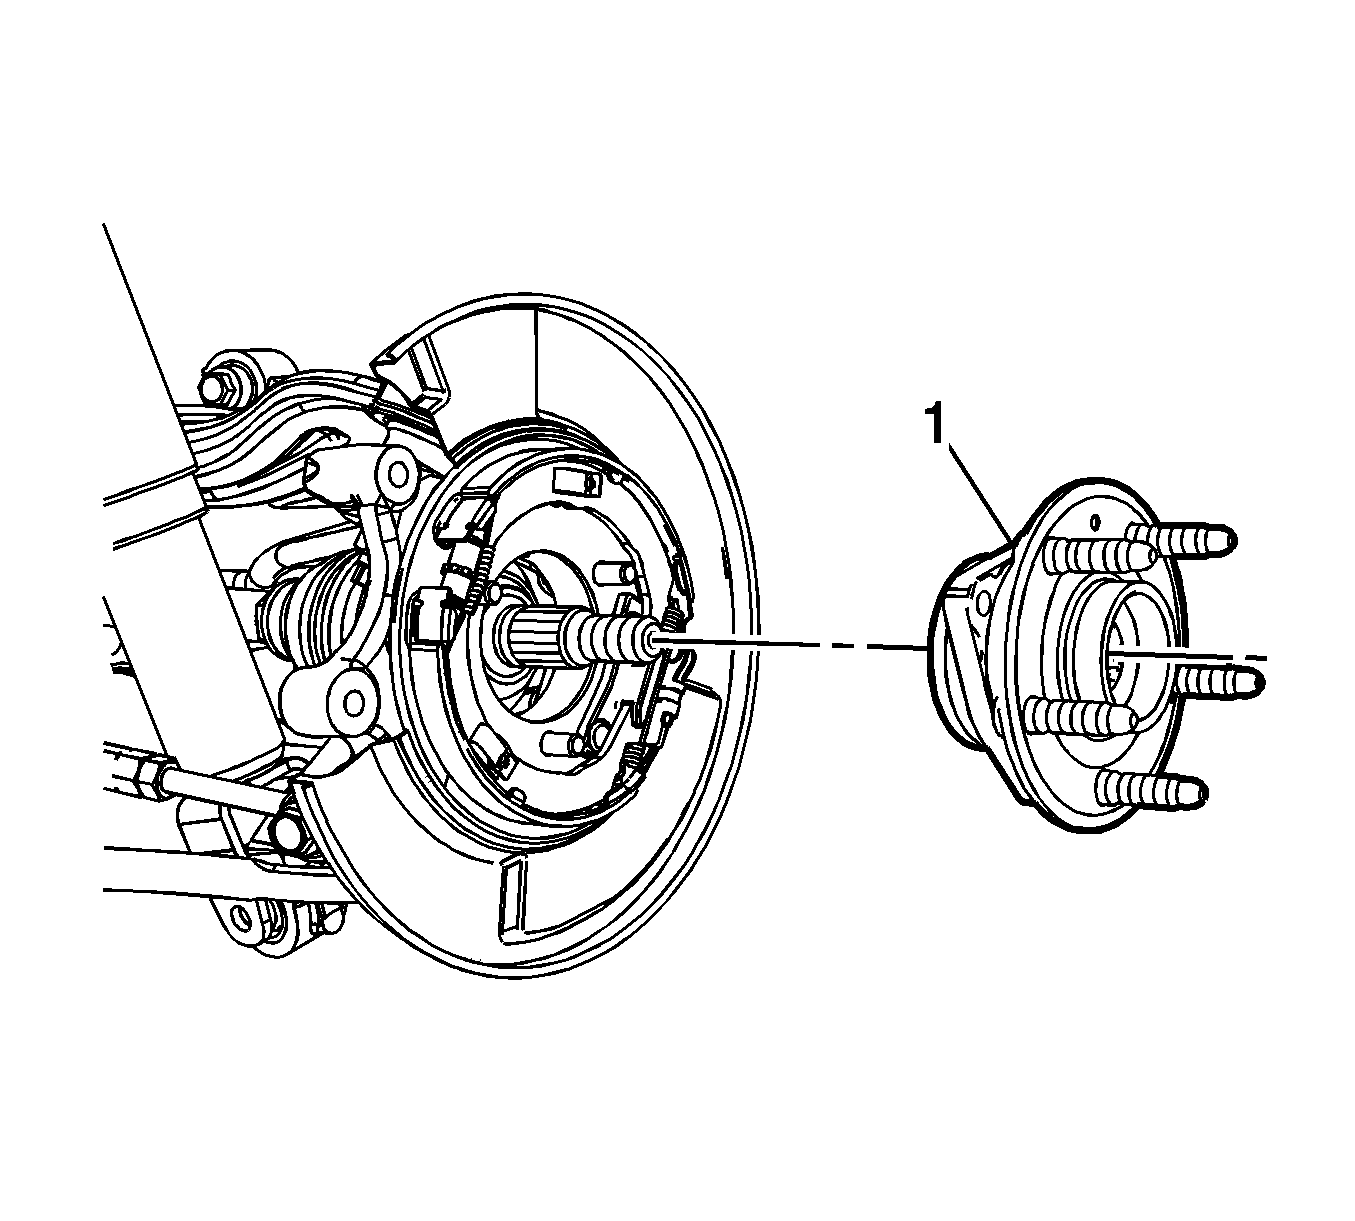
- Using the J 45859 remover/installer , remove the wheel bearing/hub assembly (1) from the knuckle.
- Remove the J 45859 remover/installer fromm the wheel bearing/hub assembly

Caution: Avoid tool contact to the outer constant velocity boot when removing the wheel bearing mounting bolts. Failure to observe this caution may result in damage to the CV boot.
Note: When removing the wheel bearing/hub mounting bolts, it maybe necessary to push the outer CV joint in to gain enough clearance to remove the mounting bolts.

Installation Procedure
- Position the rear wheel bearing/hub (1) assembly in the knuckle.
- Insert the wheel drive axle into the wheel bearing/hub assembly.
- Hand tighten the wheel bearing/hub assembly mounting bolts (1).
- Tighten the wheel bearing/hub bolts to 140 N·m (103 lb ft).
- Install the rear brake rotor. Refer to Rear Brake Rotor Replacement.
- Install the wheel drive shaft nut. Refer to Rear Wheel Drive Shaft Replacement.
- Install the rear wheel speed sensor. Refer to Rear Wheel Speed Sensor Replacement.
- Install the tire and wheel. Refer to Tire and Wheel Removal and Installation.
- Remove the support and lower the vehicle.


Caution: Refer to Fastener Caution in the Preface section.
