GM Service Manual Online
For 1990-2009 cars only

Front Fog Lamp Replacement CTS

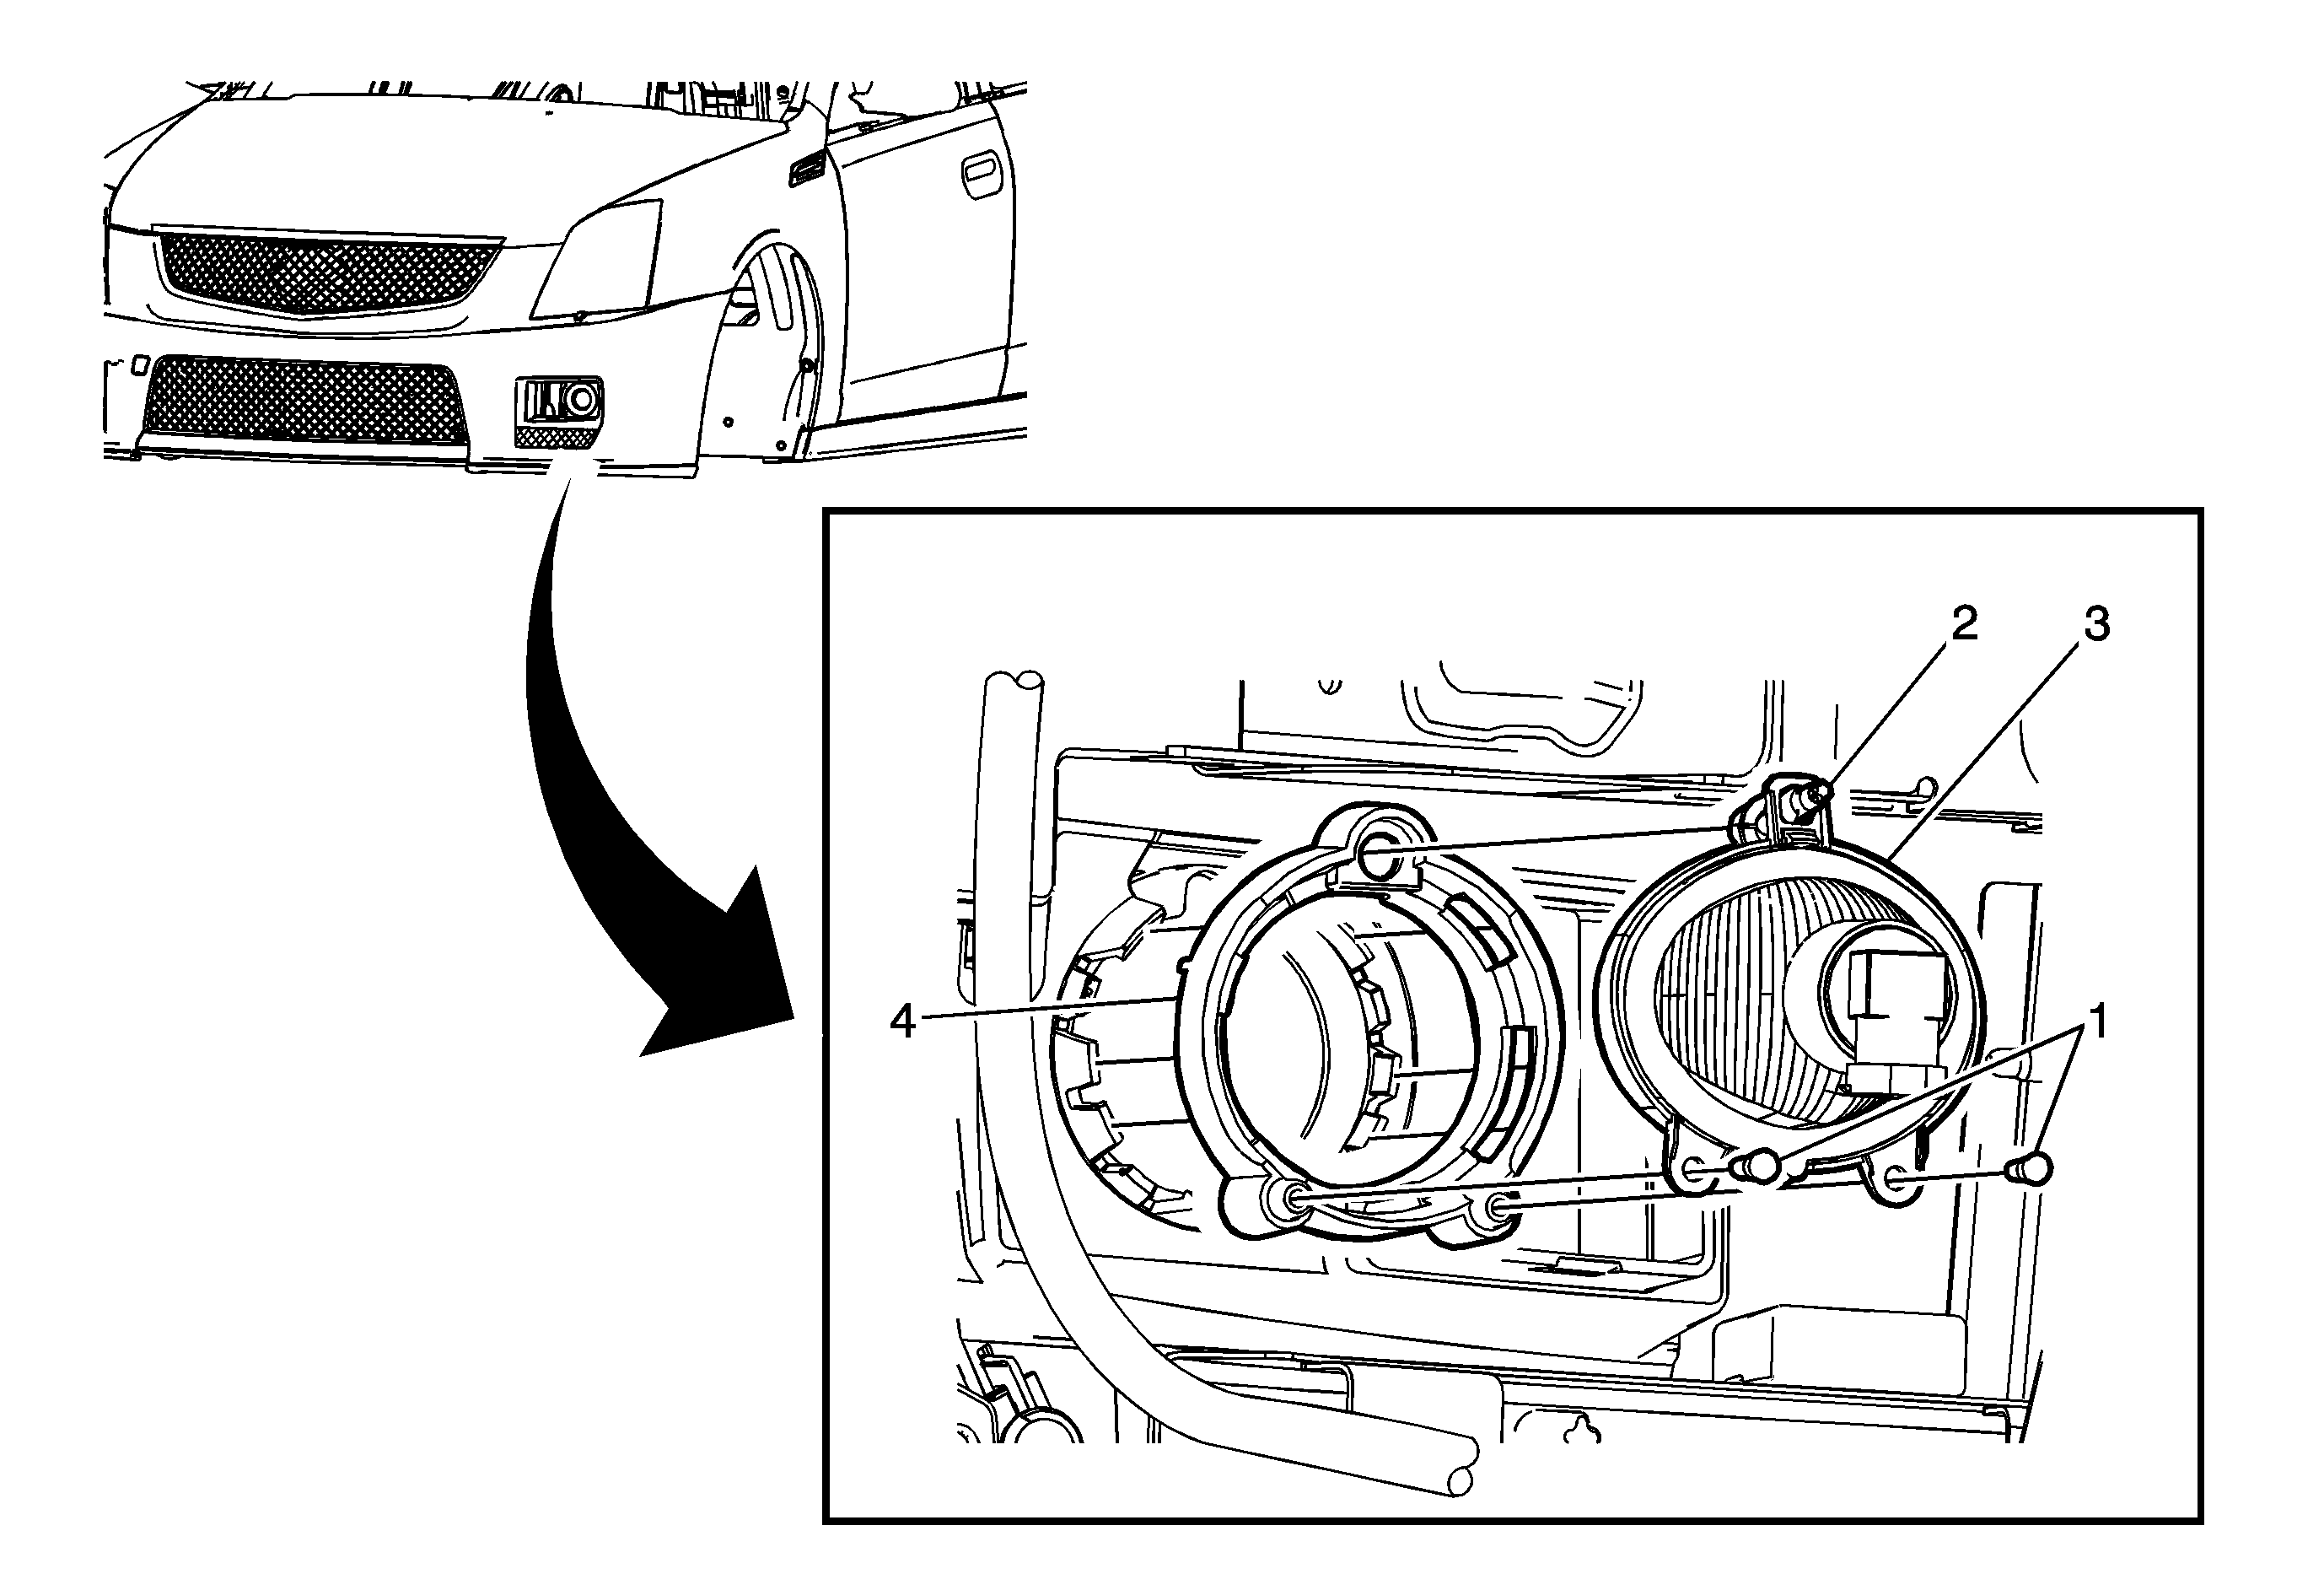
Object Number: 1969036  Size: SF

Callout

Component Name

Preliminary Procedures

  1. Remove either the LF or RF wheelhouse extension. Refer to Wheelhouse Extension Replacement.
  2. Disconnect the fog lamp bulb socket electrical connector.

1

Front Fog Lamp Adjuster Screw

Procedure

  1. Remove the adjuster screw from the fog lamp bracket and lamp assembly.
  2. Count the number of turns when removing the adjuster screw for a reference upon installation.
  3. Aim the fog lamps after installation. Refer to Fog Lamp Aiming.

2

Front Fog Lamp Screw (Qty: 2)

Caution: Refer to Fastener Caution in the Preface section.

Tighten
2 N·m (18 lb in)

3

Front Fog Lamp Assembly

Tip
Remove the lamp assembly from the fog lamp bracket.

4

Front Fog Lamp Bulb Socket

Warning: Refer to Halogen Bulb Warning in the Preface section.

Tip
Turn the bulb socket counterclockwise and remove from the lamp assembly.

Front Fog Lamp Replacement CTS-V


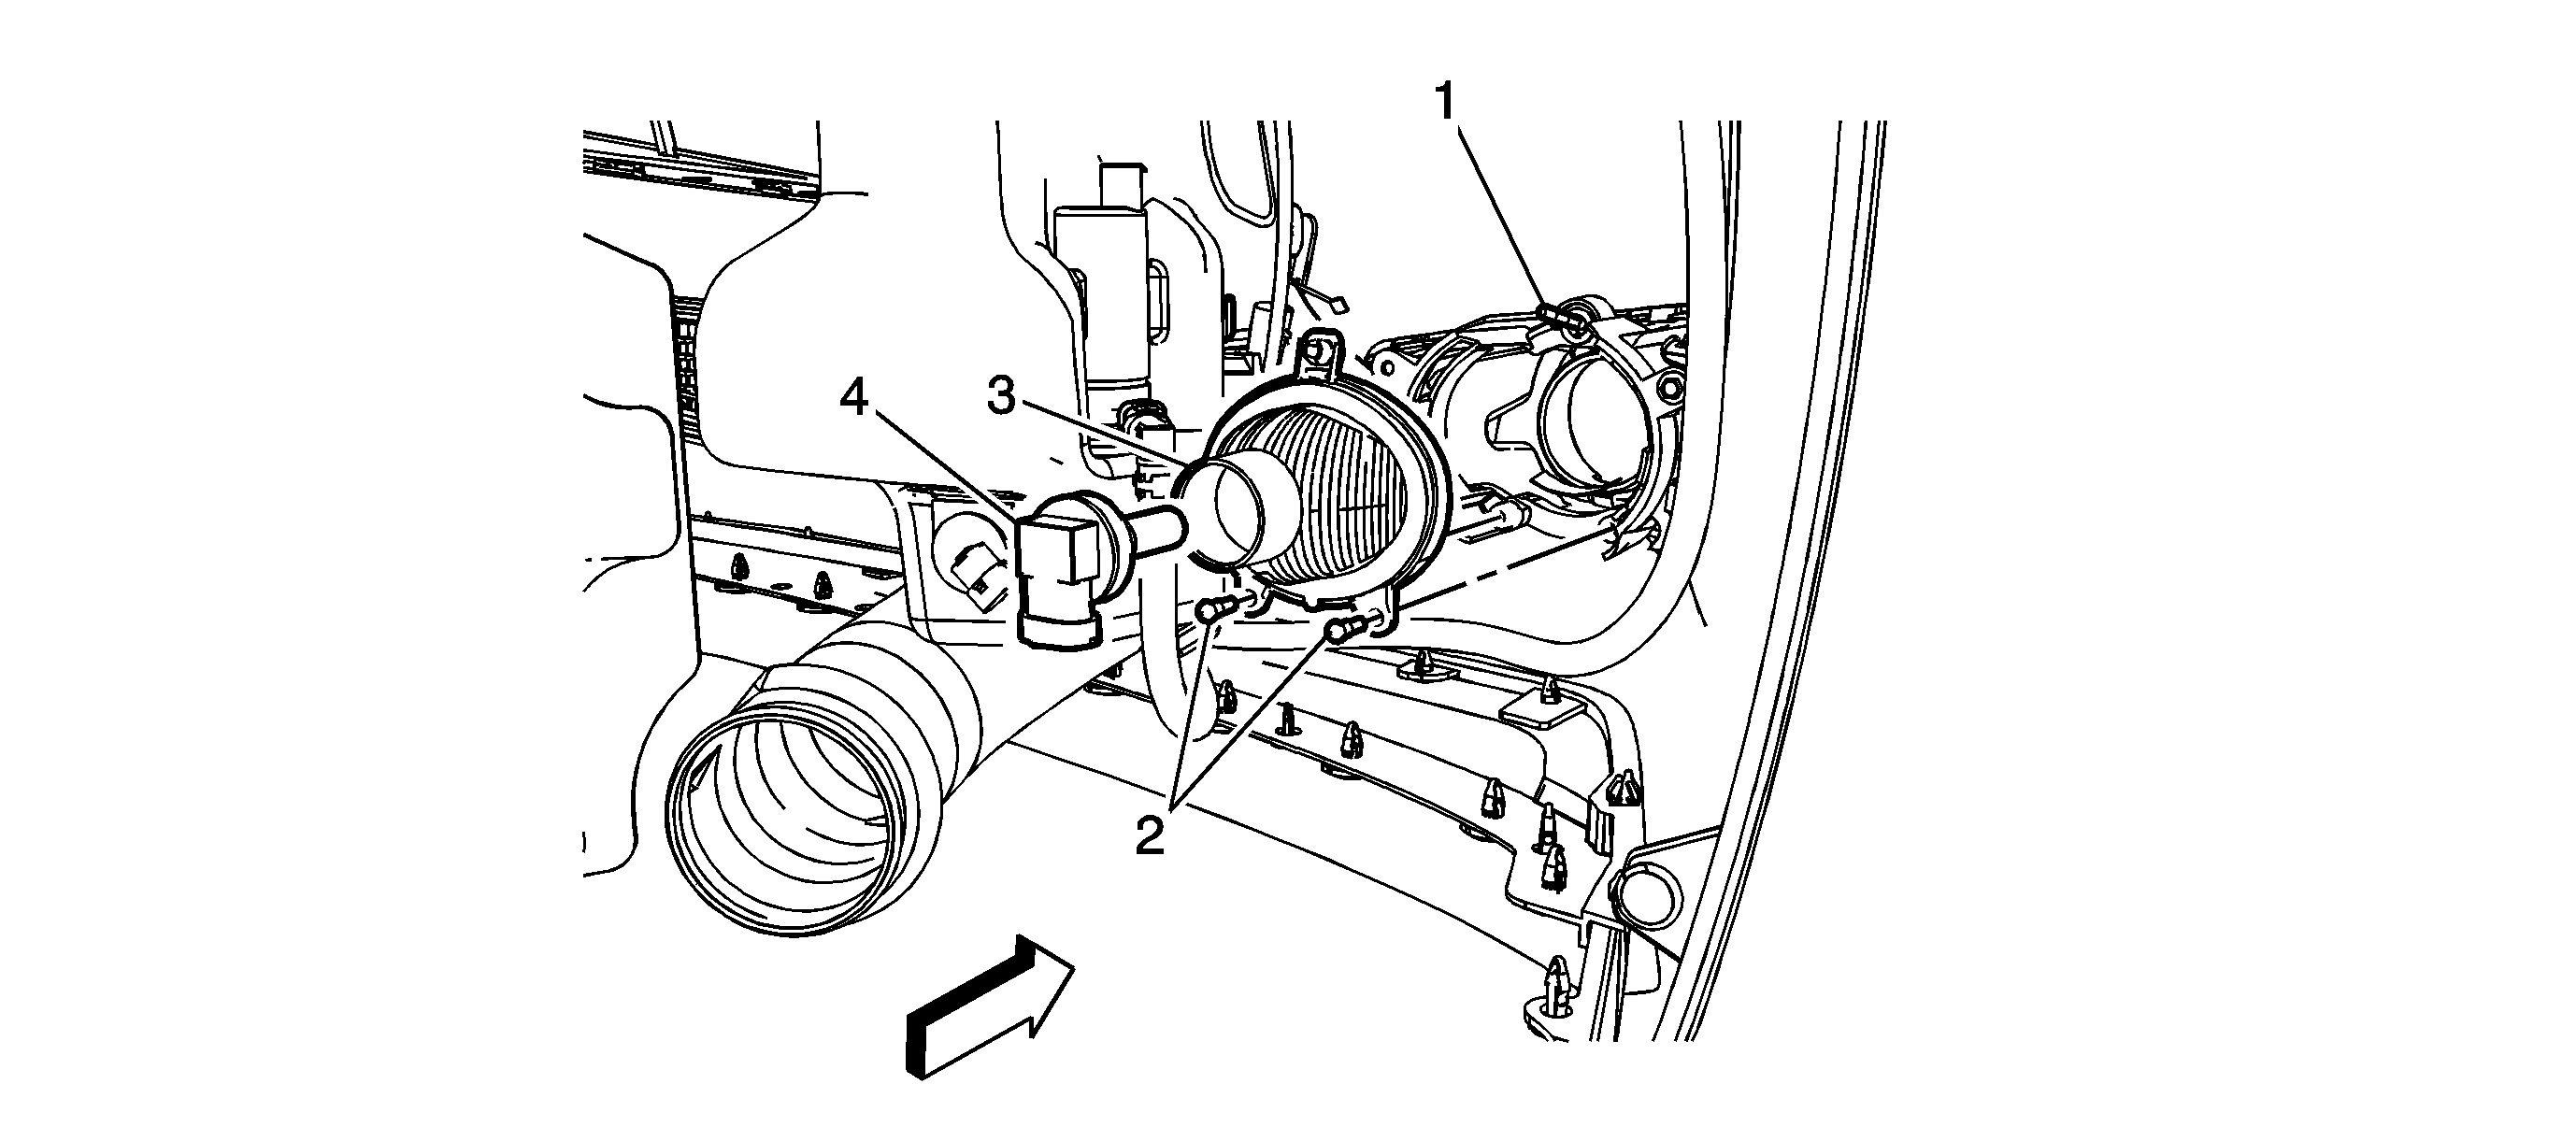
Object Number: 2150592  Size: MF

Callout

Component Name

Preliminary Procedures

  1. Remove either the LF or RF wheelhouse extension. Refer to Wheelhouse Extension Replacement.
  2. Disconnect the fog lamp bulb socket electrical connector.

1

Front Fog Lamp Screw (Qty: 2)

2

Front Fog Lamp Adjuster Screw

Tip
Remove and discard the screw.

3

Front Fog Lamp Projector

Procedure

  1. Remove and discard the fog lamp projector.
  2. The fog lamp assembly is serviced as one unit.
  3. Position the new fog lamp locking ring to the tabs on the front bumper fascia and apply inward pressure to secure the new fog lamp to the front bumper fascia.
  4. Ensure all tabs are secure on the locking ring.
  5. Aim the fog lamps after the new fog lamps have been installed. Refer to Fog Lamp Aiming.

4

Front Fog Lamp Locking Ring

Tip
Using a small flat-bladed tool, release the locking ring from the tabs on the front bumper fascia and discard.