Rear Brake Caliper Overhaul JE5, J55
Special Tools
| • | J-8092 Driver Handle |
| • | J-46275 Caliper Boot Seal Installer |
Warning: Refer to Brake Fluid Irritant Warning in the Preface section.
Caution: Refer to Brake Fluid Effects on Paint and Electrical Components Caution in the Preface section.
Disassembly Procedure
Warning: Do not place fingers in front of the caliper piston(s) in an attempt to catch or protect it when applying compressed air. The piston(s) can fly out with force and could result in serious bodily injury.
Note:
• Replace all the components included in the repair kits used to service this brake caliper. • Lubricate the rubber parts with Delco Supreme 11®, GM P/N 12377967 (Canadian P/N 992667) or equivalent DOT-3 brake fluid from a clean, sealed brake fluid container to make assembly easier. • If any hydraulic component is removed or disconnected, it may be necessary to bleed all or part of the brake system. • The torque values specified are for dry, non-lubricated fasteners. • Perform the service operations on a clean bench, free from all mineral oil materials.
- Remove the brake caliper from the vehicle. Refer to Rear Brake Caliper Replacement.
- Remove the brake caliper piston from the caliper bore by directing low pressure compressed air into the caliper bore through the brake fluid inlet hole.
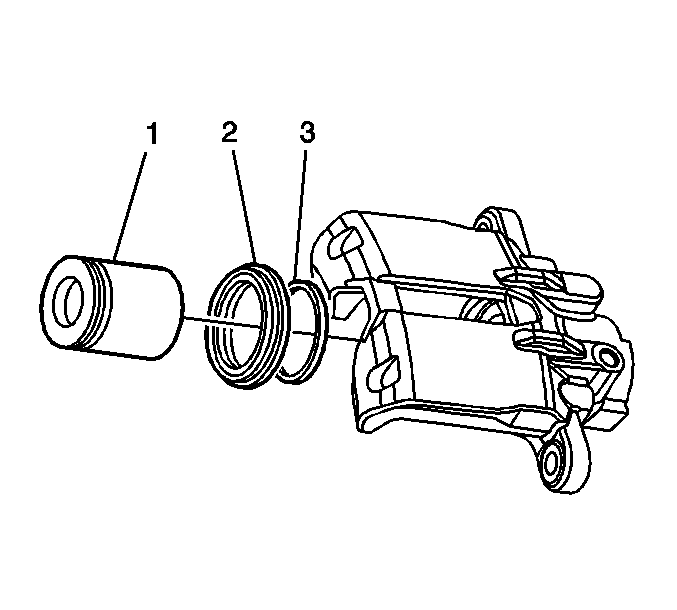
- Using a small wooden or plastic tool, remove the piston dust boot seal (2) from the seal counter-bore in the caliper and discard the boot seal.
- Using a small wooden or plastic tool, remove the piston seal (1) from the caliper bore and discard the piston seal.
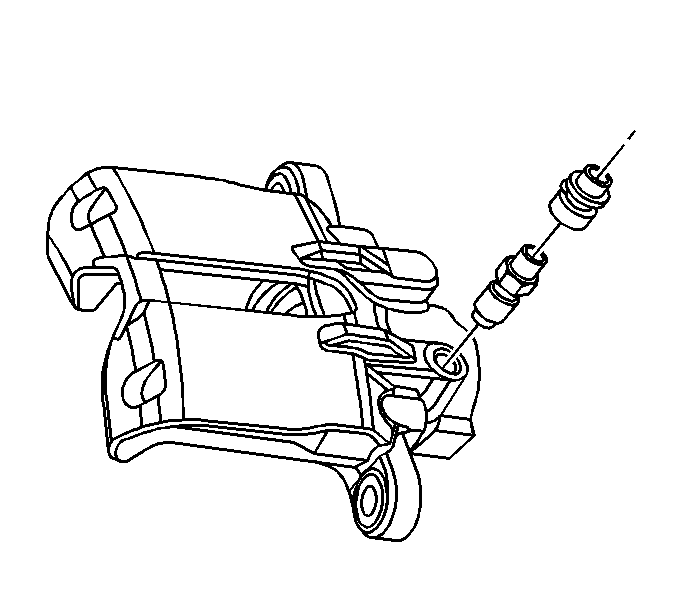
- Remove the brake caliper bleeder valve cap.
- Remove the brake caliper bleeder valve.
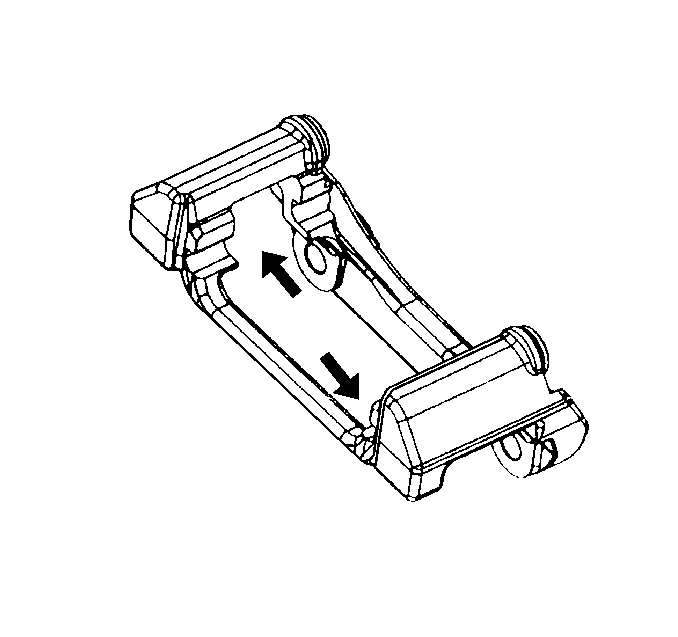
- Inspect the brake caliper mounting bracket guide surfaces for corrosion and wear. Remove and replace the brake caliper mounting bracket if damaged or worn.
- Clean the brake caliper piston bore and seal counter-bore, with denatured alcohol, or equivalent.
- Clean the brake caliper piston with denatured alcohol, or equivalent.
- Dry the caliper piston bore and counter-bore, with non-lubricated, filtered air.
- Dry the caliper piston with non-lubricated, filtered air.
- Inspect the caliper bore for cracks, scoring, pitting and excessive corrosion.
- If light corrosion is present in the caliper bore, attempt to remove the imperfection with a fine emery paper. If the imperfection cannot be removed, replace the caliper assembly.
- If cracks, scoring, pitting and excessive corrosion are present in the caliper bore, replace the caliper assembly.
- Inspect the caliper piston for cracks, scoring, and/or damage. Replace the caliper piston if any of these conditions exist.
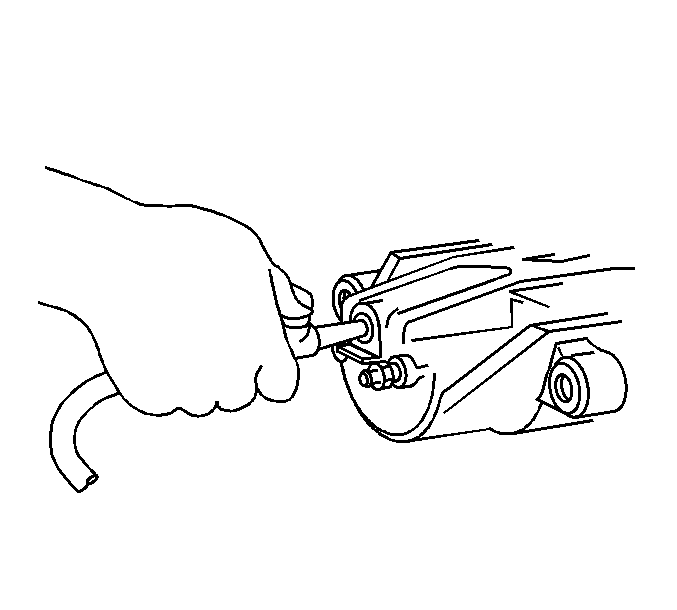
Caution: Use clean cloths to pad interior of caliper housing during piston removal. Use just enough air to ease the pistons out of the bores. If the pistons are blown out, even with the padding provided, it may be damaged.
Note: Do not use abrasives to clean the brake caliper piston.
Assembly Procedure
- Install the brake caliper bleeder valve and tighten to 13 N·m (115 lb in).
- Install the brake caliper bleeder valve cap.
- Lubricate the new piston seal (3) with Delco Supreme 11®, GM P/N 12377967 (Canadian P/N 992667) or equivalent DOT-3 brake fluid from a clean, sealed brake fluid container.
- Install the new lubricated piston seal (3) into the caliper bore seal groove.
- Make sure the seal is not twisted.
- Lubricate the brake caliper bore and the piston (1) with brake fluid.
- Install the caliper piston (1) into the caliper bore.
- Install the new piston dust boot seal (2) over the piston.
- Assemble the J-8092 Driver Handle and the J-46275 Caliper Boot Seal Installer .
- Install the caliper to the vehicle. Refer to Rear Brake Caliper Replacement.
Caution: Refer to Fastener Caution in the Preface section.


| 9.1. | Using J-8092 Driver Handle and J-46275 Caliper Boot Seal Installer fully seat the dust boot seal (2) into the caliper. |
| 9.2. | Ensure the caliper piston dust boot (2) is properly seated into the groove in the brake caliper bore. |
Rear Brake Caliper Overhaul J56
Warning: Refer to Brake Fluid Irritant Warning in the Preface section.
Caution: Refer to Brake Fluid Effects on Paint and Electrical Components Caution in the Preface section.
Caution: Do not remove the caliper external crossover tube or separate the 2 caliper halves. If the crossover tube and/or the caliper halves are separated, corrosion and damage to the caliper may result.
Caution: This brake caliper is coated with a specialized paint. Use care when handling and servicing to ensure the paint does not get chipped or scratched. Clean any brake fluid from painted surfaces with denatured alcohol, or equivalent, as soon as possible.
Note:
• Replace all the components included in the repair kits used to service this brake caliper. • Lubricate the rubber parts with new Delco Supreme 11®, GM P/N 12377967 (Canadian P/N 992667) or equivalent DOT-3 brake fluid to make assembly easier. • If any hydraulic component is removed or disconnected, it may be necessary to bleed all or part of the brake system. • The torque values specified are for dry, non-lubricated fasteners. • Perform the service operations on a clean bench, free from all mineral oil materials.
Disassembly Procedure
Warning: Do not place fingers in front of the caliper piston(s) in an attempt to catch or protect it when applying compressed air. The piston(s) can fly out with force and could result in serious bodily injury.
Caution: Use clean cloths to pad interior of caliper housing during piston removal. Use just enough air to ease the pistons out of the bores. If the pistons are blown out, even with the padding provided, it may be damaged.
Note: It will be necessary to fabricate one or more blocks of wood to the following dimensions to be used during this procedure:
• Must fabricate 1 block: 19 mm (¾ in) X 51 mm (2 in) X 51 mm (2 in) • Optional to fabricate 1 block, rather than using an old brake pad: 19 mm (¾ in) X 51 mm (2 in) X 127 mm (5 in) • Optional to fabricate 1 block to cushion piston removal: 19 mm (¾ in) X 51 mm (2 in) X 127 mm (5 in)
- Remove the brake caliper from the vehicle. Refer to Rear Brake Caliper Replacement.
- Drain the brake fluid from the brake caliper.
- Place the caliper in a vise using plastic vise caps or suitable material to protect the caliper mounting bosses from the vise jaws.
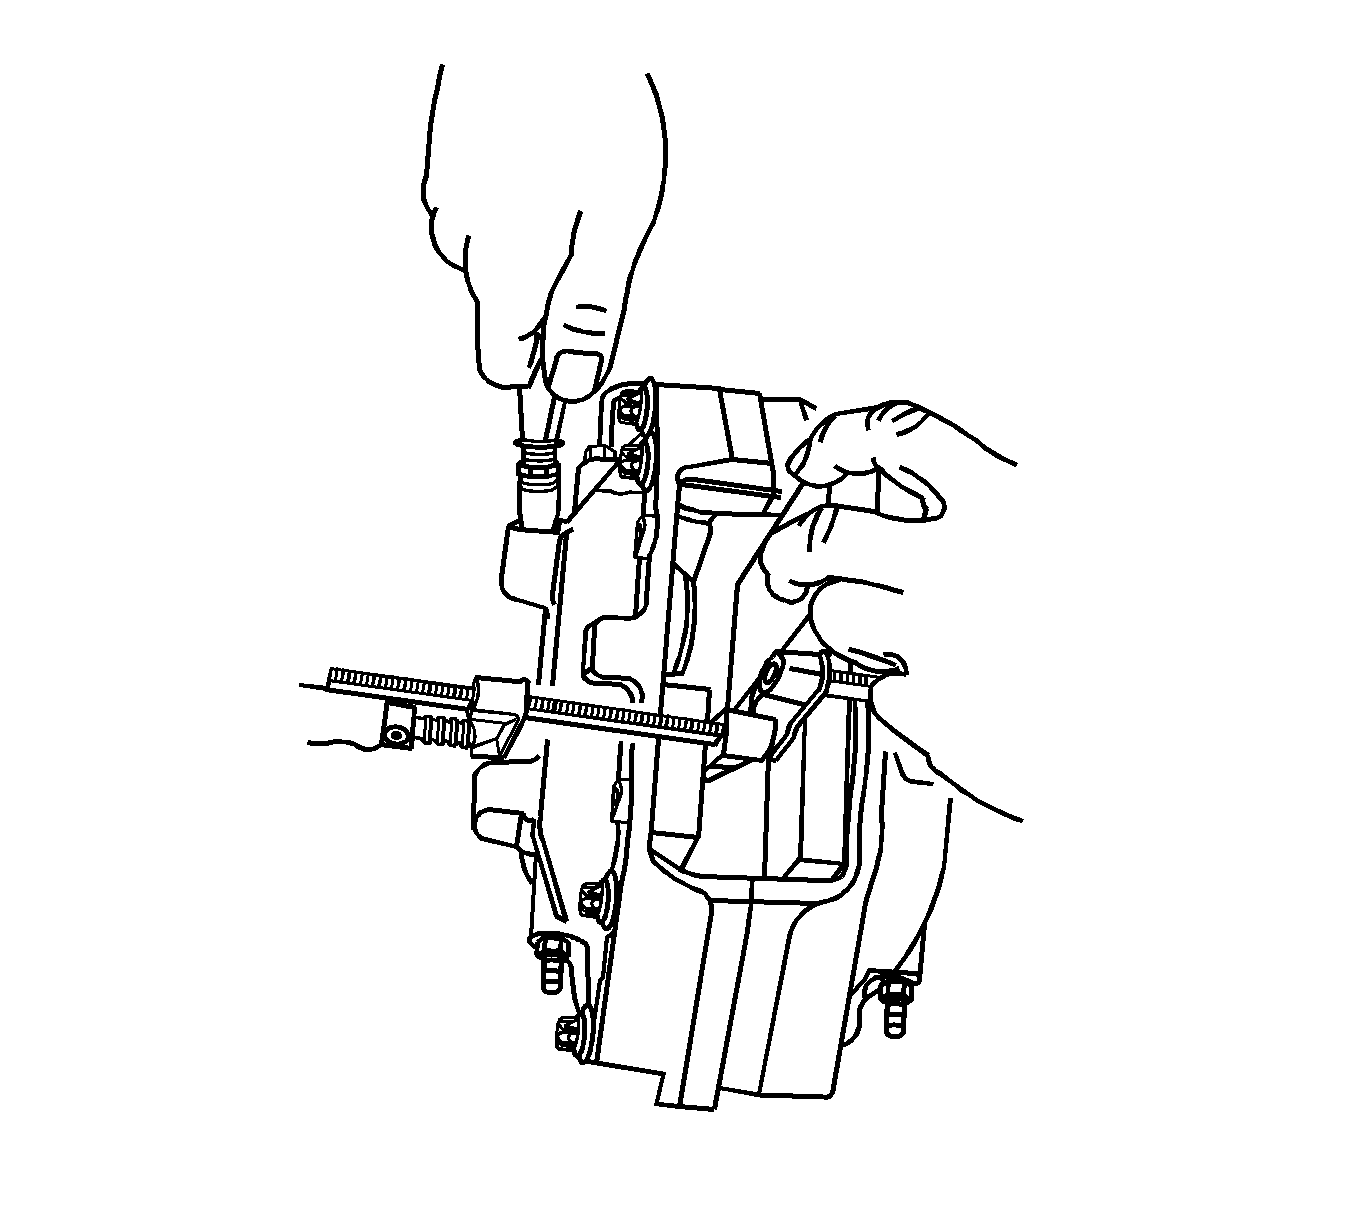
- Place an old brake pad or the fabricated 127 mm (5 in) long block of wood over 2 adjoining piston bores and secure in place with a non-marring C-clamp.
- Place the fabricated 51 mm (2 in) long block of wood over one of the opposing piston bores and secure it in place with a non-marring C-clamp.
- Use clean cloths or the other fabricated 127 mm (5 in) long block of wood to pad the interior of caliper housing during removal of the piston.
- Carefully remove the brake caliper piston by directing low pressure compressed air into the brake caliper inlet hole. If the dust boot seal slides out with the piston, remove the dust boot seal from piston and reinstall the seal into the caliper.
- Move the fabricated 51 mm (2 in) long block of wood over the emptied piston bore and secure it in place with a non-marring C-clamp.
- Move the clean cloths or the other fabricated 127 mm (5 in) long block of wood to pad the interior of caliper housing during the removal of the piston.
- Carefully remove the brake caliper piston by directing low pressure compressed air into the brake caliper inlet hole. If the dust boot seal slides out with the piston, remove the dust boot seal from piston and reinstall the seal into the caliper.
- Repeat steps 4 through 10 for the opposite side of the caliper.
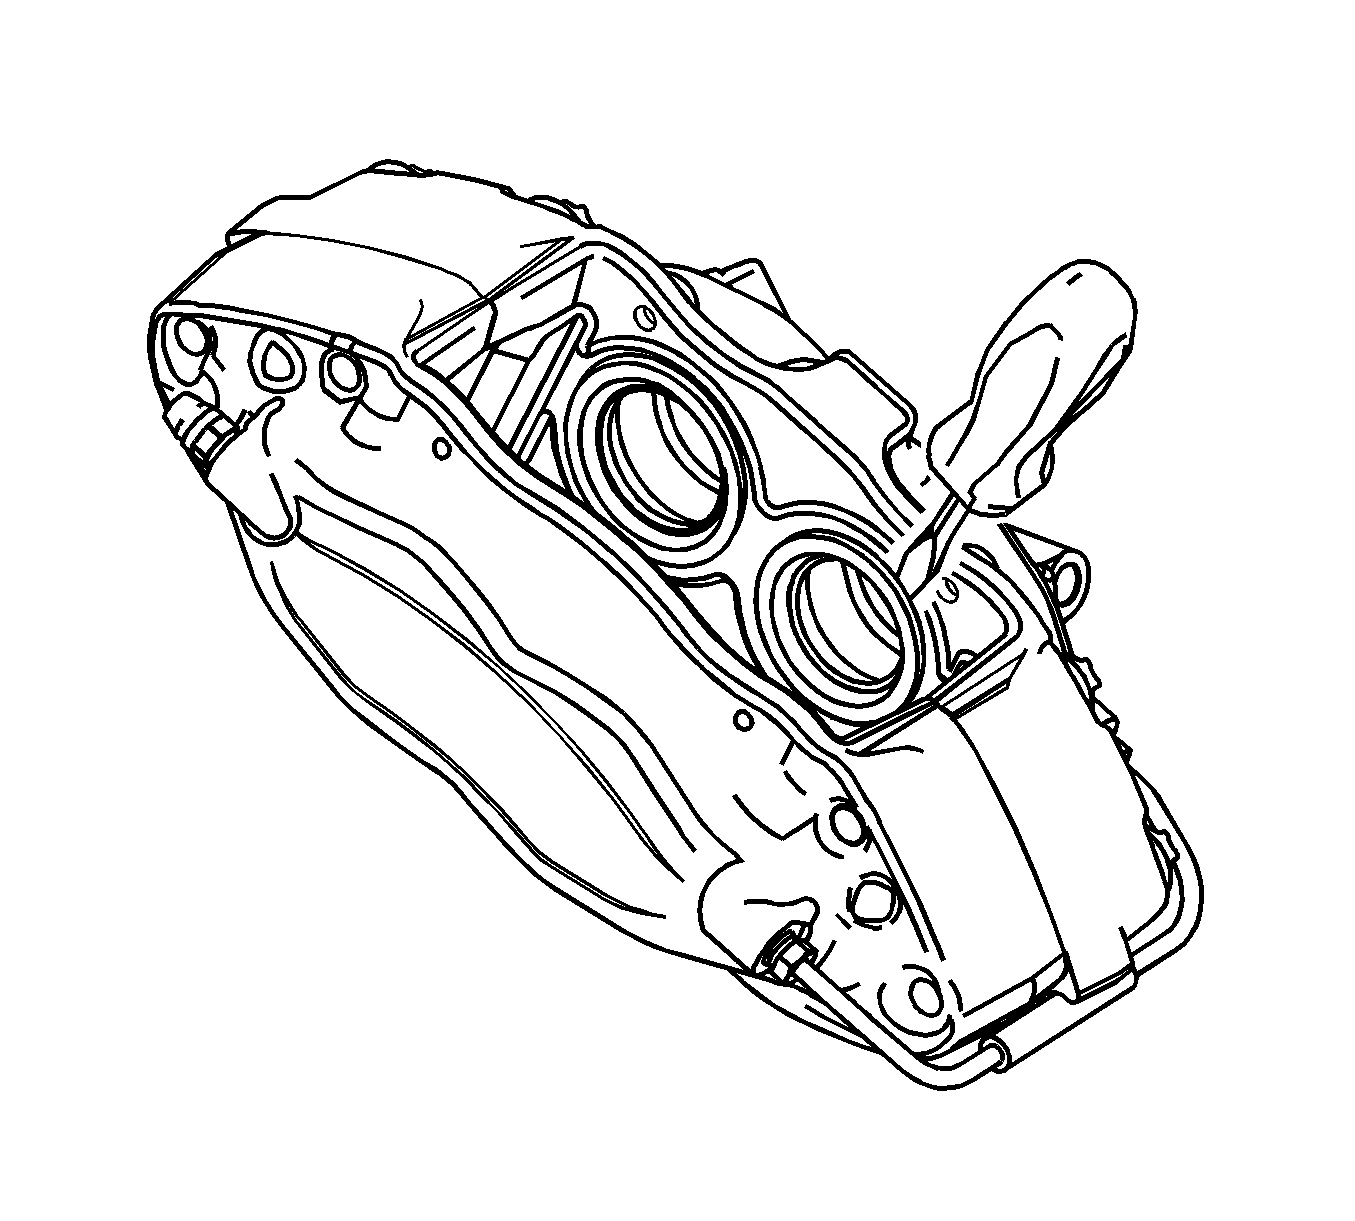
- Using care to not scratch or mar the painted surfaces or piston bore, remove all the dust boot seals using a flat-bladed tool. Discard the dust boot seals.
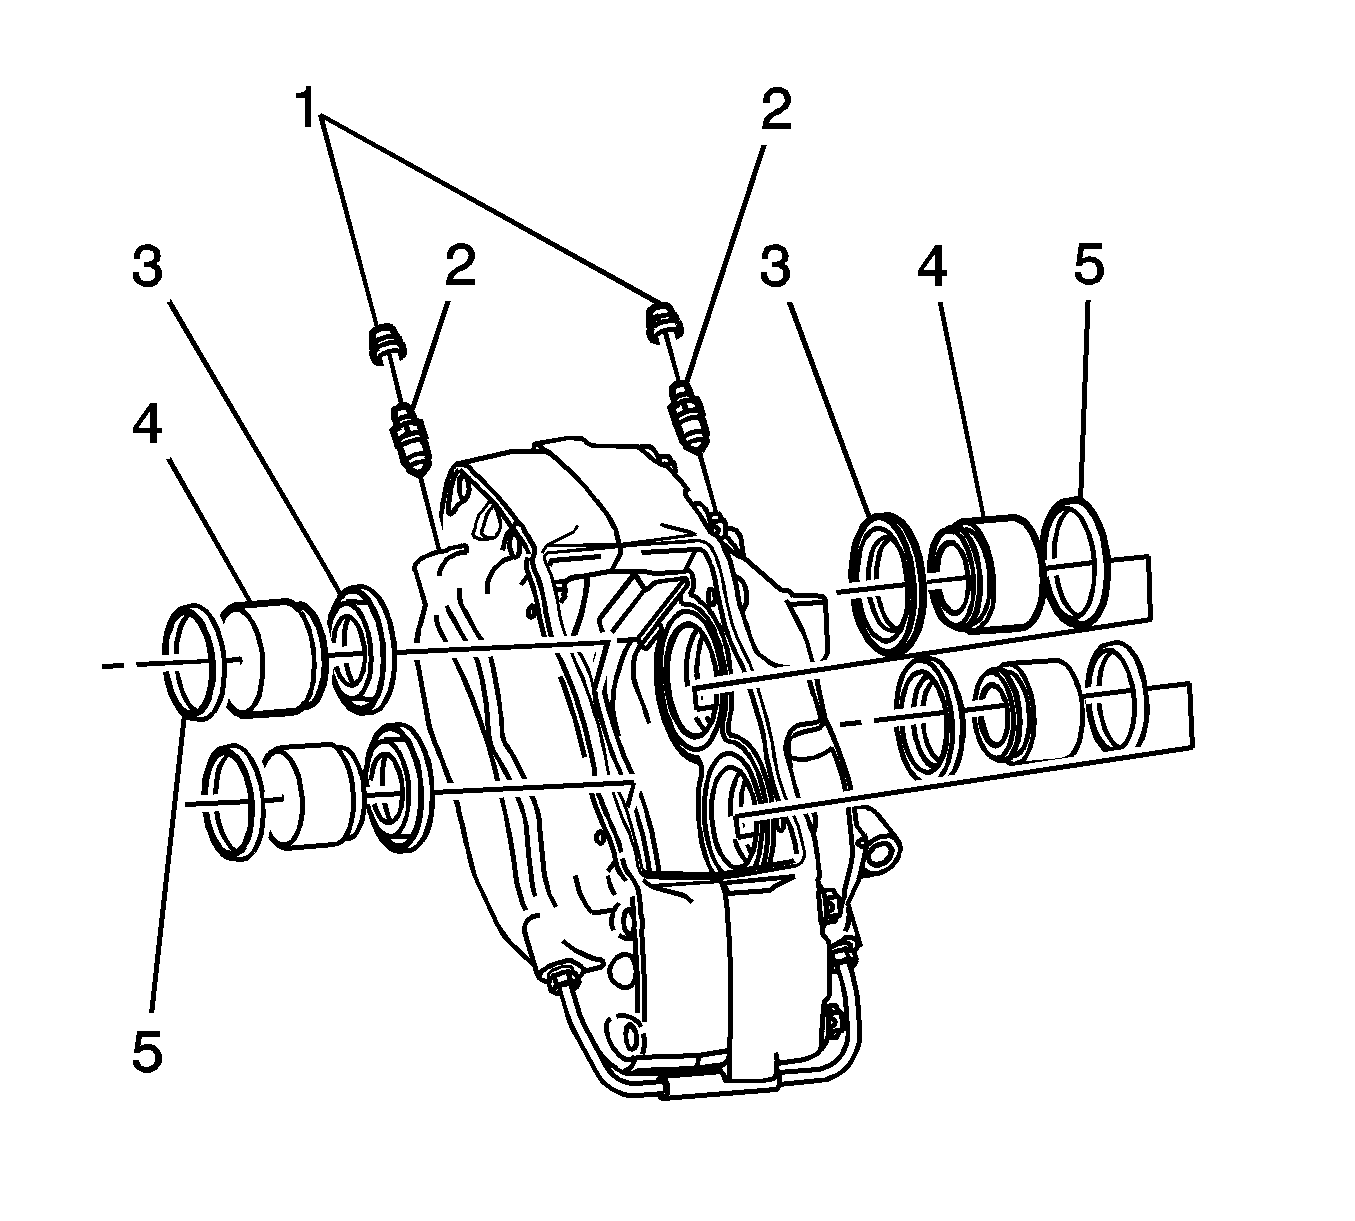
- Using wooden or plastic tool, remove the piston seals (5) from the piston bores. Discard the piston seals.
- Remove both brake caliper bleeder caps and valves (1, 2).
- Remove the caliper from the vise and clean the entire caliper with denatured alcohol, or equivalent.
- Dry the caliper piston bores with non-lubricated filtered air. Make sure the external crossover pipe and the internal fluid ports are clean and free of obstructions.
- Inspect the caliper cylinder bores and piston seal counter-bores for scratches, cracks, pitting, and/or corrosion.
- If the caliper piston bores are scratched, cracked, or pitted, or if corrosion cannot be cleaned with denatured alcohol, replace the caliper assembly.
Note: Do not clean the caliper piston bores by honing or cleaning with abrasives.
Assembly Procedure
- Install the new piston dust boot seals (3) over the pistons (4). Make sure the dust boot seal is properly seated on the piston, in the dust boot seal groove.
- Lubricate the new piston seals (5) with Delco Supreme 11®, GM P/N 12377967 (Canadian P/N 992667) or equivalent DOT-3 brake fluid from a clean, sealed brake fluid container.
- Install the lubricated, new piston seals (5) into the brake caliper bore seal grooves. Make sure the seals are not twisted.
- Apply a thin coat of Delco Supreme 11®, GM P/N 12377967 (Canadian P/N 992667) or equivalent DOT-3 brake fluid from a clean, sealed brake fluid container, onto the caliper piston bores and the outer surface of the caliper pistons.
- Install the piston and dust boot assemblies into the correct caliper bores. Press the pistons and dust boot seals all the way in by hand.
- Place a clean old brake pad or the fabricated 127 mm (5 in) long block of wood over 2 adjoining piston bores and apply light pressure with non-marring C-clamp. This will ensure the dust boots and pistons are fully seated into the caliper.
- Repeat step 6 for the opposite pistons.
- Install the brake caliper bleeder valves (2) and tighten to 13 N·m (115 lb in).
- Install the brake caliper bleeder valve caps (1).
- Install the caliper to the vehicle. Refer to Rear Brake Caliper Replacement.

Caution: Refer to Fastener Caution in the Preface section.
