GM Service Manual Online
For 1990-2009 cars only
Table 1: Transfer Case and Cover Cleaning and Inspection
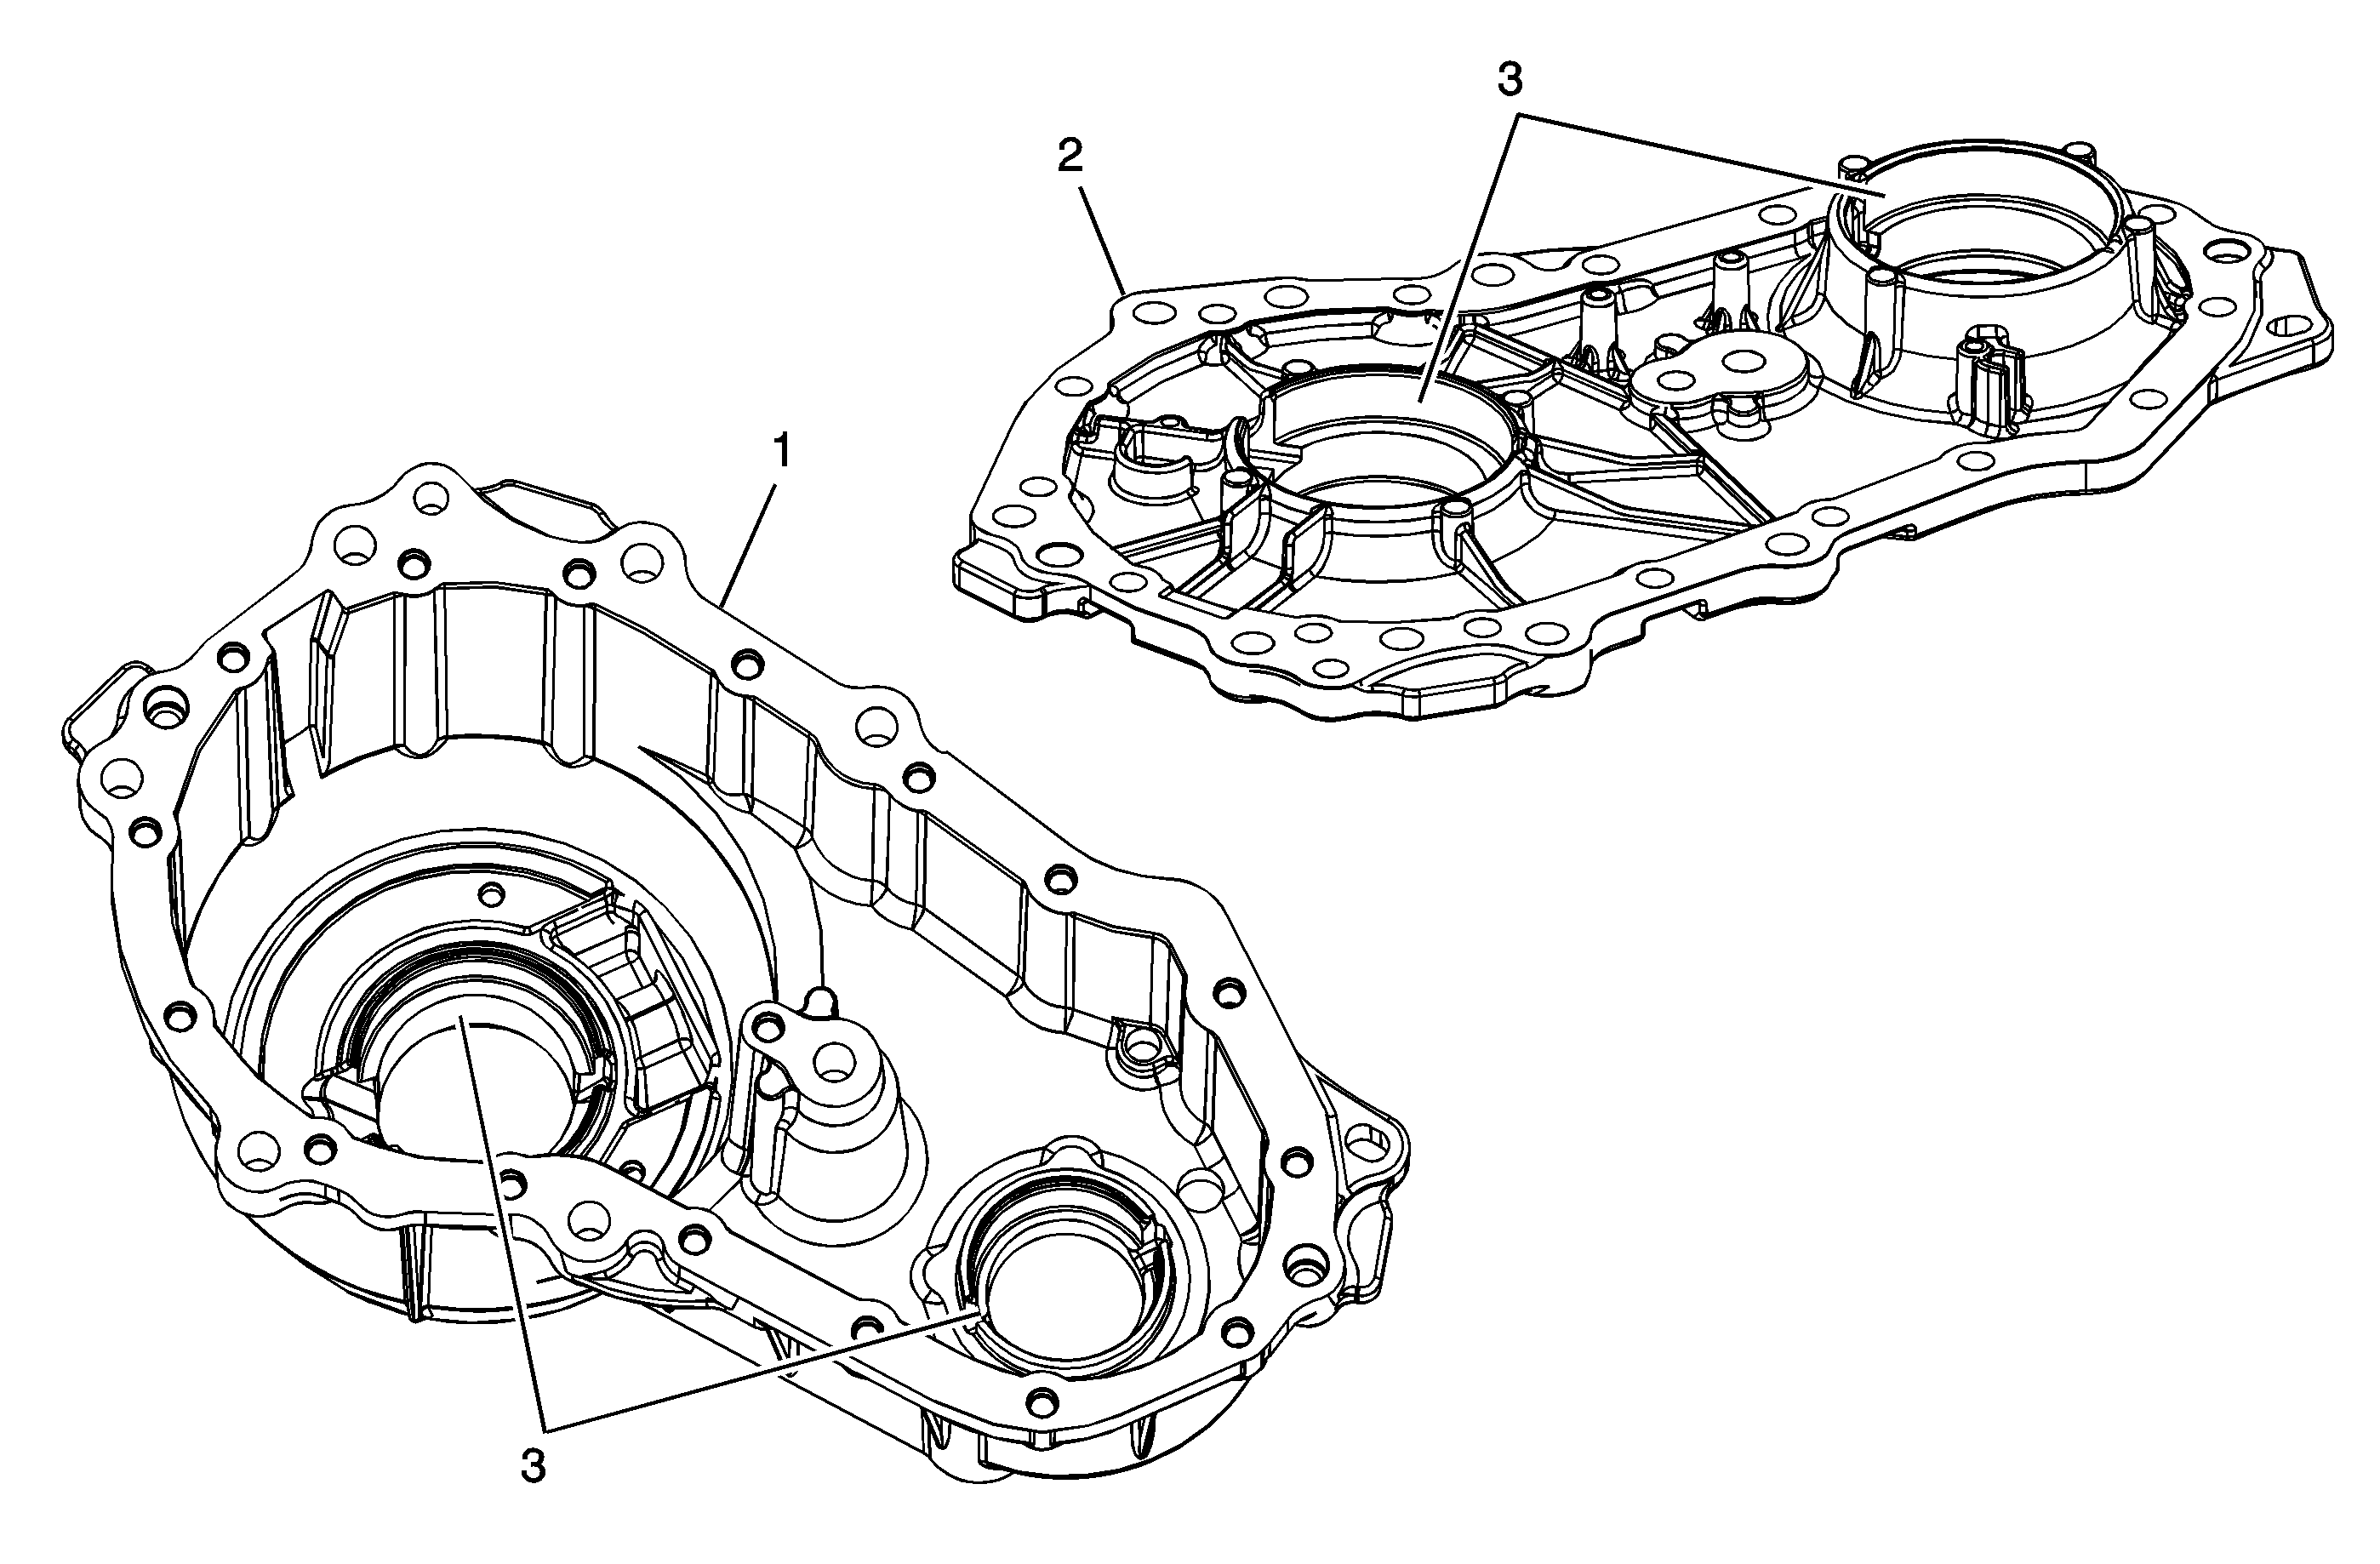
Table 2: Clutch Components Cleaning and Inspection
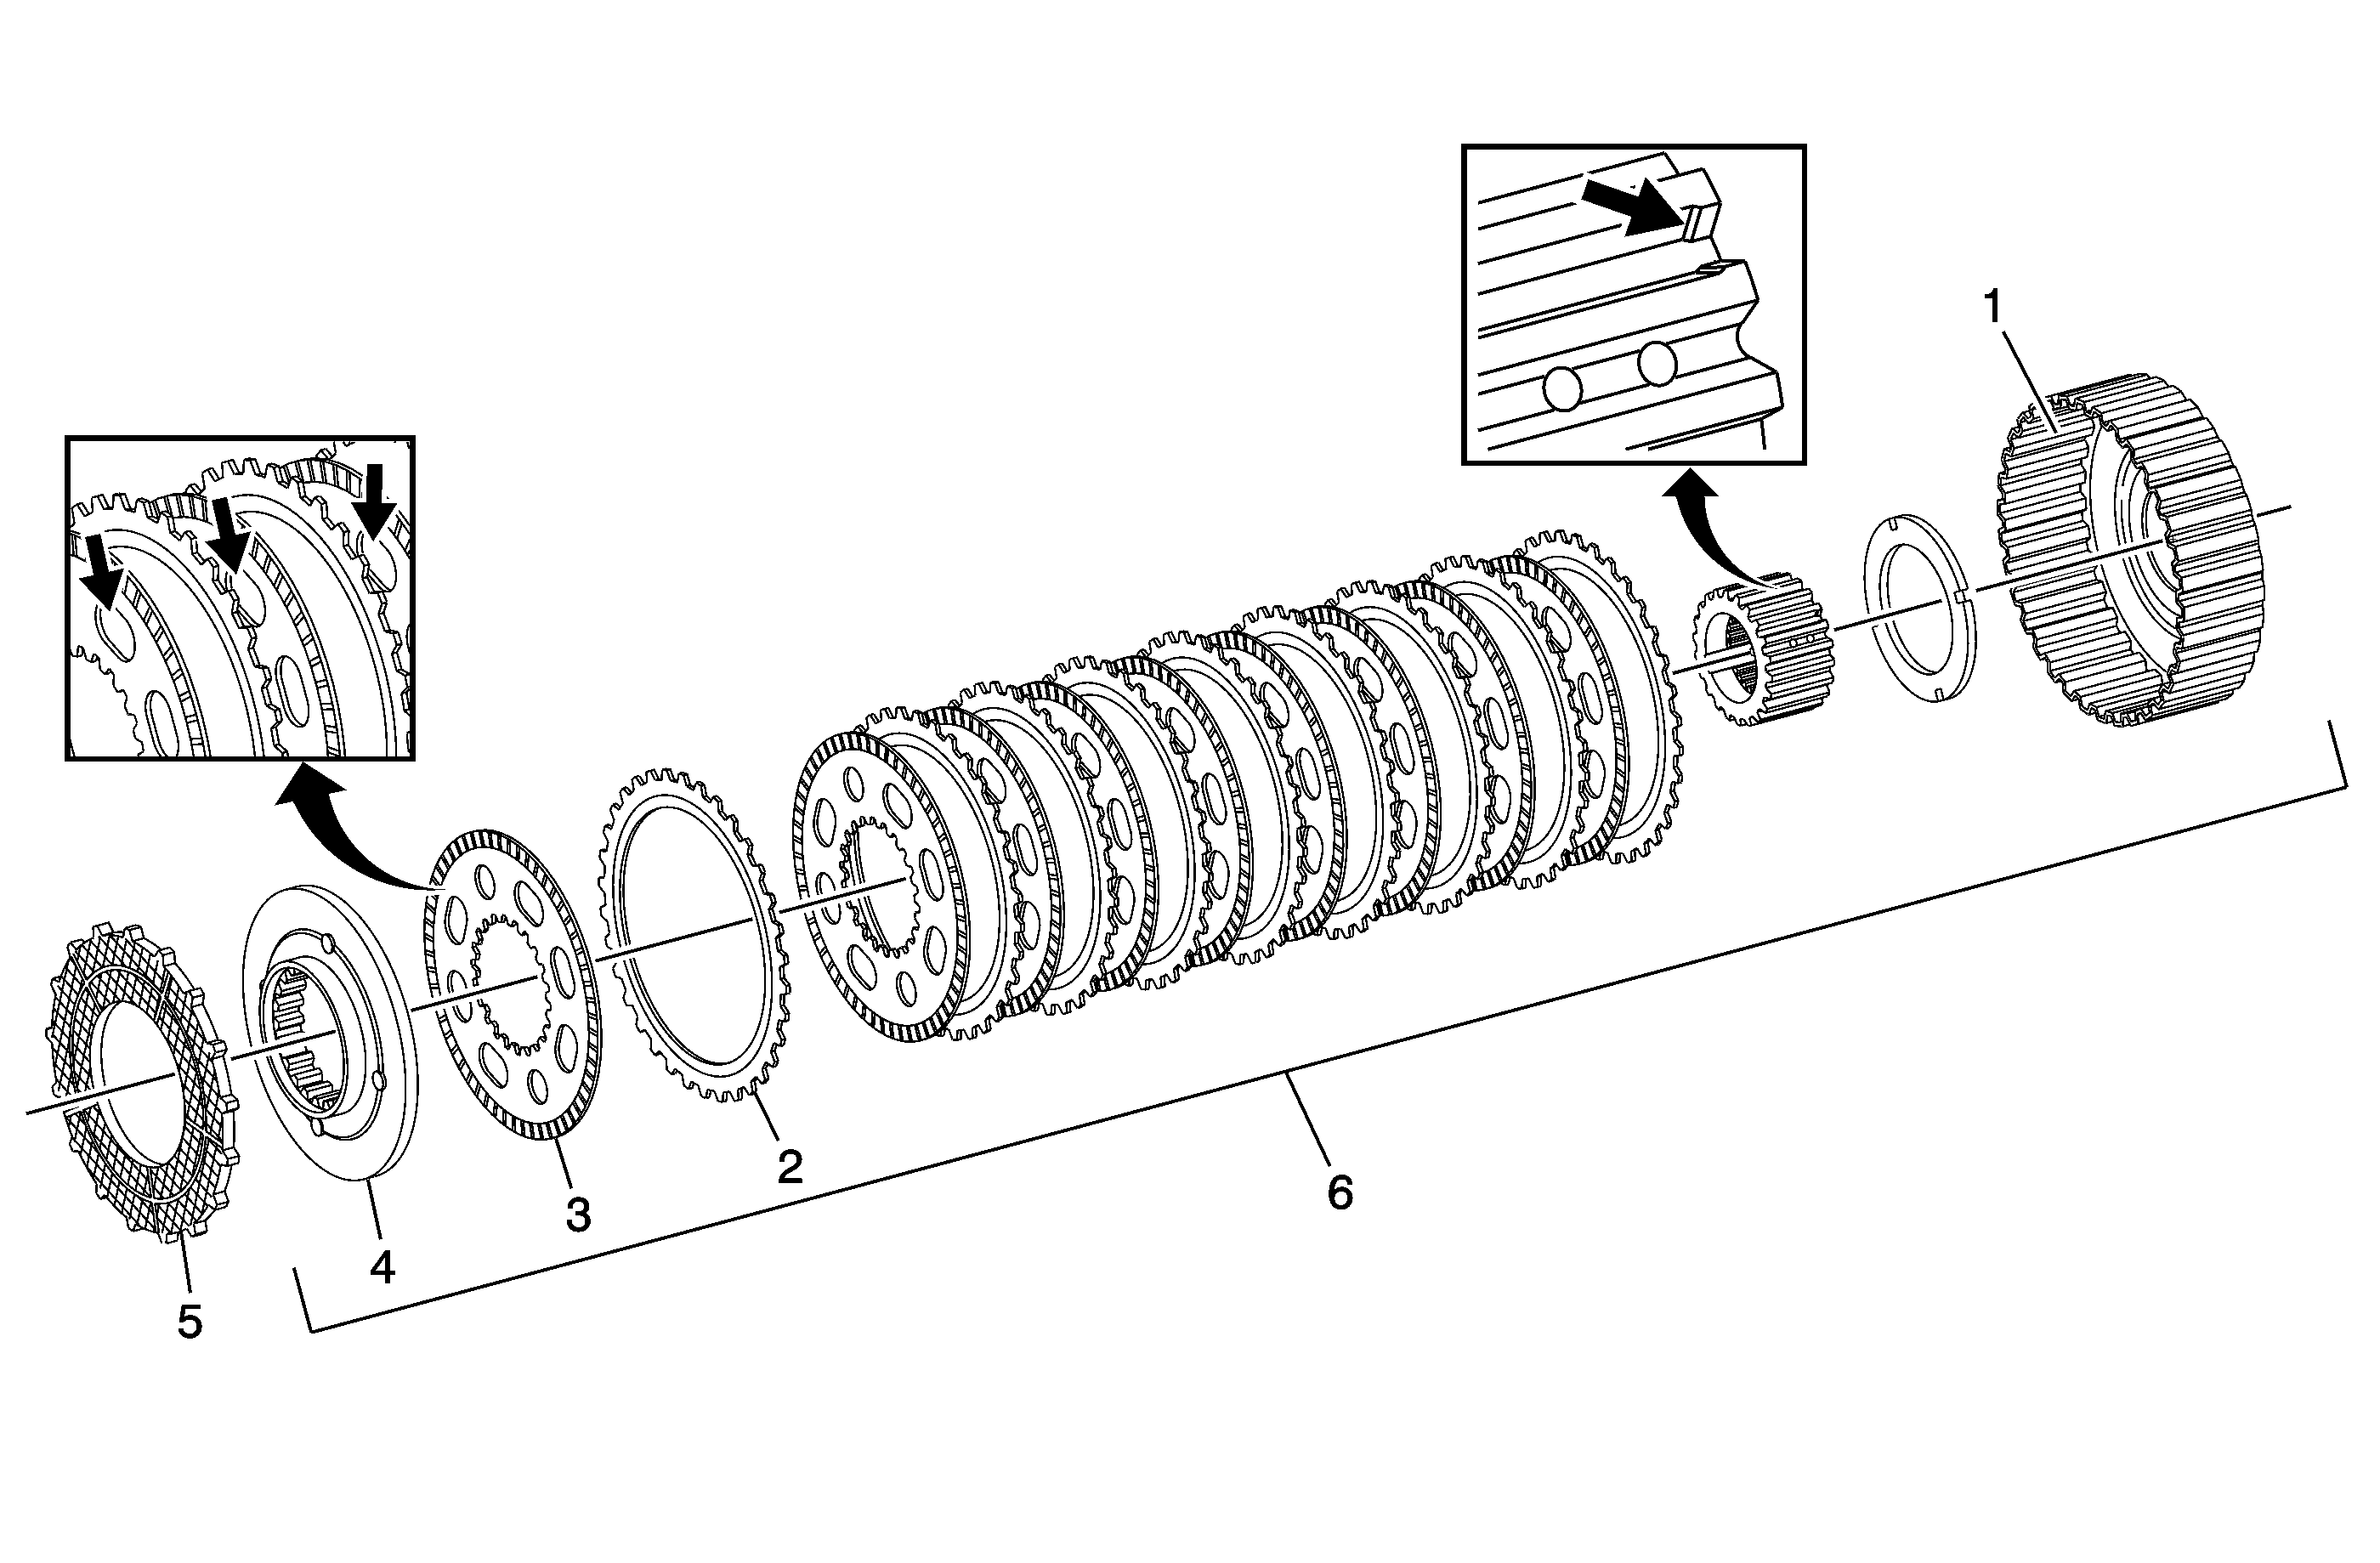
Table 3: Chain, Sprockets, and Snubber Cleaning and Inspection
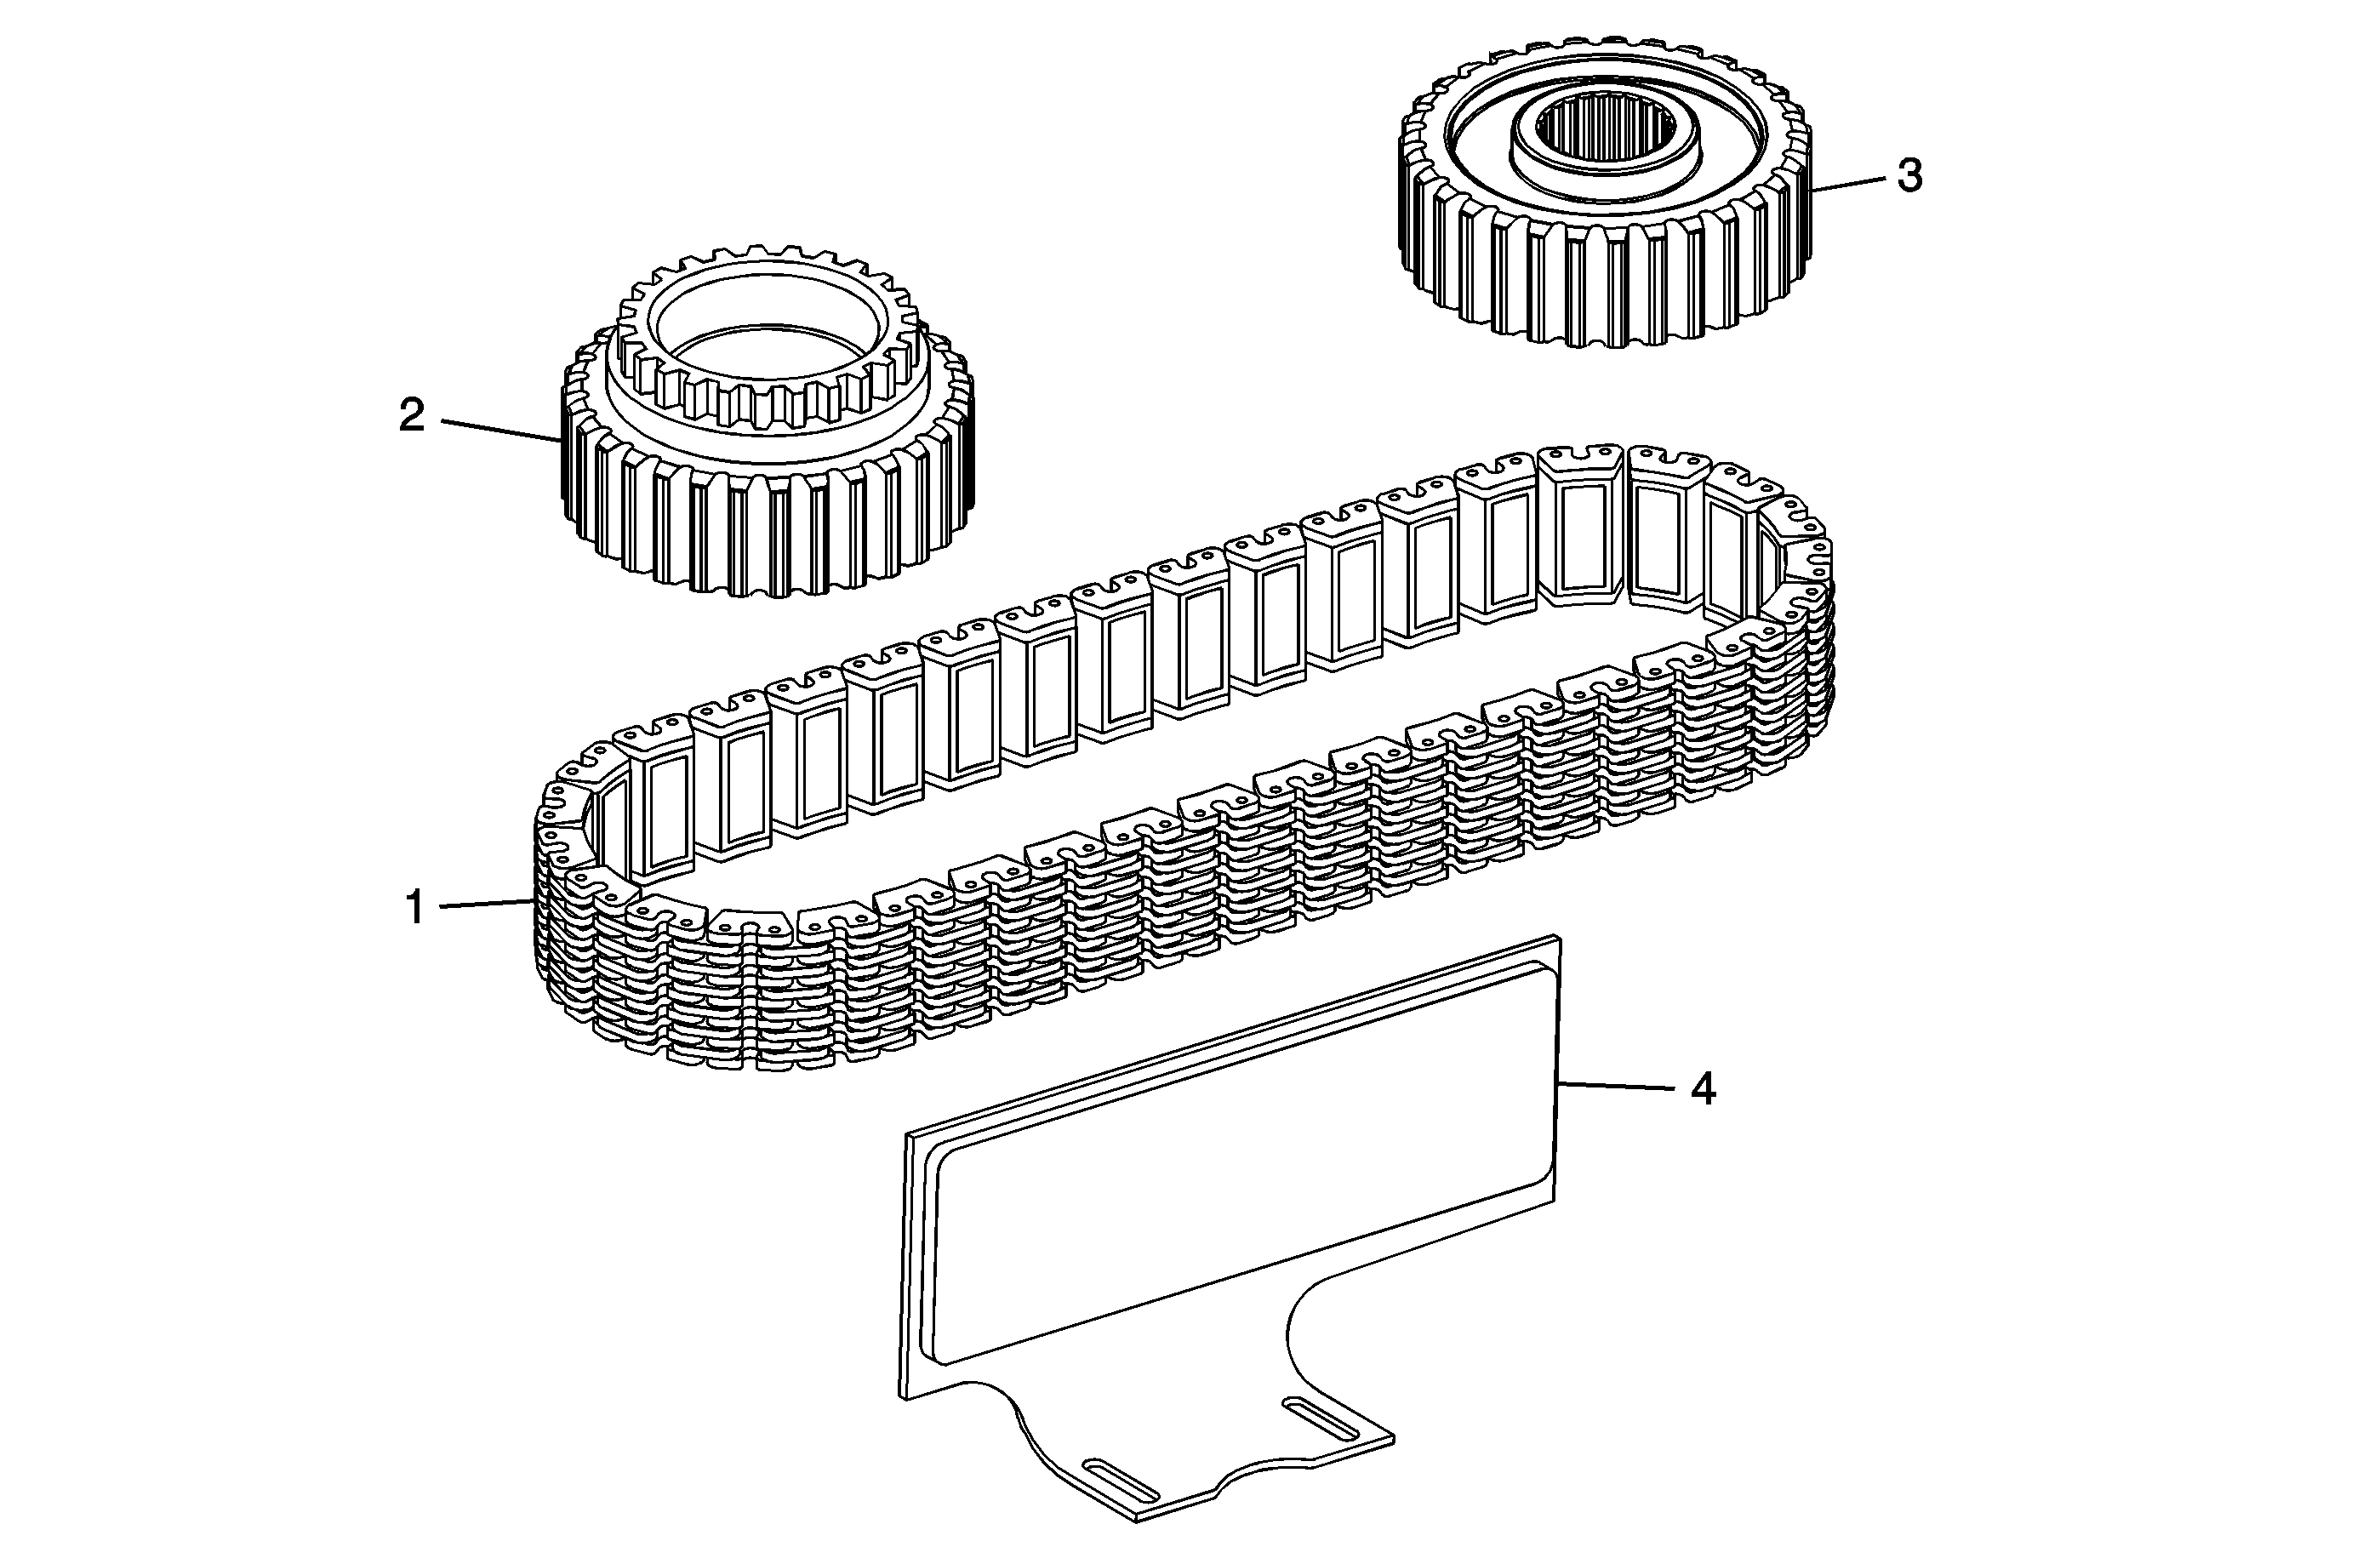
Table 4: Input Shaft and Front Output Shaft Cleaning and Inspection
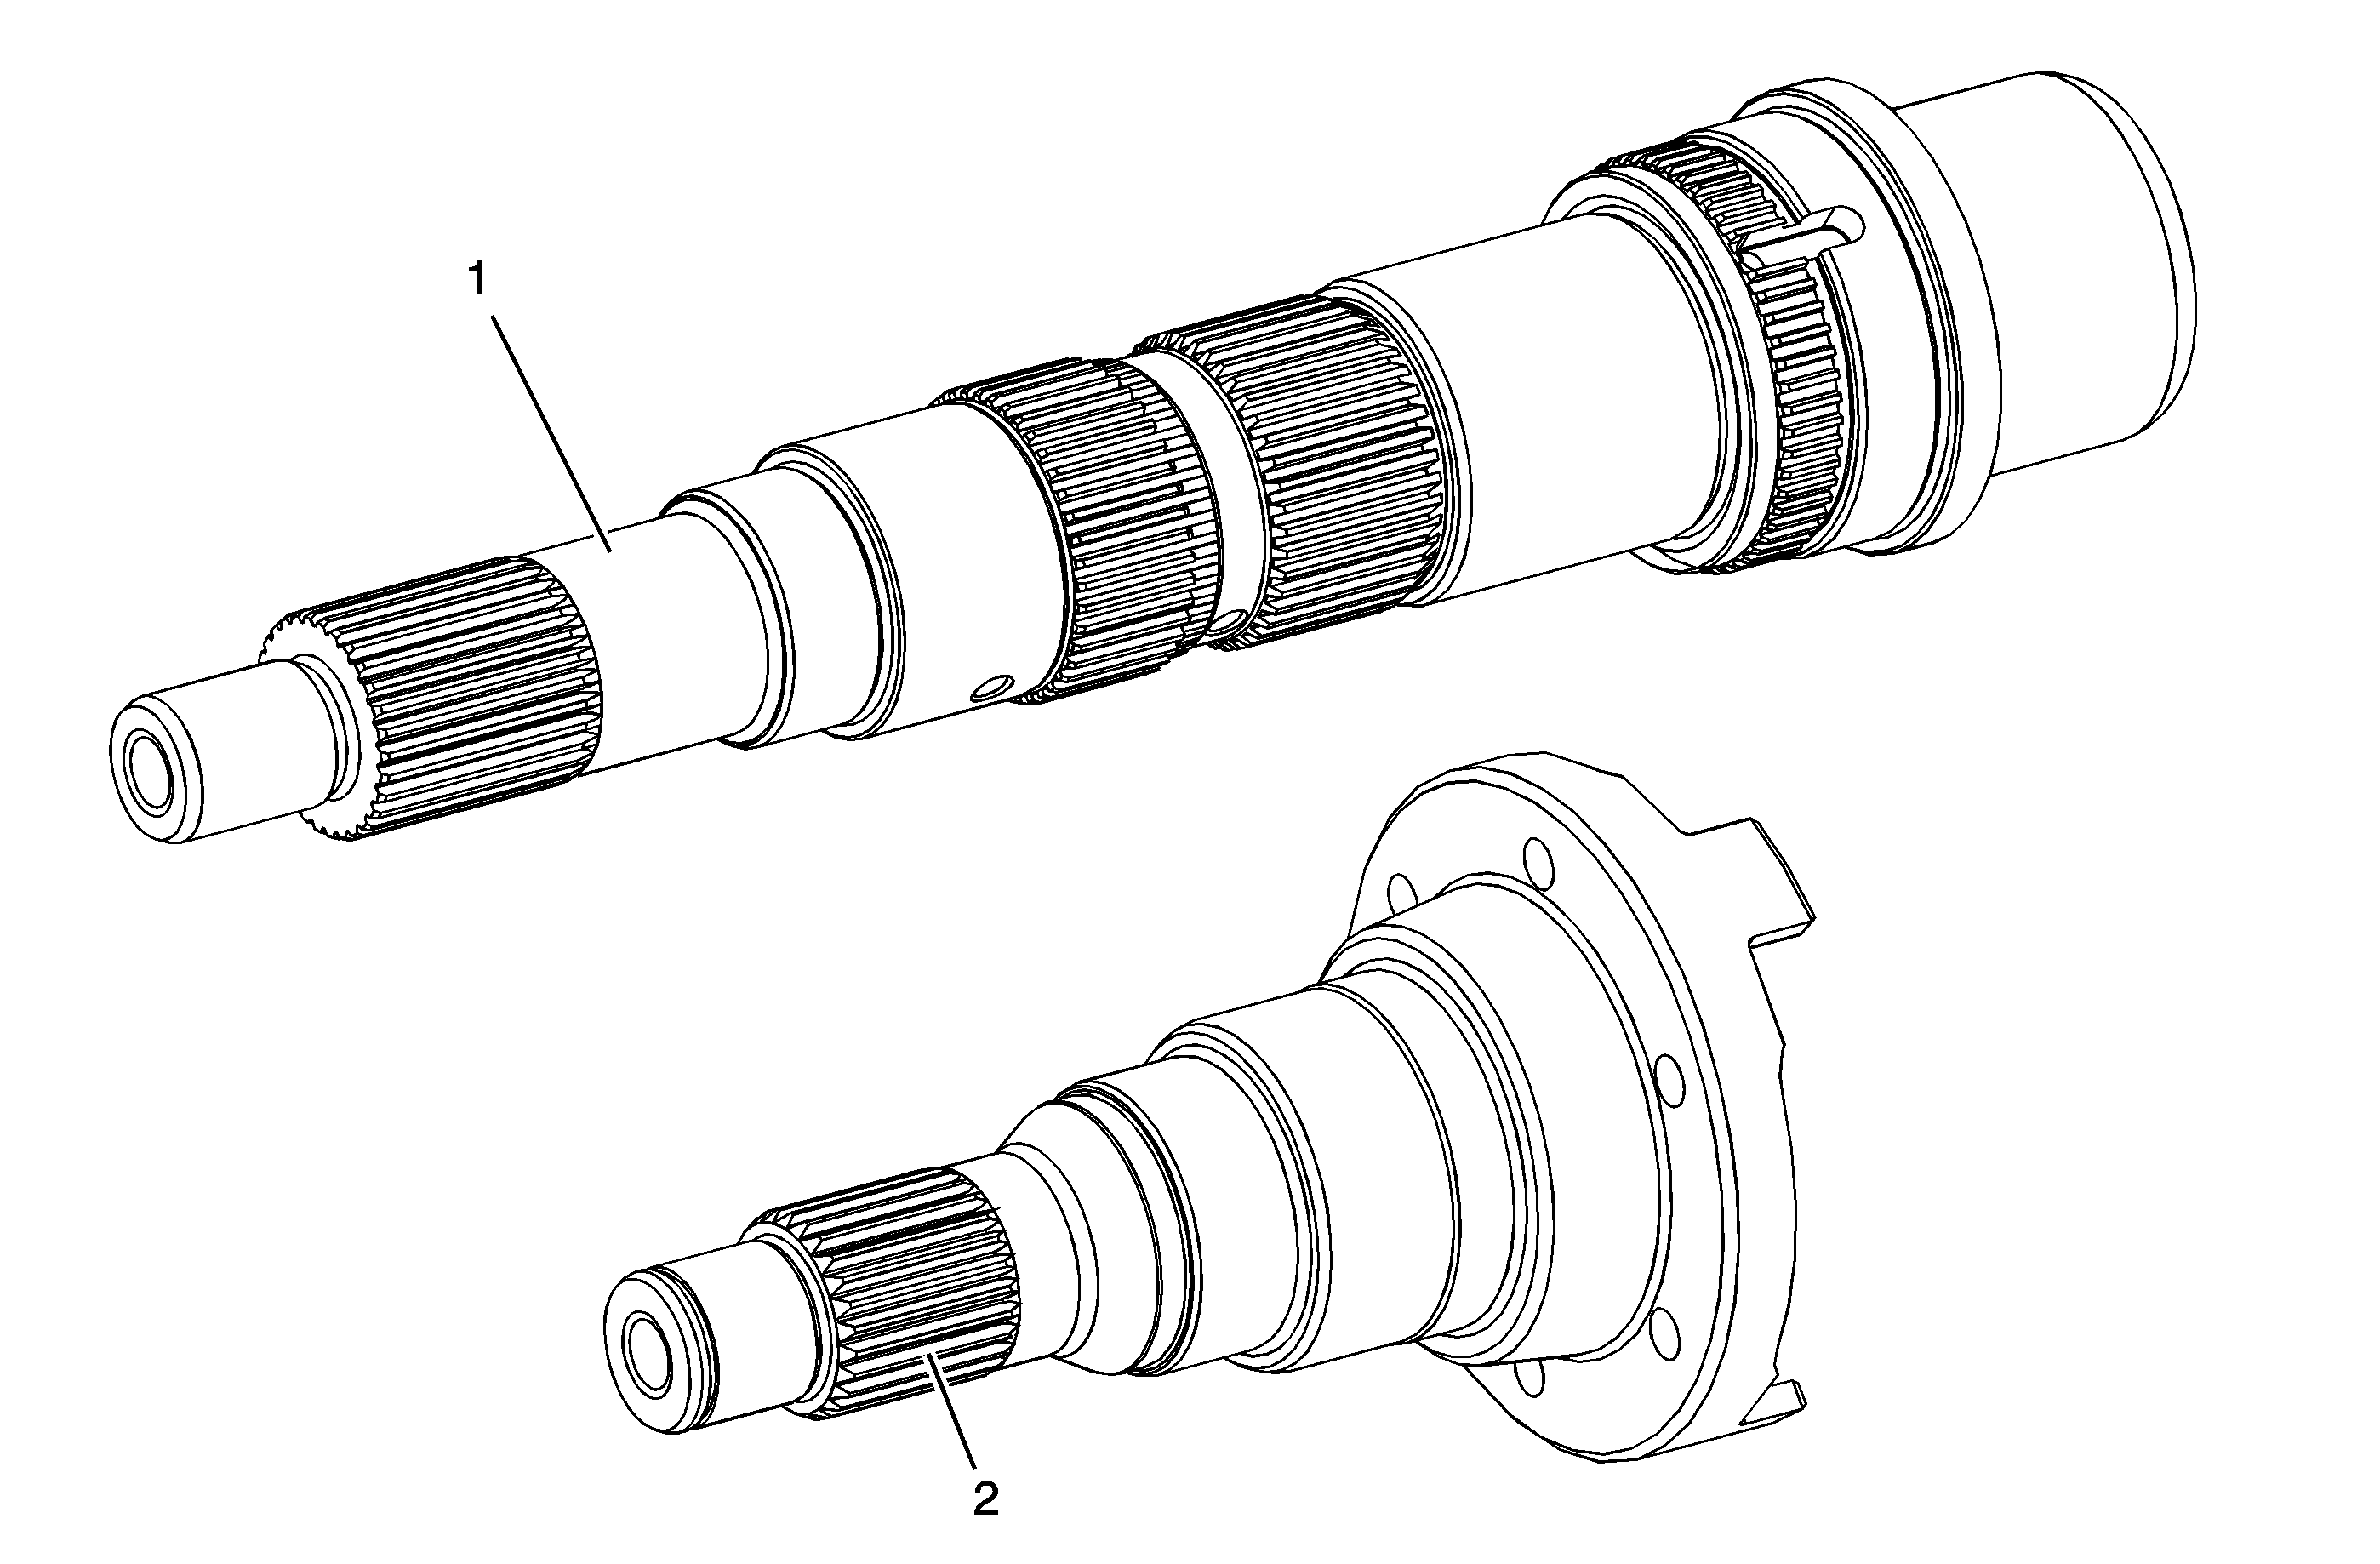
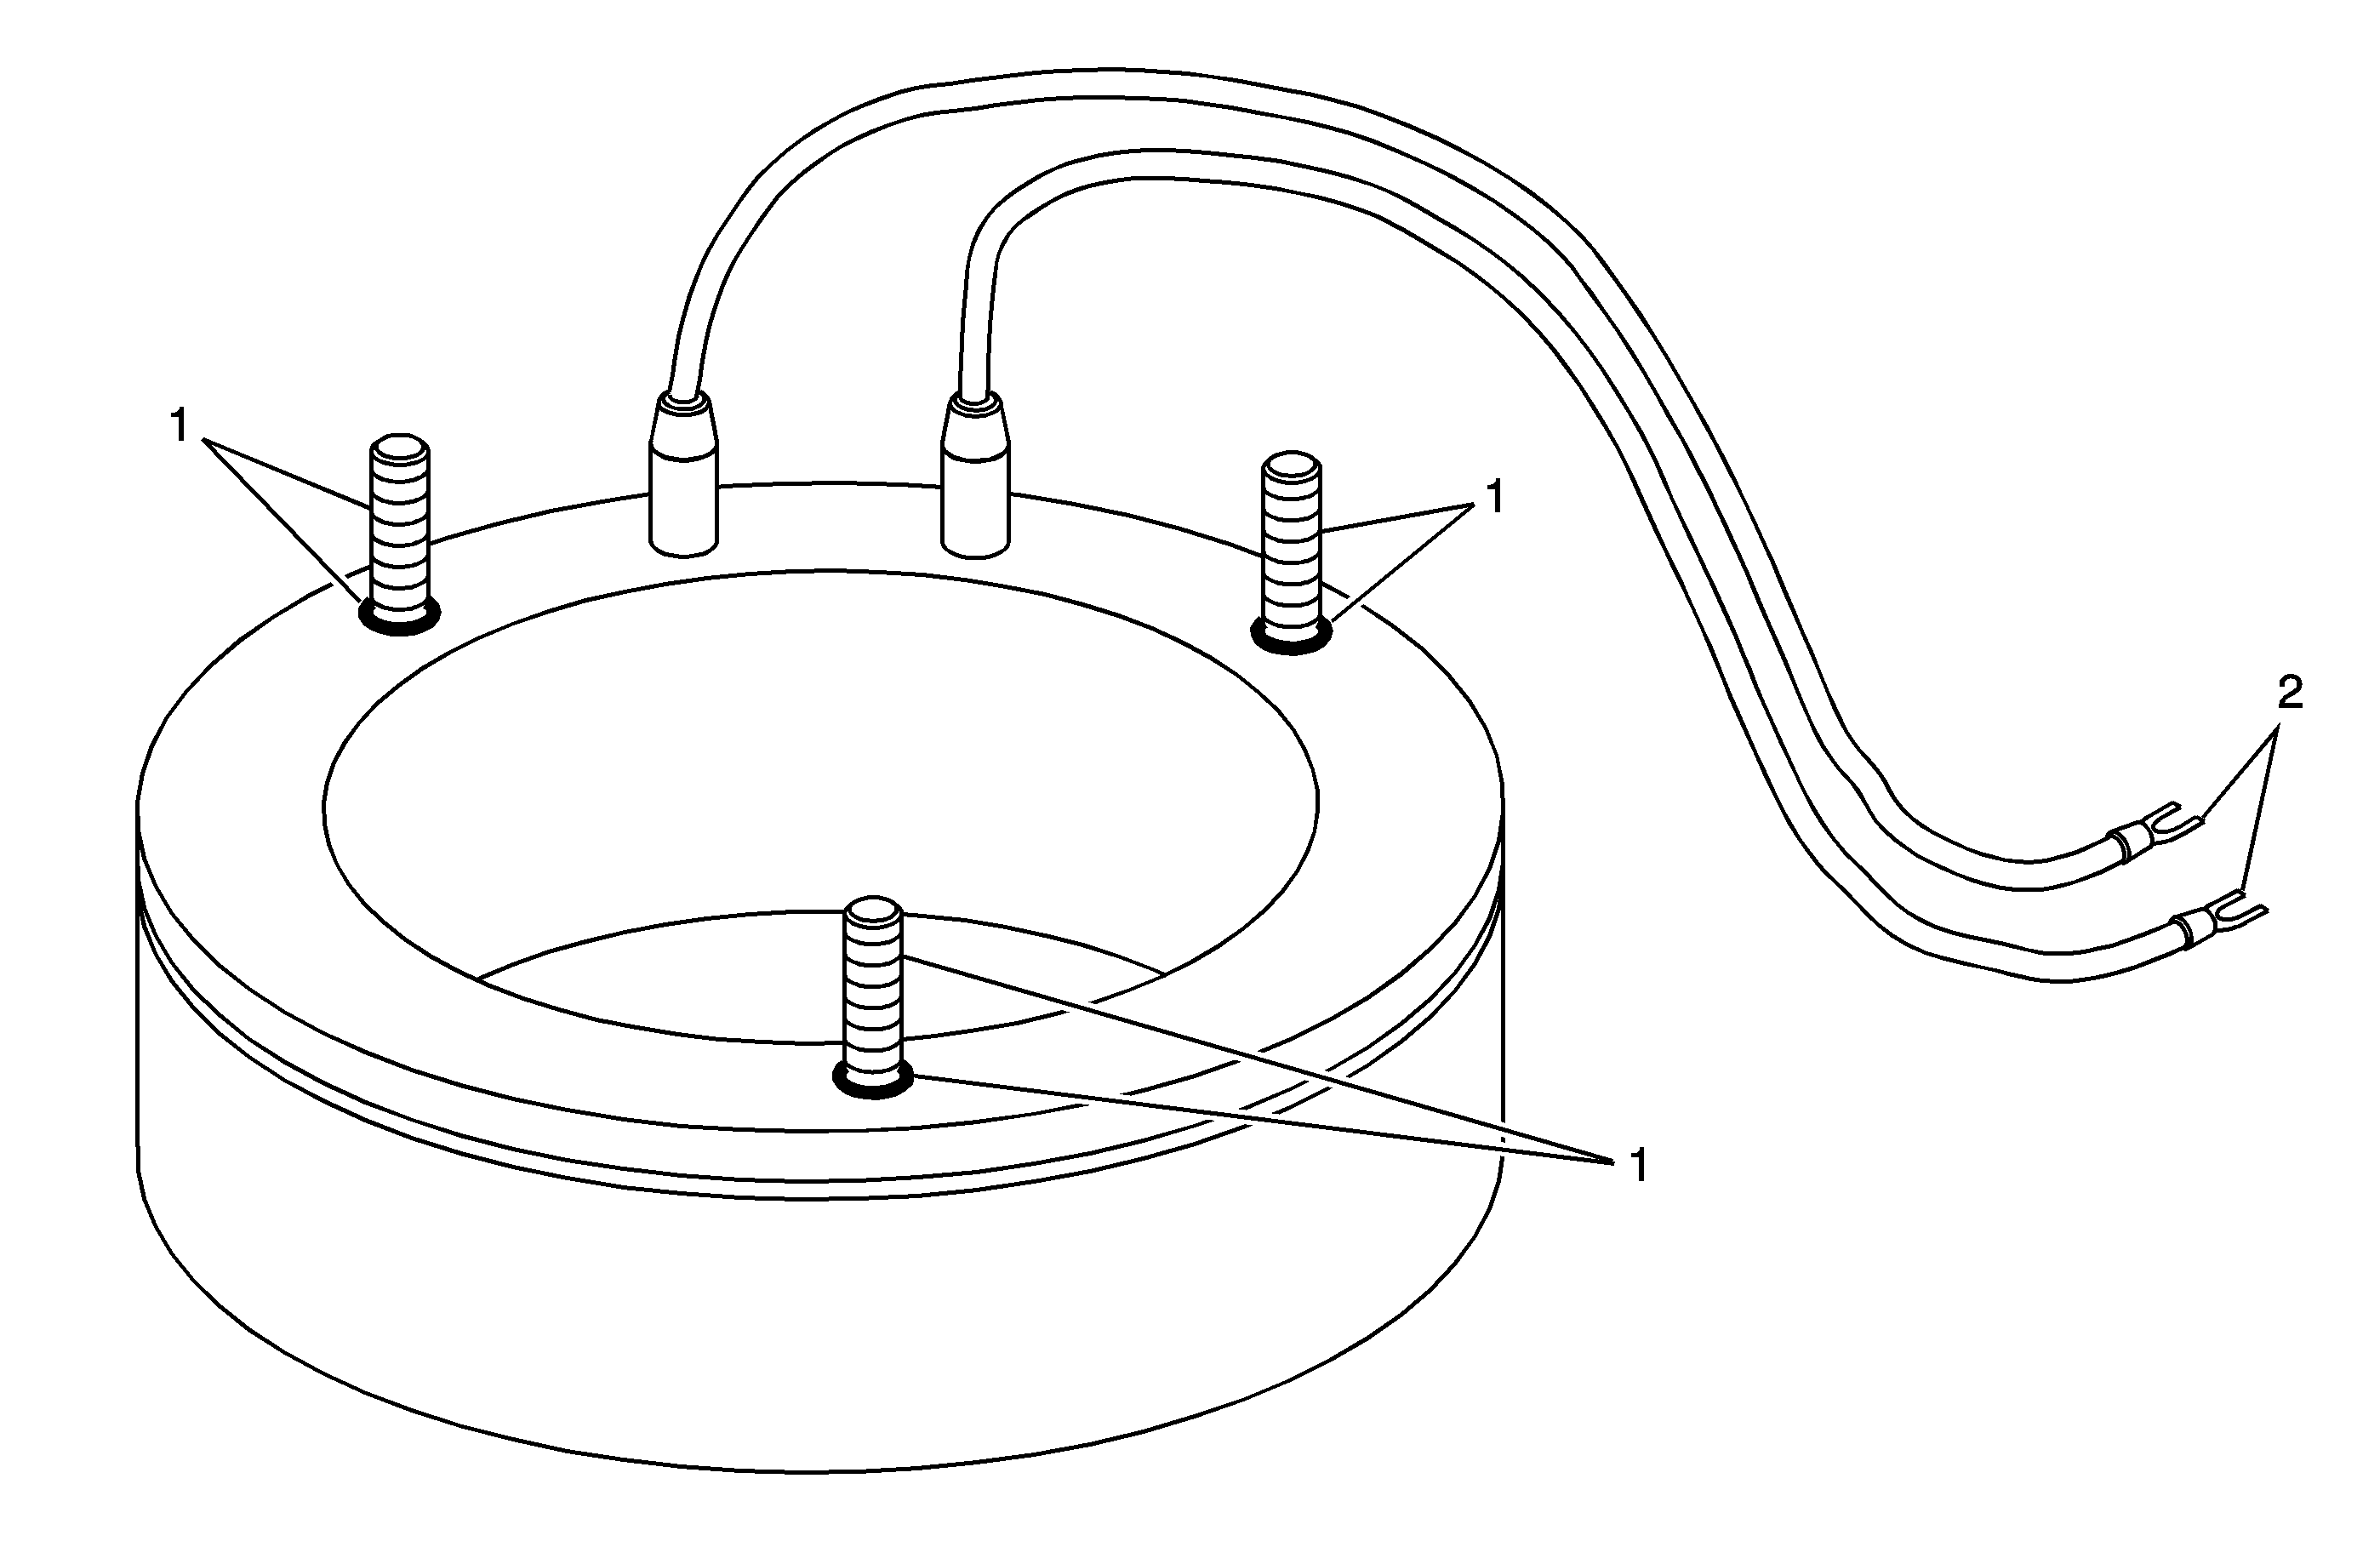
Table 5: Coil Assembly Cleaning and Inspection
Table 6: Oil Pump and Suction Pipe Assembly Cleaning and Inspection
Transfer Case and Cover Cleaning and Inspection


Object Number: 1907935  Size: MF

Transfer Case and Cover Cleaning and Inspection

Callout

Component Name

Caution: Refer to Machined Surface Damage Caution in the Preface section.

Preliminary Procedures

  1. Inspect all components or sub-components and perform any repair procedure necessary to fix the damage.
  2. Remove the sealer from the case sealing surfaces.
  3. Clean the case and cover in cleaning solvent and air dry.
  4. Inspect for cracks, broken areas, or other damage. Repair small scratches on the sealing surfaces with light sanding.

1

Transfer Case - Rear Half

2

Transfer Case - Front Half

3

Transfer Case Bearing Race Bores

Tip
Replace the rear case or front case if a race has spun or cracks are detected.

Clutch Components Cleaning and Inspection


Object Number: 1907937  Size: MF

Clutch Components Cleaning and Inspection

Callout

Component Name

Preliminary Procedures

  1. Inspect all components or sub-components and perform any repair procedure necessary to fix the damage. The clutch pack is only available as an assembly (1-4).
  2. Do not clean the clutch fiber plates in solvent. Other components may be cleaned in solvent.

1

Transfer Case Clutch Pack Housing and Clutch Hub

Tip
Inspect the clutch housing and clutch hub for excessive wear or damage. Excessive wear can be identified by steps in the teeth, which prevent the plates from moving freely.

2

Transfer Case Friction Plate

Tip

    • The friction plates are assembled with the lube holes aligned. This provides an unrestricted oil path when assembled.
    • Inspect the plates for worn, scored, or burnt friction material.
    • Inspect the plates for flatness and warping.

3

Transfer Case Separator Plate

Tip

    • The friction plates are assembled with the lube holes aligned. This provides an unrestricted oil path when assembled.
    • Inspect the plates for worn, scored, or burnt friction material.
    • Inspect the plates for flatness and warping.

4

Transfer Case Pressure Plate

Tip
Inspect the plates for flatness and warping.

5

Transfer Case Armature

Tip
Small scratches or wear patterns are allowed on the armature. Deep gouges or raised metal in armature require transfer case replacement. The armature is assembled in the clutch pack with the rounded edges on the spline teeth towards the pack. The armature is not serviced.

6

Transfer Case Clutch Pack Assembly

Tip
If the clutch pack assembly is replaced, a 12.7 k ohm clutch coil resistor should be used in place of the pre-existing resistor. If the resistor is replaced due to loss or damage without replacing the clutch pack, replace with one of the same resistance and refer to Transfer Case Clutch Coil Resistor Replacement.

Chain, Sprockets, and Snubber Cleaning and Inspection


Object Number: 1907939  Size: MF

Chain, Sprockets, and Snubber Cleaning and Inspection

Callout

Component Name

Preliminary Procedures

  1. Clean all components in solvent and air dry.
  2. Inspect all components or sub-components and perform any repair procedure necessary to fix the damage.

1

Transfer Case Front Output Shaft Drive Chain Assembly

Tip
Inspect the chain for loose links or pins, binding links, embedded debris, and worn tooth surfaces.

2

Transfer Case Front Output Shaft Drive Sprocket

Tip
Inspect the sprockets for chipped teeth, embedded debris, and excessively worn gear surfaces. Slight wear marks are normal.

3

Transfer Case Front Output Shaft Driven Sprocket

Tip
Inspect the sprockets for chipped teeth, embedded debris, and excessively worn gear surfaces. Slight wear marks are normal.

4

Transfer Case Front Output Shaft Drive Chain Snubber

Tip
Inspect the snubber for an excessively worn or gouged lining. Slight wear marks are normal.

Input Shaft and Front Output Shaft Cleaning and Inspection


Object Number: 1907943  Size: MF

Input Shaft and Front Output Shaft Cleaning and Inspection

Callout

Component Name

Preliminary Procedures

  1. Clean the shafts in solvent and air dry, including the input shaft oil galleries.
  2. Inspect all components or sub-components and perform any repair procedure necessary to fix the damage.

1

Transfer Case Input Shaft Assembly

Tip

    • Inspect the bearing journals for scoring, pitting, or excessive wear.
    • Do not attempt to smooth roughness in the bearing journals.
    • Inspect the splines for damage or excessive wear. Witness marks are normal.

2

Transfer Case Front Output Shaft

Tip

    • Inspect the bearing journals for scoring, pitting, or excessive wear.
    • Do not attempt to smooth roughness in the bearing journals.
    • Inspect the splines for damage or excessive wear. Witness marks are normal.

Coil Assembly Cleaning and Inspection


Object Number: 1907946  Size: MF

Coil Assembly Cleaning and Inspection

Callout

Component Name

Preliminary Procedures

  1. Clean all components in solvent and air dry.
  2. Inspect components and perform any repair procedure necessary to fix the damage. The coil is serviced as an assembly.

1

Transfer Case Coil Assembly Studs

Tip
Inspect the studs and O-rings for damage.

2

Transfer Case Coil Assembly Wires

Tip
Inspect the wires and terminals for damage. Repair, as required.

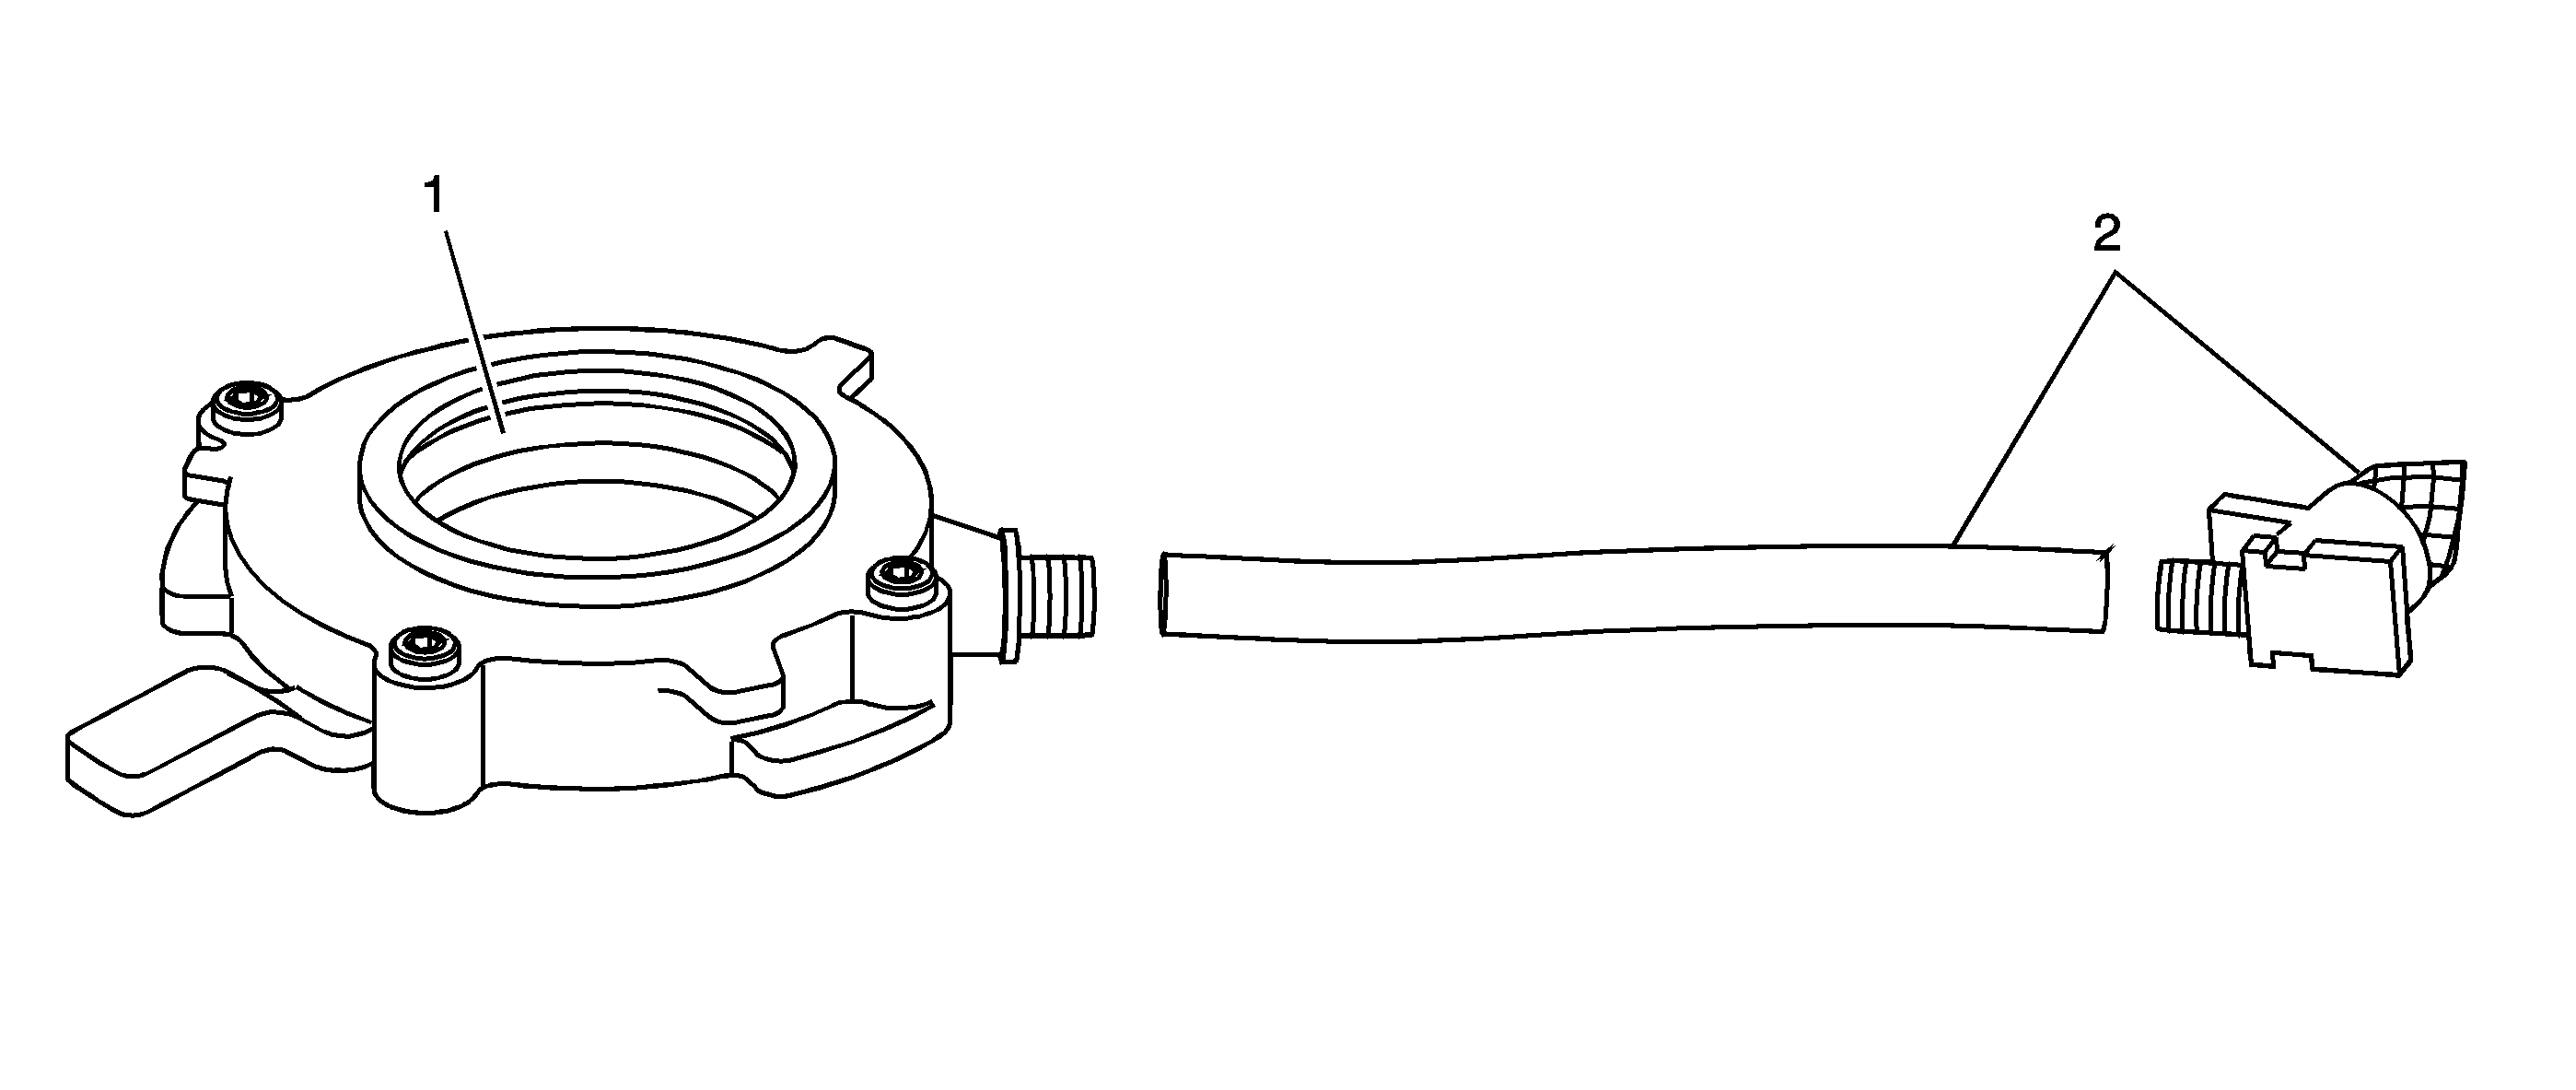
Oil Pump and Suction Pipe Assembly Cleaning and Inspection


Object Number: 1907948  Size: SF

Oil Pump and Suction Pipe Assembly Cleaning and Inspection

Callout

Component Name

Preliminary Procedures

  1. Remove the oil pump suction hose from the screen and pump.
  2. Clean all components in solvent and air dry.
  3. Inspect components and perform any repair procedure necessary to fix the damage.

1

Transfer Case Oil Pump Assembly

Tip

    • Inspect the pump for free movement. Replace the pump if it is binding.
    • Do not disassemble the pump. The pump is serviced as an assembly.

2

Transfer Case Oil Pump Assembly Screen and Hose

Tip
Inspect the screen and hose for cracks, tears, or debris.