Master Cylinder Reservoir Replacement LHD
Removal Procedure
Warning: Refer to Brake Fluid Irritant Warning in the Preface section.
Caution: Refer to Brake Fluid Effects on Paint and Electrical Components Caution in the Preface section.
- Remove the brake fluid from the master cylinder reservoir.
- Disconnect the brake fluid level indicator switch electrical connector.
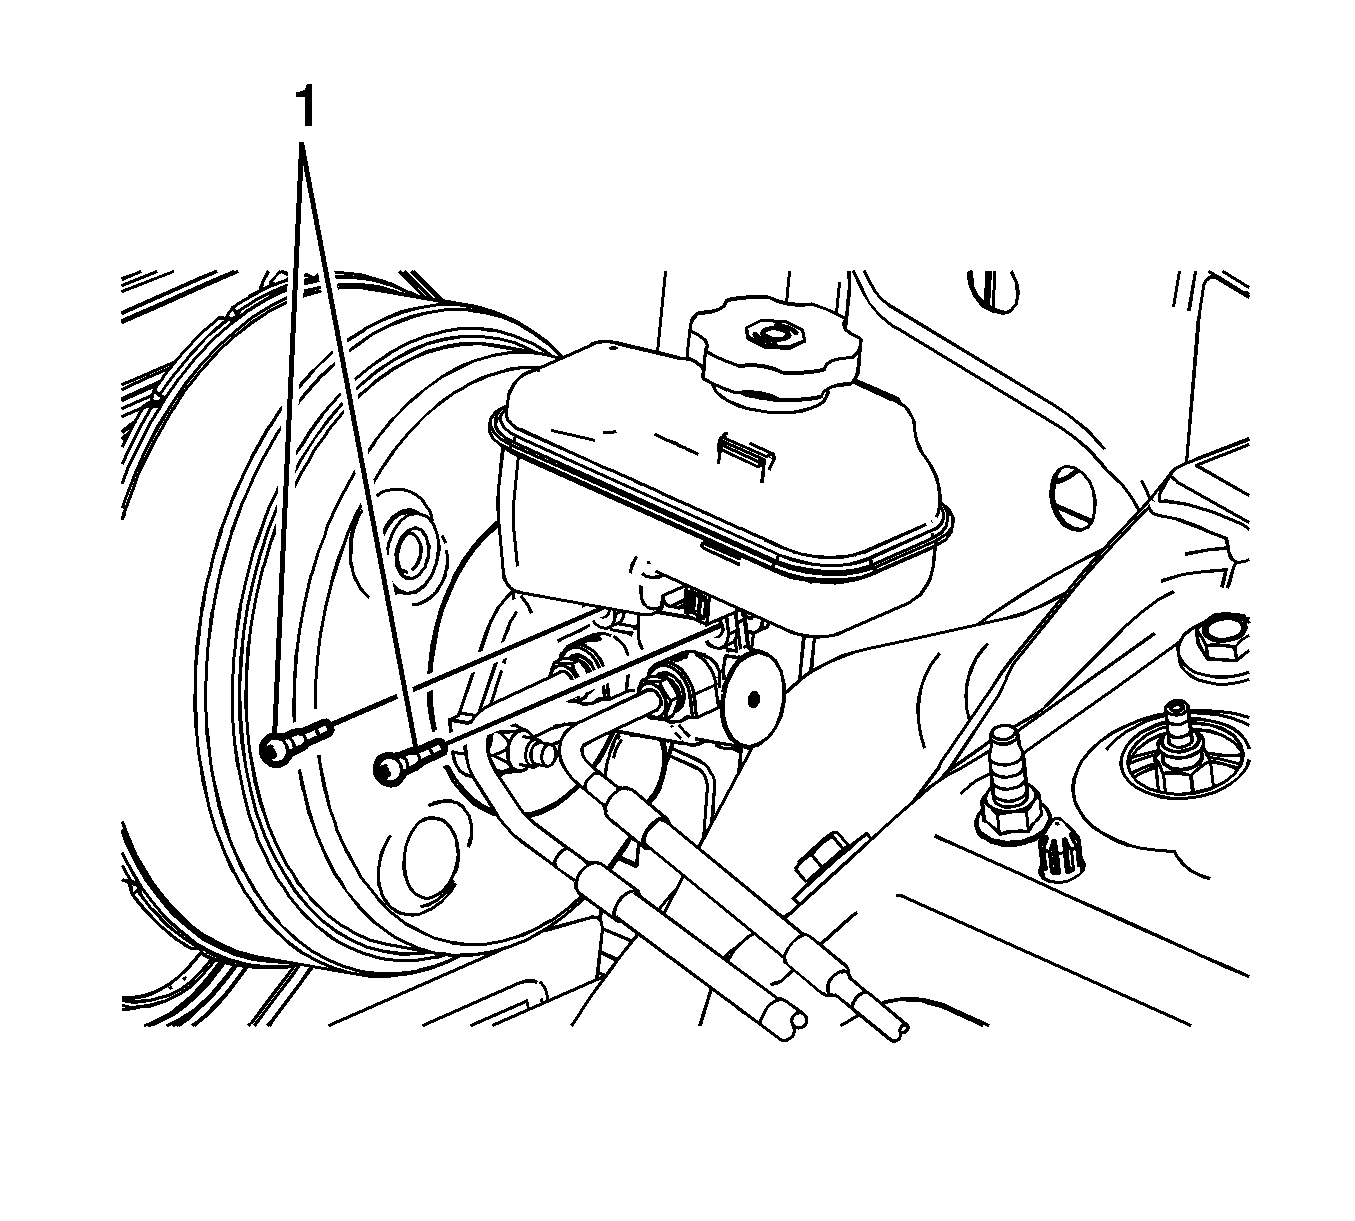
- Remove the master cylinder reservoir bolts (1).
- Remove the master cylinder reservoir (1).
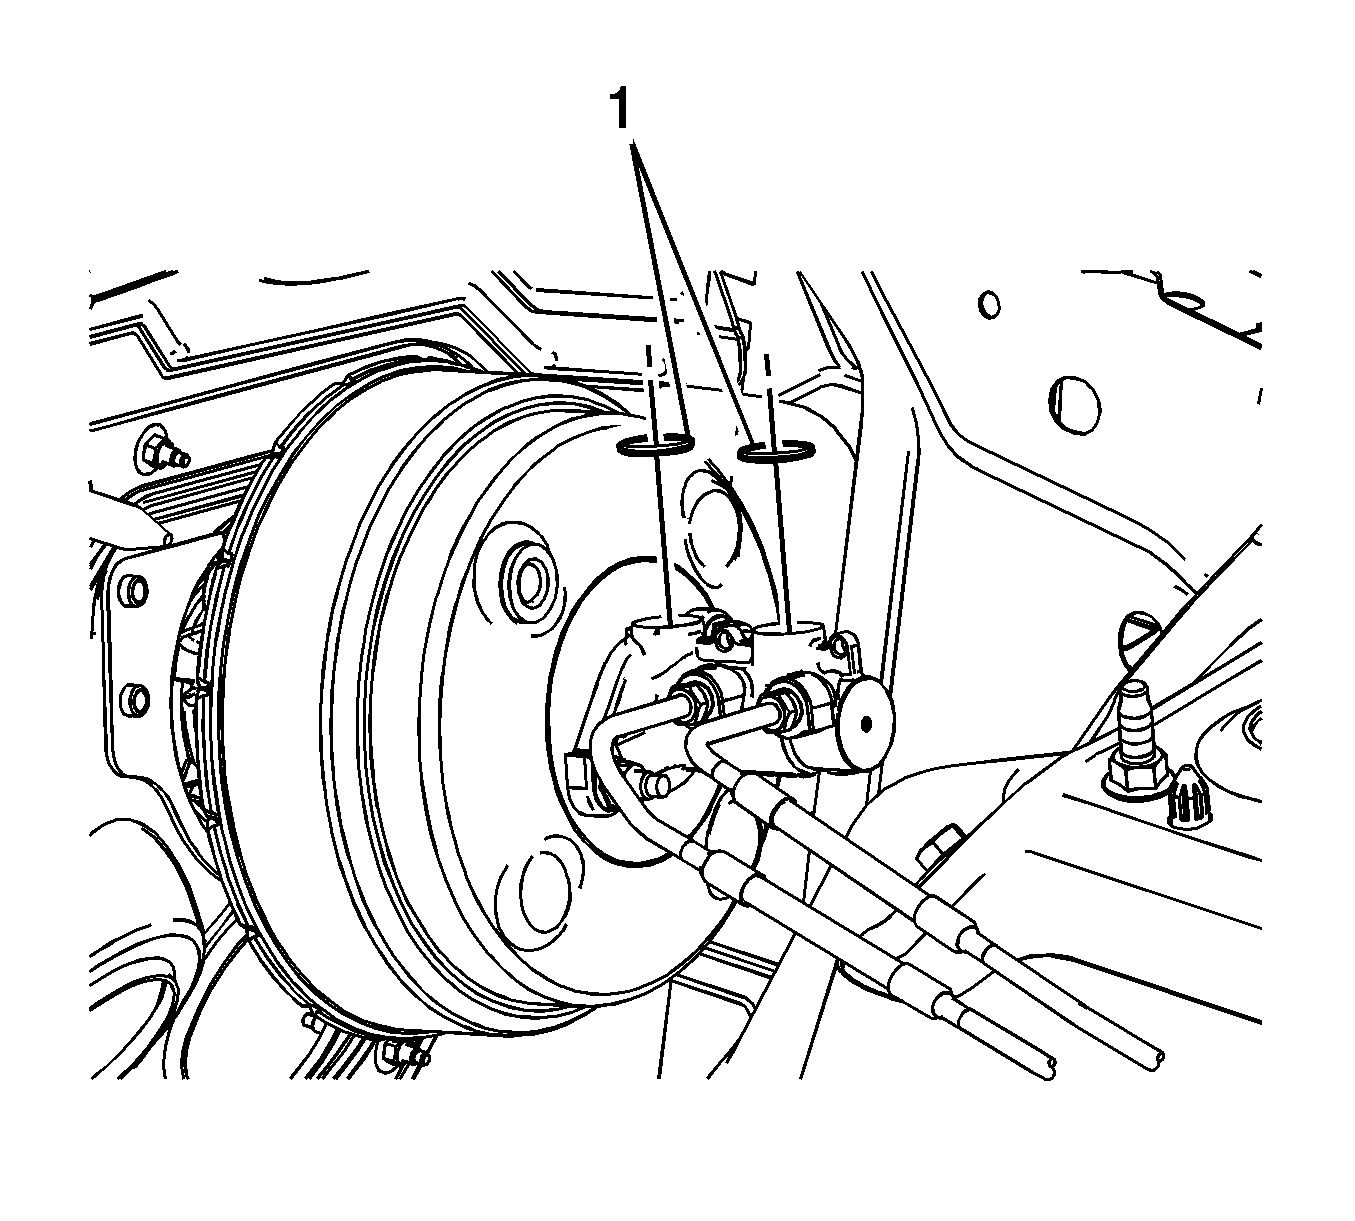
- Remove the master cylinder reservoir seals (1).
- If installing a new master cylinder reservoir, remove the brake fluid level indicator switch. Refer to Brake Fluid Level Indicator Switch Replacement.
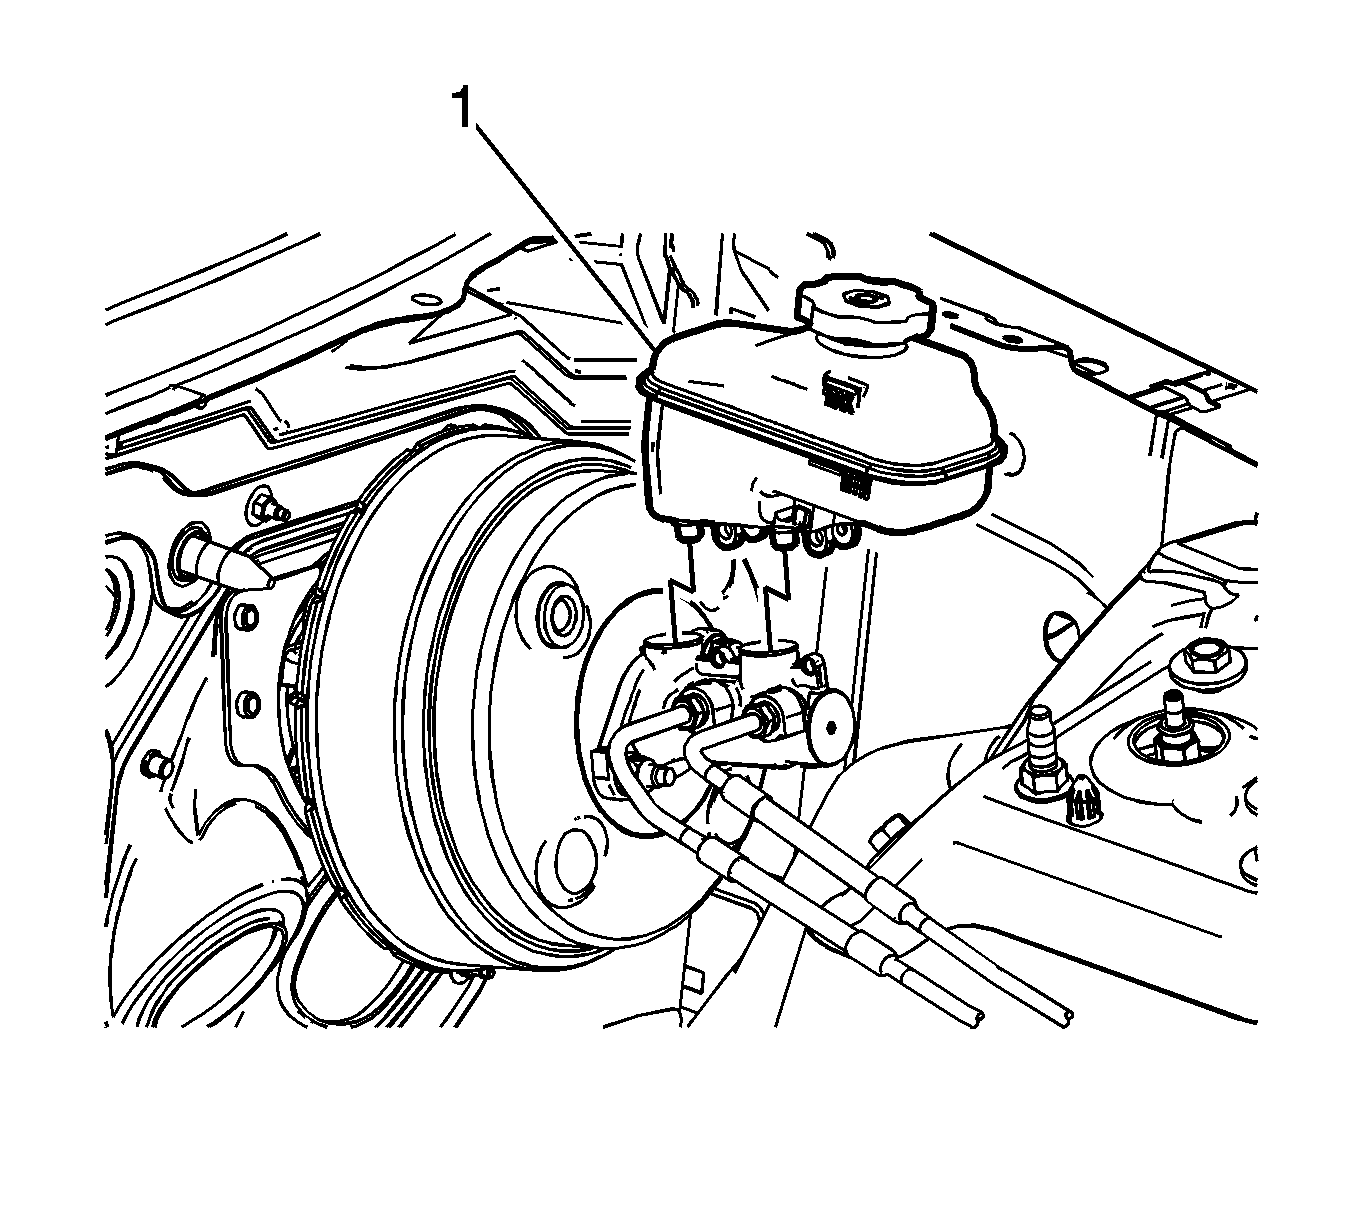
Carefully pull the reservoir straight upward.
Installation Procedure
- If installing a new master cylinder reservoir, install the brake fluid level indicator switch. Refer to Brake Fluid Level Indicator Switch Replacement.
- If installing the original master cylinder reservoir, clean the master cylinder reservoir with denatured alcohol and dry with filtered, non-lubricated compressed air.
- Install the master cylinder reservoir seals (1).
- Install the master cylinder reservoir (1).
- Install the master cylinder reservoir bolts (1) and tighten to 8 N·m (71 lb in).
- Connect the brake fluid level indicator switch electrical connector.
- Fill the master cylinder reservoir. Refer to Master Cylinder Reservoir Filling.

Lubricate the seals with Delco Supreme 11®, GM P/N 12377967 (Canadian P/N 992667), or equivalent DOT-3 brake fluid from a clean, sealed brake fluid container.

Carefully press the reservoir straight downward.
Caution: Refer to Fastener Caution in the Preface section.

Master Cylinder Reservoir Replacement RHD
Removal Procedure
Warning: Refer to Brake Fluid Irritant Warning in the Preface section.
Caution: Refer to Brake Fluid Effects on Paint and Electrical Components Caution in the Preface section.
- Remove the brake fluid from the master cylinder reservoir.
- Disconnect the brake fluid level indicator switch electrical connector.
- Remove the master cylinder reservoir bolts (1).
- Remove the master cylinder reservoir (1).
- Remove the master cylinder reservoir seals (1).
- If installing a new master cylinder reservoir, remove the brake fluid level indicator switch. Refer to Brake Fluid Level Indicator Switch Replacement.
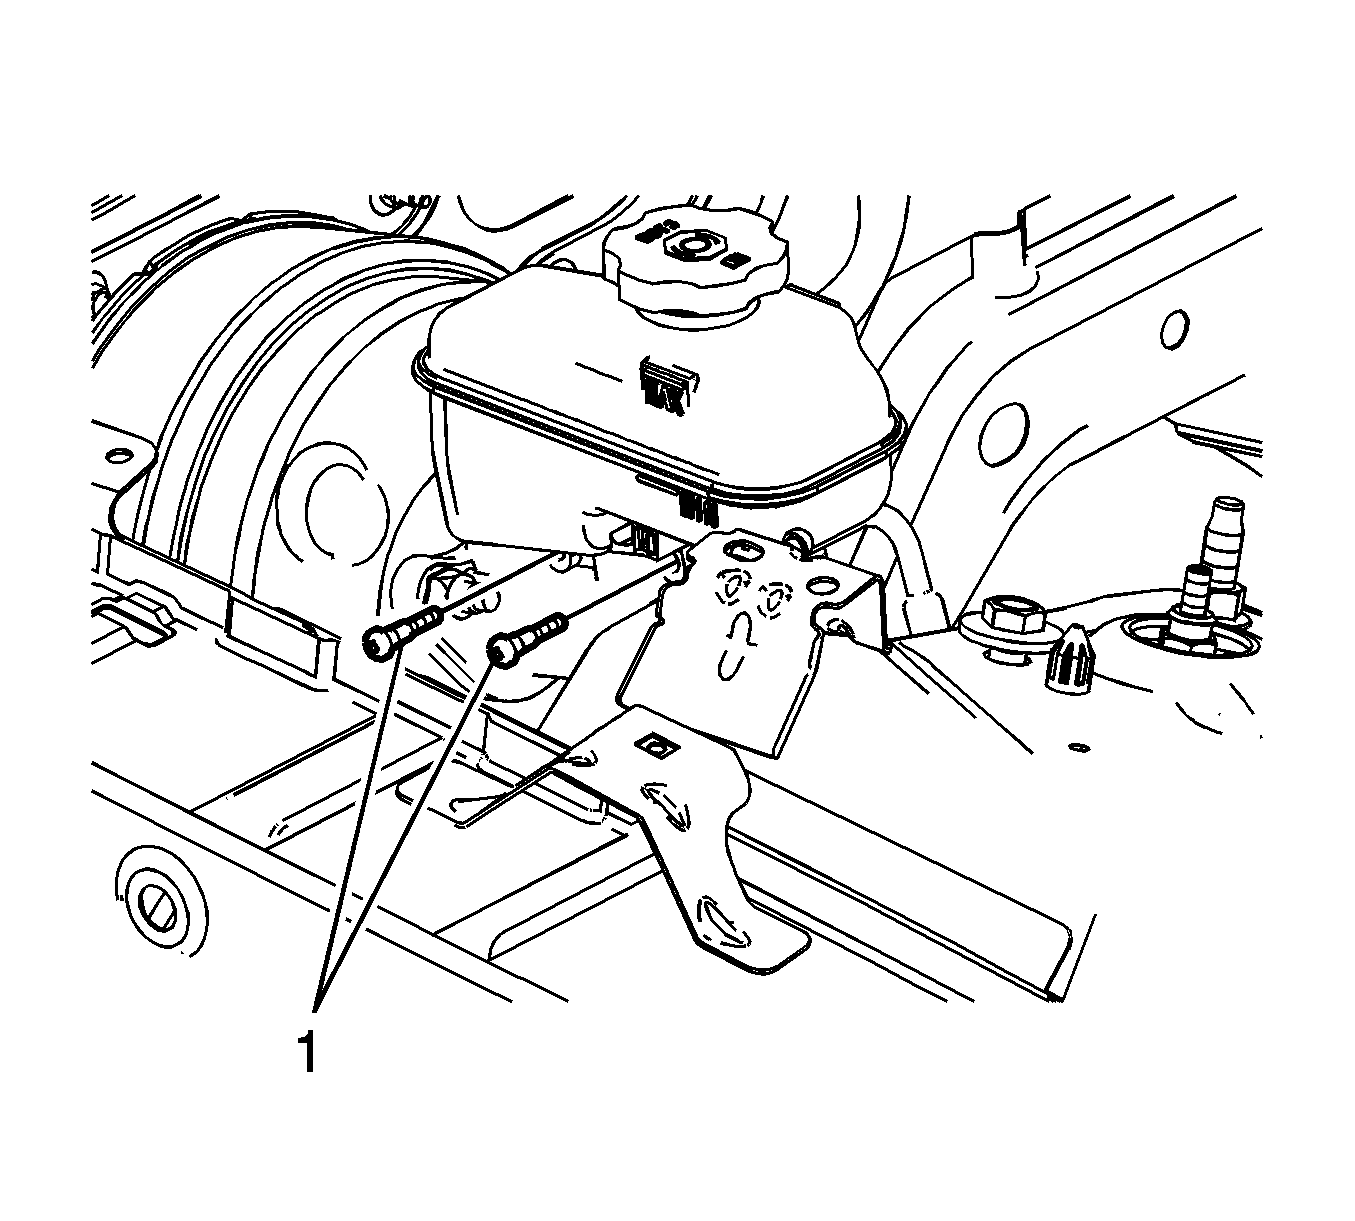
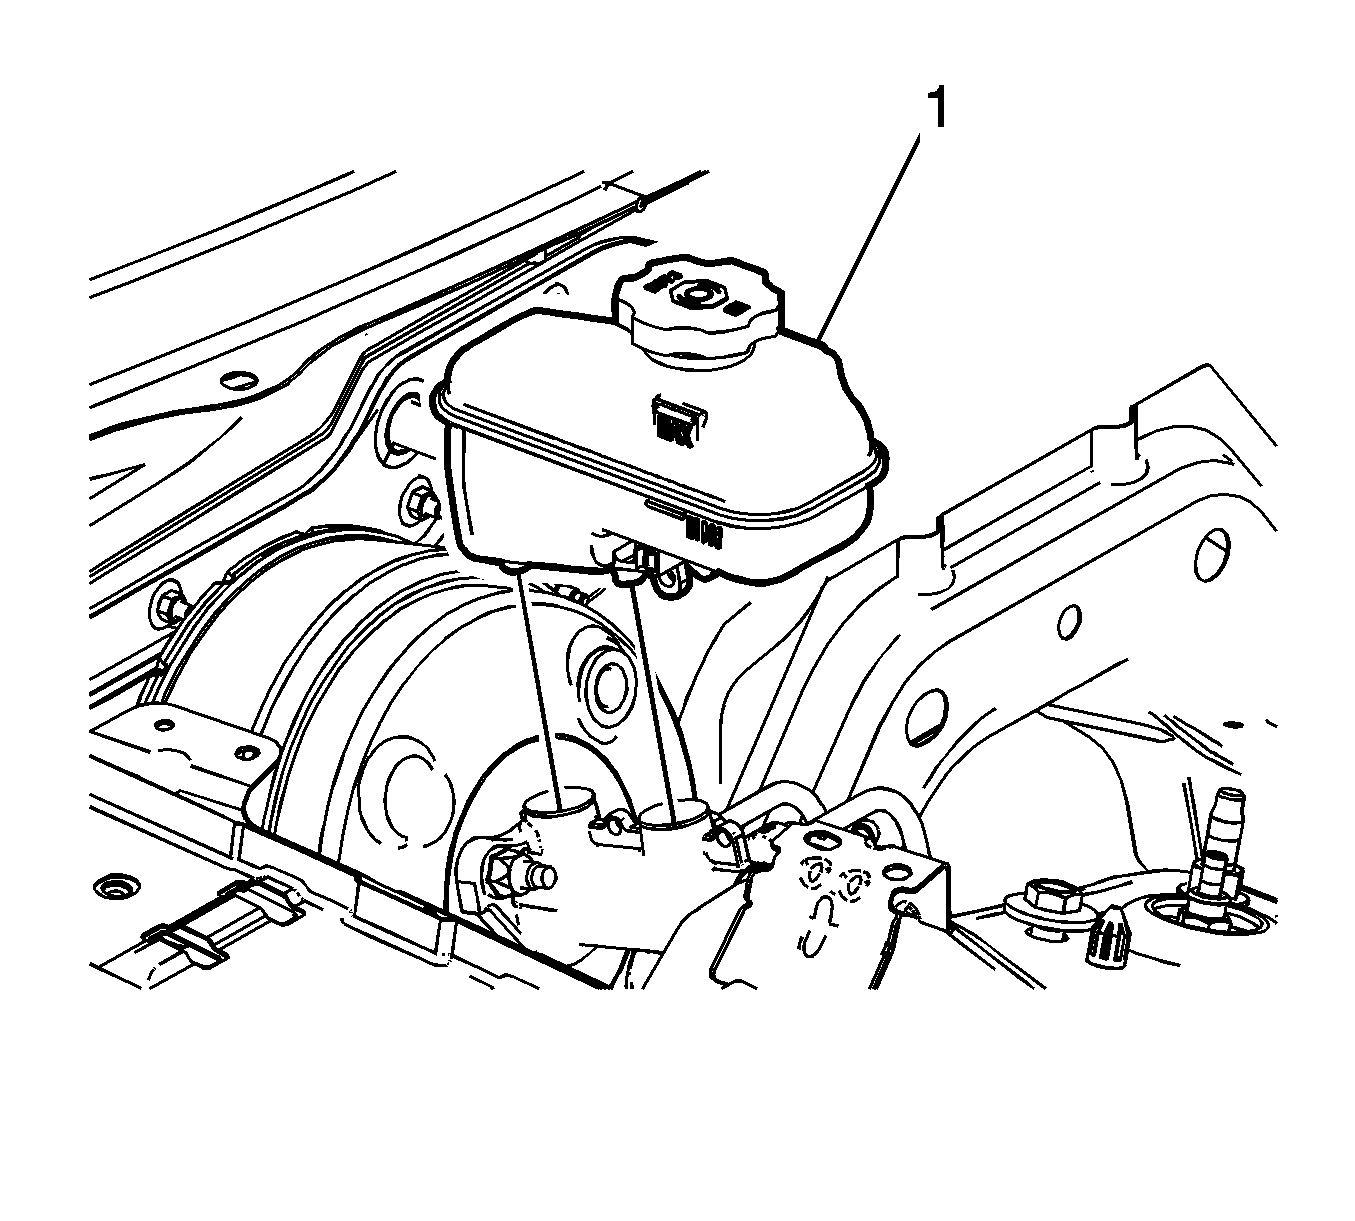
Carefully pull the reservoir straight upward.
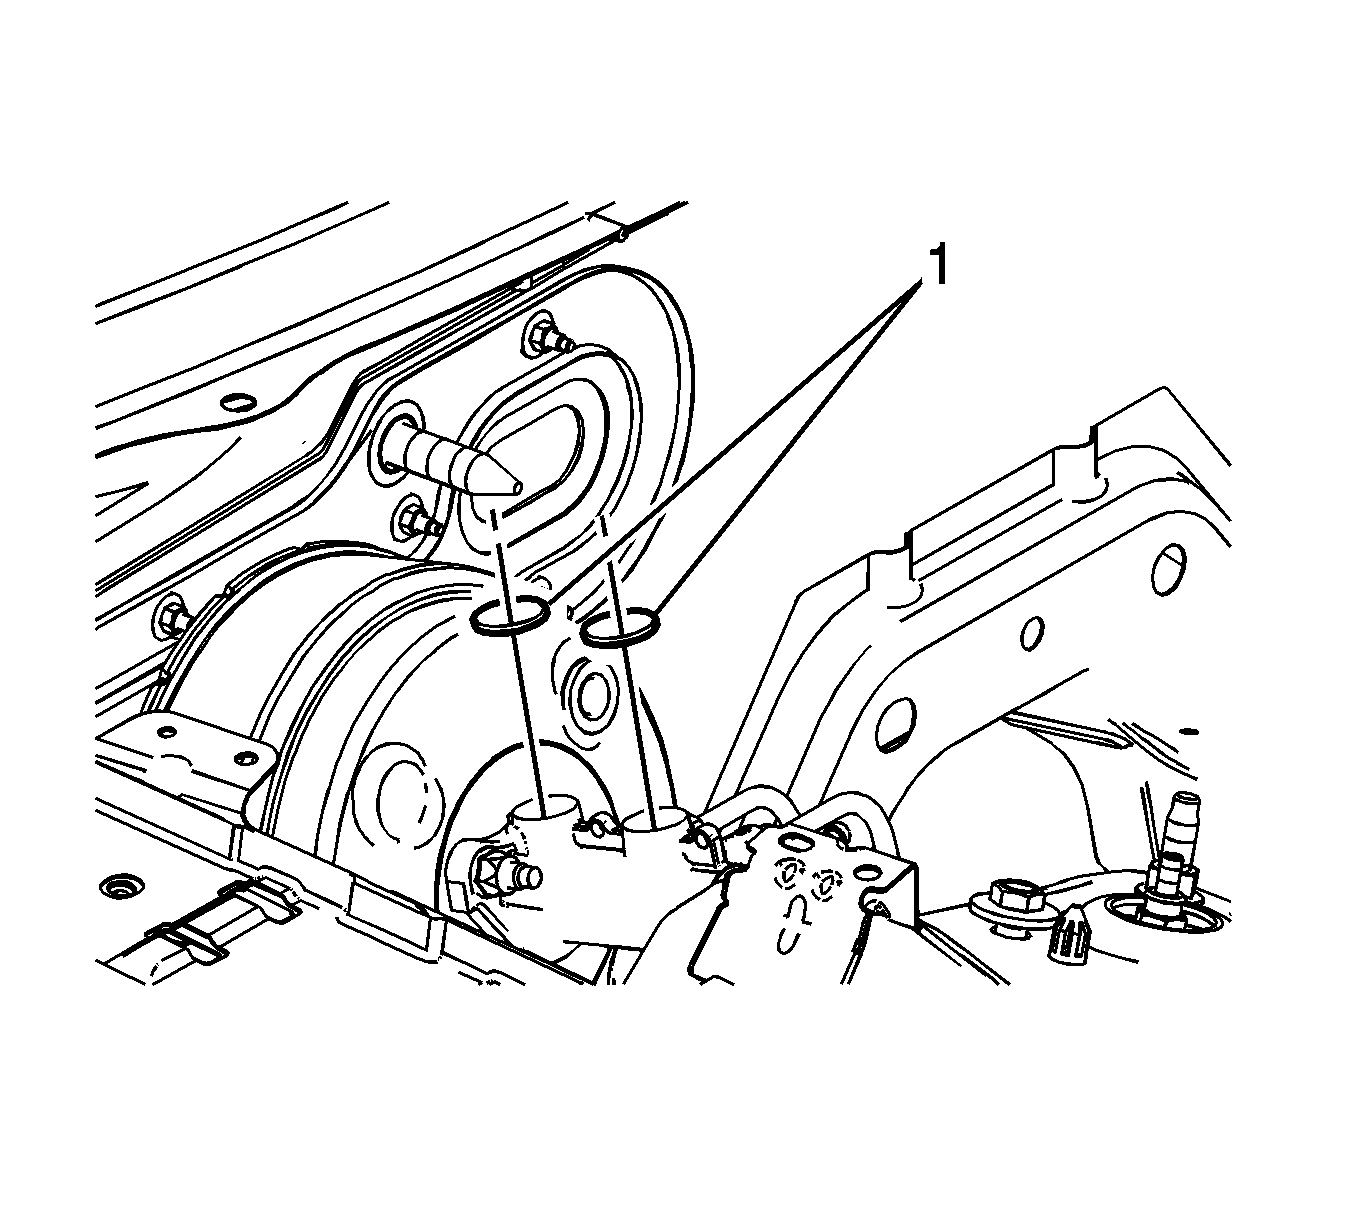
Installation Procedure
- If installing a new master cylinder reservoir, install the brake fluid level indicator switch. Refer to Brake Fluid Level Indicator Switch Replacement.
- If installing the original master cylinder reservoir, clean the master cylinder reservoir with denatured alcohol and dry with filtered, non-lubricated compressed air.
- Install the master cylinder reservoir seals (1).
- Install the master cylinder reservoir (1).
- Install the master cylinder reservoir bolts (1) and tighten to 8 N·m (71 lb in).
- Connect the brake fluid level indicator switch electrical connector.
- Fill the master cylinder reservoir. Refer to Master Cylinder Reservoir Filling.

Lubricate the seals with Delco Supreme 11®, GM P/N 12377967 (Canadian P/N 992667), or equivalent DOT-3 brake fluid from a clean, sealed brake fluid container.

Carefully press the reservoir straight downward.
Caution: Refer to Fastener Caution in the Preface section.

