For 1990-2009 cars only
Removal Procedure
- Relieve the fuel system pressure. Refer to Fuel Pressure Relief .
- Remove the air inlet grill in order to gain access to the fuel pressure regulator. Refer to Air Inlet Grille Panel Replacement in Body Front End.
- Place a shop towel under the fuel pressure regulator to absorb any lost fuel when removing the regulator.
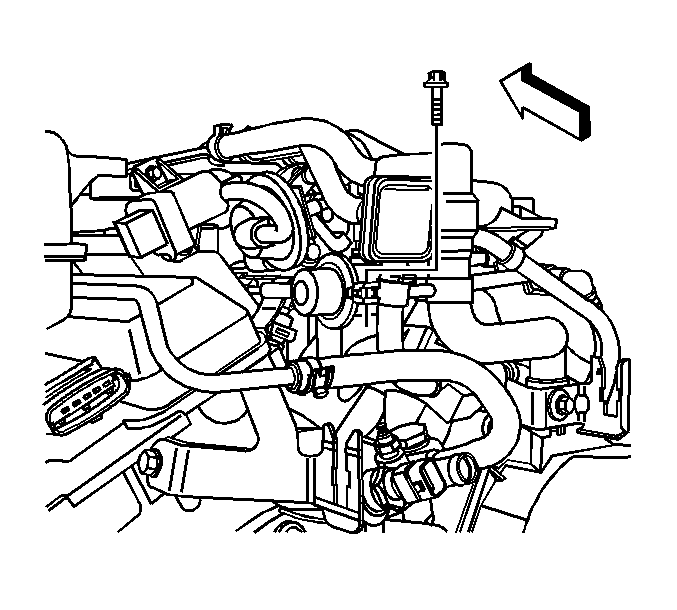
- Disconnect the atmospheric vent hose from the fuel pressure regulator.
- Remove the fuel pressure regulator clamp bolt.
- Spread the clamp only enough to allow the fuel pressure regulator to be removed.
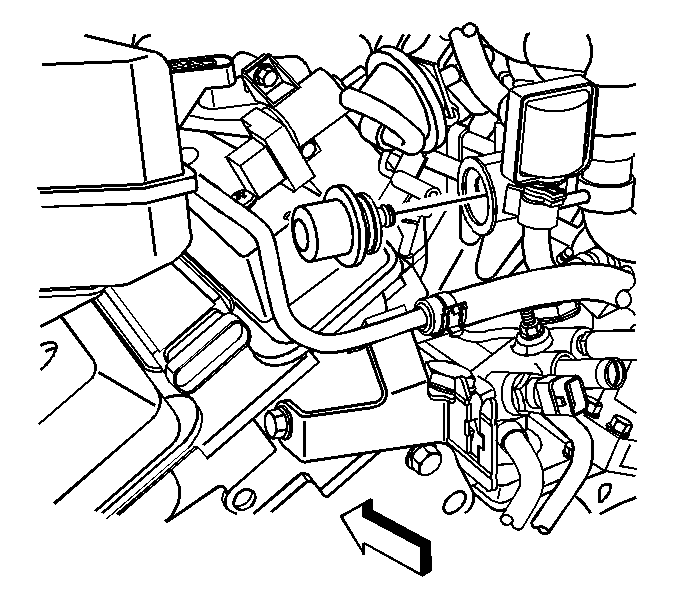
- Twist while pulling outward in order to remove the fuel pressure regulator from the fuel rail.
Caution: Refer to Gasoline/Gasoline Vapors Caution in the Preface section.


Installation Procedure
- Apply a few drops of clean engine oil to the O-ring seals on the fuel pressure regulator.
- Twist while pushing inward on the fuel pressure regulator, until fully seated against the fuel rail.
- Position the clamp around both the fuel pressure regulator and the fuel rail.
- Install the fuel pressure regulator clamp bolt.
- Install the atmospheric vent hose on to the fuel pressure regulator port.
- Using the scan tool turn ON the fuel pump to pressurize the system.
- Check for fuel leaks.
- Install the air inlet grill. Refer to Air Inlet Grille Panel Replacement in Body Front End.

Important: Be sure to locate the atmospheric vent toward the front of the engine on the fuel pressure regulator.
Notice: Refer to Fastener Notice in the Preface section.

Tighten
Tighten the fuel pressure regulator clamp bolt to 5 N·m (44 lb in).
