For 1990-2009 cars only
Tools Required
J 44767 Seal Installer
- Inspect the park system components for the following:
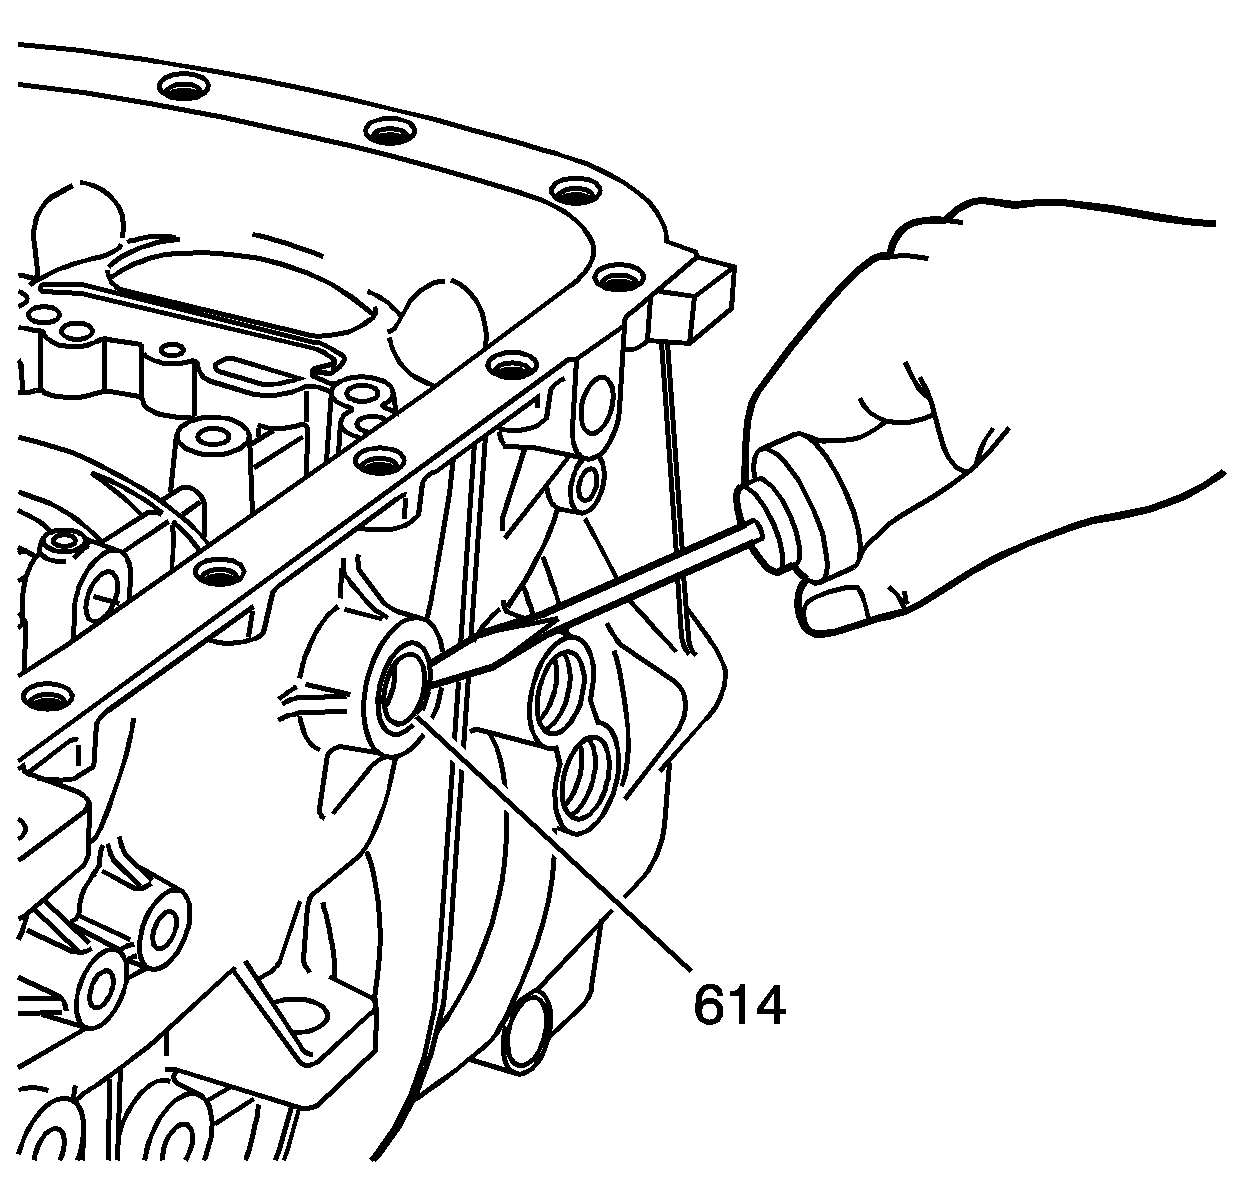
- Remove the cup plug (614) using a small screw driver and discard it.
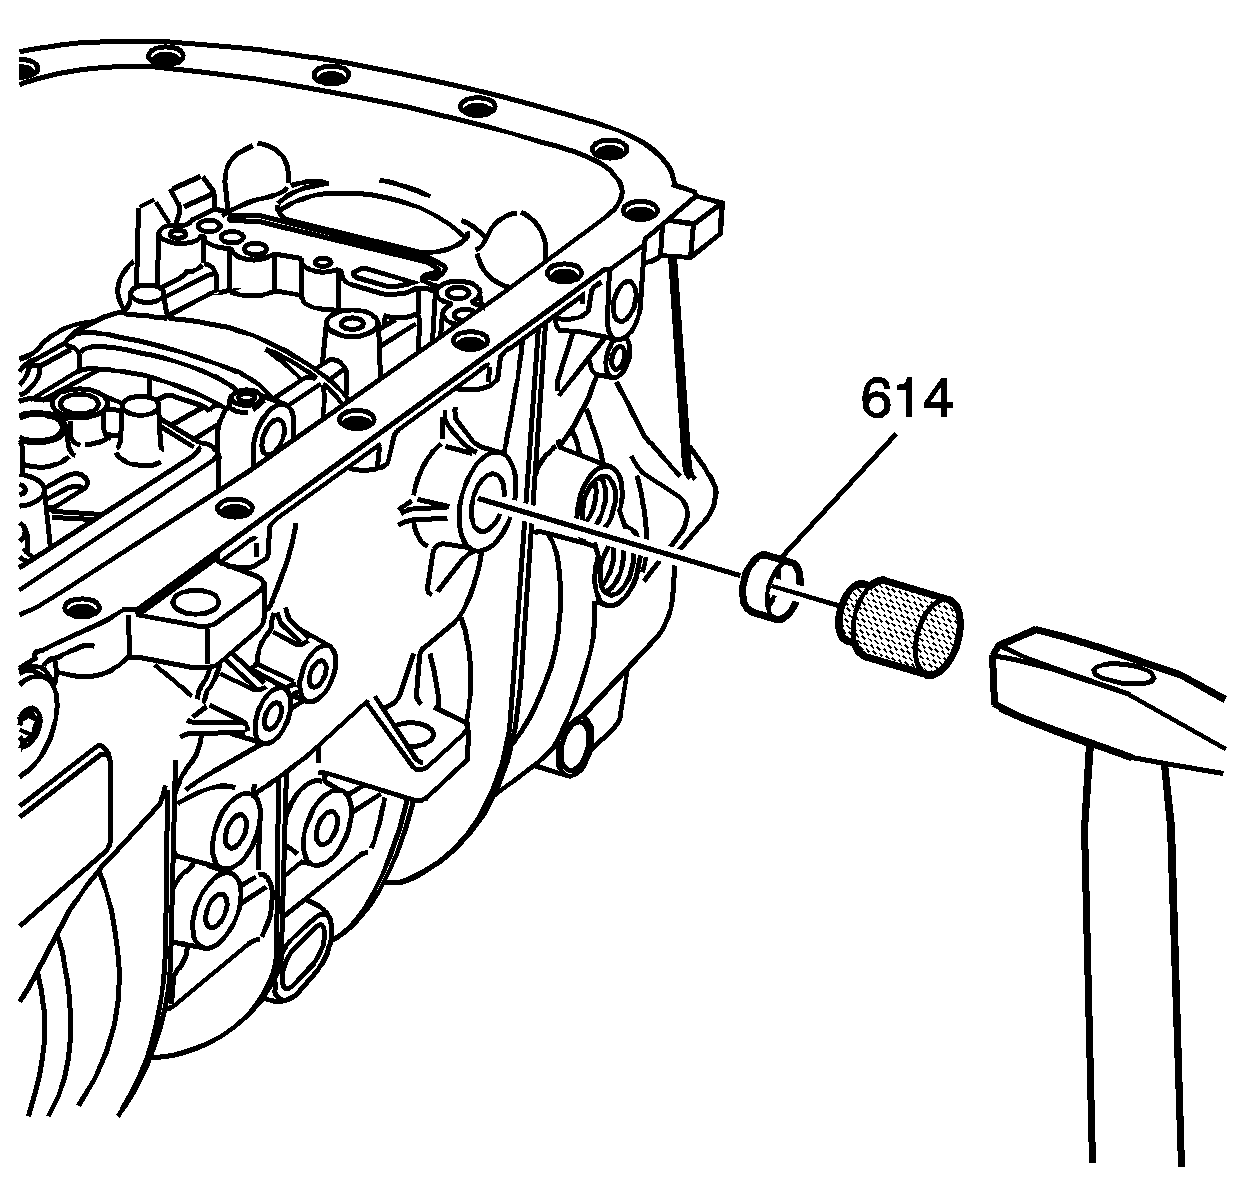
- Lubricate a new cup plug with transmission lubricant.
- Install the NEW cup plug (614).
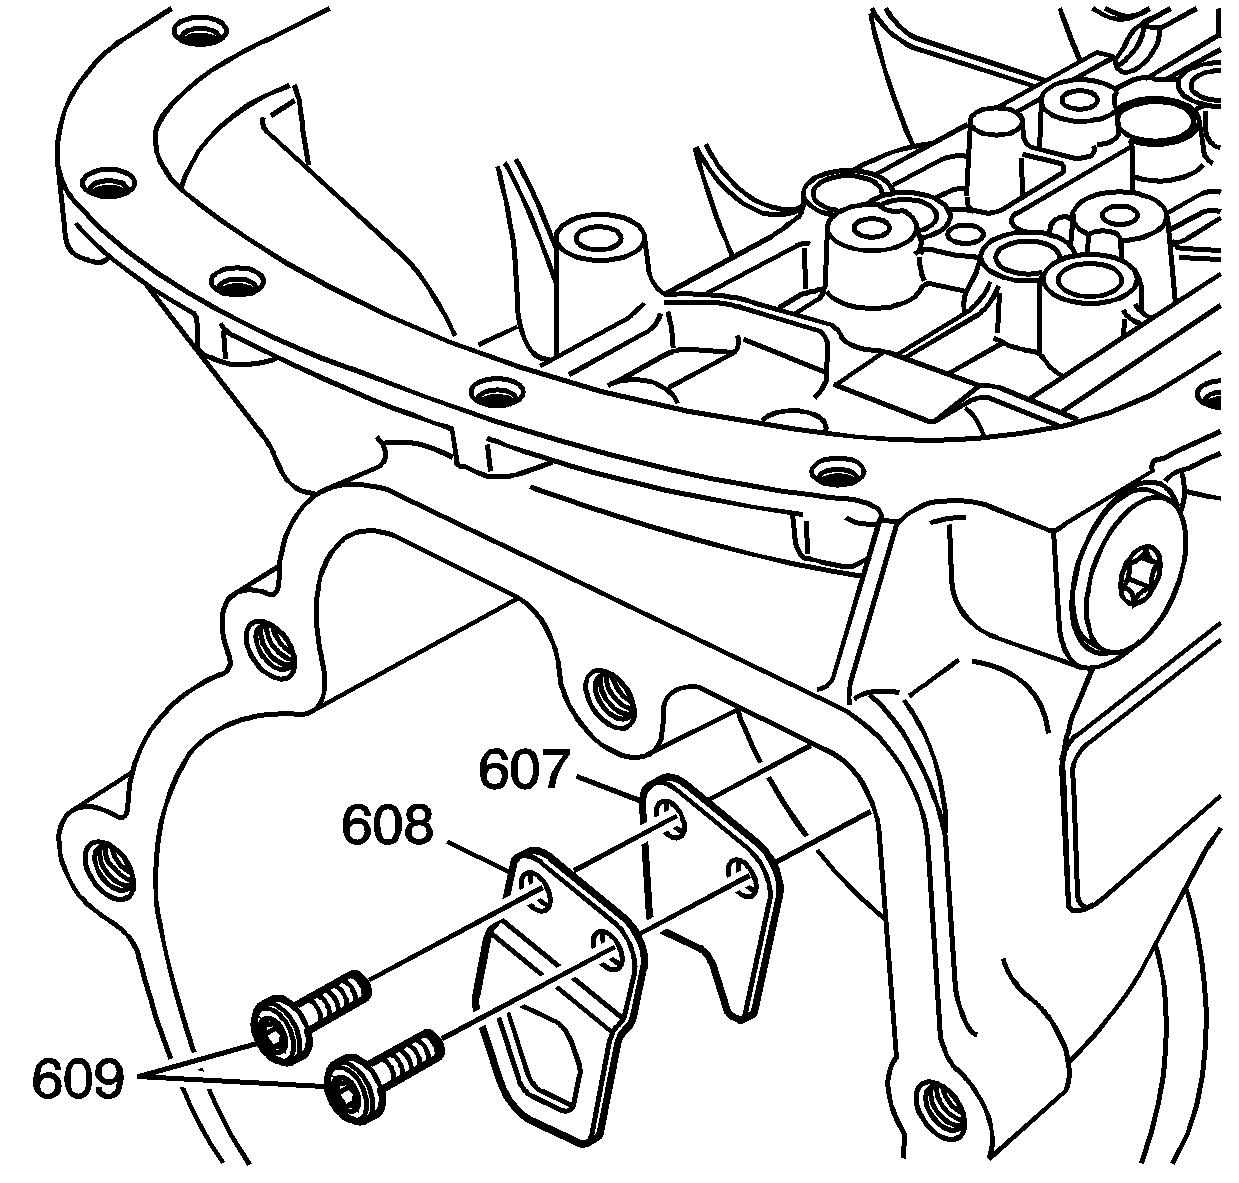
- Install the park pawl actuator brackets (607, 608) onto the case (604).
- Install the bracket bolts (609).
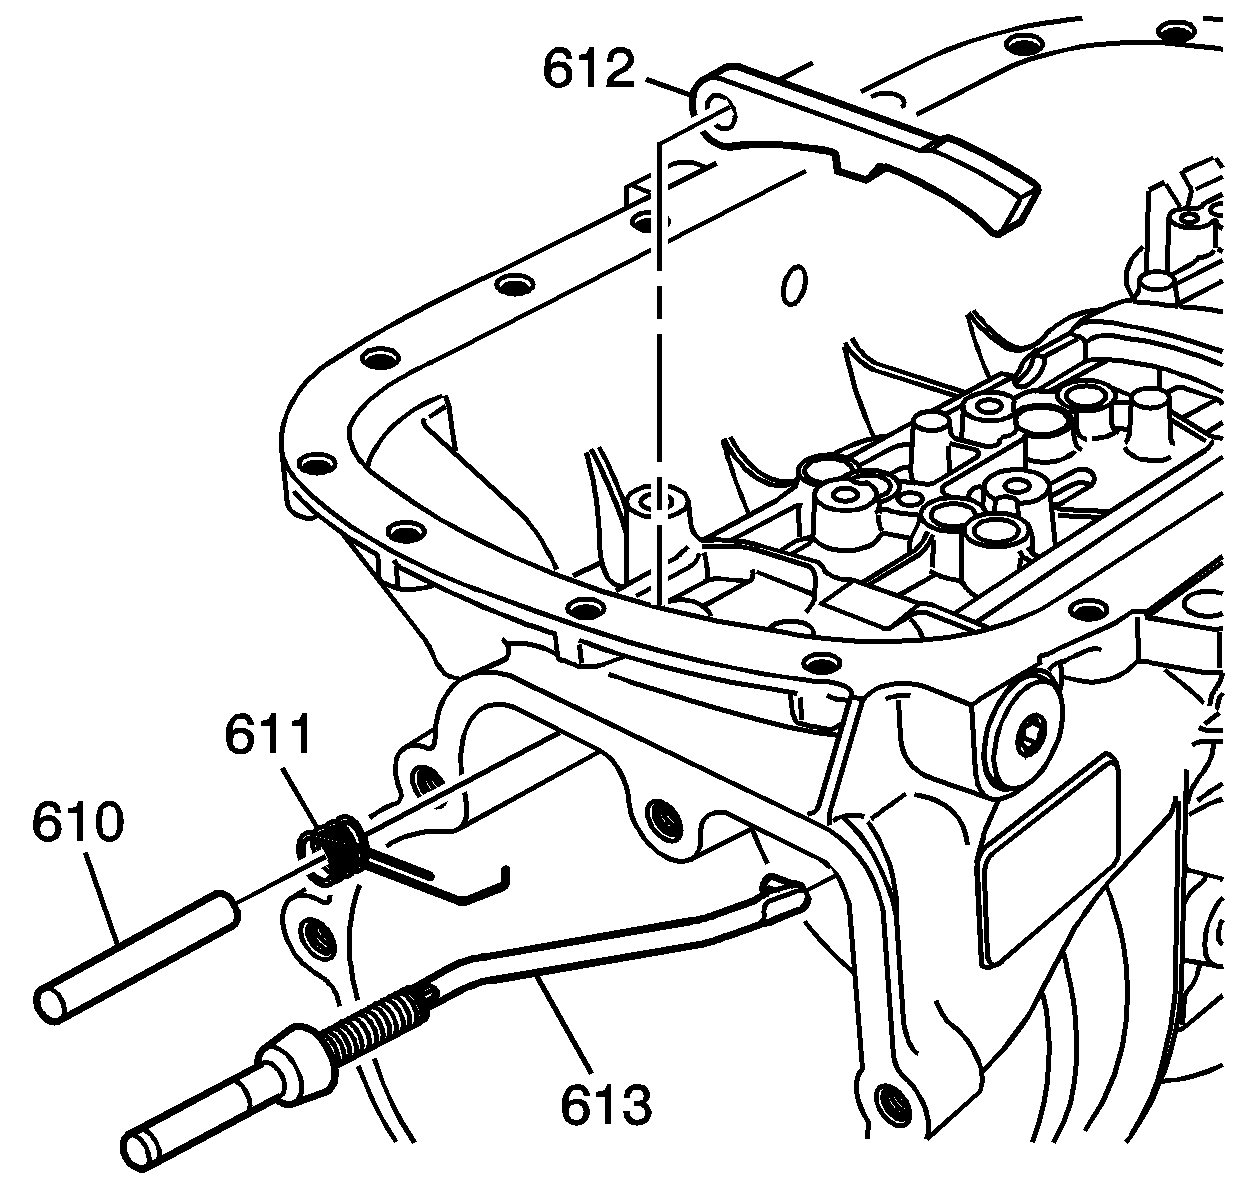
- Install the park pawl (612), the park pawl spring (611), and the park pawl shaft (610) into the case (604).
- Install the park pawl actuator (613) into the case (604).
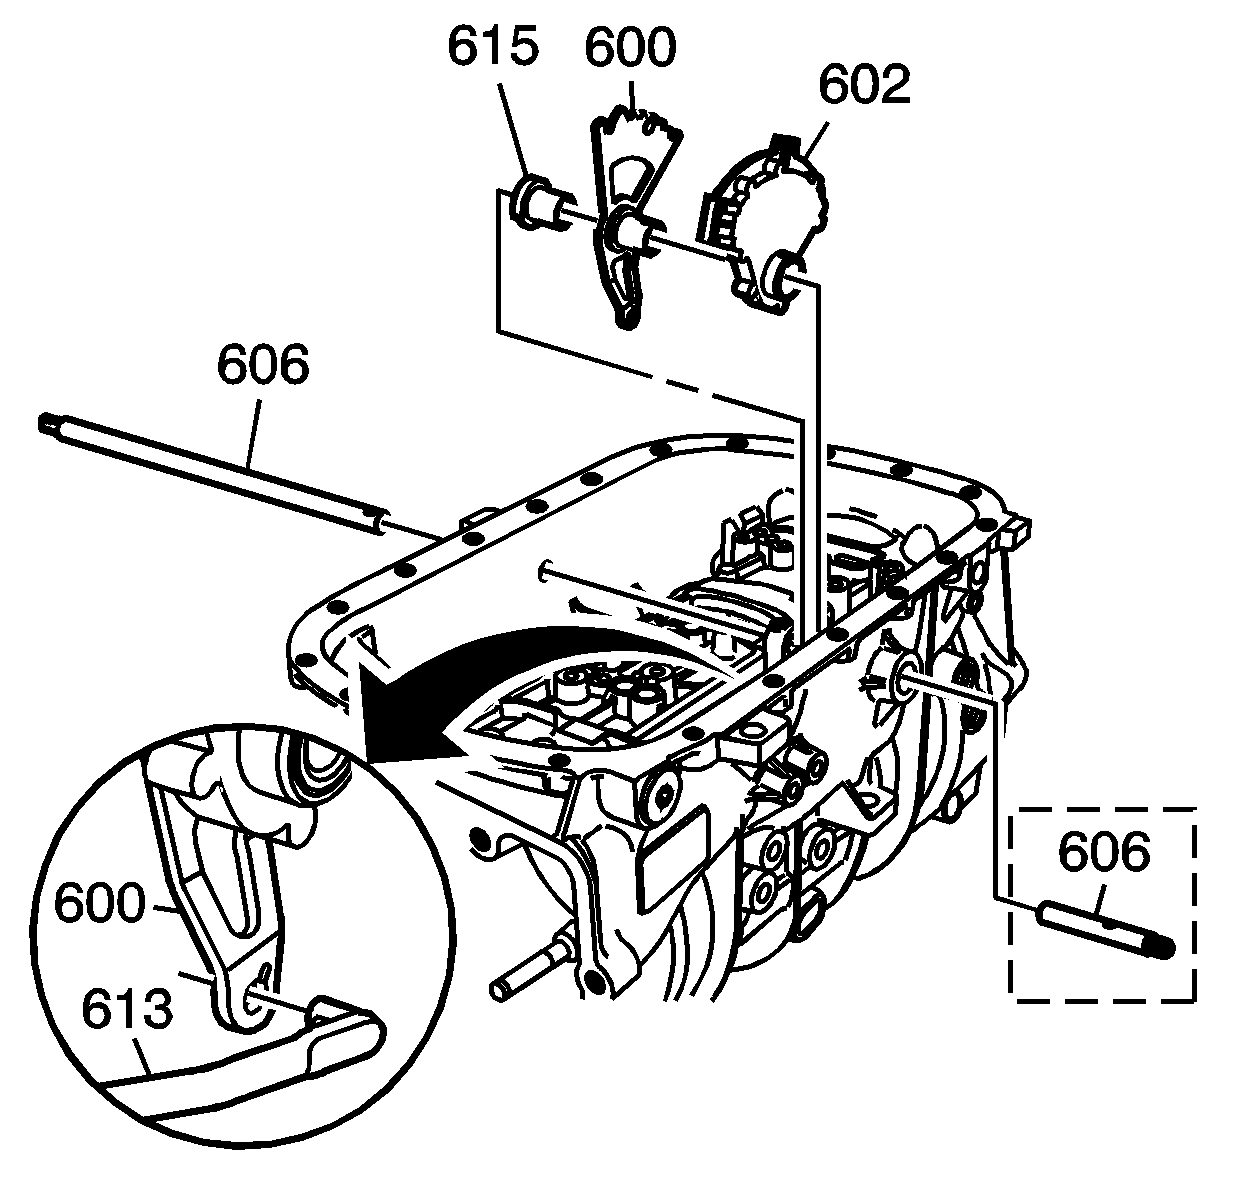
- Assemble the shift switch assembly (602) and spacer (615) onto the detent lever (600).
- Assemble the park pawl actuator (613) into the detent lever (600).
- Install the manual shaft (606) into the case (604).
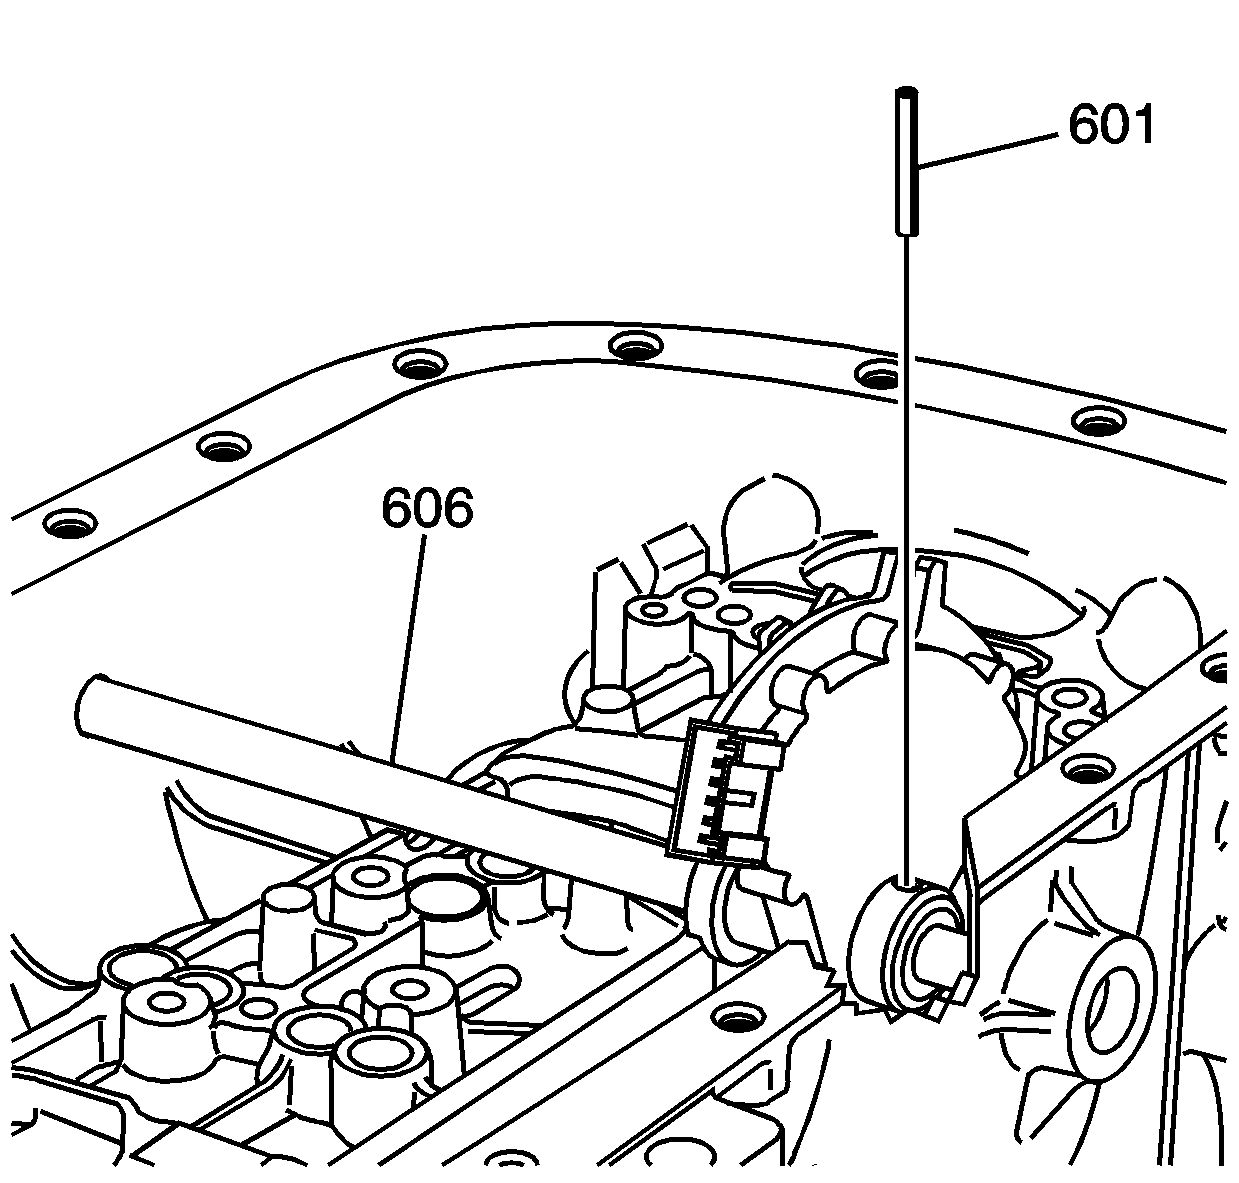
- Align the groove for the new manual shaft pin (601) with the pin hole in the detent lever/shift switch assembly.
- Install the NEW manual shaft pin (601) into the manual shift shaft (606).
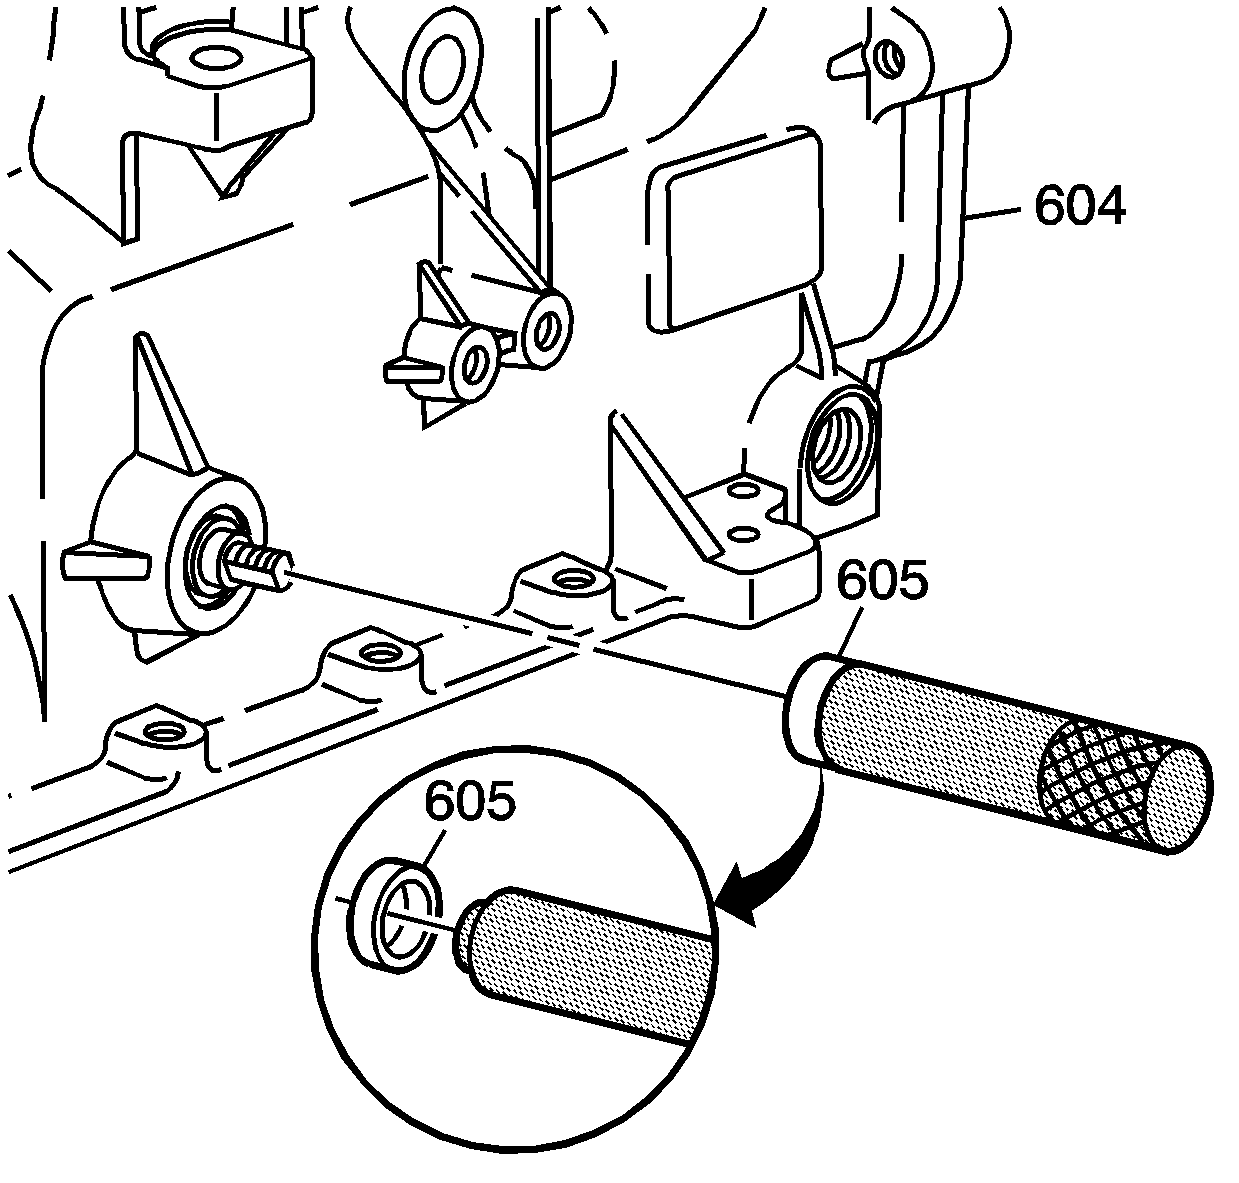
- Install a NEW manual shaft seal (605) onto J 44767 .
- Use a J 44767 to install the NEW manual shaft seal (605) into the case (604).
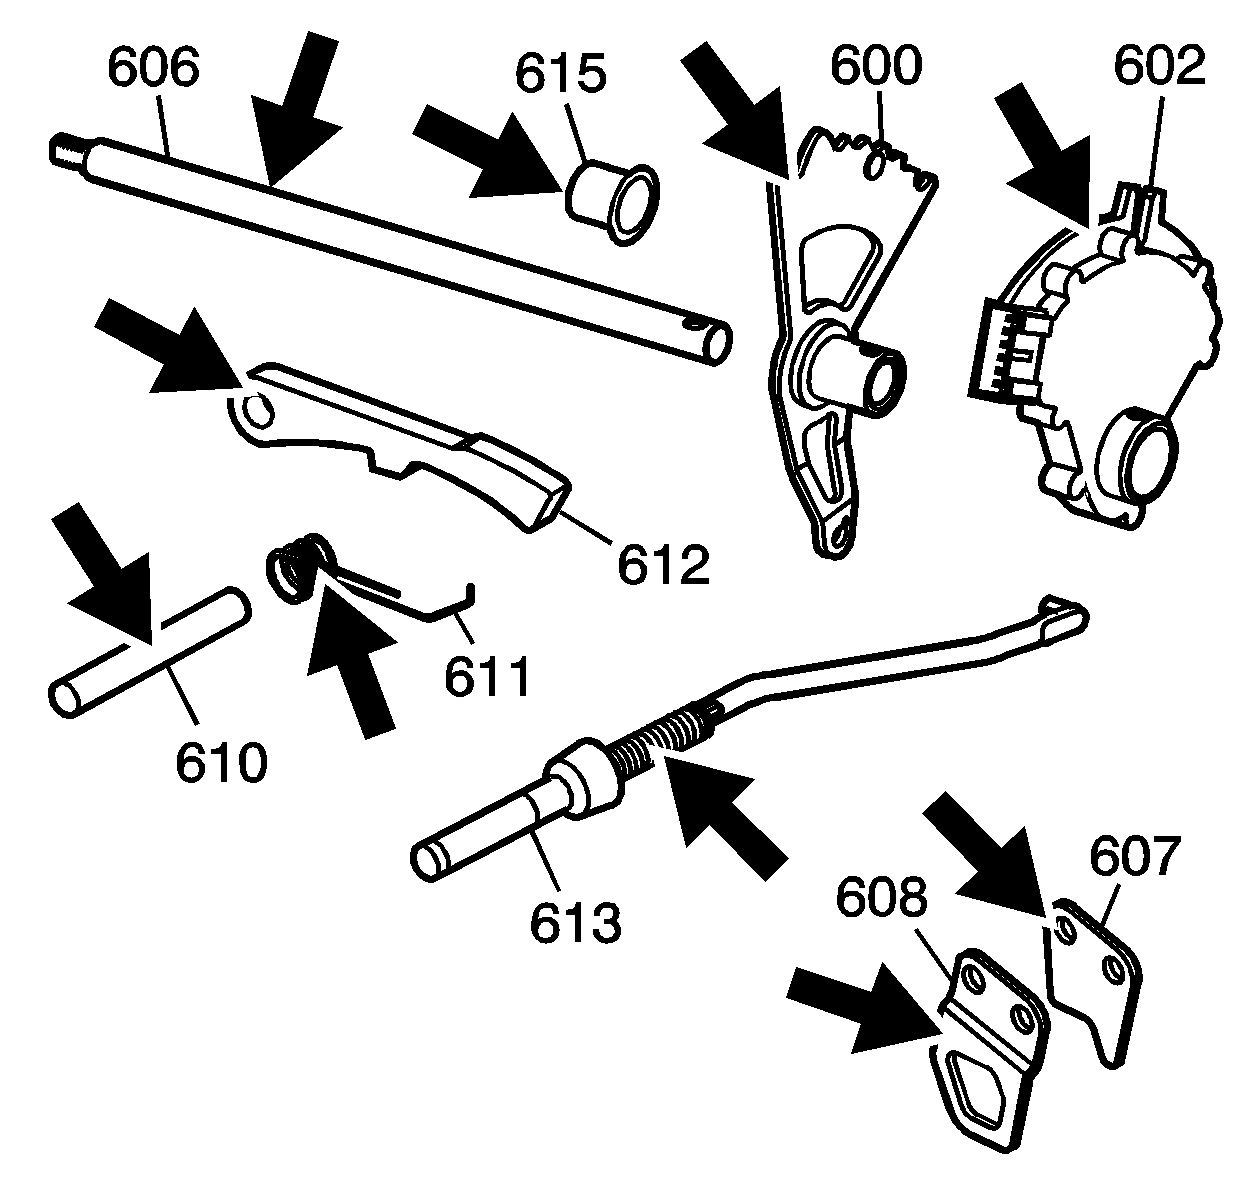
| • | Worn park pawl actuator brackets (607, 608) |
| • | A damaged or bent park pawl actuator assembly (613) |
| • | A damaged manual shaft detent lever (600) |
| • | A damaged manual shaft shift switch assembly (602) |
| • | A worn or stripped manual shaft (606) |
| • | A worn or damaged park pawl shaft (610), park pawl spring (611), and park pawl (612) |
Notice: Use the correct fastener in the correct location. Replacement fasteners must be the correct part number for that application. Fasteners requiring replacement or fasteners requiring the use of thread locking compound or sealant are identified in the service procedure. Do not use paints, lubricants, or corrosion inhibitors on fasteners or fastener joint surfaces unless specified. These coatings affect fastener torque and joint clamping force and may damage the fastener. Use the correct tightening sequence and specifications when installing fasteners in order to avoid damage to parts and systems.
Tighten
Tighten the bracket bolts to 22 N·m (16 lb ft).
