For 1990-2009 cars only
Master Cylinder Reservoir Replacement JL9
Removal Procedure
Warning: Refer to Brake Fluid Irritant Warning in the Preface section.
Caution: Refer to Brake Fluid Effects on Paint and Electrical Components Caution in the Preface section.
- Remove the brake fluid from the master cylinder reservoir and discard in an approved container.
- Disconnect the brake fluid level indicator switch electrical connector.
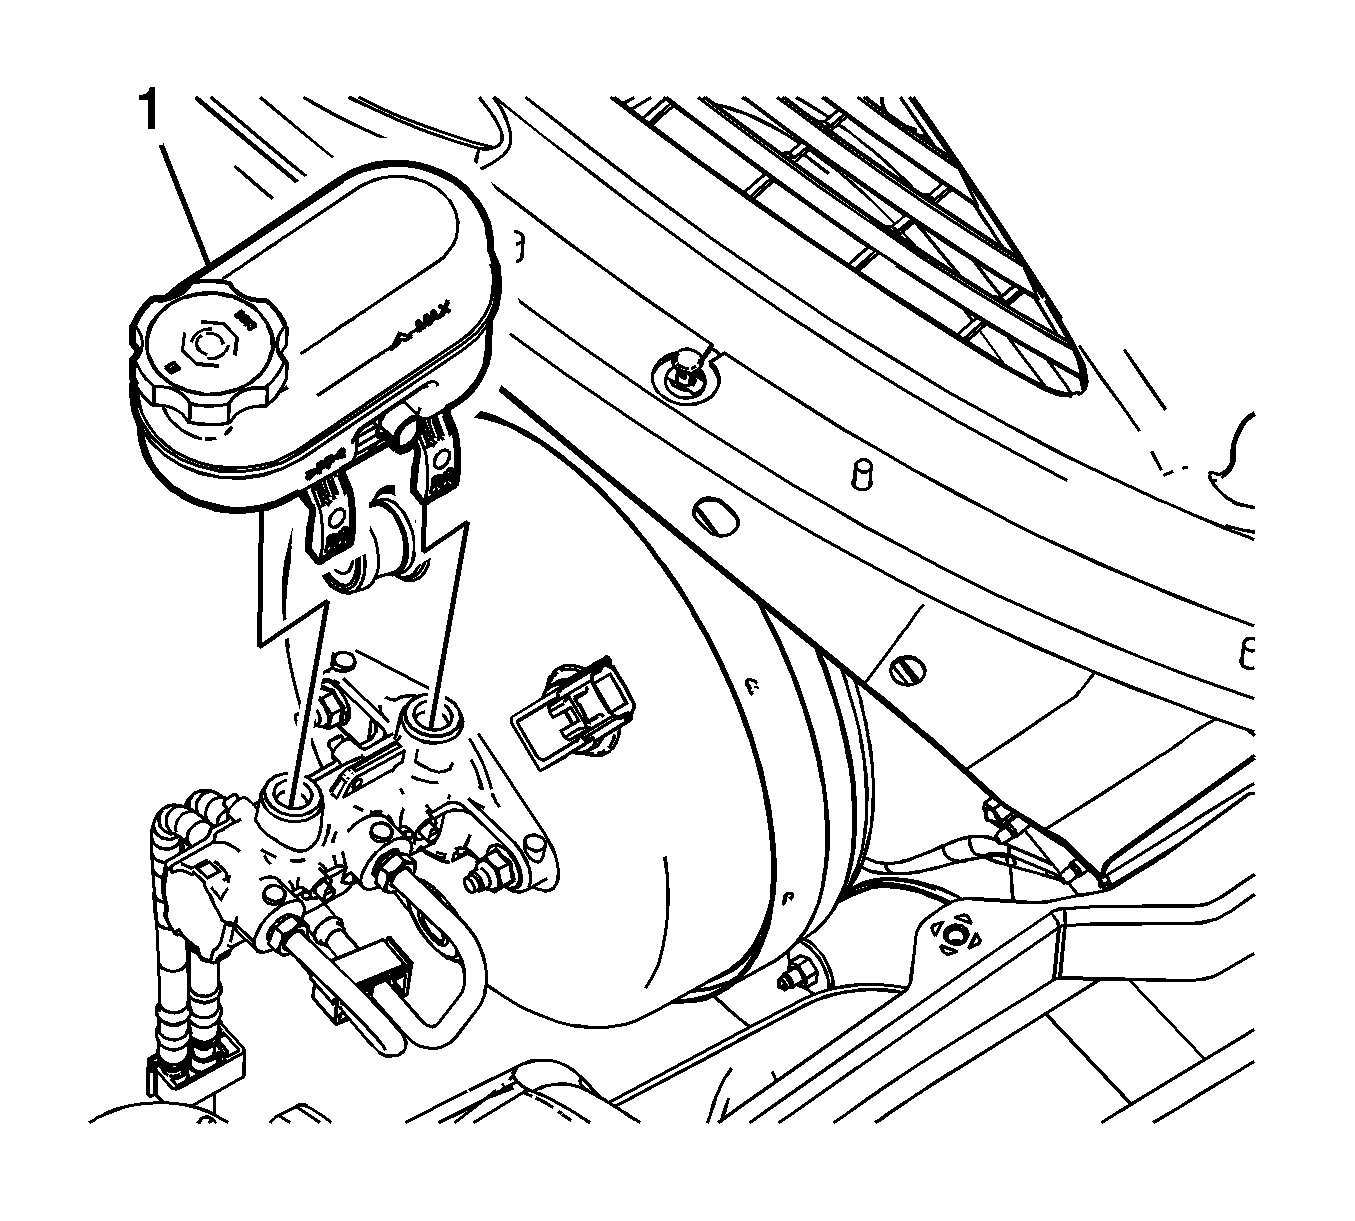
- Carefully spread the master cylinder reservoir (1) locking tabs and lift the reservoir upward from the master cylinder.
- Clean the area surrounding the master cylinder and the master cylinder body with denatured alcohol and a clean shop cloth.
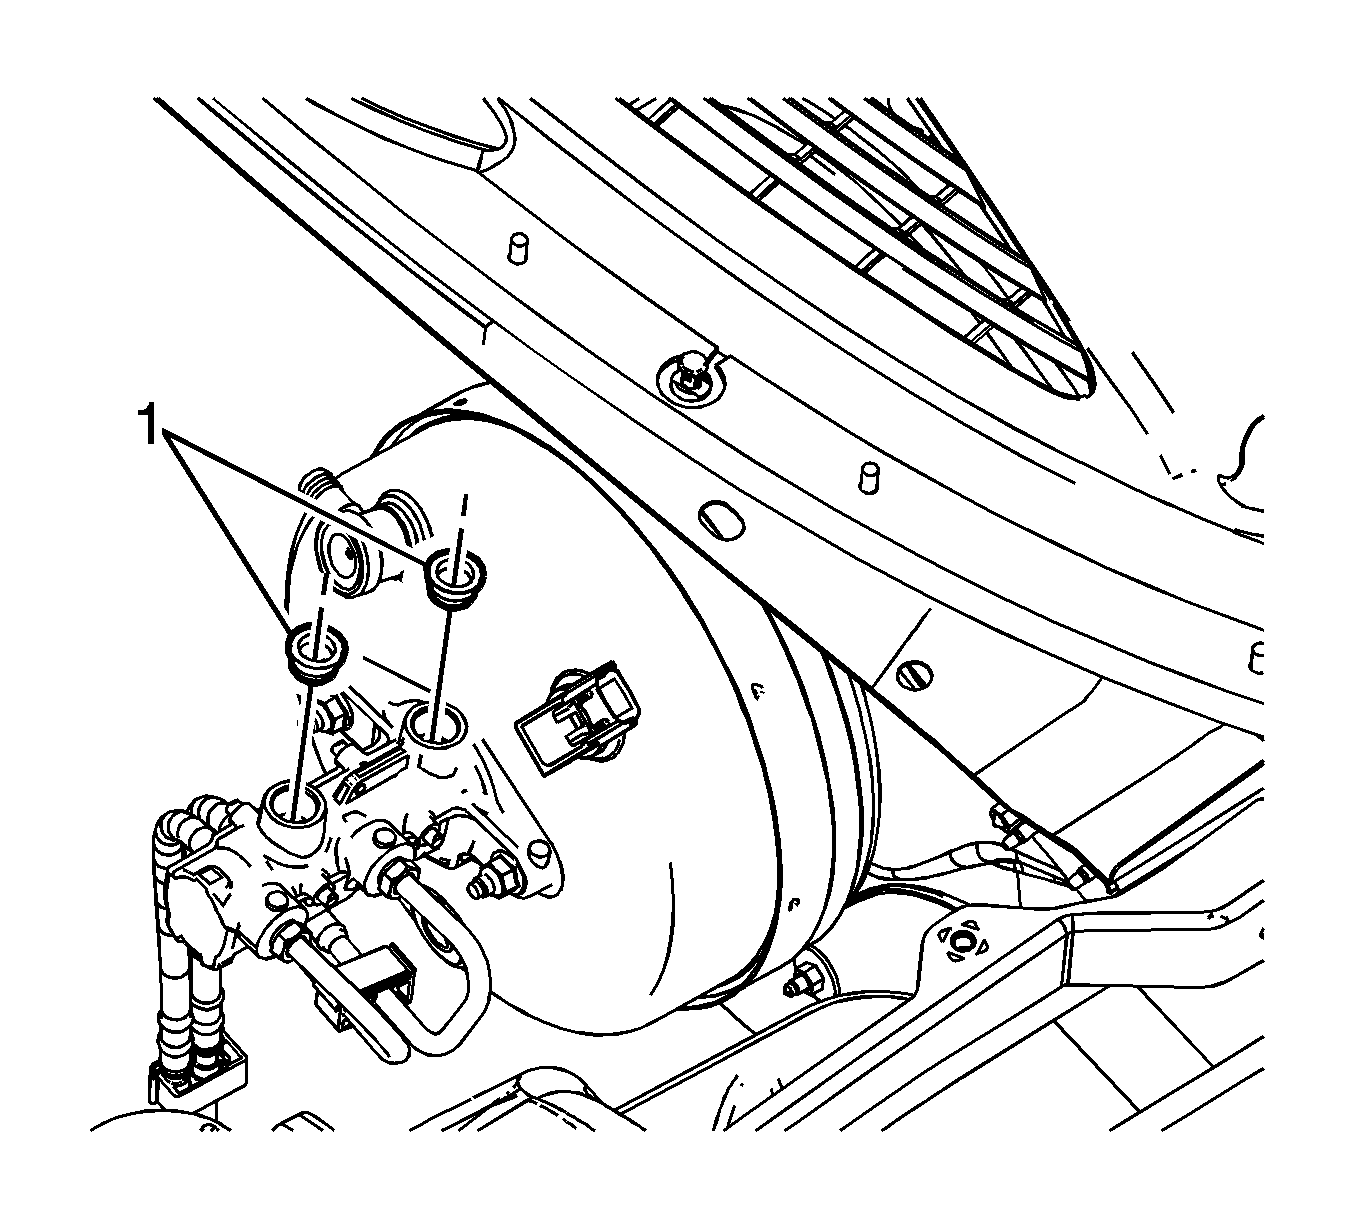
- Remove the master cylinder reservoir seals (1).

Note: Do not reuse the brake fluid.

Installation Procedure
- Lubricate the master cylinder reservoir seals and the reservoir barrel sealing areas with approved GM brake fluid from a clean, sealed brake fluid container. Refer to Fluid and Lubricant Recommendations.
- Install the master cylinder reservoir seals (1).
- Carefully install the master cylinder reservoir (1) to the master cylinder.
- Connect the brake fluid level indicator switch electrical connector.
- Fill the master cylinder reservoir. Refer to Master Cylinder Reservoir Filling.

Ensure the seals are fully seated in the master cylinder body.

Note: Apply equal pressure to the master cylinder reservoir while pressing firmly downward to ensure the reservoir is properly seated.
Press firmly downward on the master cylinder reservoir until the locking tabs engage the pins on the master cylinder body.
Master Cylinder Reservoir Replacement J55
Warning: Refer to Brake Fluid Irritant Warning in the Preface section.
Caution: Refer to Brake Fluid Effects on Paint and Electrical Components Caution in the Preface section.
Removal Procedure
- Remove the master cylinder from the vehicle. Refer to Master Cylinder Replacement.
- Disconnect the electrical connector from the fluid level sensor.
- Remove the master cylinder fluid level sensor. Refer to Brake Fluid Level Indicator Switch Replacement.
- Drain the brake fluid from the master cylinder reservoir.
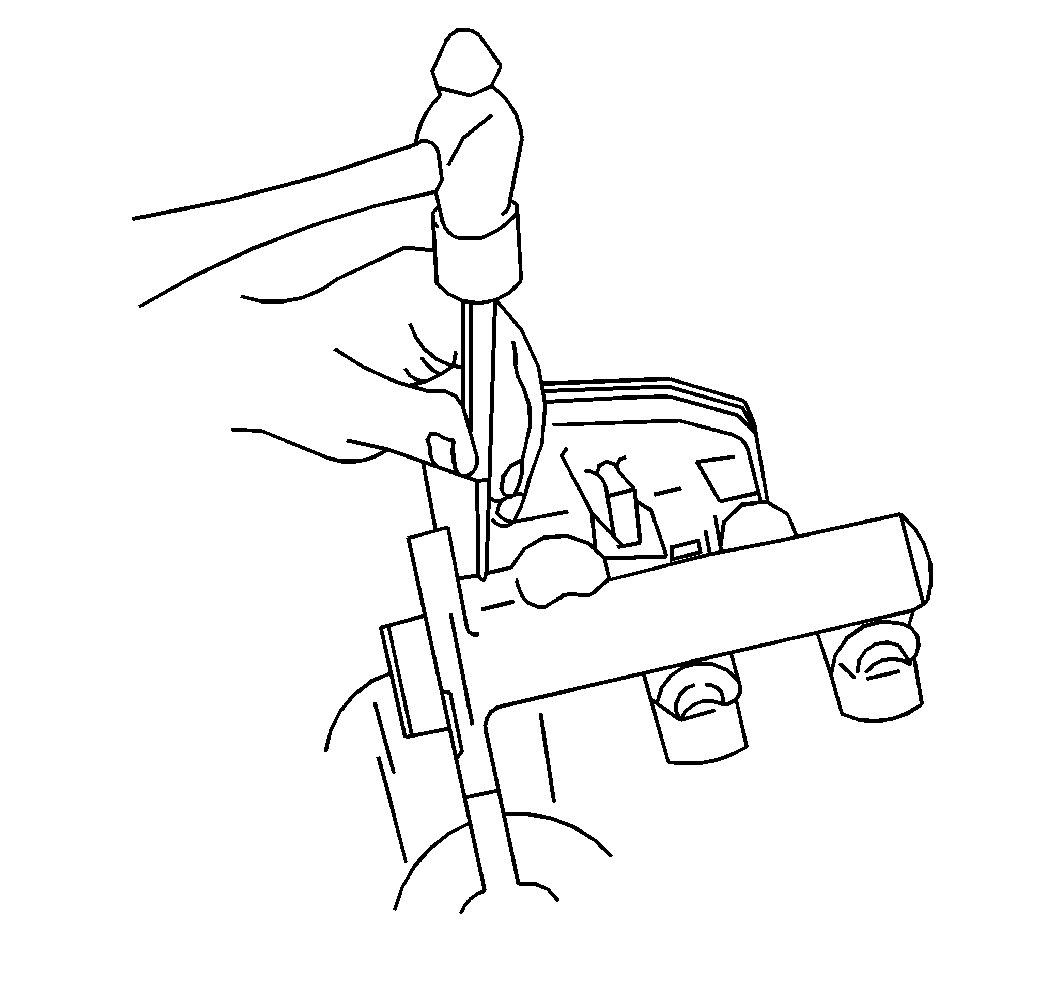
- Carefully tap back the retaining pins until clear of master cylinder reservoir.
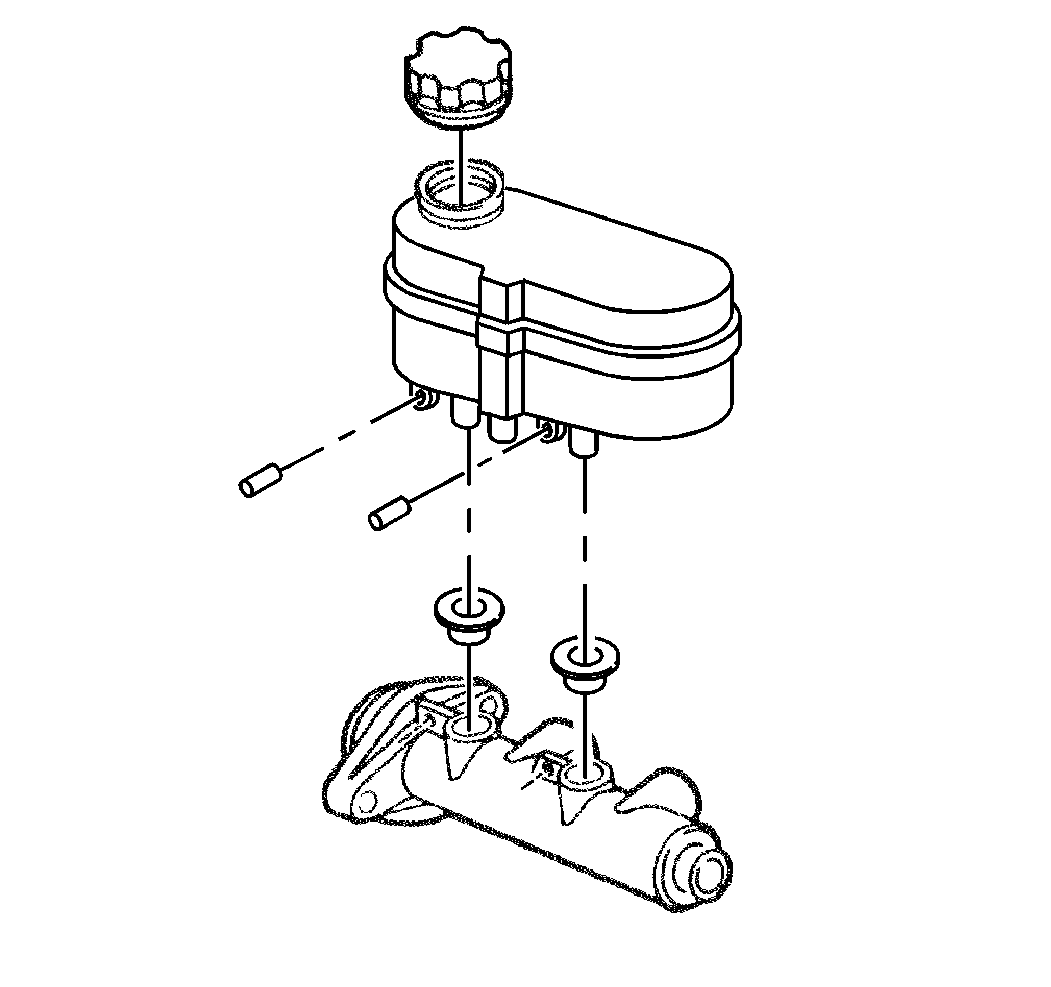
- Remove the master cylinder reservoir from the master cylinder.
- Remove the seals from the master cylinder reservoir.


Installation Procedure
- Inspect the master cylinder reservoir for cracks or deformities. If found, replace the reservoir.
- Clean the reservoir with clean denatures alcohol or equivalent.
- Dry the master cylinder reservoir with non-lubricated, filtered air.
- Lubricate the new seals and the reservoir bayonets with GM approved brake fluid from a clean, sealed brake fluid container. Refer to Fluid and Lubricant Recommendations.
- Install the seals, making sure they are fully seated.
- Install the reservoir onto the master cylinder by pressing straight down by hand until the pins holes are aligned.
- Press straight down by hand until pin holes are aligned.
- Carefully tap in the master cylinder reservoir retaining pins to secure the reservoir.
- Fill the master cylinder reservoir. Refer to Master Cylinder Reservoir Filling.
- Install the master cylinder fluid level sensor. Refer to Brake Fluid Level Indicator Switch Replacement.
- Connect the electrical connector to fluid sensor.
- Install the master cylinder. Refer to Master Cylinder Replacement.


