For 1990-2009 cars only
Special Tools
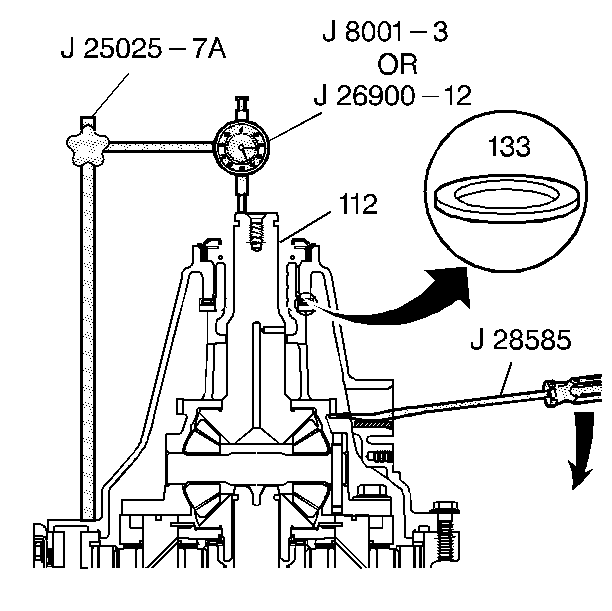
| • | J 25025-7A Dial Indicator Post |
| • | J 28585 Snap Ring Remover |
| • | J 8001 Dial Indicator |
For equivalent regional tools, refer to Special Tools.
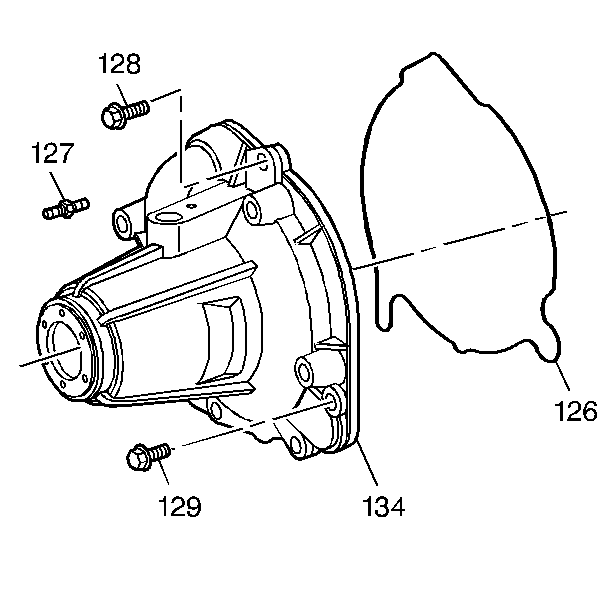
- Inspect the case to case extension seal (126).
- Inspect the case extension mating surface for damage.
- Install the following parts:
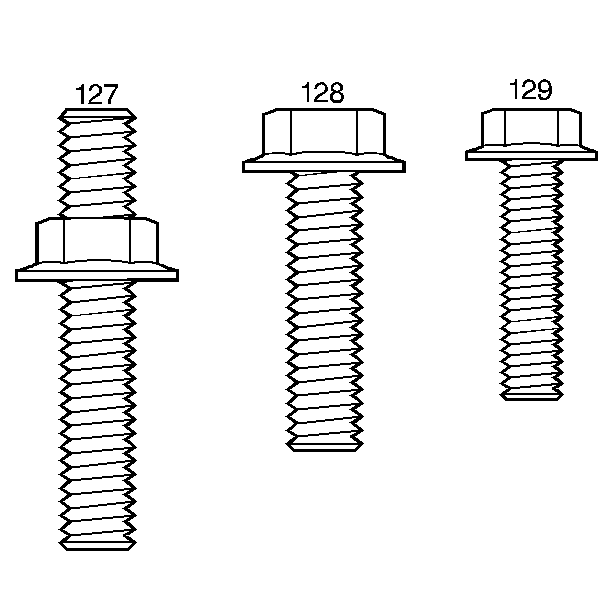
- Apply pip thread sealant GM P/N 12346004 to bolt threads before installation. Install the case extension bolts (128, 129).
- Hand tighten bolts (128, 129) until case extension (134) is seated onto case.
- Install the long J 25025-7A dial indicator post and the J 8001 dial indicator .
- Position the dial indicator with the stem contacting the output shaft (112). Set the dial indicator to zero.
- Insert the J 28585 snap ring remover through the vehicle speed sensor bore and lift the speed sensor rotor for measurement. Protect the bore with a piece of wood or a suitable piece of plastic.
- Proper end play clearance is 0.15-0.65 mm (Eng. Spec.).
- Record measured specification and, if necessary, adjust the clearance with the proper thickness selective thrust washer on reassembly. Refer to step 3.
- Remove the dial indicator set and the post.
- Install the stud (127).
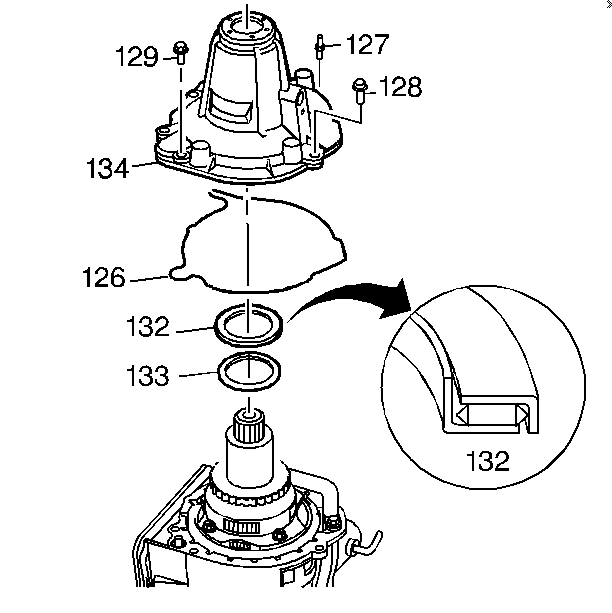
| • | The selective washer (133) |
| • | The thrust washer (132) |
| • | The case extension seal (126) |
| • | The case extension (134) |
Caution: Failure to ensure that proper end play clearance exists, could lead to internal component damage.
Caution: Refer to Fastener Caution in the Preface section.
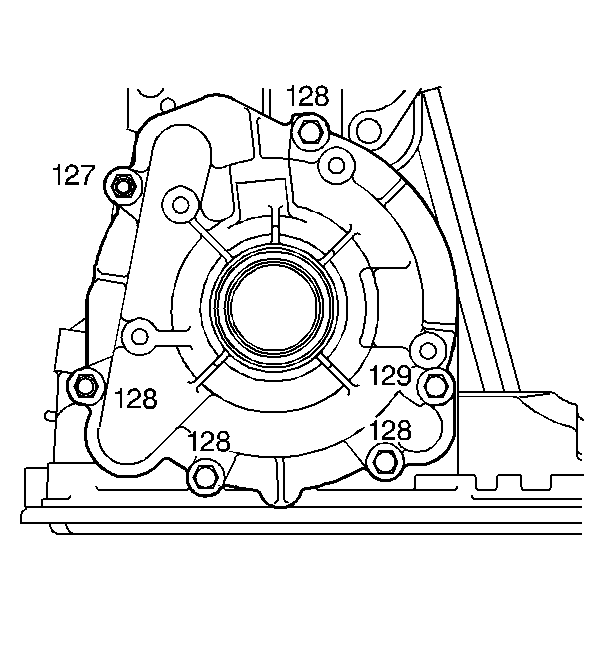
| • | Tighten the bolt (128) and the stud (127) to 50-55 N·m (37-40 lb ft). |
| • | Tighten the bolt (129) to 20-27 N·m (15-20 lb ft). |
