Removal Procedure
Tools Required
Refer to J 41081
, Injector Remover

- Remove the negative battery cable.
- Relieve the fuel system pressure.
Refer to Fuel Pressure Relief Procedure
.
- Remove the injector electrical connector.

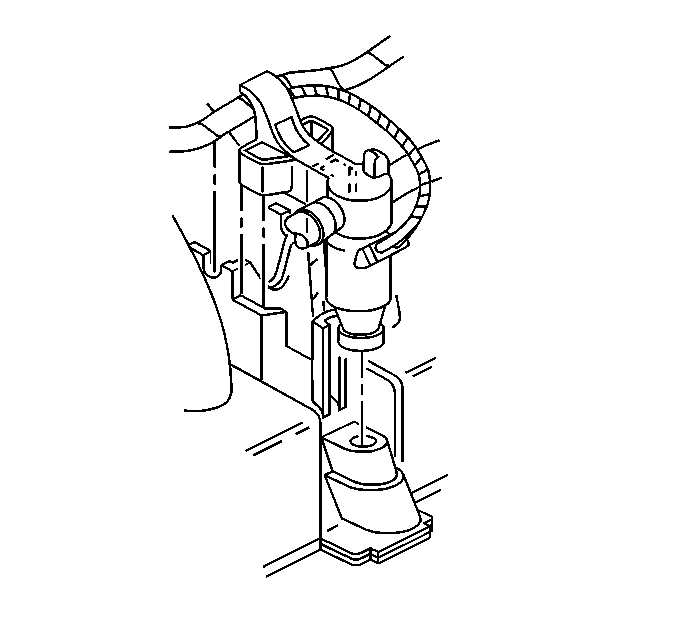
- Release the fuel rail to intake manifold locking tab by pushing toward center
of intake manifold.

- Pry the injector up out of intake manifold using J 41081 between the
bottom of injector and intake manifold.

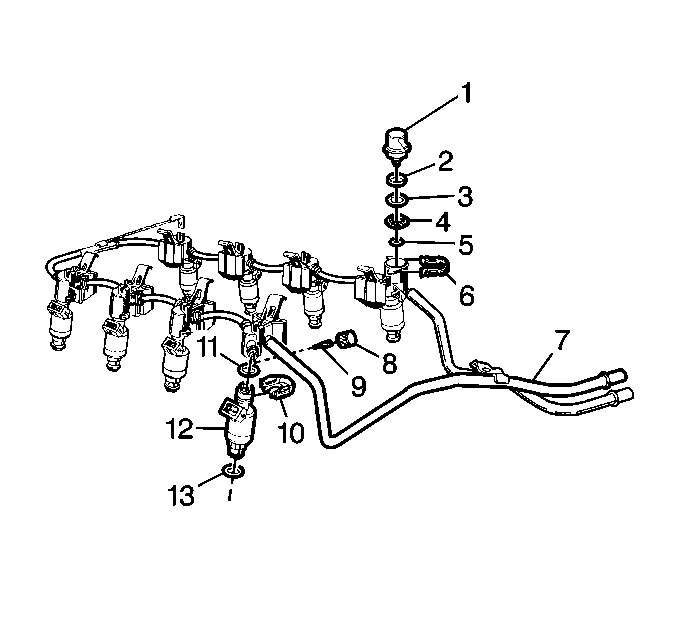
- Spread the injector retainer clip (10) to release injector from fuel rail.
Important: It may be necessary to release the adjacent injector(s) from the intake
manifold to allow increased fuel rail movement for injector access.
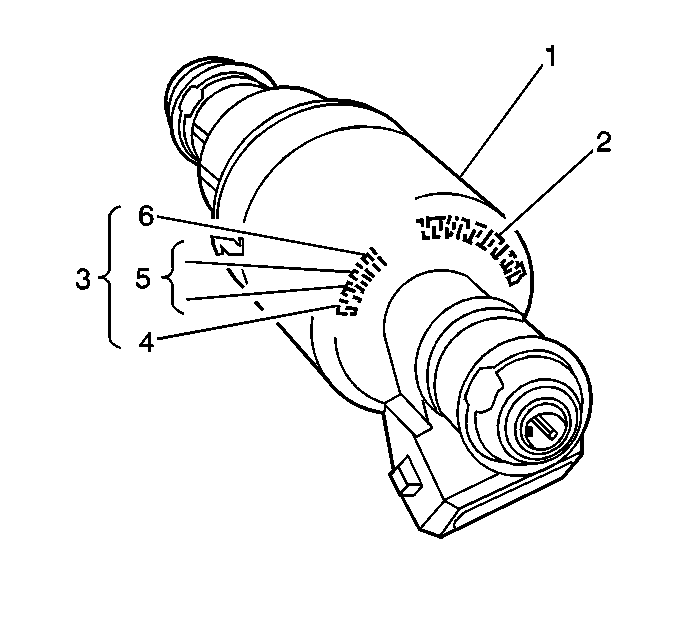
Important: When replacing a fuel injector, it may be necessary to have the following
identification information. The fuel injector assembly contains the part number
identification (2), the build date code (3), the month (4) 1-9 (Jan-Sept)
O, N, D (Oct, Nov, Dec), the day (5), and the year (6).

- Remove the fuel injector assembly (1).
Installation Procedure

- Lubricate the new upper (11) and lower
injector (13) O-rings with clean engine oil and install on injector.
- Install the new retainer clip (6) onto injector.
- Install the fuel injector (12) into fuel rail.
| • | Ensure injectors are aligned by orientating electrical connector
perpendicular to crankshaft. |
| • | Push in far enough to engage retainer clip with machined slots
on rail socket. |
- Snap the fuel rail down onto intake manifold.
- Install the injector electrical connector.
- Tighten the fuel filler cap.
| 6.1. | Turn ignition switch to On position for 2 seconds. |
| 6.2. | Turn the ignition switch OFF for 10 seconds |
| 6.3. | Turn the ignition switch ON. |
| 6.4. | Check for fuel leaks. |

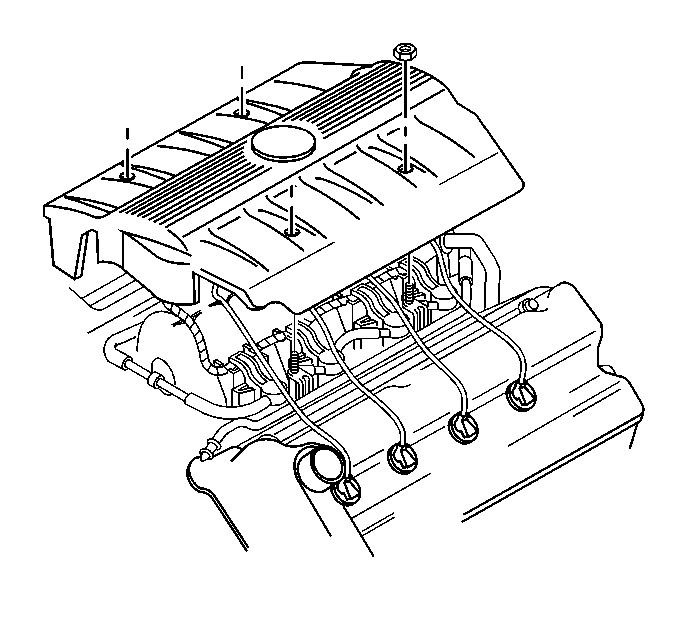
- Install the intake manifold top cover.
- Install the negative battery cable.


