Removal Procedure
Tools Required
| • | J 37097-A Hose Clamp Remover/Installer |
| • | J 41623-B Cooler Quick Connect Tool |
- Disconnect the battery negative cable. Refer to Battery Negative Cable Disconnection and Connection in Engine Electrical.
- Remove the upper radiator support. Refer to Front End Upper Tie Bar Replacement in Body Front End.
- Drain the cooling system. Refer to Cooling System Draining and Filling .
- Remove the air deflector. Refer to Front Air Deflector Replacement in Body Front End.
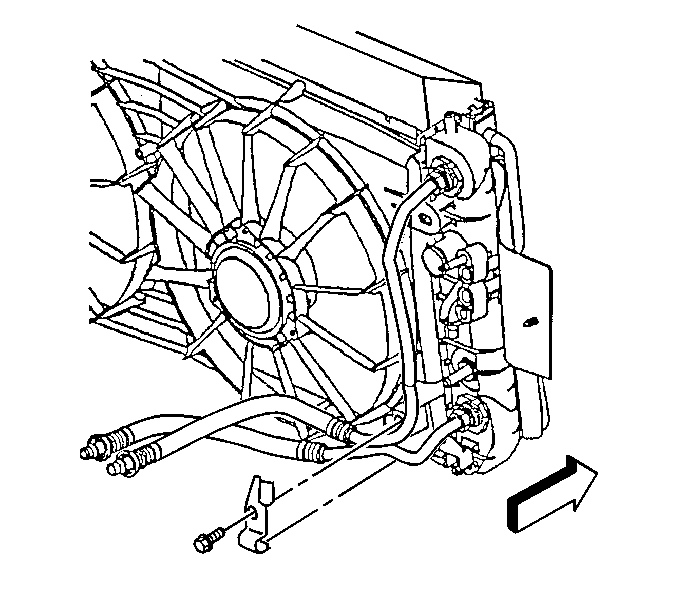
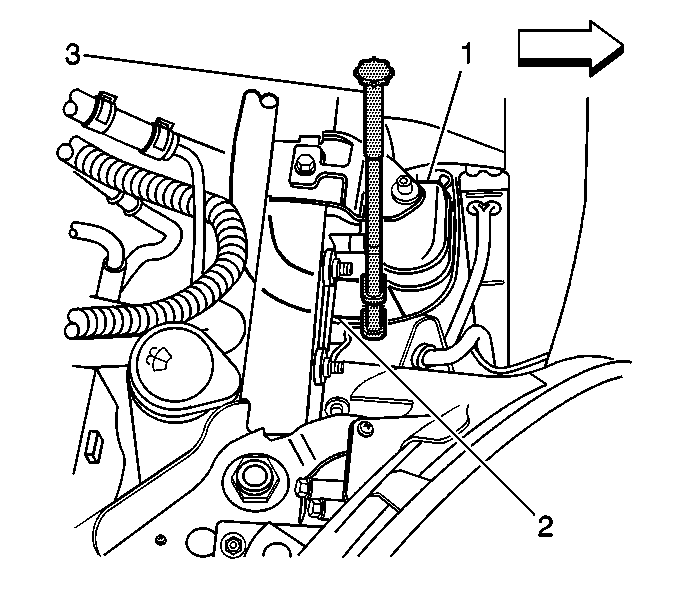
- Remove the engine oil cooler pipe retaining clip and bolt from the fan shroud.
- Lower the vehicle.
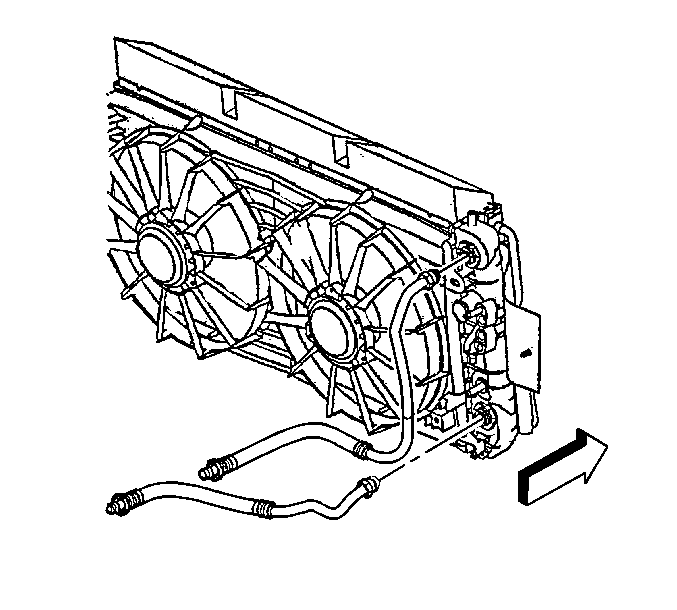
- Position the J 37097-A (3) to the clamp in order to remove the inlet radiator hose (2) from the radiator (1).
- Disconnect the upper engine oil cooler pipe from the radiator.
- Remove the upper transaxle oil cooler pipe retaining bolt from the fan shroud.
- Slide the plastic cap off the upper transaxle oil cooler pipe quick connect fitting.
- Disconnect the upper transaxle oil cooler pipe from the radiator using the J 41623-B .
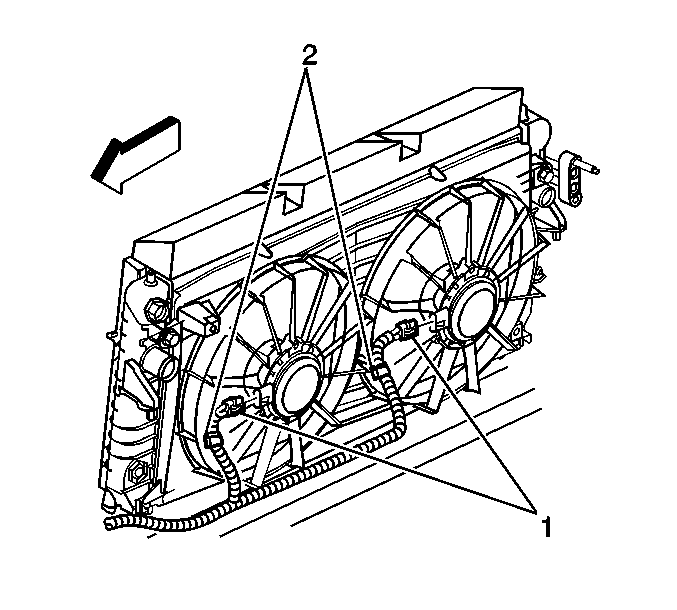
- Disconnect the wiring harness electrical connectors (1) from the cooling fan motors.
- Remove the clips (2) attaching the harness to the fan shroud.
- Disconnect the 2 retainers from the A/C discharge hose.
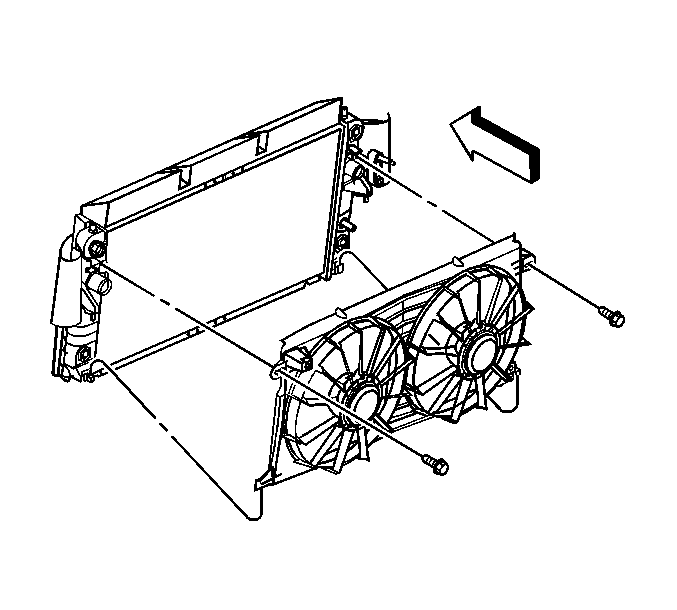
- Remove the 2 electric cooling fan mounting bolts.
- Remove the electric cooling fan assembly from the vehicle in the following order:
Caution: An electric fan under the hood can start up even when the engine is not running and can injure you. Keep hands, clothing and tools away from any underhood electric fan.
Caution: To help avoid personal injury or damage to the vehicle, a bent, cracked, or damaged fan blade or housing should always be replaced.
Important: Care should be taken when removing the cooling fan assembly not to damage the lower attachment points of both the cooling fan assembly and radiator.
| 16.1. | Position the cooling fan assembly towards the left side of the vehicle. |
| 16.2. | Pull upward on the right side of the fan assembly. |
| 16.3. | Position the fan assembly towards the right side of the vehicle. |
| 16.4. | Pull upward on the fan assembly removing it from the vehicle. |
Installation Procedure
- Install the cooling fan assembly to the vehicle in the following order:
- Install the electric cooling fan mounting bolts.
- Connect the 2 retainers to the A/C discharge hose.
- Connect the wiring harness electrical connectors (1) to the cooling fan motors.
- Attach the wiring harness retaining clips (2) to the fan shroud.
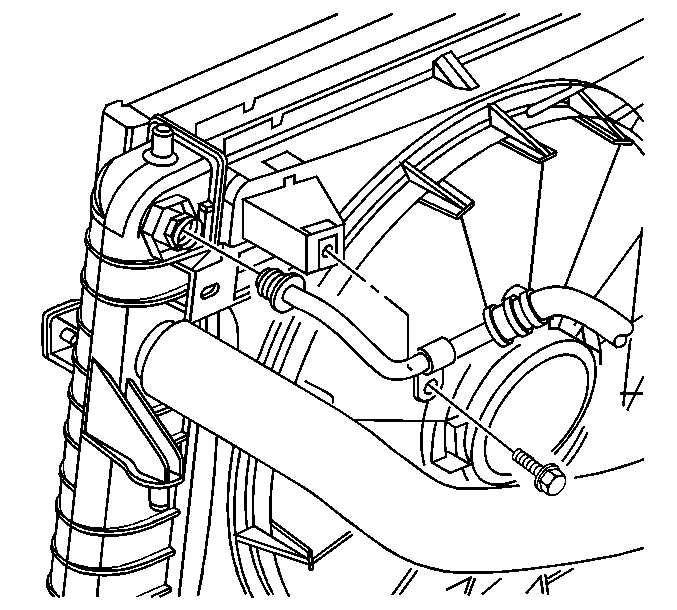
- Push the upper transaxle oil cooler pipe into the radiator quick connect fitting, until a "click" is heard.
- Tug gently on the cooler pipe to ensure proper retention.
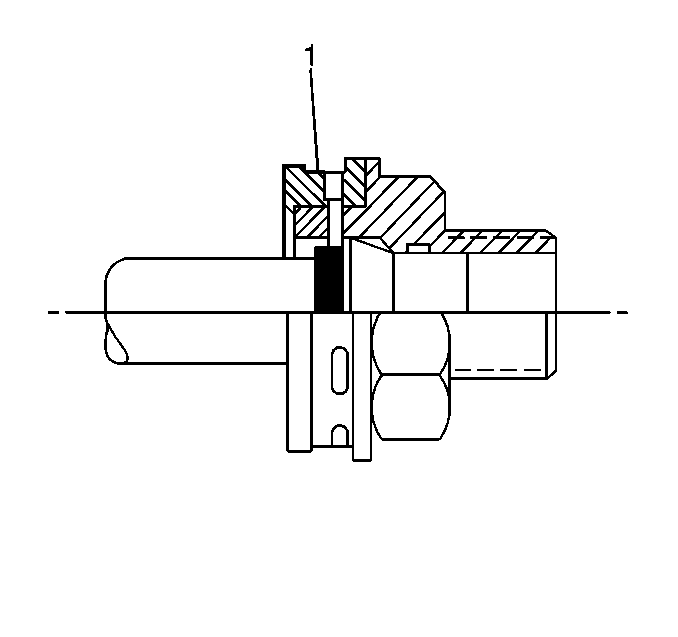
- Slide the plastic cap (1) over the quick connect joint.
- Install the upper transaxle oil cooler pipe retaining bolt to the fan shroud.
- Connect the upper engine oil cooler pipe to the radiator.
- Position the J 37097-A (3) to the clamp in order to connect the inlet radiator hose (2) to the radiator (1).
- Raise and support the vehicle. Refer to Lifting and Jacking the Vehicle in General Information.
- Install the engine oil cooler pipe retaining clip and bolt to the fan shroud.
- Install the air deflector. Refer to Front Air Deflector Replacement in Body Front End.
- Lower the vehicle.
- Install the upper radiator support. Refer to Front End Upper Tie Bar Replacement in Body Front End.
- Fill the cooling system. Refer to Cooling System Draining and Filling .
- Connect the battery negative cable. Refer to Battery Negative Cable Disconnection and Connection in Engine Electrical.
- Check the engine oil level.
Important: Care should be taken when installing the cooling fan assembly not to damage the lower attachment points of both the cooling fan assembly and radiator.
| 1.1. | Position the cooling fan assembly behind the radiator. |
| 1.2. | Position the fan assembly towards the right side of the vehicle. |
| 1.3. | Push downward on the right side of the fan assembly. |
| 1.4. | Move the fan assembly into position, aligning the lower feet of the fan shroud to the mounting tabs on the radiator. |
Important: The bolts retaining the cooling fan to the radiator end tanks are a special length and should be the ONLY bolts used upon reinstallation. The use of longer bolts will damage the radiator end tanks.
Notice: Use the correct fastener in the correct location. Replacement fasteners must be the correct part number for that application. Fasteners requiring replacement or fasteners requiring the use of thread locking compound or sealant are identified in the service procedure. Do not use paints, lubricants, or corrosion inhibitors on fasteners or fastener joint surfaces unless specified. These coatings affect fastener torque and joint clamping force and may damage the fastener. Use the correct tightening sequence and specifications when installing fasteners in order to avoid damage to parts and systems.
Tighten
Tighten the electric cooling fan mounting bolts to 6 N·m (53 lb in).
Tighten
Tighten the transaxle oil cooler pipe retaining bolt to 6 N·m (53 lb in).
Tighten
Tighten the engine oil cooler pipe fitting to 18 N·m (13 lb ft).
Tighten
Tighten the engine oil cooler pipe retaining bolt to 6 N·m (53 lb in).
