Night Vision Camera Replacement Design 1
Removal Procedure
- Open and support the hood.
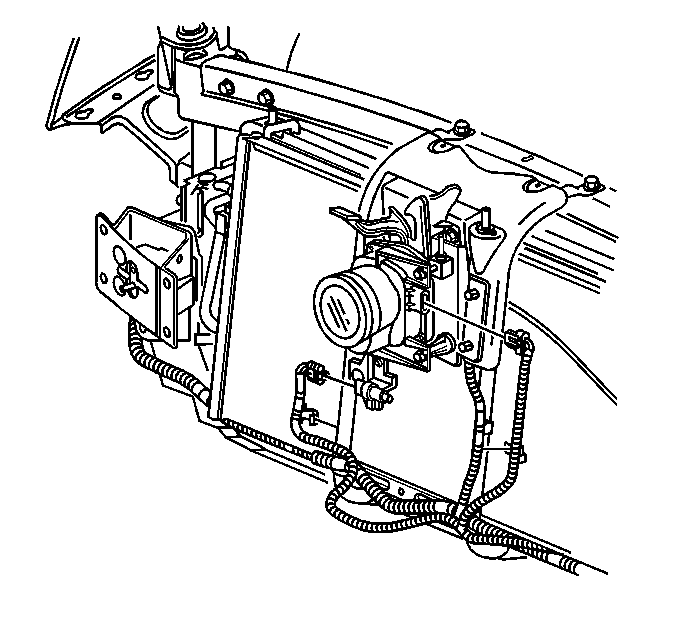
- Disconnect the night vision camera electrical connector.
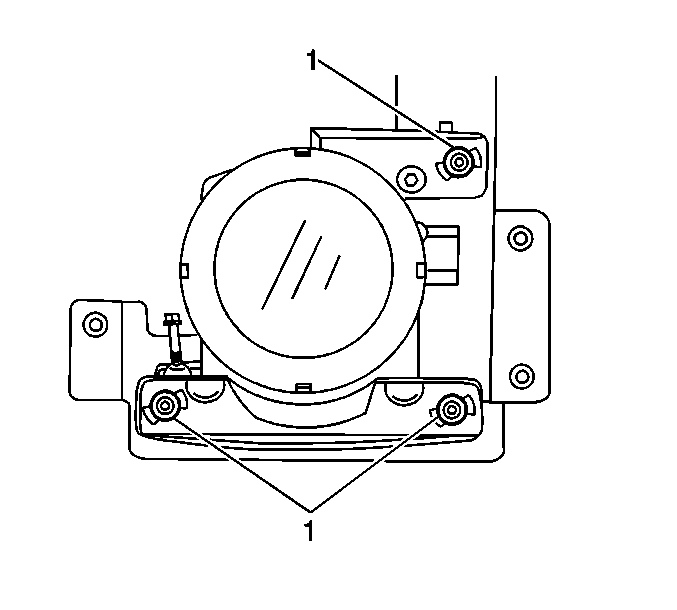
- Turn the three camera retainers (1) 90 degrees and remove the camera from the mounting bracket.
- Remove the night vision camera.
Important:
• The first design night vision camera is not serviceable and must
be sent to an authorized service center for repair. The second design night vision camera has a serviceable window/lens.
the second design camera can be recognized by the electrical connection below
the window/lens. • If the night vision camera is removed or adjusted for any reason,
it must be aimed. Refer to
Night Vision Camera Aiming
.


Installation Procedure
- Install the night vision camera to the mounting bracket and turn the retainers (1) 90 degrees.
- Connect the electrical connector.
- Perform aiming procedure for night vision camera. Refer to Night Vision Camera Aiming .
Important: Make sure the retainers are fully turned and in the locked position.


Night Vision Camera Replacement Design 2
Removal Procedure
- Open and support the hood.
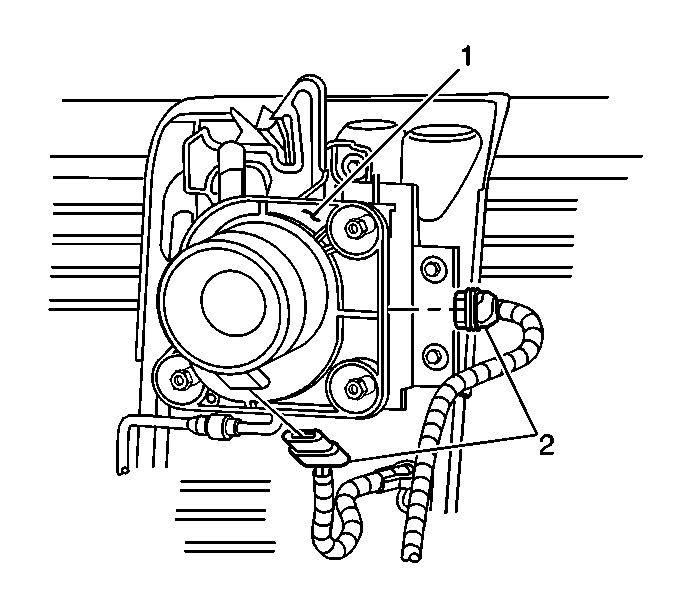
- Disconnect the night vision camera (1) electrical connectors (2).
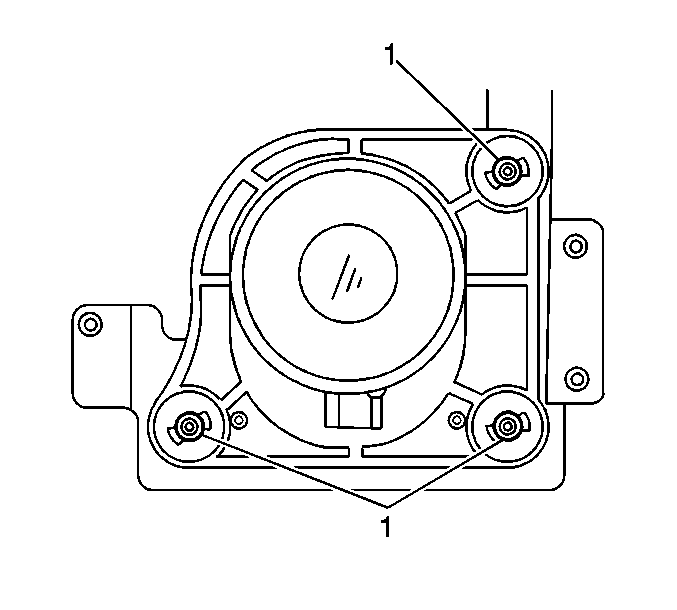
- Turn the three camera retainers (1) 90 degrees in order to remove the camera from the mounting bracket.
- Remove the night vision camera.
Important:
• The first design night vision camera is not serviceable and must
be sent to an authorized service center for repair. The second design night vision camera has a serviceable window/lens.
the second design camera can be recognized by the electrical connection below
the window/lens. • If the night vision camera is removed or adjusted for any reason,
it must be aimed. Refer to
Night Vision Camera Aiming
.


Installation Procedure
- Install the night vision camera to the mounting bracket and turn the retainers (1) 90 degrees.
- Connect the electrical connectors (2).
- Perform aiming procedure for night vision camera (1). Refer to Night Vision Camera Aiming .
Important: Make sure the retainers are fully turned and in the locked position.


