Removal Procedure
- Open the front door.
- Remove the closeout/insulator panel. Refer to Instrument Panel Insulator Panel Replacement - Left Side or Instrument Panel Insulator Panel Replacement - Right Side in Instrument Panel, Gages and Console.
- Disconnect the door wire harness from the body wire harness.
- Remove the door wire harness and conduit from the front body hinge pillar.
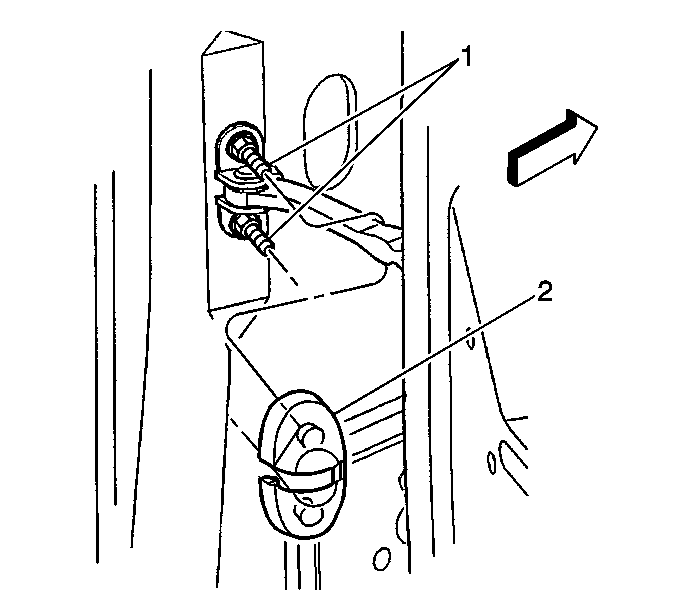
- Remove the check link cover (2) at the pillar.
- Remove the check link studs from the pillar.
- Remove the intermediate hinge fasteners (1) from both hinges.
- Lift the door to remove.
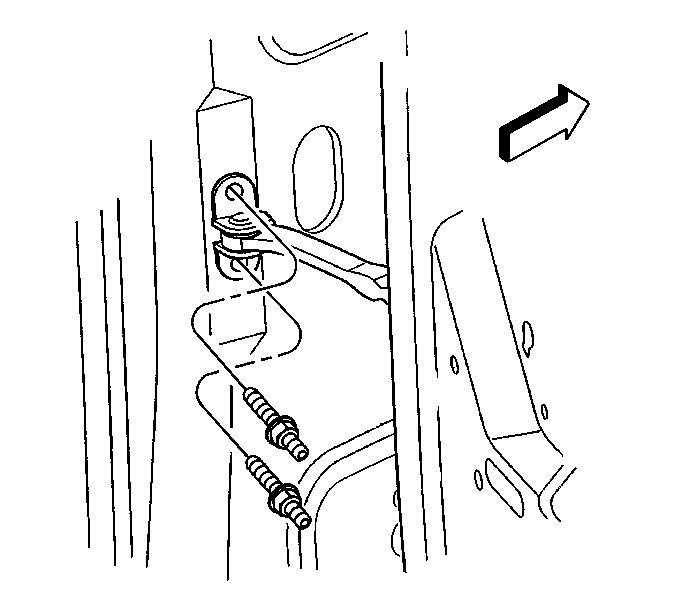
- Mark the position of the hinge (2) on the pillar.
- Remove the hinge fasteners (1) from the pillar.
- Remove the hinge half from the pillar.
- Mark the position of the hinge on the door.
- Remove the hinge fasteners from the door.
- Remove the hinge half from the door.
Important: Be careful to secure the studplate when removing the hinge half from the door. The studplate is not attached and could fall into the door.
Installation Procedure
- Align the pillar half of the hinge (2) with the marks made on the pillar during removal.
- Install the hinge-to-pillar fasteners (1).
- Align the door half of the hinge with the marks made on the door during removal.
- Install the hinge-to-door fasteners.
- Align the door hinge halves.
- Lower the door so the hinge halves mate together.
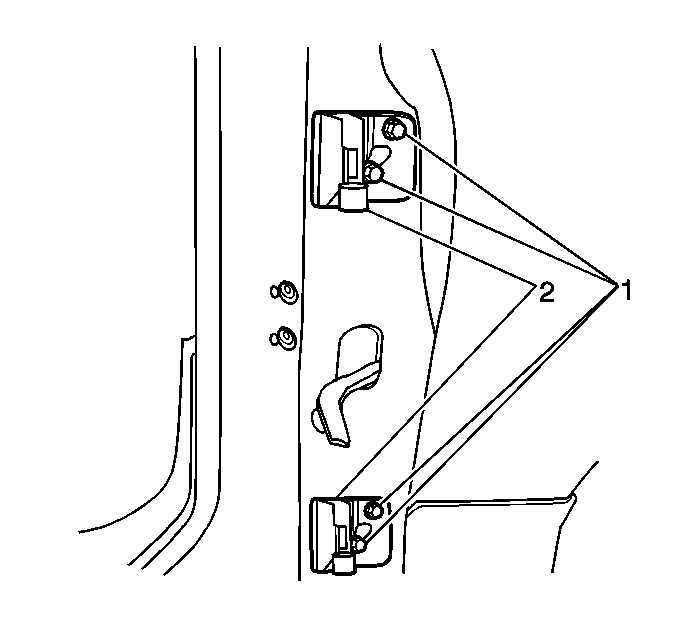
- Install the intermediate door hinge fasteners (1).
- Position the check link arm to the pillar.
- Install the check link studs to the pillar.
- Install the check link cover (2) at the pillar.
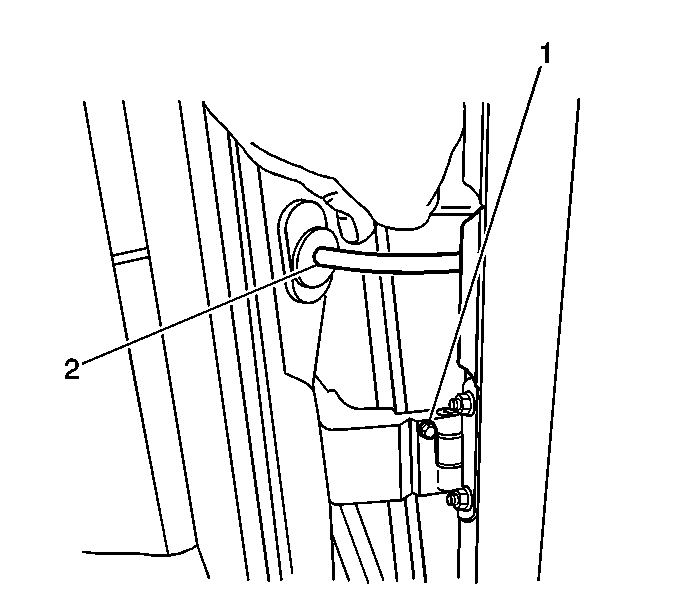
- Insert the door wire harness and conduit through the windshield pillar.
- Pull outward slightly to fully seat the grommet.
- Connect the door wire harness to the body wire harness.
- Install the closeout/insulator panel. Refer to Instrument Panel Insulator Panel Replacement - Left Side or Instrument Panel Insulator Panel Replacement - Right Side in Instrument Panel, Gages and Console.
- Adjust the door for proper alignment. Refer to Door Adjustment .
- Touch up any damage to the hinge, and the hinge fasteners with body color paint.
Notice: Use the correct fastener in the correct location. Replacement fasteners must be the correct part number for that application. Fasteners requiring replacement or fasteners requiring the use of thread locking compound or sealant are identified in the service procedure. Do not use paints, lubricants, or corrosion inhibitors on fasteners or fastener joint surfaces unless specified. These coatings affect fastener torque and joint clamping force and may damage the fastener. Use the correct tightening sequence and specifications when installing fasteners in order to avoid damage to parts and systems.
Tighten
Tighten the fasteners to 30 N·m (22 lb ft).
Tighten
Tighten the fasteners to 34 N·m (24 lb ft).
Important: Use Loctite® Blue GM P/N 12345382 or equivalent prior to the installing the fasteners.
Tighten
Tighten the fasteners to 24 N·m (18 lb ft).
Tighten
Tighten the check link studs to 9 N·m (80 lb in).
