Service Engine Soon (SES) Light On, Reduced Vehicle Power/Acceleration/Speed, Diagnostic Trouble Code (DTC) P0420 (Diagnosis and Replace Catalytic Converter)

| Subject: | Service Engine Soon (SES) Light on, Reduced Vehicle Power/Acceleration/Speed, Diagnostic Trouble Code (DTC) P0420 (Diagnosis and Replace Catalytic Converter) |
| Models: | 2002-2003 Cadillac DeVille, Seville |
Condition
Some customers may comment of the SES light on and/or possible reduced vehicle power, acceleration and reduced top speed. DTC P0420 may be set.
Cause
The catalytic converter efficiency may be too low and/or restricted.
Correction
Follow the service procedure below for catalytic converter diagnosis and replacement .
- For diagnostic information, refer to DTC P0420 SI Document ID #792317
- Raise and support the vehicle. Refer to Lifting and Jacking the Vehicle SI Document ID #377101.
- Support the exhaust system near the resonator with a suitable adjustable jack.
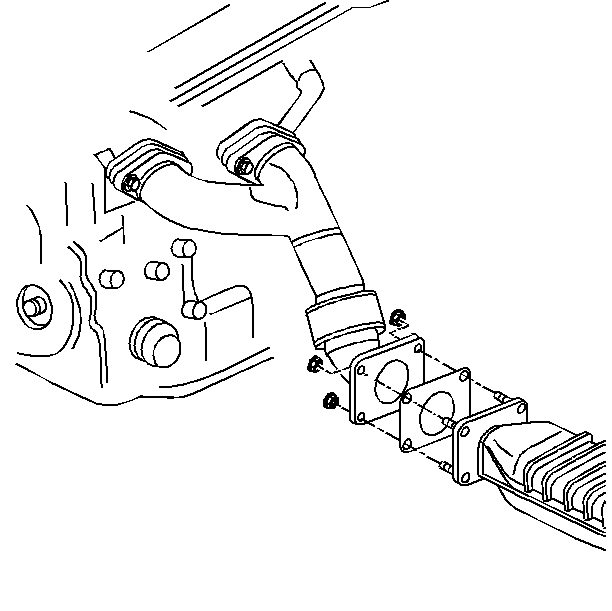
- Remove the 4 nuts securing the catalytic converter to the rear exhaust manifold pipe.
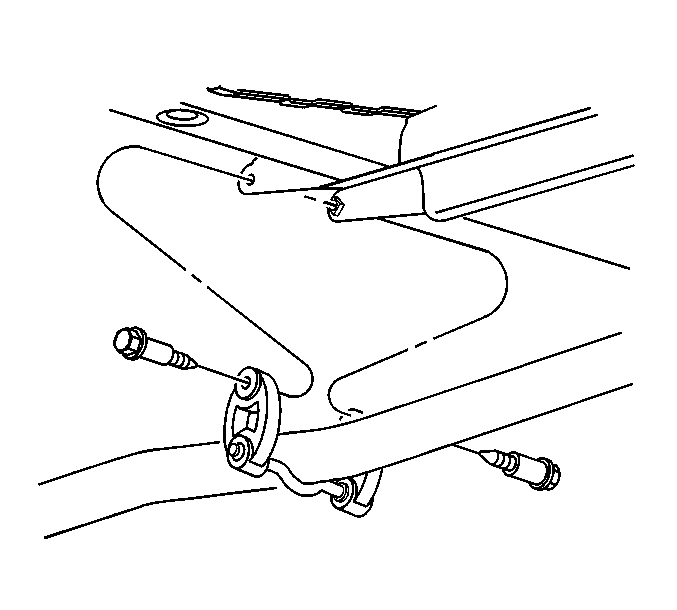
- Remove the 2 bolts securing the center exhaust hangers to the rear suspension support brackets.
- Remove the catalytic converter from the rear exhaust manifold pipe.
- Remove the catalytic converter gasket and discard the gasket.
- Lower the exhaust system with the adjustable jack to allow clearance for the cut-off tool.
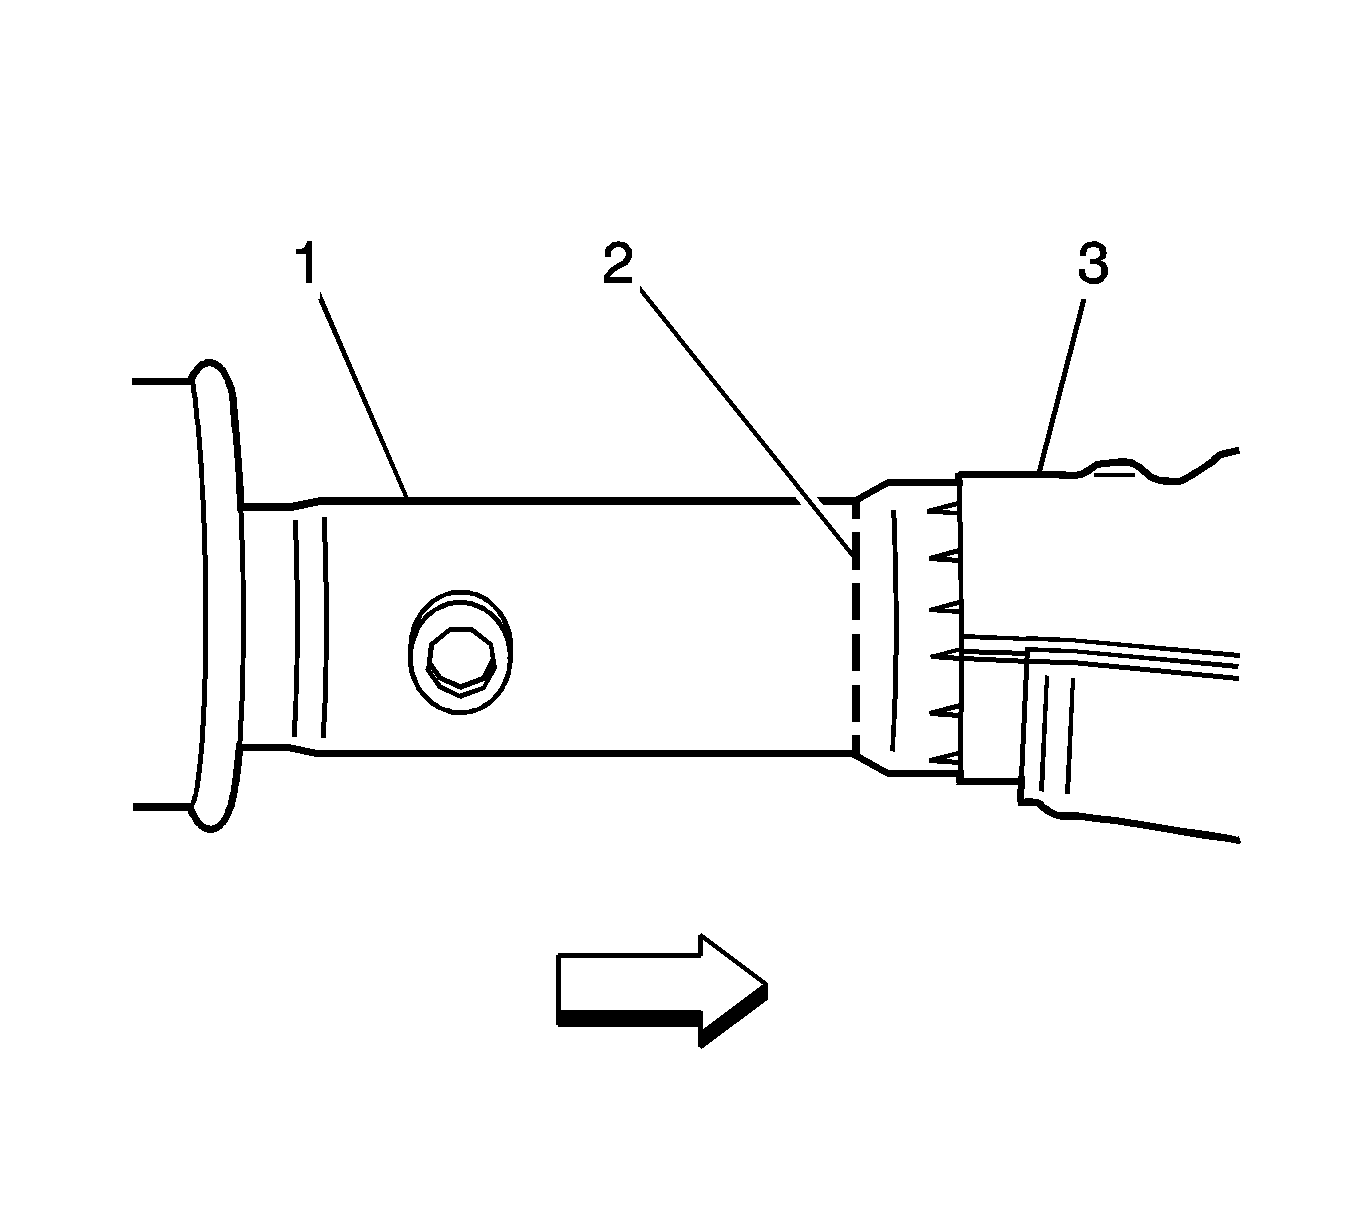
- Cut (2) the catalytic converter (3) from the resonator inlet pipe (1) ahead of the step but as close to the step as the tool will permit.
- Remove and properly discard the catalytic converter.
- DO NOT REPLACE the following complete exhaust systems when replacing the catalytic converter.
- Ensure the catalytic converter heat shield is upward. The "honeycomb" side faces downward.
- Slide the new catalytic converter, P/N 25755681, onto the resonator inlet pipe until it is fully seated against the heated oxygen sensor boss.
- Install a new exhaust seal, P/N 03544534, on the four studs.
- Install the converter onto the rear exhaust manifold pipe.
- Install the four nuts securing the catalytic converter to the rear exhaust manifold pipe.
- Install the 2 bolts securing the center exhaust hangers to the rear suspension support brackets.
- Tighten the catalytic converter nuts in a crisscross pattern to 25 Nm (18 lb ft).
- Tighten the center exhaust hanger bolts to 30 Nm (22 lb ft).
- Install two exhaust clamps, P/N 15992529, on the converter pipe with the two clamp ends 180 degrees from each other. Each set of clamp nuts should face opposite directions for proper sealing.
- Remove the adjustable jack stand.
- Lower the vehicle and inspect for exhaust leaks.
Caution:
• In order to avoid being burned, do not service the exhaust system while
it is still hot. Service the system when it is cool. • Always wear protective goggles and gloves when removing exhaust parts
as falling rust and sharp edges from worn exhaust components could result in serious
personal injury.


Important: Use care not to overextend the heated oxygen sensor pigtail.

Important: Ensure the cut is made on the catalytic converter side of the pipe.
Important:
• 25727006 • 88959335 • 88959334 • 25727009 • 25709529
Tighten
Important: Ensure the catalytic converter outlet pipe is fully seated against the heated oxygen sensor boss.
Tighten
Tighten the service clamp nuts to 30 N·m(22 lb ft),
Parts Information
Part Number | Description | Qty |
|---|---|---|
25755681 | Catalytic Converter | 1 |
11517031 | Nut (Only Order As Needed) | 4 |
03544534 | Gasket, Catalytic Converter | 1 |
15992529 | Clamp | 2 |
Parts are currently available from GMSPO.
Warranty Information
For vehicles repaired under warranty, use:
Labor Operation | Description | Labor Time |
|---|---|---|
L2300 | Catalytic Converter Replacement | 0.5 hr |
Add A | Diagnosis Time | 0.0 -- 0.3 hr |
