For 1990-2009 cars only
Removal Procedure
- Remove the bottom pan and seal, scavenge screens, and the lip seals. Refer to Transfer Oil Pump Inlet Screen and Pipe Seal Replacement .
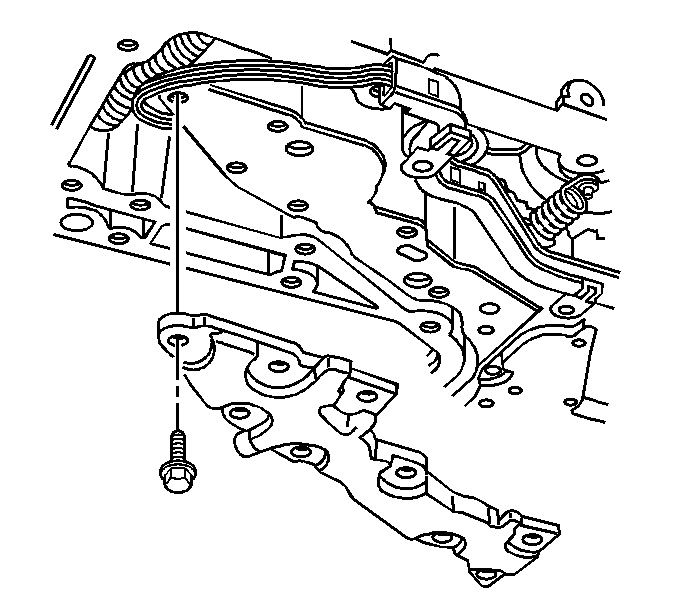
- Remove the bolts from the oil transfer plate and the wire harness extension retaining clip.
- Remove the oil transfer plate.
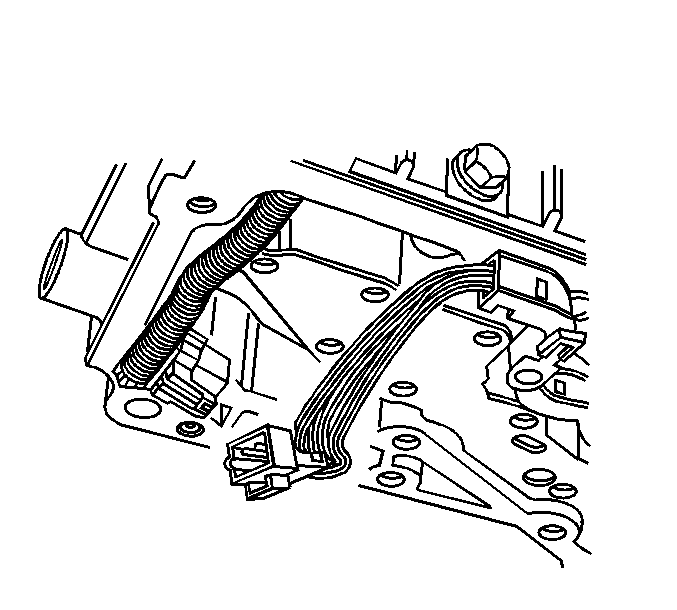
- Disconnect the wire harness extension from the wire harness assembly.
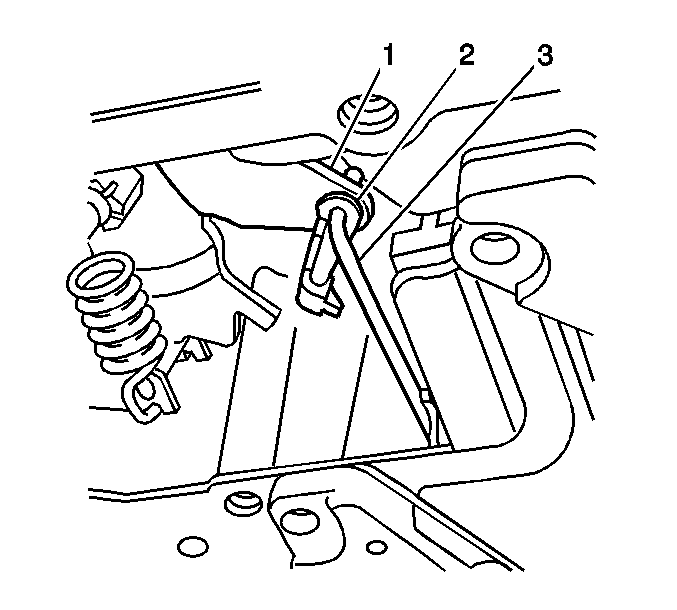
- Use a small screwdriver in order to disconnect the manual valve link retainer (2) from the manual valve link (3).
- Remove the manual valve link (3) from the inside detent lever (1).
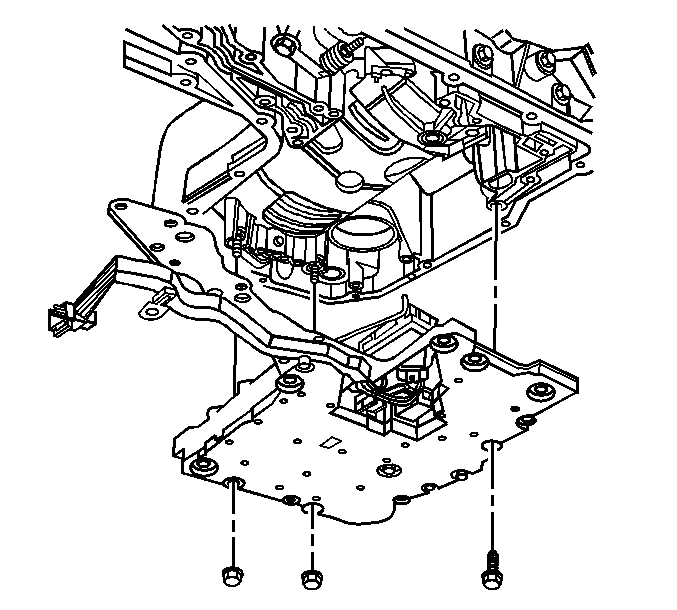
- Remove the two nuts and fourteen bolts from the lower valve assembly.
- Remove the lower valve assembly (consisting of the channel plate, control valve body, accumulator assembly, and wire harness extension) from the transaxle case as a single unit.
- For disassembly of the lower control valve body assembly. Refer to Control Valve Lower Body Disassemble in Automatic Transaxle - 4T80-E Unit Repair Manual.


Important: Do not reuse the retainer (2), it must be replaced.
Important: Do not pry the internal mode switch assembly.

Installation Procedure
- For reassembly of the lower control valve body assembly. Refer to Lower Control Valve Body and Transmission Fluid Pressure Switch Install in Automatic Transaxle - 4T80-E Unit Repair Manual.
- Install the lower valve assembly (consisting of the channel plate, control valve body, accumulator assembly, and the wire harness extension) to the transaxle case as a single unit.
- Place the Lower valve assembly over the forward support studs.
- Hand start the bolts and nuts to the lower valve assembly.
- Install the oil transfer plate.
- Position the wire harness extension retaining clip over the appropriate bolt hole in the oil transfer plate.
- Hand start the bolts to the oil transfer plate.
- Insert the manual valve link (3) into the inside detent lever (1).
- Connect the wire harness extension to the wire harness assembly.
- Install the bottom pan and seal, the scavenger screens, and the lip seals. Refer to Transfer Oil Pump Inlet Screen and Pipe Seal Replacement .
- Reset the TAP values. Refer to Transmission Adaptive Functions.


Notice: Refer to Fastener Notice in the Preface section.
Tighten
Tighten the Lower valve assembly and the oil transfer plate bolts and nuts to 11 N·m (97 lb in).

Important: Do not reuse retainer (2), it must be replaced.
Clip the manual valve link retainer (2) onto the manual valve link (3).

Important: It is recommended that transmission adaptive pressure (TAP) information be reset.
Resetting the TAP values using a scan tool will erase all learned values in all cells. As a result, The ECM, PCM or TCM will need to relearn TAP values. Transmission performance may be affected as new TAP values are learned.