For 1990-2009 cars only
Removal Procedure
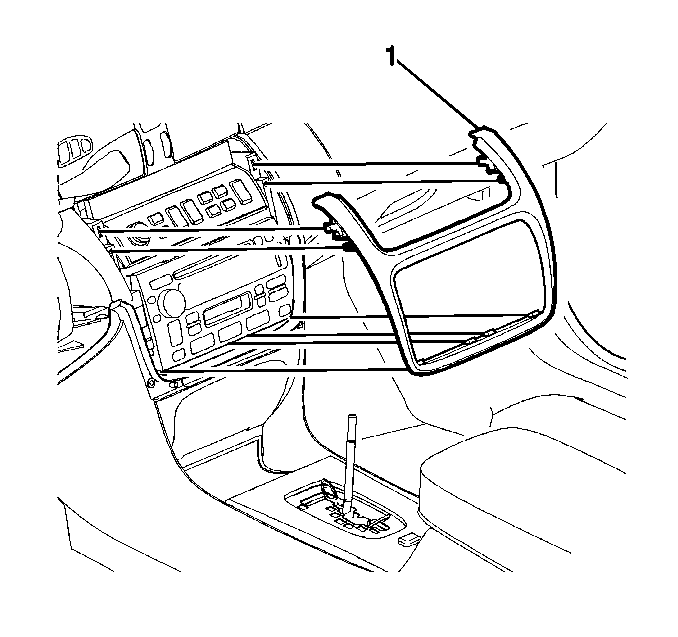
- Remove the instrument panel center trim plate (1). Refer to Instrument Panel Center Trim Panel Replacement in Instrument Panel, Gages, and Console.
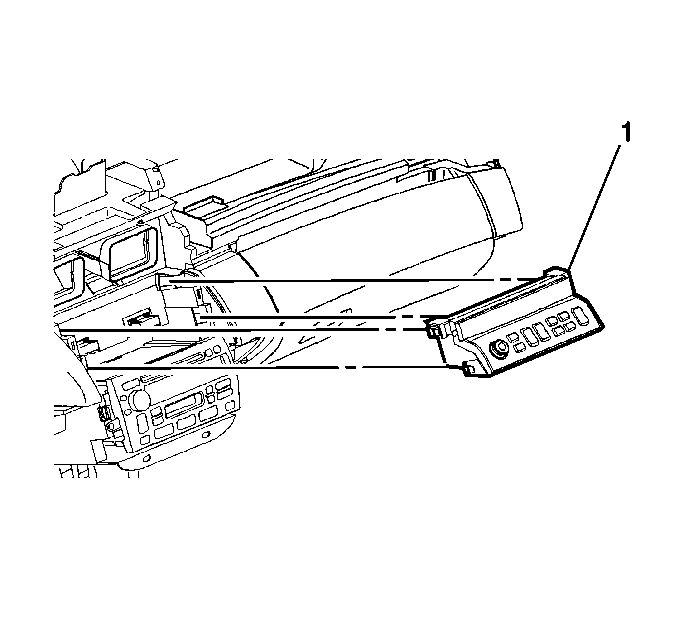
- Depress and hold the locking tabs, located on the 4 corners of the HVAC control assembly.
- Disconnect the electrical connectors from the HVAC control.
- Remove the HVAC control assembly (1) from the instrument panel.

Pull the HVAC control away from the instrument panel.

Installation Procedure
- Connect the HVAC electrical connectors.
- Install the HVAC control assembly (1) into the instrument panel.
- Install the instrument panel center trim plate (1). Refer to Instrument Panel Center Trim Panel Replacement in Instrument Panel, Gages, and Console.
- Start the engine and let run for one minute.

Important: The ignition must be in the OFF position when connecting the electrical connectors to ensure proper actuator calibration.
Push the HVAC control assembly (1) into the instrument panel opening in order to engage the retainers.

Important: Do not adjust any controls on the HVAC control module while the HVAC control module is self-calibrating. If interrupted improper HVAC performance will result.
The engine must be running for proper calibration to occur.