Removal Procedure
- Raise the vehicle. Refer to Lifting and Jacking the Vehicle .
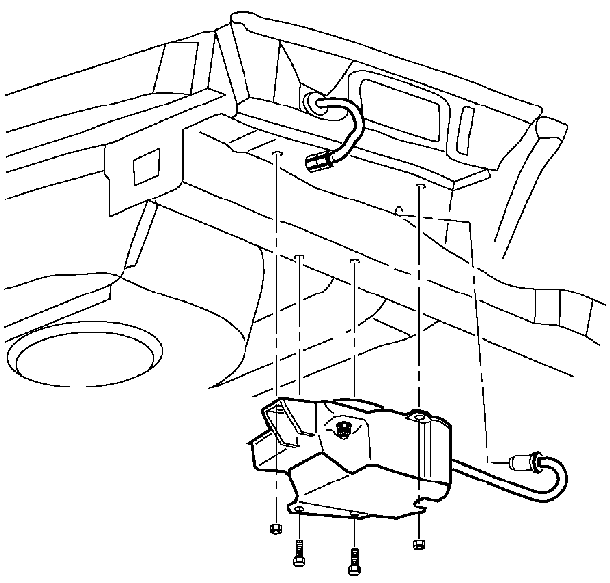
- Disconnect the air tube from the air dryer.
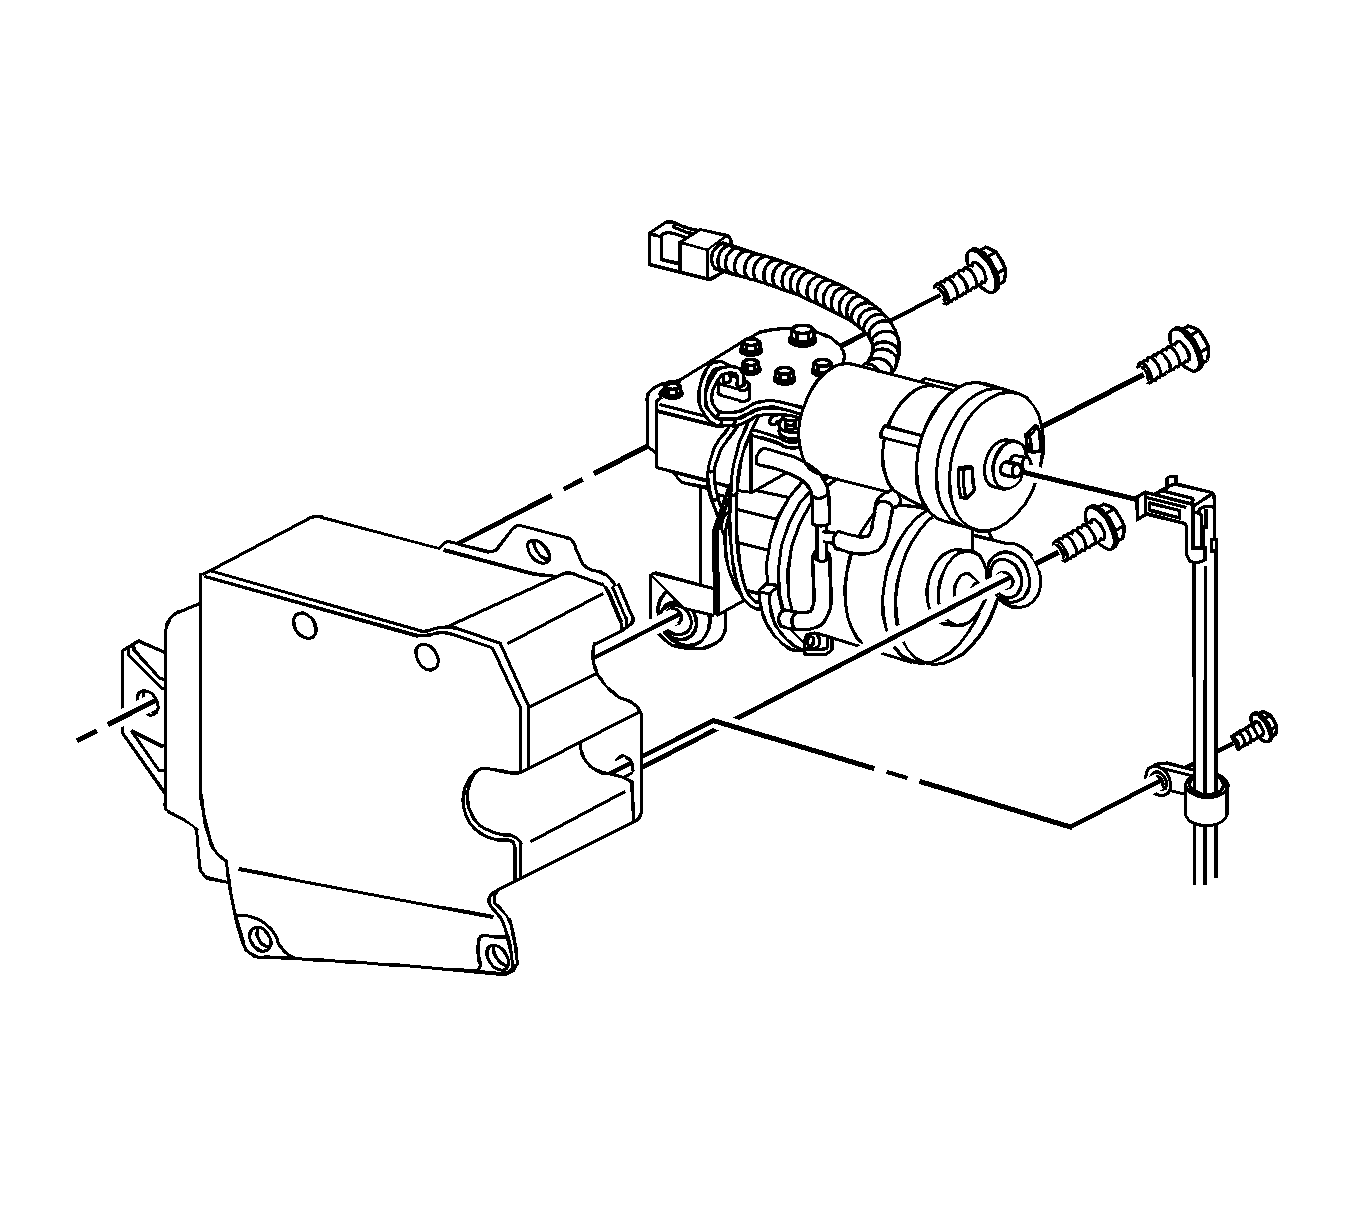
- Remove the bolt and the harness tie with the air tube from the air compressor bracket.
- Remove the intake air filter from the vehicle.
- Remove the vehicle harness connector from the air compressor connector.
- Remove the 2 nuts, 2 bolts, and the air compressor assembly from the vehicle.
- Slide the air compressor connector off of the connector anchor.
- Remove 2 bolts and the heat shield from the air compressor bracket.
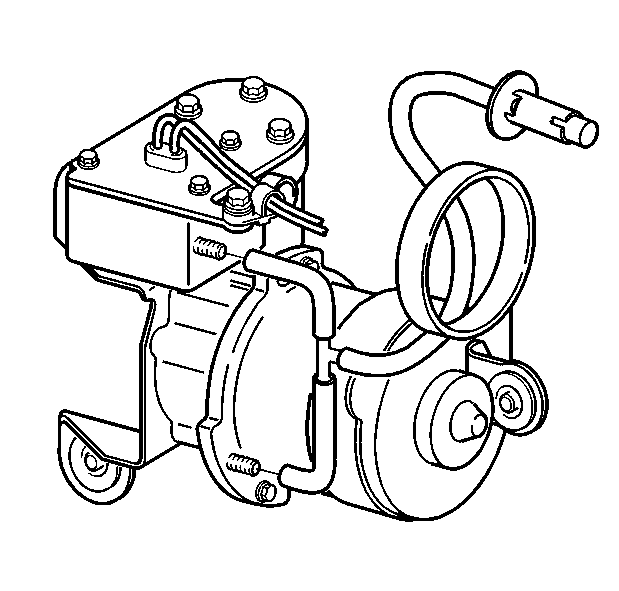
- Remove the air dryer from the air compressor. Refer to Automatic Level Control Air Dryer Replacement .
- Remove the air hose from the air compressor at 2 places.
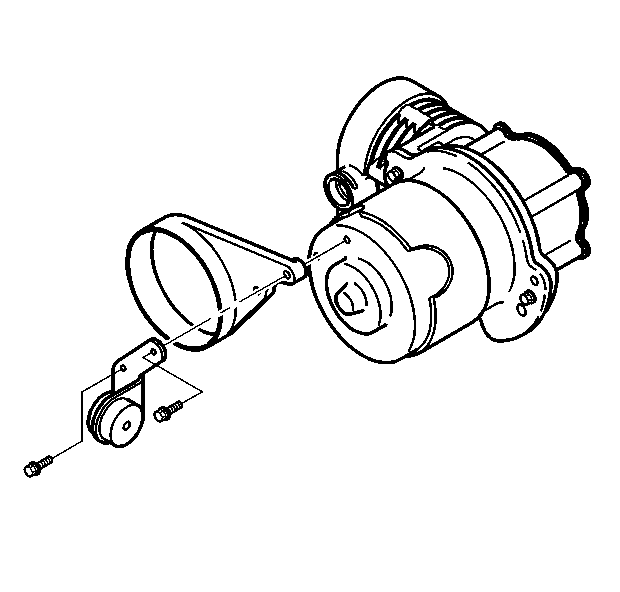
- Remove the 2 screws and the 2 brackets from the air compressor.
Important: Before disconnecting the air hose from the intake air filter or the air compressor, clean the components and the surrounding area to prevent dirt and other foreign material from entering the ALC system.


Installation Procedure
- Install the 2 brackets on the air compressor with 2 screws.
- Connect the air hose to the air compressor at 2 places.
- Install the air dryer on the air compressor. Refer to Automatic Level Control Air Dryer Replacement .
- Install the heat shield on the air compressor bracket with three bolts (Do not install the fourth heat shield bolt. It must be installed after the air tube is connected).
- Install the air compressor connector to the connector anchor.
- Install the air compressor assembly on the vehicle with 2 nuts and 2 bolts.
- Connect the harness connector to the air compressor connector.
- Install the intake air filter on the vehicle.
- Connect the air tube to the air dryer.
- Connect the air tube and the harness tie to the air compressor bracket with the bolt.
- Lower the vehicle. Refer to Lifting and Jacking the Vehicle .

Notice: Use the correct fastener in the correct location. Replacement fasteners must be the correct part number for that application. Fasteners requiring replacement or fasteners requiring the use of thread locking compound or sealant are identified in the service procedure. Do not use paints, lubricants, or corrosion inhibitors on fasteners or fastener joint surfaces unless specified. These coatings affect fastener torque and joint clamping force and may damage the fastener. Use the correct tightening sequence and specifications when installing fasteners in order to avoid damage to parts and systems.
Tighten
Tighten 2 screws to 7 N·m (62 lb in).


Tighten
Tighten the bolts to 4 N·m (35 lb in).

Tighten
| • | Tighten the bolts to 9 N·m (80 lb in). |
| • | Tighten the two nuts to 9 N·m (80 lb in). |

Tighten
Tighten the bolt to 4 N·m (35 lb in).
Important: Before driving the vehicle, turn the ignition on and wait approximately 45 seconds. This will ensure that the air adjustable shock absorbers are filled with residual pressure.
