For 1990-2009 cars only
Removal Procedure
- Record the RIM personalization settings. Refer to Control Module References .
- Remove the rear storage compartment trim. Refer to Rear Compartment Front Trim Panel Replacement in Body Rear End.
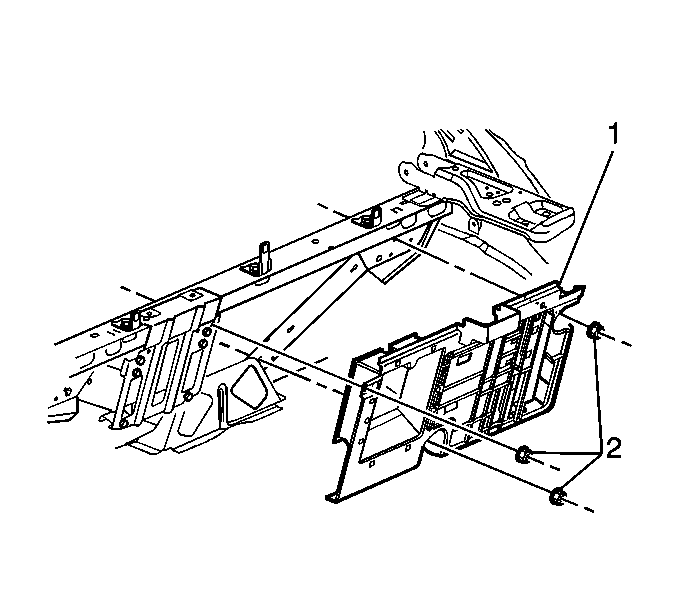
- Remove the mounting bracket fasteners (2).
- Pull the mounting bracket (1) away from the body and place the mounting bracket (1) module side up in the rear compartment.
- Disconnect the RIM (1) electrical connectors.
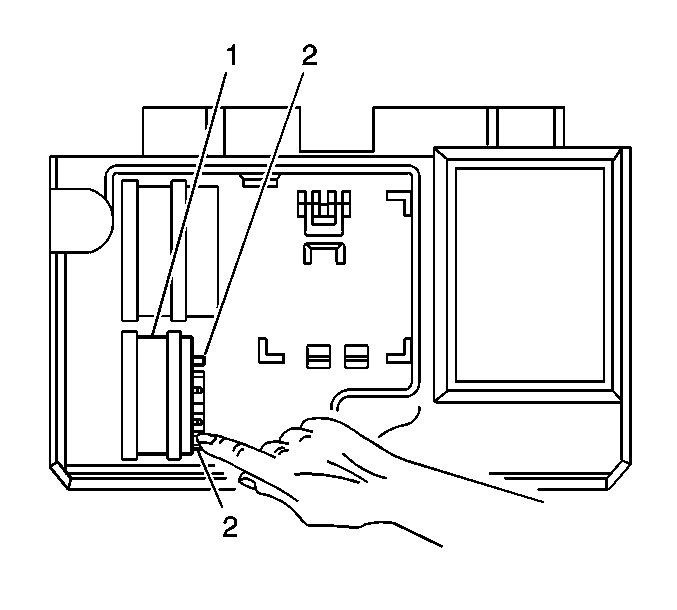
- Depress inward on the locking tabs (2).
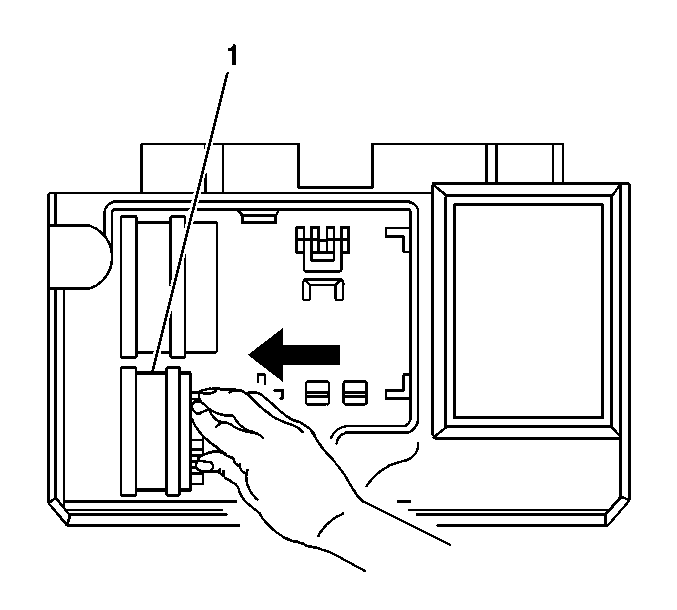
- With the locking tabs (2) depressed, slide the RIM (1) out of the mounting bracket.
- Remove the RIM (1) from the mounting bracket.
Important: Before replacing the rear integration module (RIM), record the personalization settings in order to restore the settings after the new module is installed.


Installation Procedure
- Install the RIM (1) to the mounting bracket.
- Push the RIM (1) into the mounting bracket until an audible click is heard indicating the locking tabs are fully engaged.
- Connect the RIM (1) electrical connectors.
- Install the mounting bracket (1) to the vehicle body.
- Install the mounting bracket fasteners (2).
- Install the rear compartment trim. Refer to Rear Compartment Front Trim Panel Replacement in Body Rear End.
- Program the body control module (BCM) and restore the personalization settings. Refer to Body Control Module Programming and Setup in Programming and Setup.
- Refer to Control Module References for programming and setup information.

Notice: Refer to Fastener Notice in the Preface section.

Tighten
Tighten the fasteners (2) to 9 N·m (80 lb in).
