Rear Side Door Trim Panel Replacement Standard
Tools Required
J 36796 Clip Zip Clip Removal Tool or J 38778 Door Trim Pad Clip Remover
Removal Procedure
- Position the window fully downward.
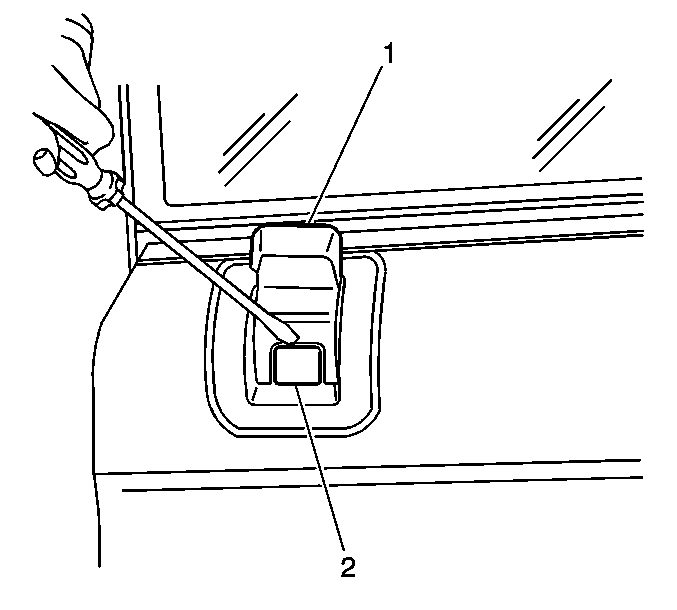
- Ensure the manual lock knob (1) is in the unlock position.
- Insert a flat bladed tool into the top service notch in order to disengage the locking clip (2) located at the front of the manual lock knob (1).
- Remove the manual lock knob (1).
- Remove the inside handle bezel from the inner door panel in the following order:
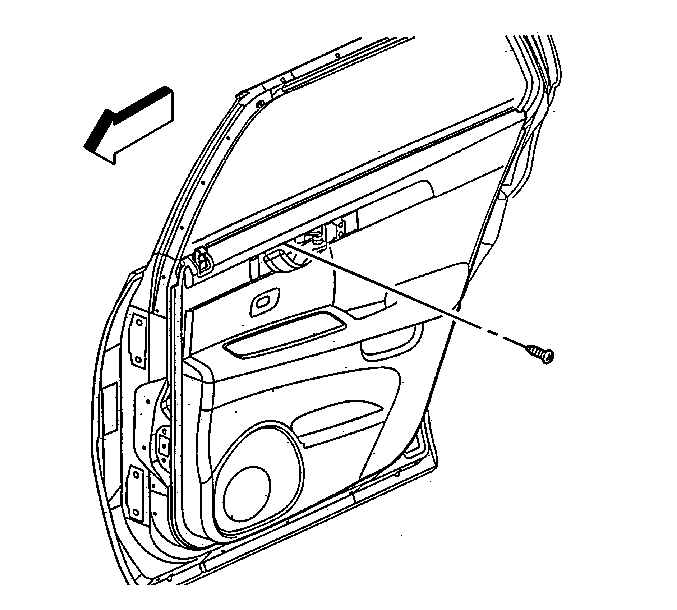
- Remove the screw attaching the inside door handle to the sheet metal.
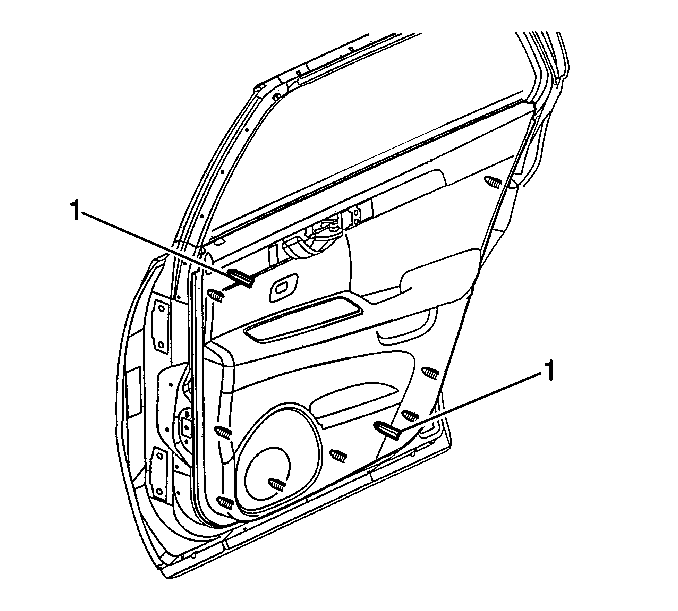
- Use the J 36796 or J 38778 in order to release the eight retainers (1) around the outside edges of the door trim panel.
- Slide the door trim panel (1) upwards to release it from the following:
- Disconnect the door trim panel electrical connector.
| 5.1. | Hold the inside handle to the open position. |
| 5.2. | Insert a flat bladed tool at the front lower corner of the bezel. |
| 5.3. | Pry outward on the bezel. |
| 5.4. | Remove the bezel from the inner door panel. |
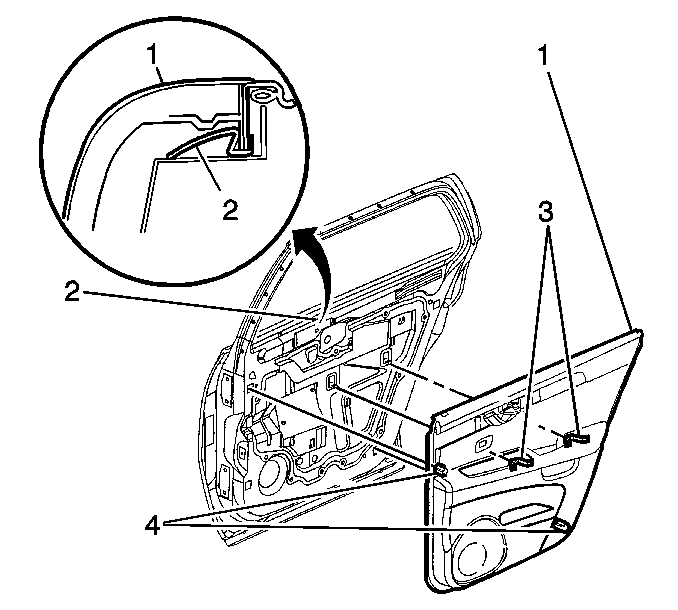
| • | The alignment datums (4) |
| • | The eight retainers |
| • | The arm rest steel retainer clips (3) |
| • | The inner belt molding (2) |
Installation Procedure
- Position the manual lock rod (1) vertically into the bell crank retainer clip (2).
- Slide the electrical connector (4) into position on the water deflector (1).
- Remove the steel retainer clips (2) from the arm rest pull handle brackets.
- Slide the steel clips (2) into the nylon nuts (3).
- Install the door trim panel to the inner door in the following order:
- Install the screw attaching the inside door handle to the sheet metal.
- Install the inside handle bezel to the inner door panel in the following order:
- Position the manual lock knob (1) into the bezel opening until the locking clip (2) bottoms out on the bezel.
- Engage the locking clip (2) located at the front of the lock knob (1) to the lock rod.
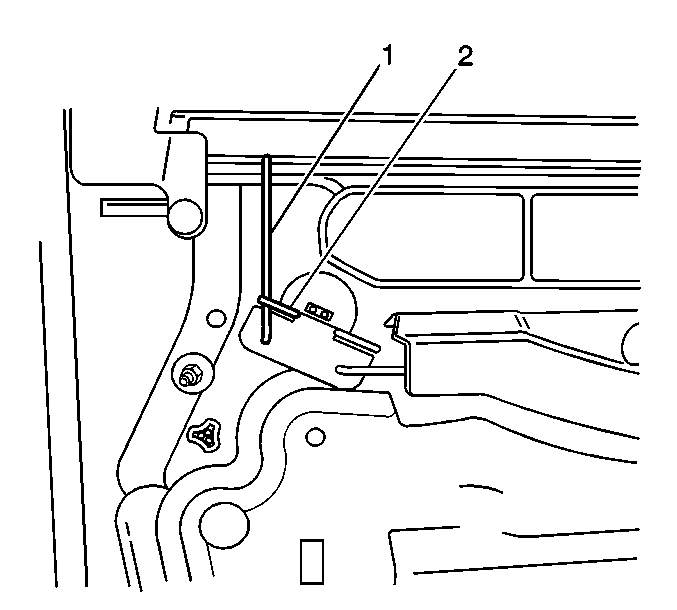
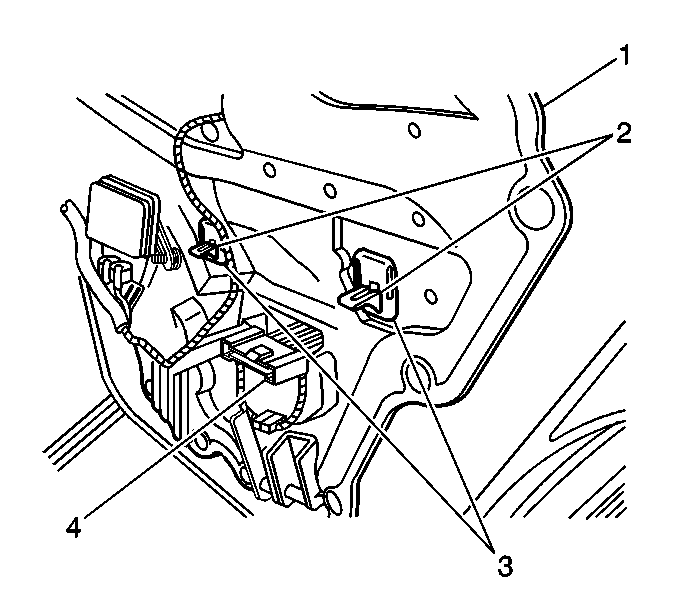

| 5.1. | Position the door trim panel (1) downward over the following: |
| • | The manual lock rod |
| • | The inner belt molding (2) |
| 5.2. | Engage the door trim panel simultaneously into the following: |
| • | The alignment datums (4) |
| • | The electrical connector |
| • | The armrest pull handle retainer clips (3) |
| • | The eight retainers |
Caution: This screw must be properly installed. This screw is critical in order to maintain retention of the inside handle to the slider-glide mechanism. Failure to properly install this screw may allow the door to unlatch during a collision, resulting in personal injury.

Notice: Use the correct fastener in the correct location. Replacement fasteners must be the correct part number for that application. Fasteners requiring replacement or fasteners requiring the use of thread locking compound or sealant are identified in the service procedure. Do not use paints, lubricants, or corrosion inhibitors on fasteners or fastener joint surfaces unless specified. These coatings affect fastener torque and joint clamping force and may damage the fastener. Use the correct tightening sequence and specifications when installing fasteners in order to avoid damage to parts and systems.
Tighten
Tighten the screw to 0.5 N·m (4 lb in).
| 7.1. | Hold the inside handle to the open position. |
| 7.2. | Insert the rear hook on the bezel to the wood trim tab. |
| 7.3. | Press the forward end of the bezel inward until it is fully seated. |
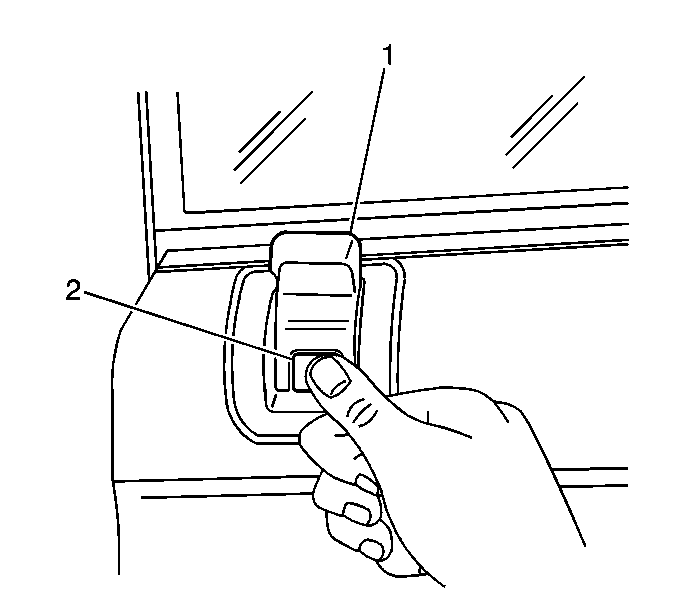
Important: Ensure the manual lock rod is in the full up/unlocked position.
Rear Side Door Trim Panel Replacement WC2, WC8
Tools Required
| • | J 36796 Clip Zip Clip Removal Tool |
| • | J 38778 Door Trim Pad Clip Remover |
Removal Procedure
- Ensure the manual lock knob (1) is in the unlock position.
- Insert a flat bladed tool into the top service notch in order to disengage the locking clip (2) located at the front of the manual lock knob (1).
- Remove the manual lock knob (1).
- Remove the inside handle bezel from the inner door panel in the following order:
- Remove the screw attaching the inside door handle to the sheet metal.
- Use J 36796 or J 38778 in order to release the eight retainers (1) around the outside edges of the door trim panel.
- Slide the door trim panel (1) upwards to release the panel from the following components:
- Disconnect the door trim panel electrical connector.

Important: Do NOT scratch the window on the armored vehicle.

| 4.1. | Hold the inside handle to the open position. |
| 4.2. | Insert a flat bladed tool at the front lower corner of the bezel. |
| 4.3. | Pry outward on the bezel. |
| 4.4. | Remove the bezel from the inner door panel. |


| • | The alignment datums (4) |
| • | The 8 retainers |
| • | The arm rest steel retainer clips (3) |
| • | The inner belt molding (2) |
Installation Procedure
- Position the manual lock rod (1) vertically into the bell crank retainer clip (2).
- Slide the electrical connector (4) into position on the water deflector (1).
- Remove the steel retainer clips (2) from the arm rest pull handle brackets.
- Slide the steel clips (2) into the nylon nuts (3).
- Install the door trim panel to the inner door in the following order:
- Install the screw attaching the inside door handle to the sheet metal.
- Install the inside handle bezel to the inner door panel in the following order:
- Position the manual lock knob (1) into the bezel opening until the locking clip (2) bottoms out on the bezel.
- Engage the locking clip (2) located at the front of the lock knob (1) to the lock rod.


| 5.1. | Position the door trim panel (1) downward over the following: |
| • | The manual lock rod |
| • | The inner belt molding (2) |
| 5.2. | Engage the door trim panel simultaneously into the following: |
| • | The alignment datums (4) |
| • | The electrical connector |
| • | The armrest pull handle retainer clips (3) |
| • | The eight retainers |
Caution: This screw must be properly installed. This screw is critical in order to maintain retention of the inside handle to the slider-glide mechanism. Failure to properly install this screw may allow the door to unlatch during a collision, resulting in personal injury.

Notice: Use the correct fastener in the correct location. Replacement fasteners must be the correct part number for that application. Fasteners requiring replacement or fasteners requiring the use of thread locking compound or sealant are identified in the service procedure. Do not use paints, lubricants, or corrosion inhibitors on fasteners or fastener joint surfaces unless specified. These coatings affect fastener torque and joint clamping force and may damage the fastener. Use the correct tightening sequence and specifications when installing fasteners in order to avoid damage to parts and systems.
Tighten
Tighten the screw to 0.5 N·m (4 lb in).
| 7.1. | Hold the inside handle to the open position. |
| 7.2. | Insert the rear hook on the bezel to the wood trim tab. |
| 7.3. | Press the forward end of the bezel inward until the bezel is fully seated. |

Important: Ensure the manual lock rod is in the full up/unlocked position.
