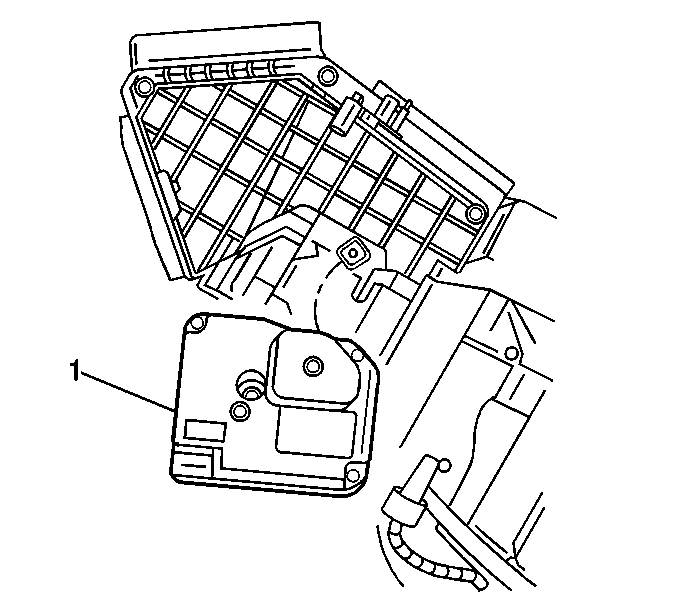
Important: The passenger air temperature actuator must be properly aligned with the temperature
door shafts prior to installation on the vehicle.

- Test fit the actuator to verify alignment
of the cams on the replacement air temperature actuator with the temperature door
shafts. If the cams and shafts are out of alignment, adjust the shafts first and proceed
to cam adjustment only if necessary.
- To adjust the shafts, do the following:
| 2.1. | Rotate the inner and outer shafts slightly rearward. The shafts have a
limited range of travel and should not be forced. |
| 2.2. | Test fit the temperature actuator to the shafts. Be sure to align the
inner shaft first. |
Important: The following steps will set an out range trouble code for the actuator. Be
sure to erase this code when the repair is complete.
- To adjust the cams, do the following:
| 3.1. | Install the electrical connector to the actuator. |
| 3.2. | Hold the actuator away from the shafts and turn the ignition to ON. The
actuator will enter the automatic re-calibration mode. The cams will continue to turn
until the ignition is turned to OFF. |
| 3.3. | Observe the motion of the cams on the actuator and turn the ignition OFF
when the cams are aligned with the position of the temperature door shafts. |
| 3.4. | Test fit the temperature actuator to the shafts. If necessary, repeat
the cam adjustment. |
- Install the air temperature actuator assembly (1) to the HVAC
module.

Notice: Use the correct fastener in the correct location. Replacement fasteners
must be the correct part number for that application. Fasteners requiring
replacement or fasteners requiring the use of thread locking compound or sealant
are identified in the service procedure. Do not use paints, lubricants, or
corrosion inhibitors on fasteners or fastener joint surfaces unless specified.
These coatings affect fastener torque and joint clamping force and may damage
the fastener. Use the correct tightening sequence and specifications when
installing fasteners in order to avoid damage to parts and systems.
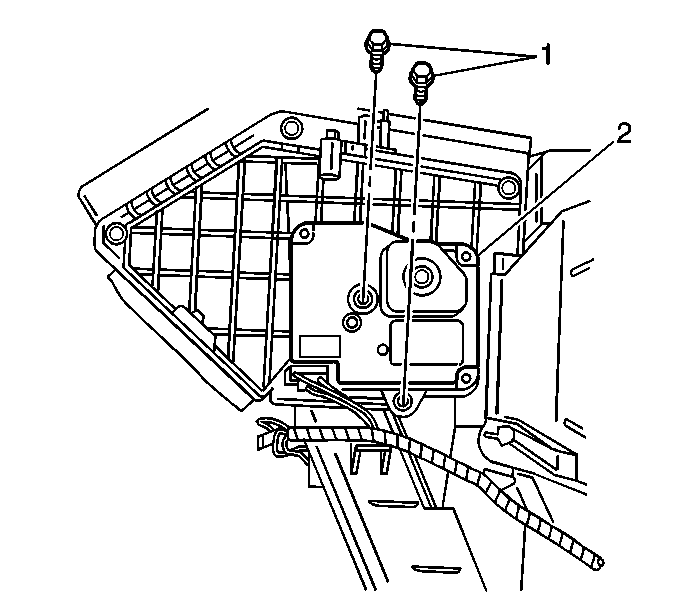
- Install the air temperature actuator assembly (2) retaining screws (1).
Tighten
Tighten the screws (1) to 1.4 N·m (12 lb in).
- Install the electrical connector to the air temperature actuator assembly (2).
- Install the instrument panel storage compartment. Refer to
Instrument Panel Storage Compartment Replacement
in Instrument Panel, Gages, and Console.
- Recalibrate the actuators. Refer to
Actuator Recalibration
.


