Removal Procedure
- Remove the front seat back trim cover. Refer to Front Seat Back Trim Replacement in Seats.
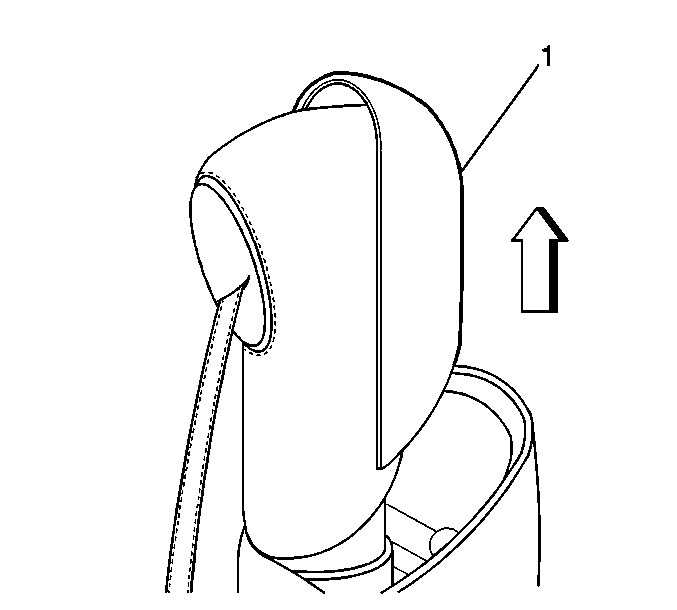
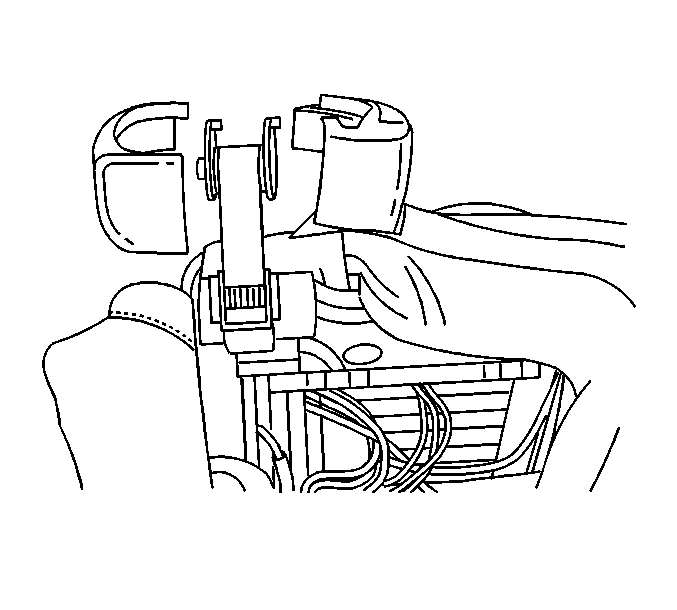
- Remove the rear half of the shoulder belt post trim (1) by applying upward pressure in order to release the trim cover (1).
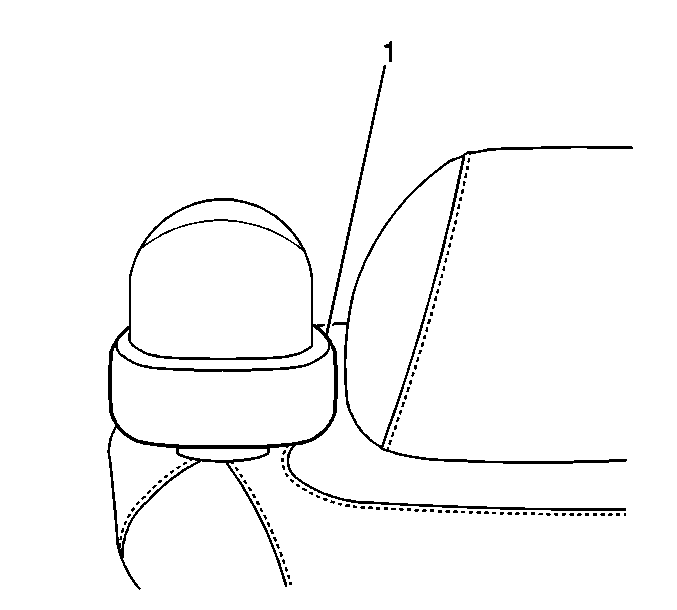
- Remove the shoulder belt tower close-out ring (1) by pulling up on the rear of the close-out ring (1) in order to release the hold-down retainer and to remove the close-out ring.
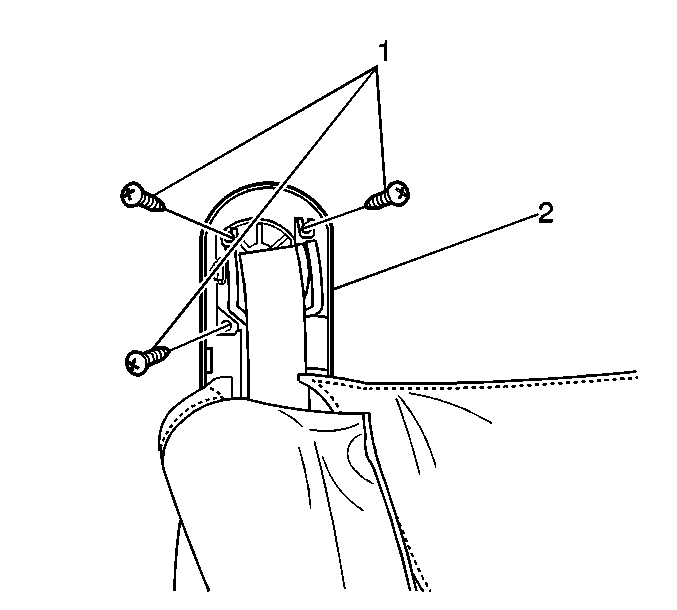
- Remove the front half of the shoulder belt post trim (2) by removing the 3 fasteners (1) from the cover.
- Remove the seat back cover J channels from the top and from both sides of the seat back.
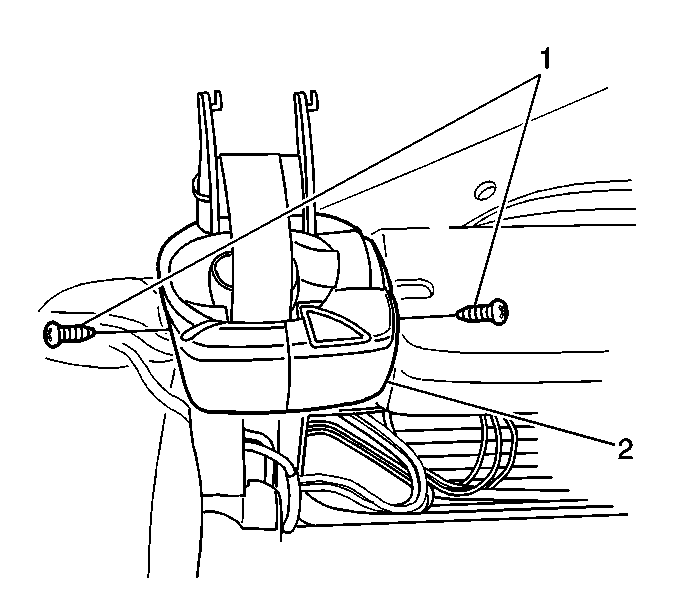
- Remove the seat cover from the upper trim retainer (2).
- Remove the 2 fasteners (1) from the upper trim retainer (2).
- Separate the upper trim retainer halves and remove both halves of the upper trim retainer from the seat.
- Inscribe a mark on the seat back frame above the upper trim retaining bracket in order to ensure proper alignment of the bracket during reassembly.
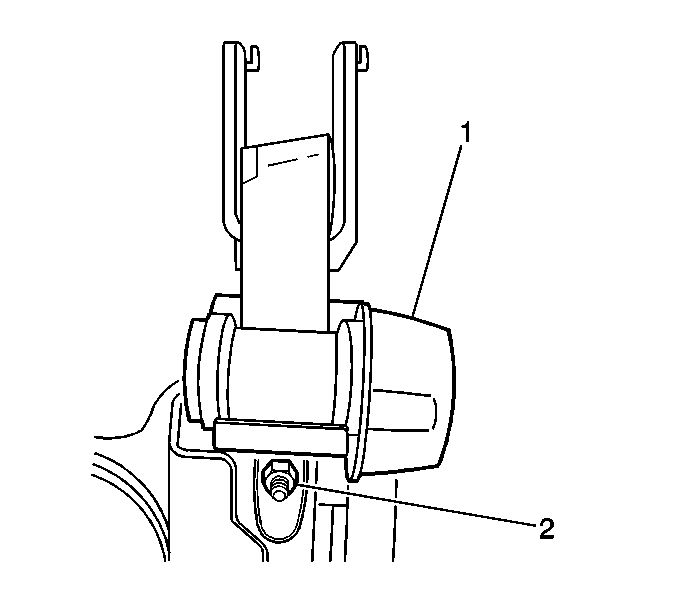
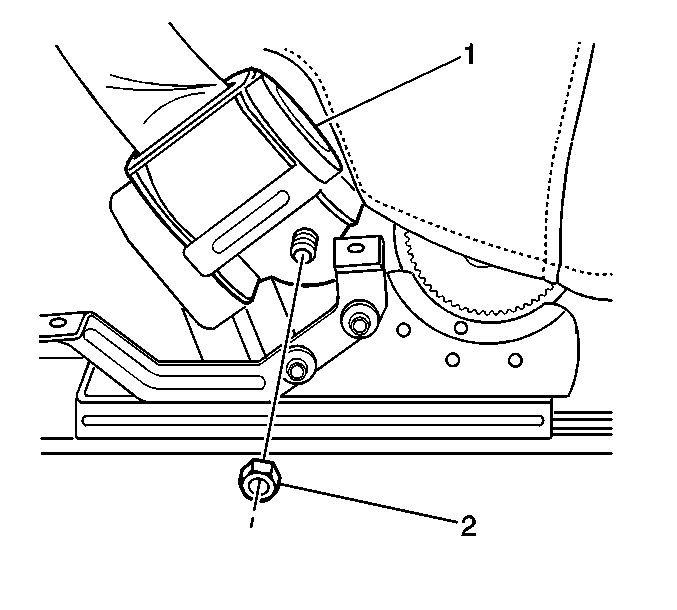
- Remove the fastener (2) from the upper seat belt retractor (1).
- Remove the upper seat belt retractor (1) from the seat frame.
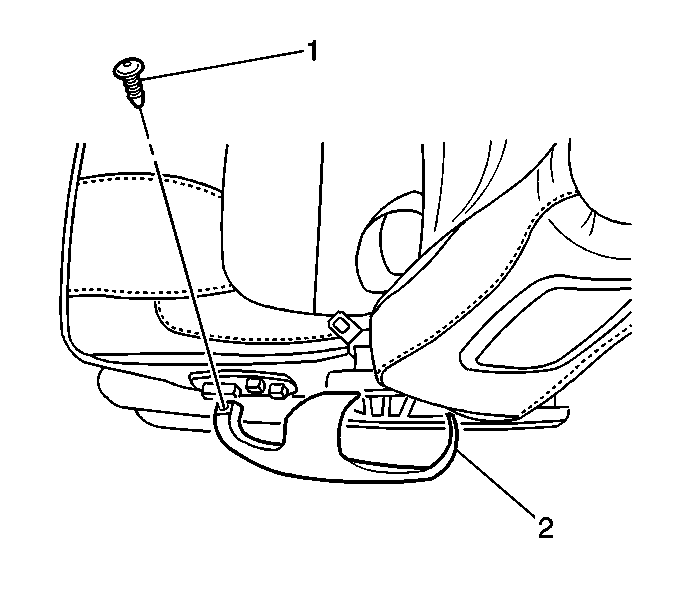
- Remove the push pin retainer (1) from the front edge of the lower seat belt retractor trim cover (2).
- Release the rear of the lower seat belt retractor trim cover (2) and remove the lower seat belt retractor trim cover.
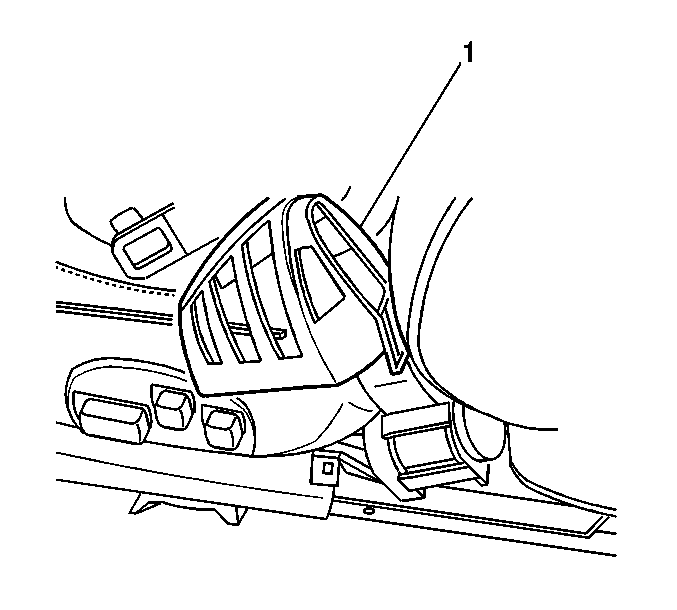
- Release the tabs and remove the lower seat belt guide (1) from the lower seat belt retractor.
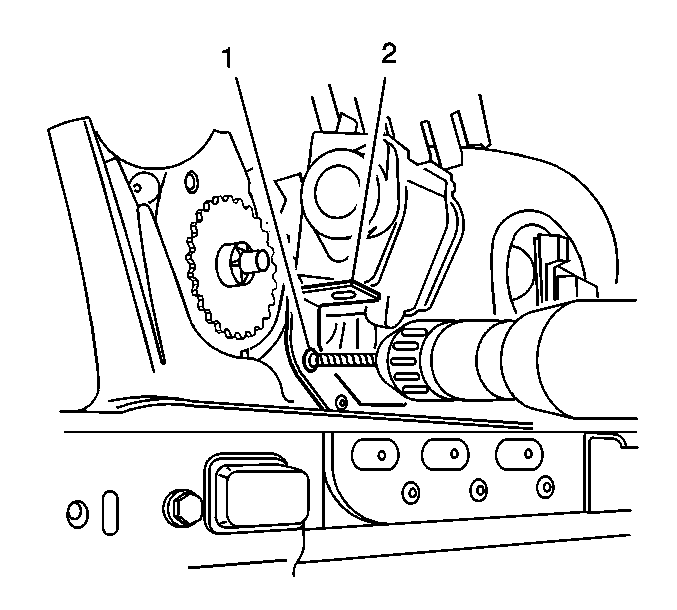
- Remove the upper rivet (1) from the lower seat belt guide bracket (2) and rotate the seat belt guide bracket in order to allow clearance for the lower seat belt retractor to be removed.
- Remove the fastener (2) from the lower seat belt retractor (1).
- Remove the lower seat belt retractor (1).
- Remove the seat belt retractors and the trim assembly from the vehicle.
Caution: Refer to SIR Caution in the Preface section.
Installation Procedure
- Ensure that the seat belt is not twisted before installing the lower retractor.
- Install the lower seat belt retractor (1) to the mounting stud.
- Install the fastener (2).
- Align the seat belt guide bracket with the seat frame, and install a new rivet.
- Install the lower retractor seat belt guide cover (1).
- Install the lower retractor trim cover (2).
- Install the push-pin fastener (1).
- Install the upper trim retaining bracket (1).
- Position the upper shoulder belt retractor over the seat belt roller.
- Install the upper shoulder belt retractor (1).
- Install the fastener (2).
- Install the upper trim retainer over the upper shoulder belt retractor.
- Install the upper trim fasteners (1).
- Ensure that the upper trim bracket and mounting fasteners do not interfere with the proper operation of the upper seat belt retractor
- Install the seat back cover over the trim retainer (2).
- Install the J channels to the seat frame.
- Install the front half of the shoulder belt post trim (2).
- Install the shoulder belt tower close-out ring (1).
- Install the rear half of the shoulder belt tower post trim cover (1).
- Install the front seat back trim cover. Refer to Front Seat Back Trim Replacement in Seats.
- Confirm proper operation of the seat belt retractors.

Ensure that the anti-rotation tab on the seat belt retractor is located properly in the seat frame before tightening the retractor fastener.
Notice: Use the correct fastener in the correct location. Replacement fasteners must be the correct part number for that application. Fasteners requiring replacement or fasteners requiring the use of thread locking compound or sealant are identified in the service procedure. Do not use paints, lubricants, or corrosion inhibitors on fasteners or fastener joint surfaces unless specified. These coatings affect fastener torque and joint clamping force and may damage the fastener. Use the correct tightening sequence and specifications when installing fasteners in order to avoid damage to parts and systems.
Tighten
Tighten the fastener to 55 N·m (41 lb ft).


Important: The upper trim bracket must be parallel with the seat back frame upper cross member in order for the remaining trim to fit properly.
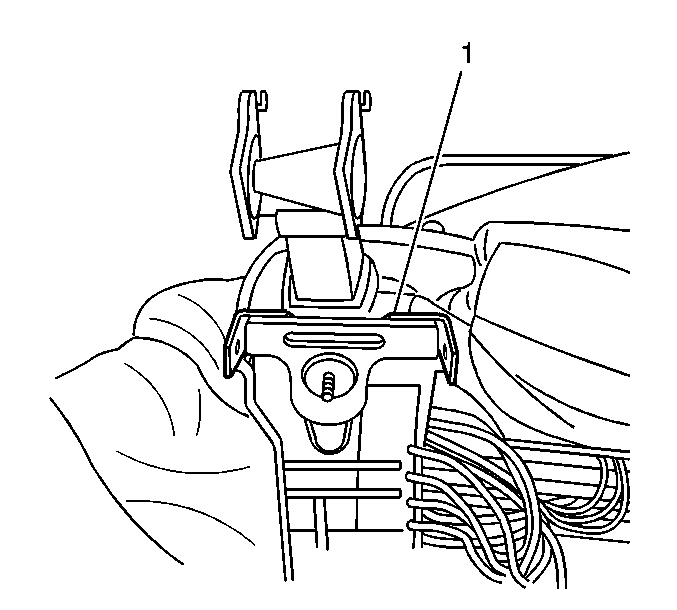
Align the upper trim bracket with the mark inscribed during disassembly.
Ensure that the seat belt is not twisted.

Ensure that the anti-rotation tab on the seat belt retractor and the upper trim retaining bracket are located properly on the seat frame before tightening the retractor fastener.
Tighten
Tighten the fastener to 55 N·m (41 lb ft).


Tighten
Tighten the fasteners (1) to 1.4 N·m
(12 lb in).

Tighten
Tighten the fasteners (1) to 1.4 N·m
(12 lb in).


