BRAKE PEDAL SLOW RELEASE SHORTEN PEDAL HUB TUBE

VEHICLES AFFECTED: 1985-86 FWD Deville and Fleetwood 1986 Eldorado and Seville
Some 1985 and 1986 Front Wheel Drive Devilles and Fleetwoods built prior to BC no. 276692, 1986 Eldorados built prior to BC no. 605210 and Sevilles built prior to BC no. 803755 may experience a condition in which the brake pedal releases slowly after a normal brake apply. This condition may not occur every time the brakes are applied and may sometimes result in dragging brakes if the pedal does not return to the fully released position.
This condition may be caused by interference of the pedal mounting bracket with the pedal pivot. If this condition is encountered, the following procedure should be used to modify the brake pedal.
1. Remove the lower sound insulator panel.
A. Remove both the left and right sound insulator panels on Deville and Fleetwood.
B. Remove only the driver's side sound insulator panel on Eldorado and Seville.
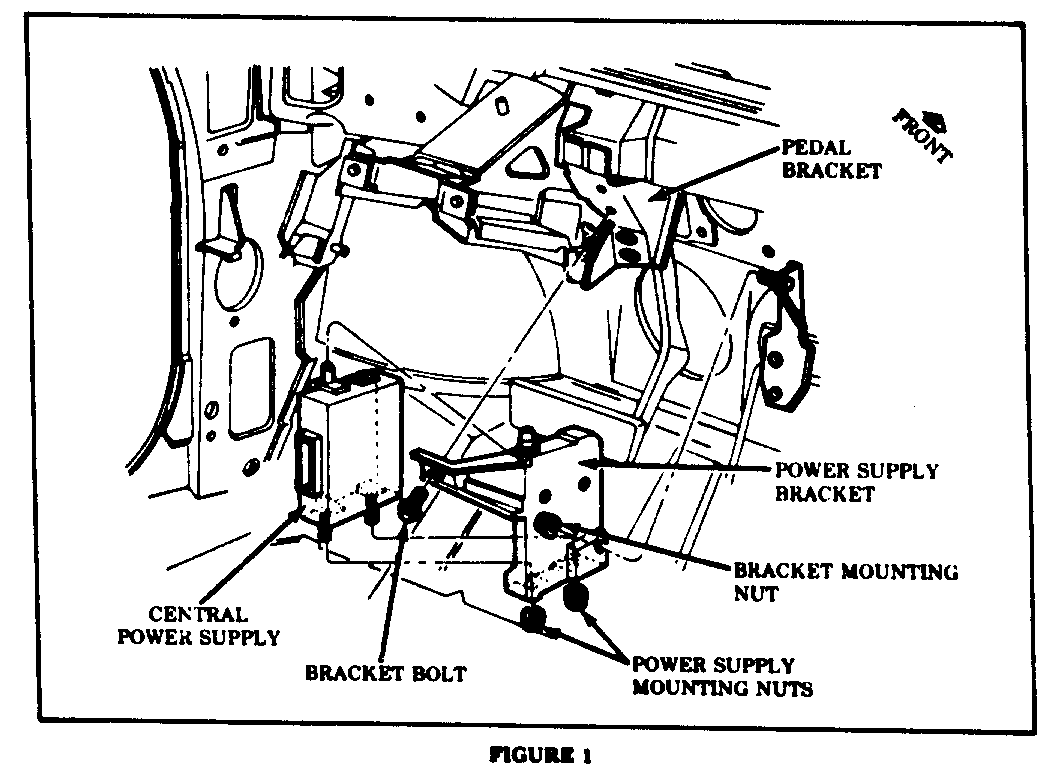
2. On Eldorado and Seville only, remove the central power supply mounting nuts and unplug and remove the power supply as shown in Figure 1. Remove the power supply mounting bracket.
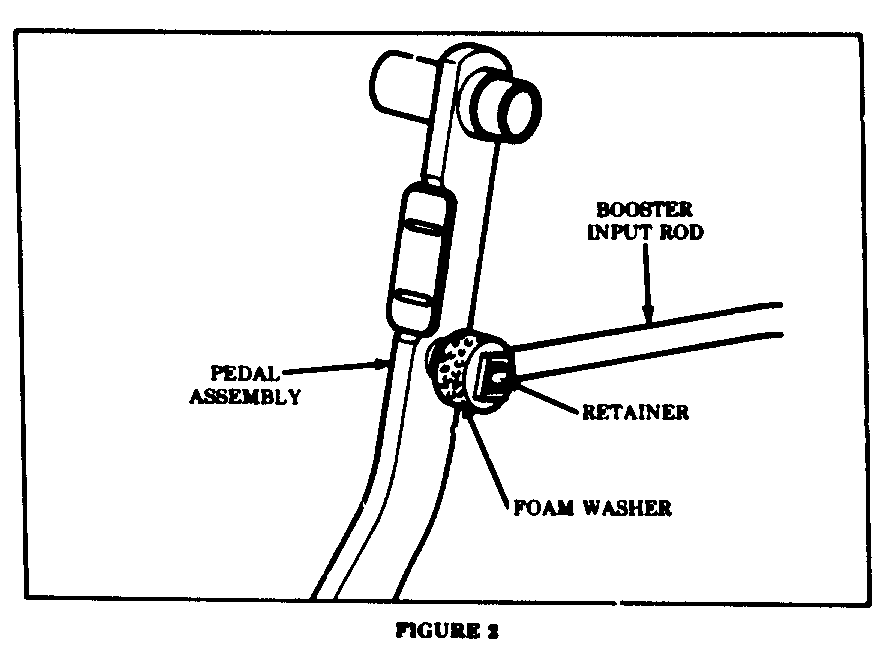
3. Remove the booster pushrod retainer and washer from the pedal. See Figure 2.
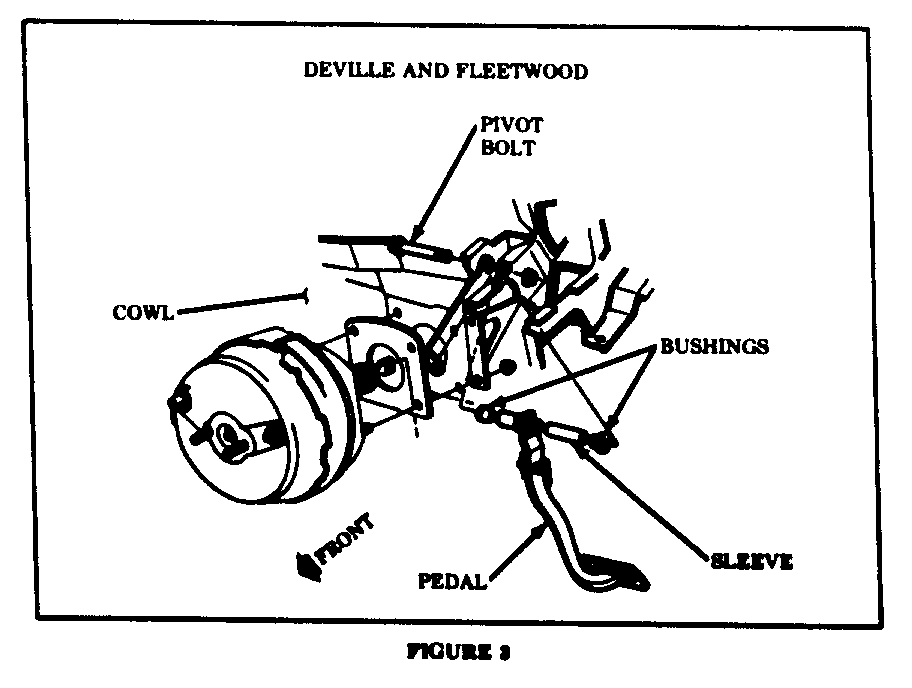
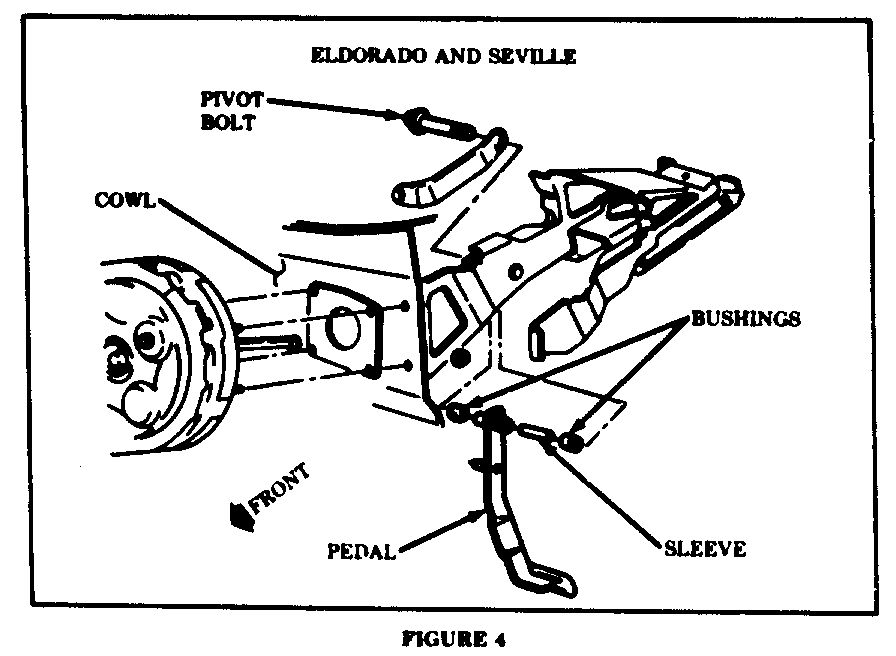
4. Remove the brake pedal pivot bolt and lower the brake pedal so that it is clear of the pedal mounting bracket. Disengage the booster input rod from the pedal and remove the pedal, sleeve and bushings from the mounting bracket. See Figure 3 (Deville and Fleetwood) or Figure 4 (Eldorado and Seville).
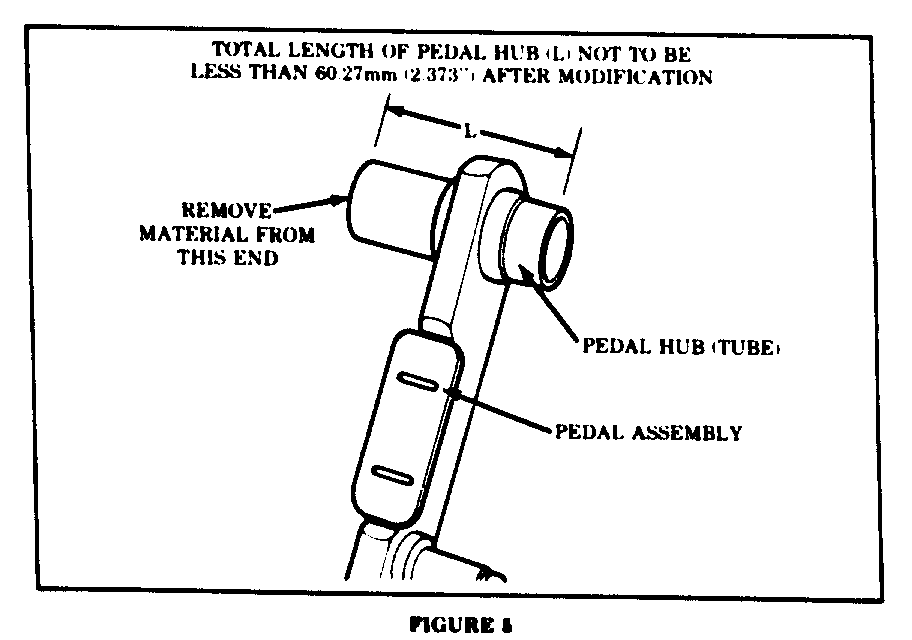
5. Shorten the pedal hub tube approximately 1mm (0.040 inch) by filing the hub at the location shown in Figure 5. Remove metal only from the tube that is a welded part of the pedal. Do not shorten the sleeve which is positioned through the pedal hub.
When shortening the pedal hub, be sure that an equal amount of material is removed around the circumference of the tube and that the modified end is parallel to the unmodified end. Overall length of the pedal hub after modification should not be less than 60.27mm (2.373 inches). After shortening the pedal hub, remove any burrs or sharp edges with emery cloth and ensure that the pedal assembly is free from any metal chips or filings.
6. Inspect the plastic pedal bushings for damage. If they are damaged in any way, replace them with new bushings, P/N 15594358.
7. Lubricate the pedal pin with GM lubriplate lubricant (P/N 5264008) or equivalent. Install the pedal by first engaging the booster input rod on the pedal pin and then positioning the bushings and sleeve in the pedal hub. Position the pedal in the pedal bracket and install the pivot bolt. Tighten the pivot bolt to 50 N.m (37 ft. lbs.). See Figure 3 (Deville/Fleetwood) or Figure 4 (Eldorado/Seville).
8. After installing the pedal, sleeve and pivot bolt, check the pedal for freedom of movement. The pedal should exhibit no tightness or binding.
9. Install the booster input rod foam washer and retainer on the pedal stud as shown in Figure 2.
10. On Eldorado and Seville, install central power supply bracket, central power supply and mounting screws. See Figure 1.
11. Install the lower sound insulator panel(s).
General Motors bulletins are intended for use by professional technicians, not a "do-it-yourselfer". They are written to inform those technicians of conditions that may occur on some vehicles, or to provide information that could assist in the proper service of a vehicle. Properly trained technicians have the equipment, tools, safety instructions and know-how to do a job properly and safely. If a condition is described, do not assume that the bulletin applies to your vehicle, or that your vehicle will have that condition. See a General Motors dealer servicing your brand of General Motors vehicle for information on whether your vehicle may benefit from the information.
