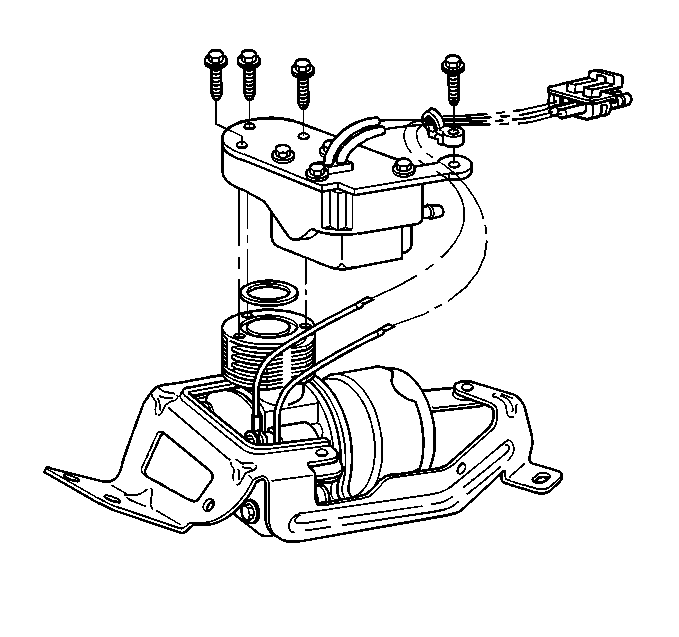
For 1990-2009 cars only
Disassembly Procedure
- Remove the air compressor assembly from the vehicle. Refer to Air Compressor Replacement .
- Remove the air dryer. Refer to Automatic Level Control Air Dryer Replacement .
- Cut the harness tie.
- Remove the bolt and the harness tie.
- Remove the two harness ties and the wrap from the wires.
- Remove two wire terminals from the air compressor connector.
- Remove three head bolts and the air compressor head from the air compressor assembly.
- Remove the gasket from the air compressor head or the air compressor assembly.

Important: Note the wire colors and the terminal numbers to ensure correct assembly.
Assembly Procedure
- Install the new gasket on the air compressor assembly.
- Install the air compressor head on the air compressor assembly with three bolts.
- Install the two wire terminals in the air compressor connector.
- Install the wrap around four wires and secure with two harness ties.
- Install four wires in the harness tie and install the harness tie on the air compressor head with the bolt.
- Install the air dryer. Refer to Automatic Level Control Air Dryer Replacement .
- Install the air compressor on the vehicle. Refer to Air Compressor Replacement .

Tighten
Tighten three bolts to 6 N·m (53 lb in).
Tighten
Tighten the bolt to 3 N·m (26 lb in).
