For 1990-2009 cars only
Removal Procedure
Tools Required
J 39822 Wiper Arm Puller
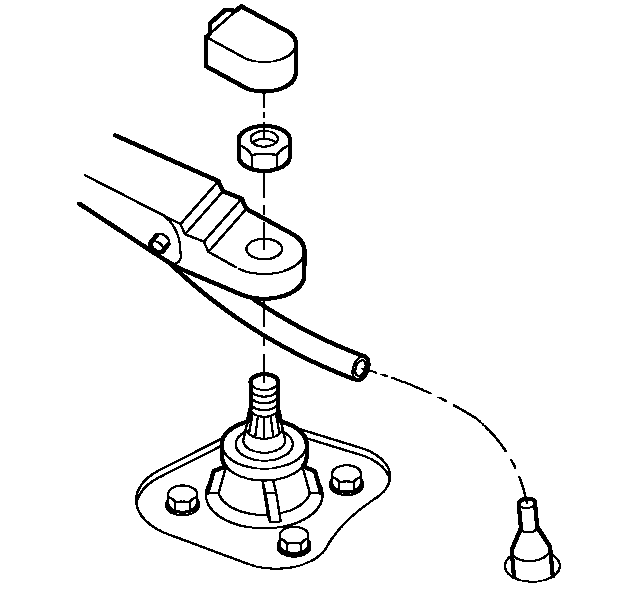
- Disconnect the washer hose from the connector on the air inlet grille panel.
- Remove the protective cap.
- Lift the wiper arm and insert a suitable pin or pop rivet completely through the two holes located next to the pivot of the arm.
- Remove the nut.
- Remove the wiper arm from the transmission pivot shaft using the J 39822
- Clean the knurls of the transmission pivot shaft with a soft wire brush.
- Remove the wiper blade from the wiper arm. Refer to Windshield Wiper Blade Replacement .

Installation Procedure
- Install the wiper blade on the wiper arm. Refer to Windshield Wiper Blade Replacement .
- Install the wiper arm onto the transmission drive shaft so that the wiper arm is 25 mm (1 in) below the stop surface of the park ramp.
- Remove the pivot prevention pin or rivet from the wiper arm.
- Install the new nut.
- Lift the wiper arm over the park ramp.
- Replace the protective cap.
- Connect the washer hose onto the connector at the air inlet grille panel.
- Run the wipers and inspect for the correct wipe pattern. The LH blade tip should wipe to a limit of 78 mm (3.063 in) from the pillar. The RH blade should overlap into the LH wipe pattern.
- Shut off the wipers and inspect for proper park position.

Notice: Use the correct fastener in the correct location. Replacement fasteners must be the correct part number for that application. Fasteners requiring replacement or fasteners requiring the use of thread locking compound or sealant are identified in the service procedure. Do not use paints, lubricants, or corrosion inhibitors on fasteners or fastener joint surfaces unless specified. These coatings affect fastener torque and joint clamping force and may damage the fastener. Use the correct tightening sequence and specifications when installing fasteners in order to avoid damage to parts and systems.
Tighten
Tighten the nut to 32 N·m (24 lb ft).
