Special Tools
| • | EN-48072 Sealant Applicator |
| • | J 42841-A Crankshaft Rear Oil Seal Remover |
| • | J 45930-A Crankshaft Rear Oil Seal Installer |
Removal Procedure
- Remove the transaxle. Refer to Transmission Replacement .
- Remove the flywheel. Refer to Engine Flywheel Replacement .
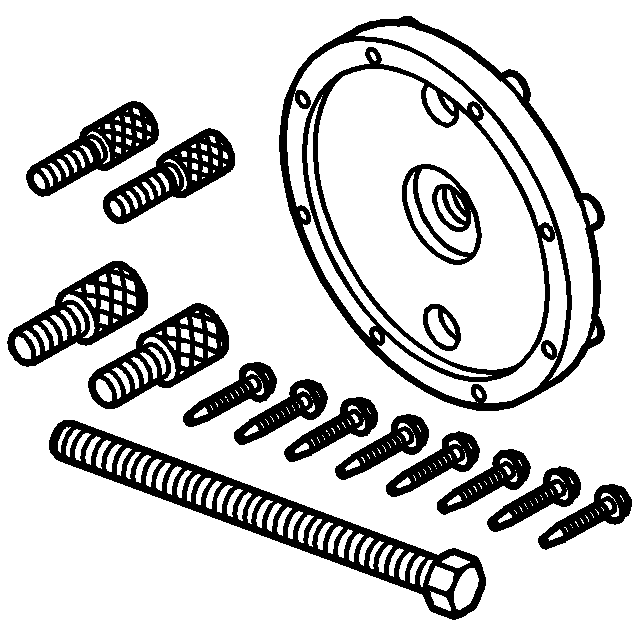
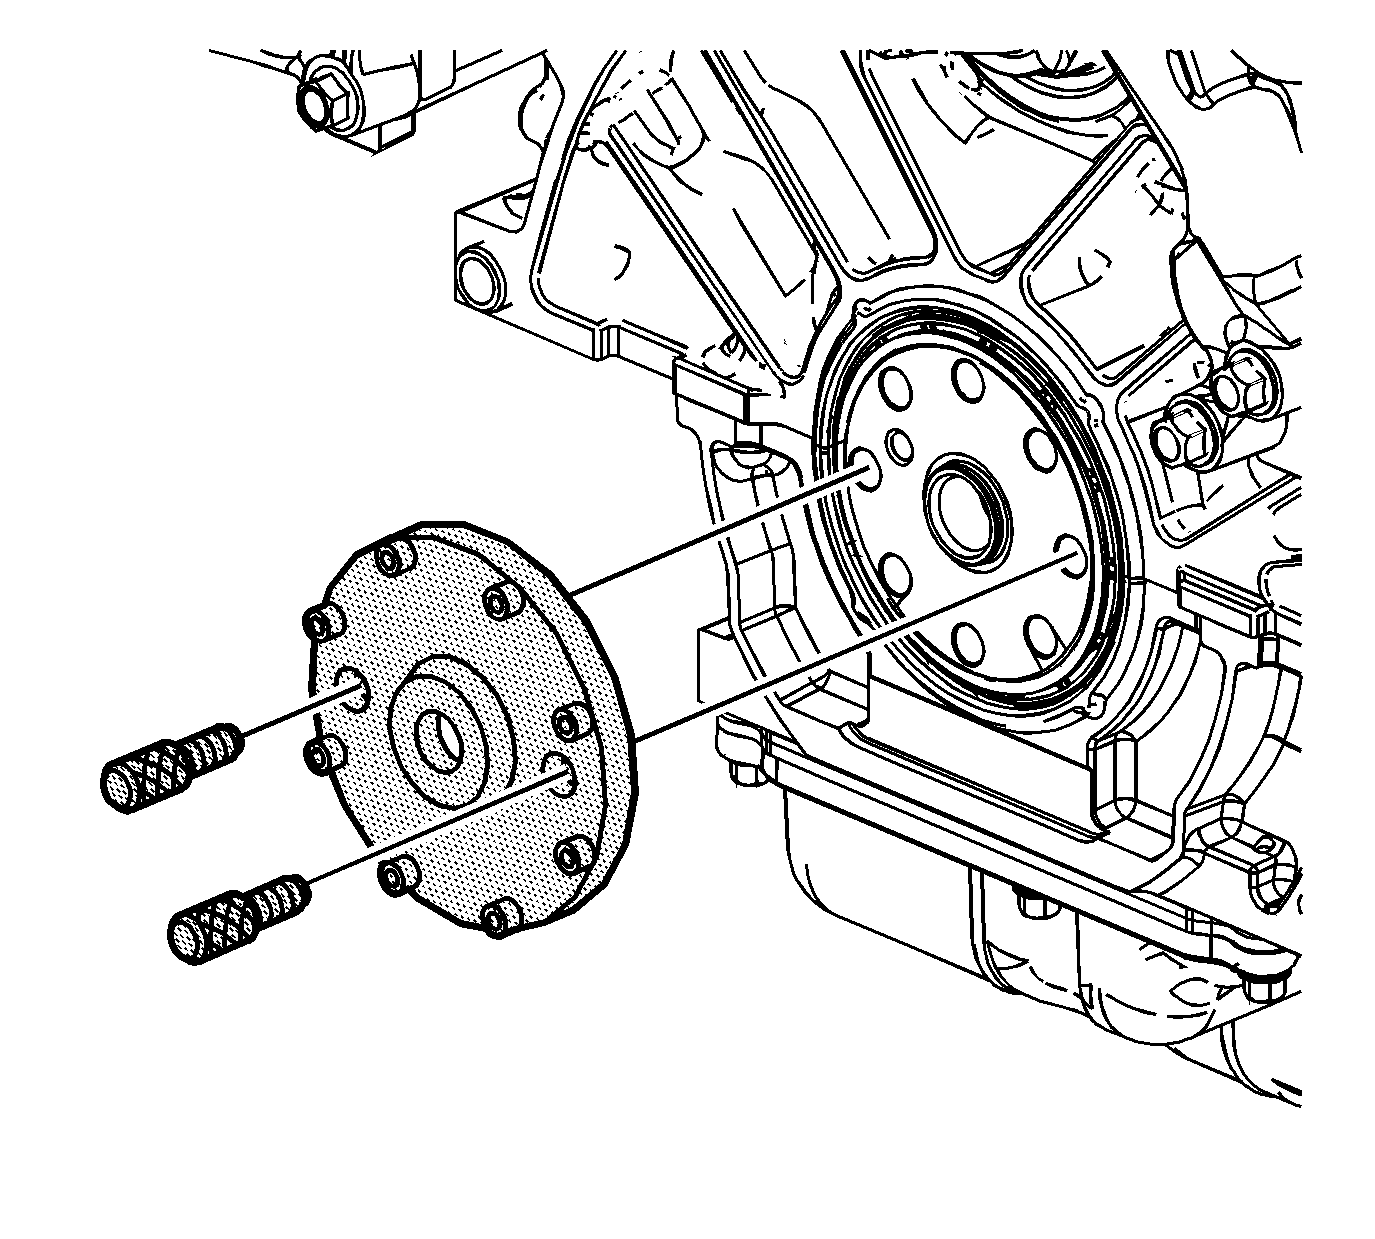
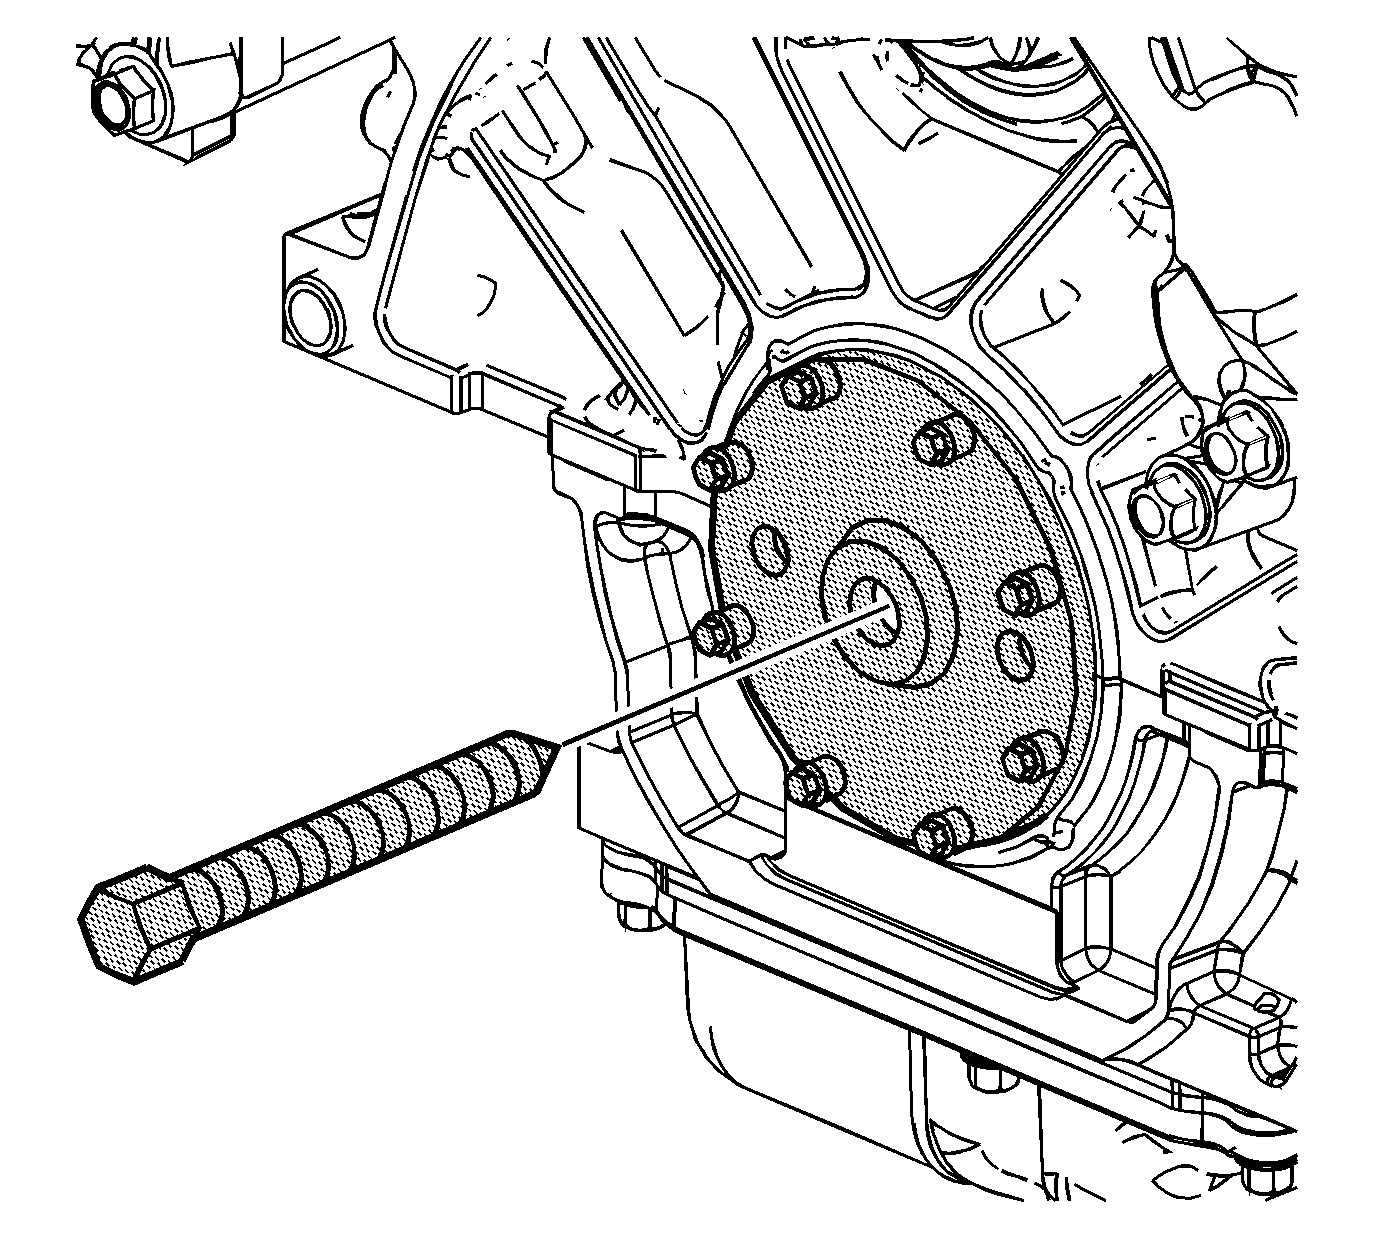
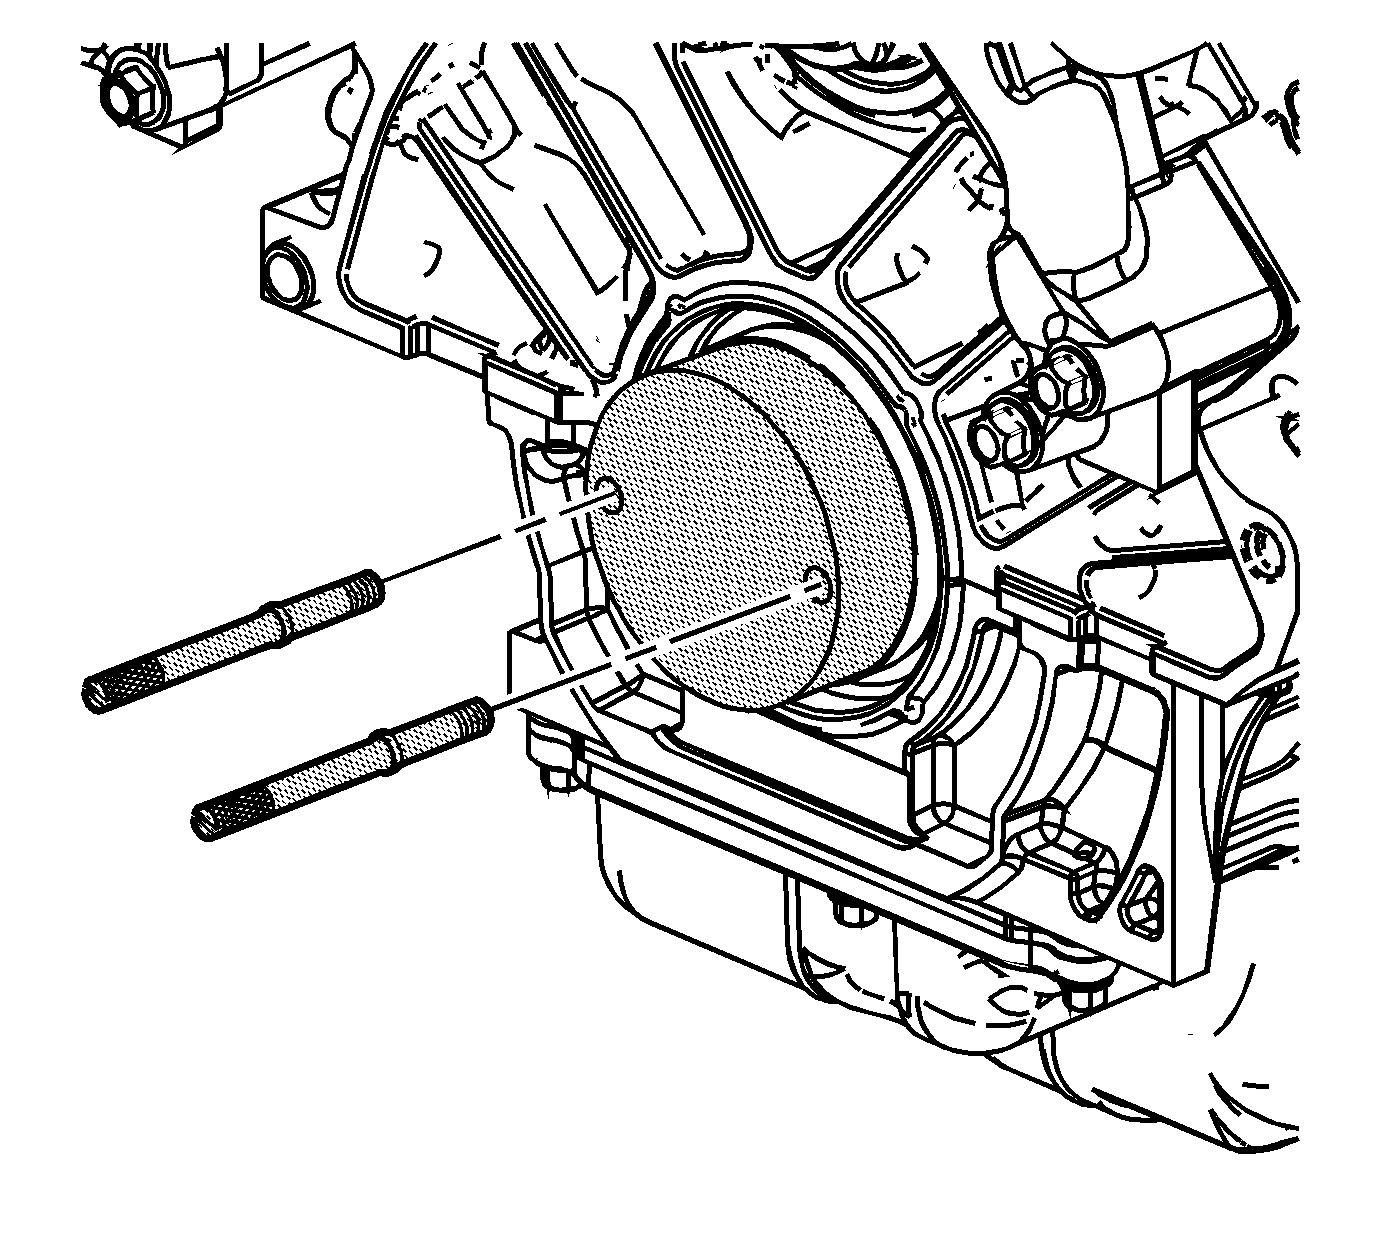
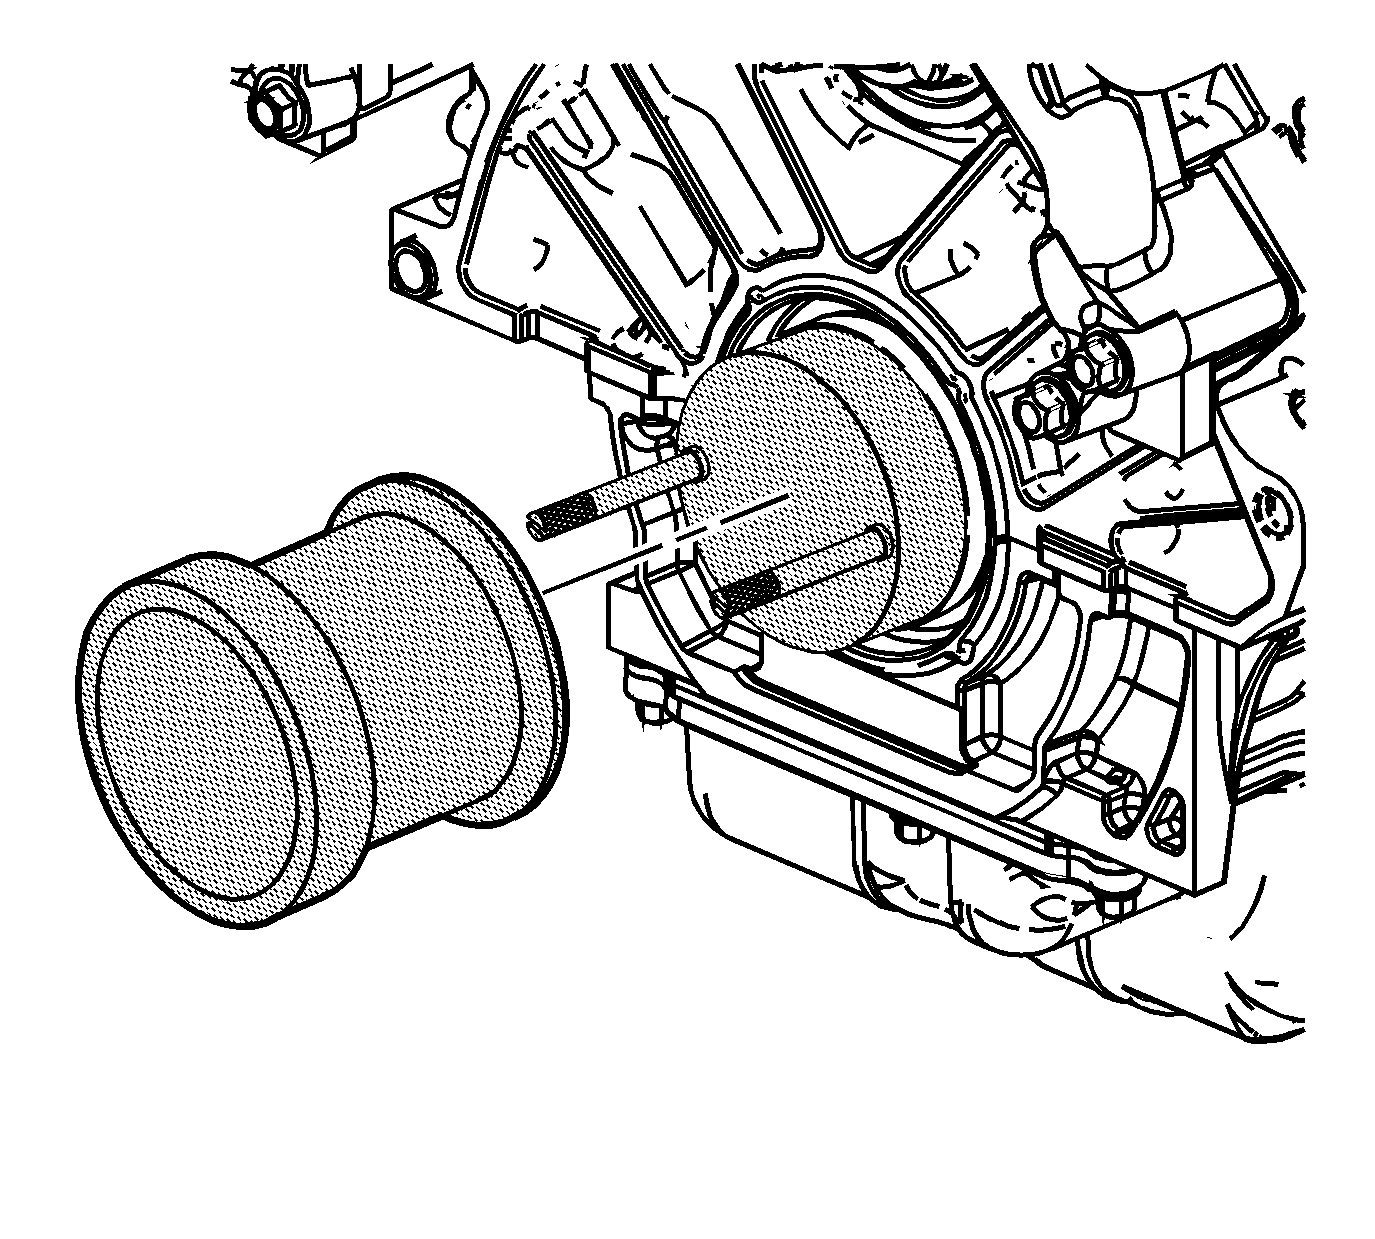
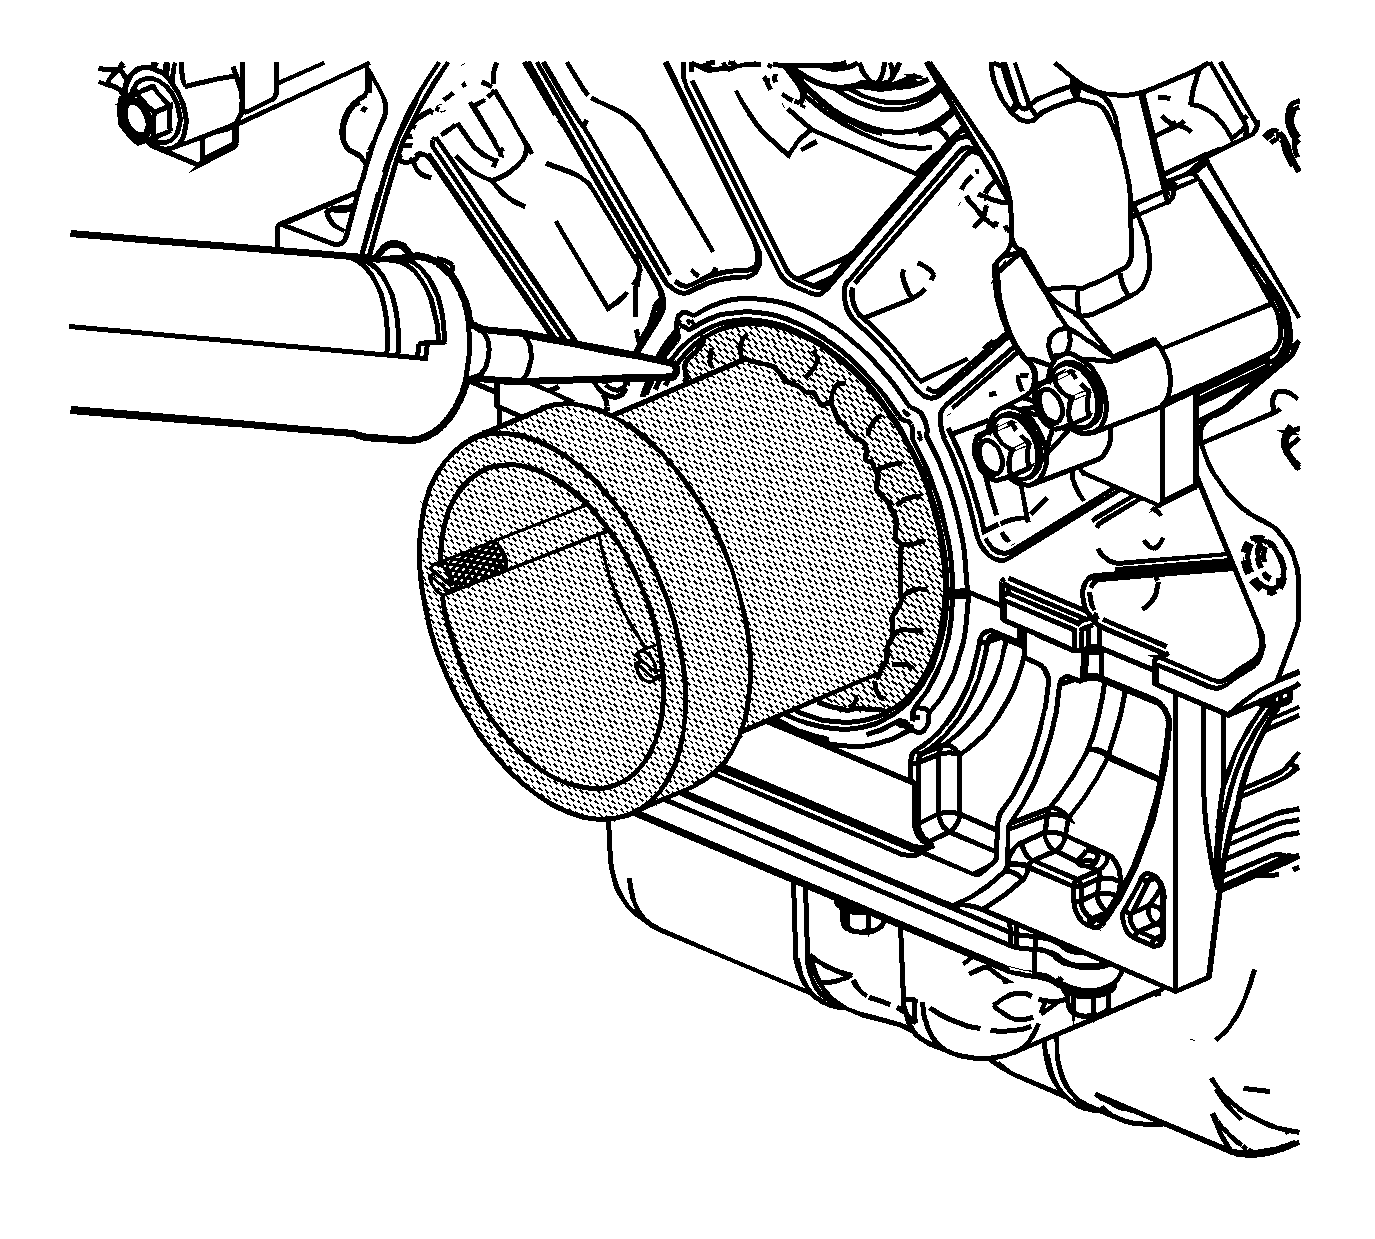
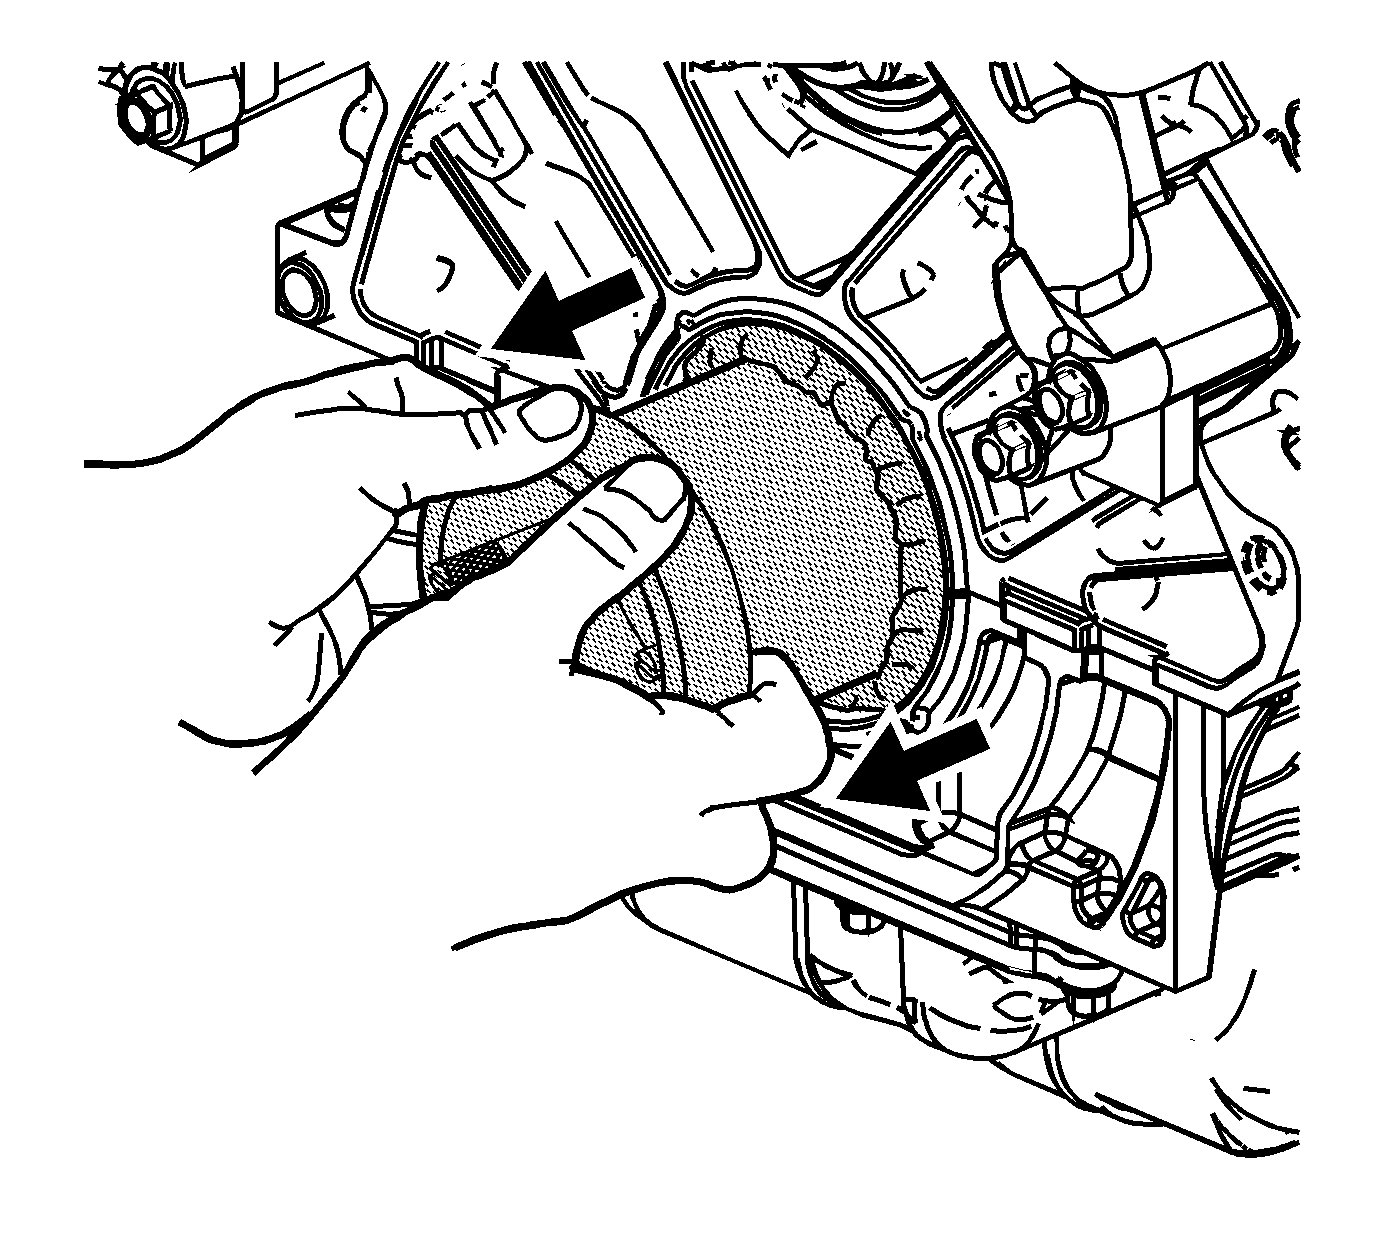
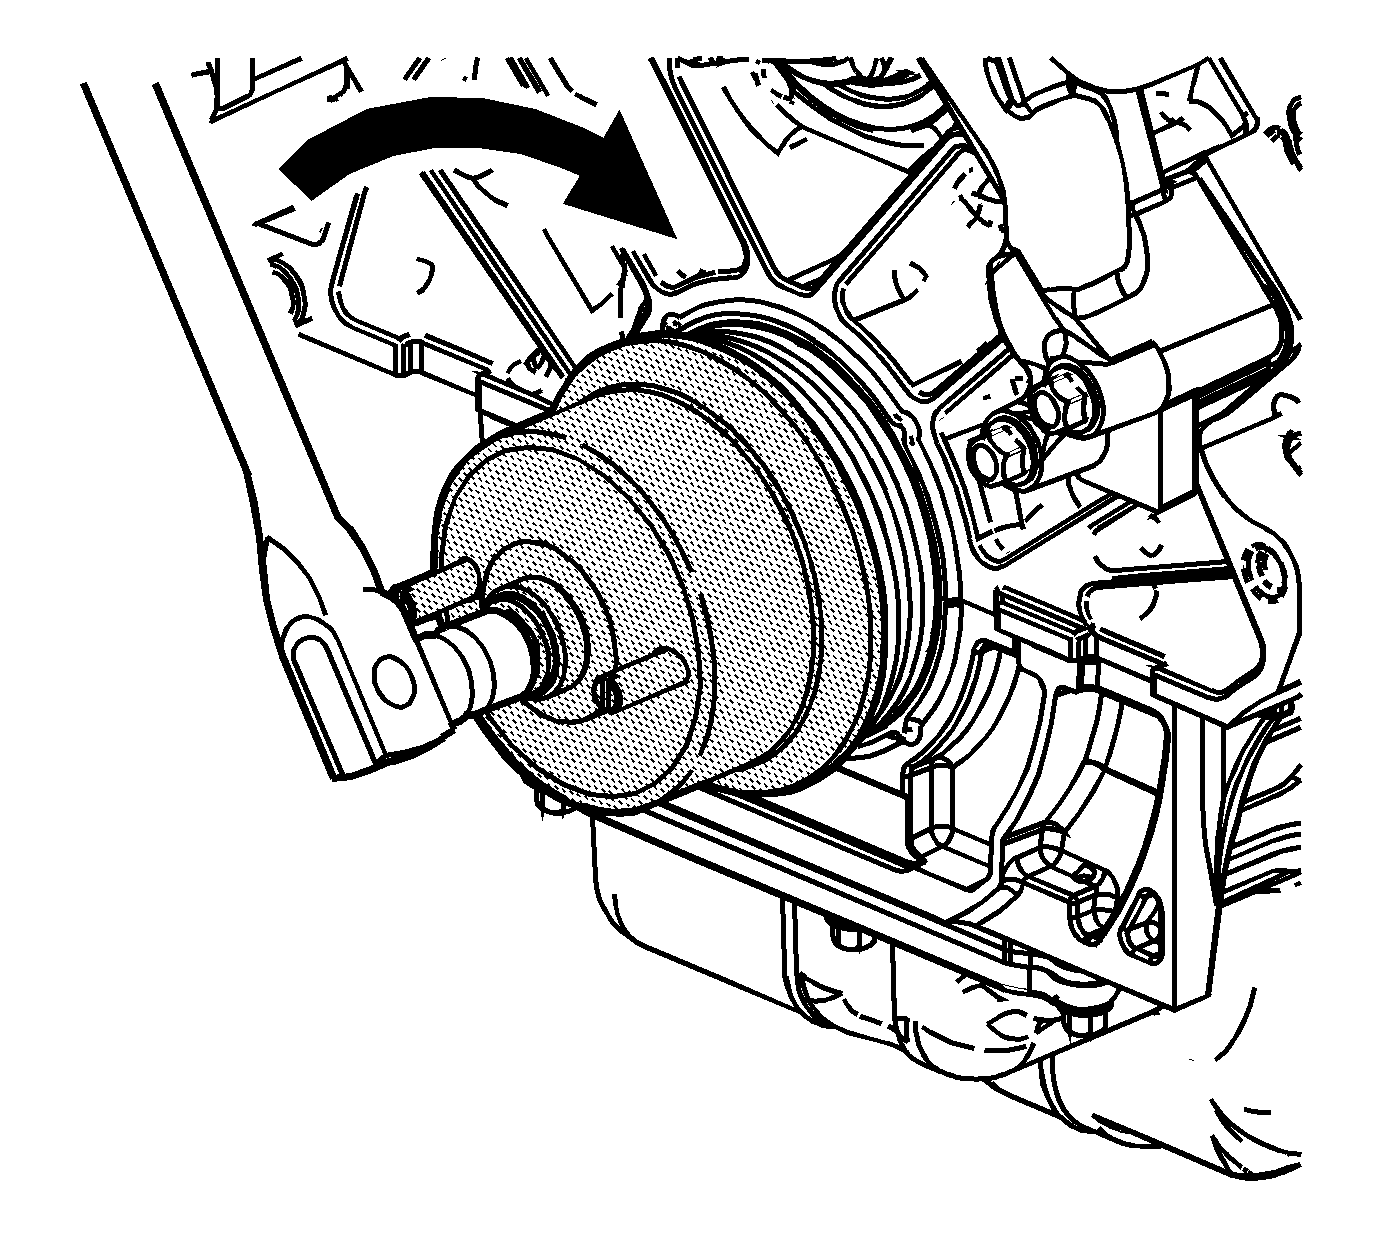
- Place the J 42841-A on to the crankshaft.
- Install the J 42841-A retaining bolts.
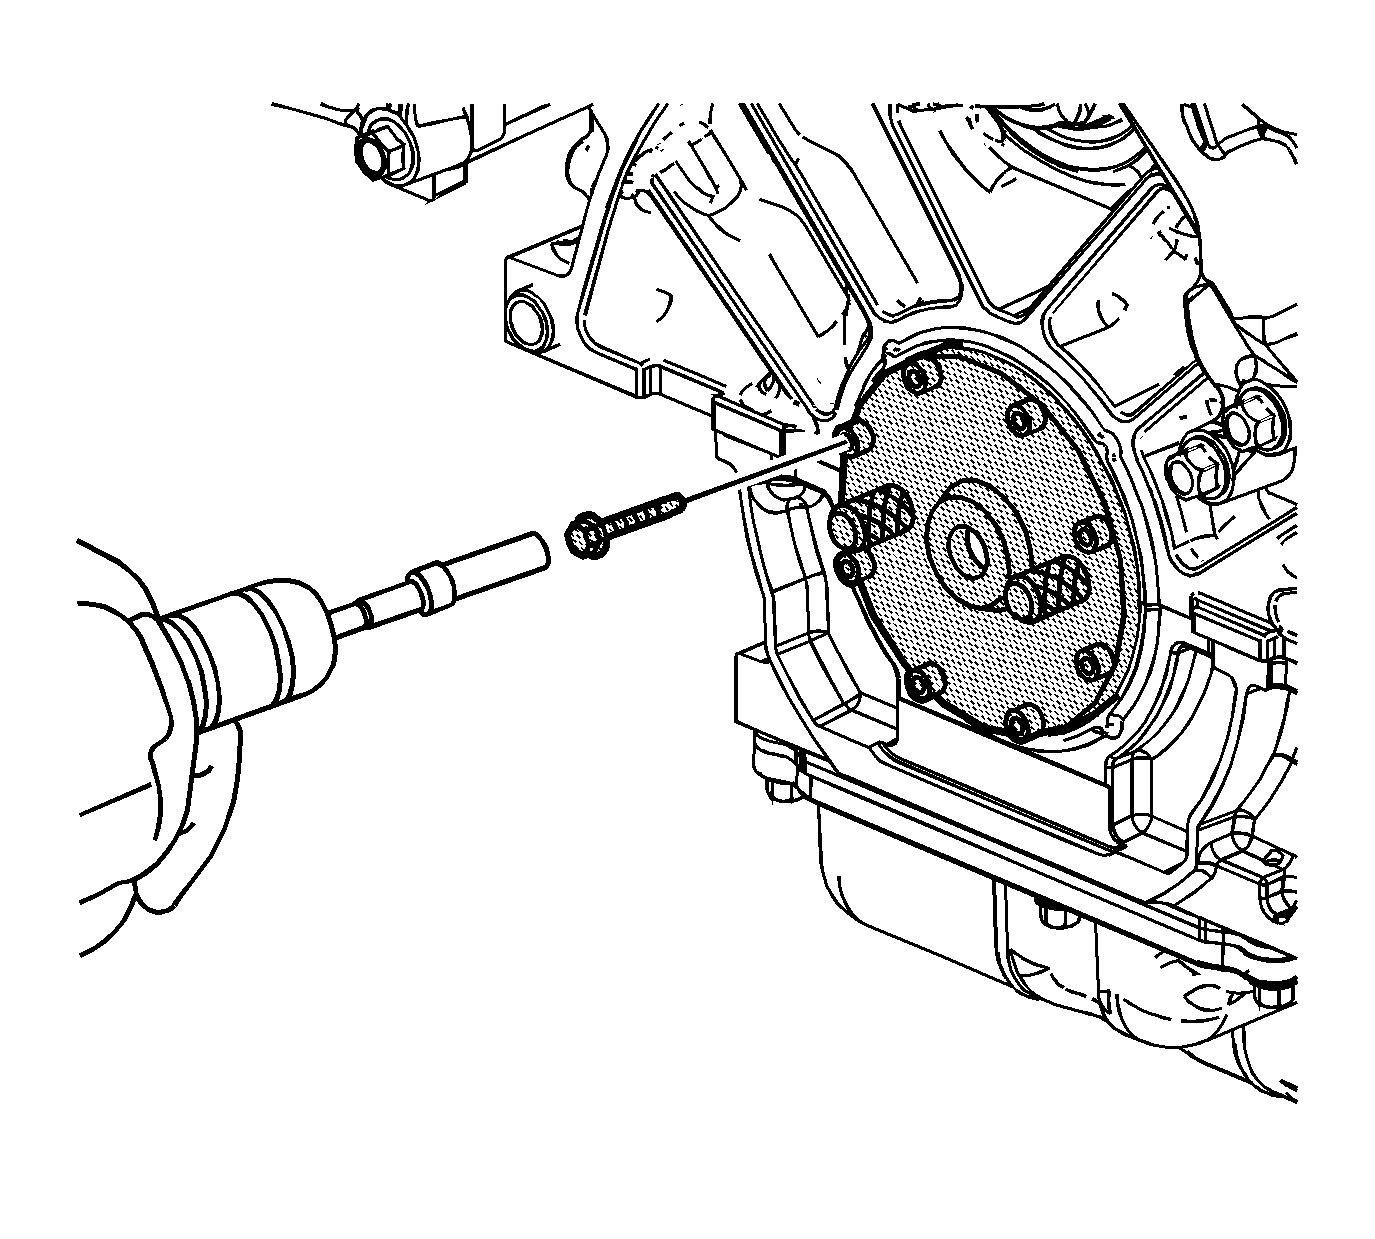
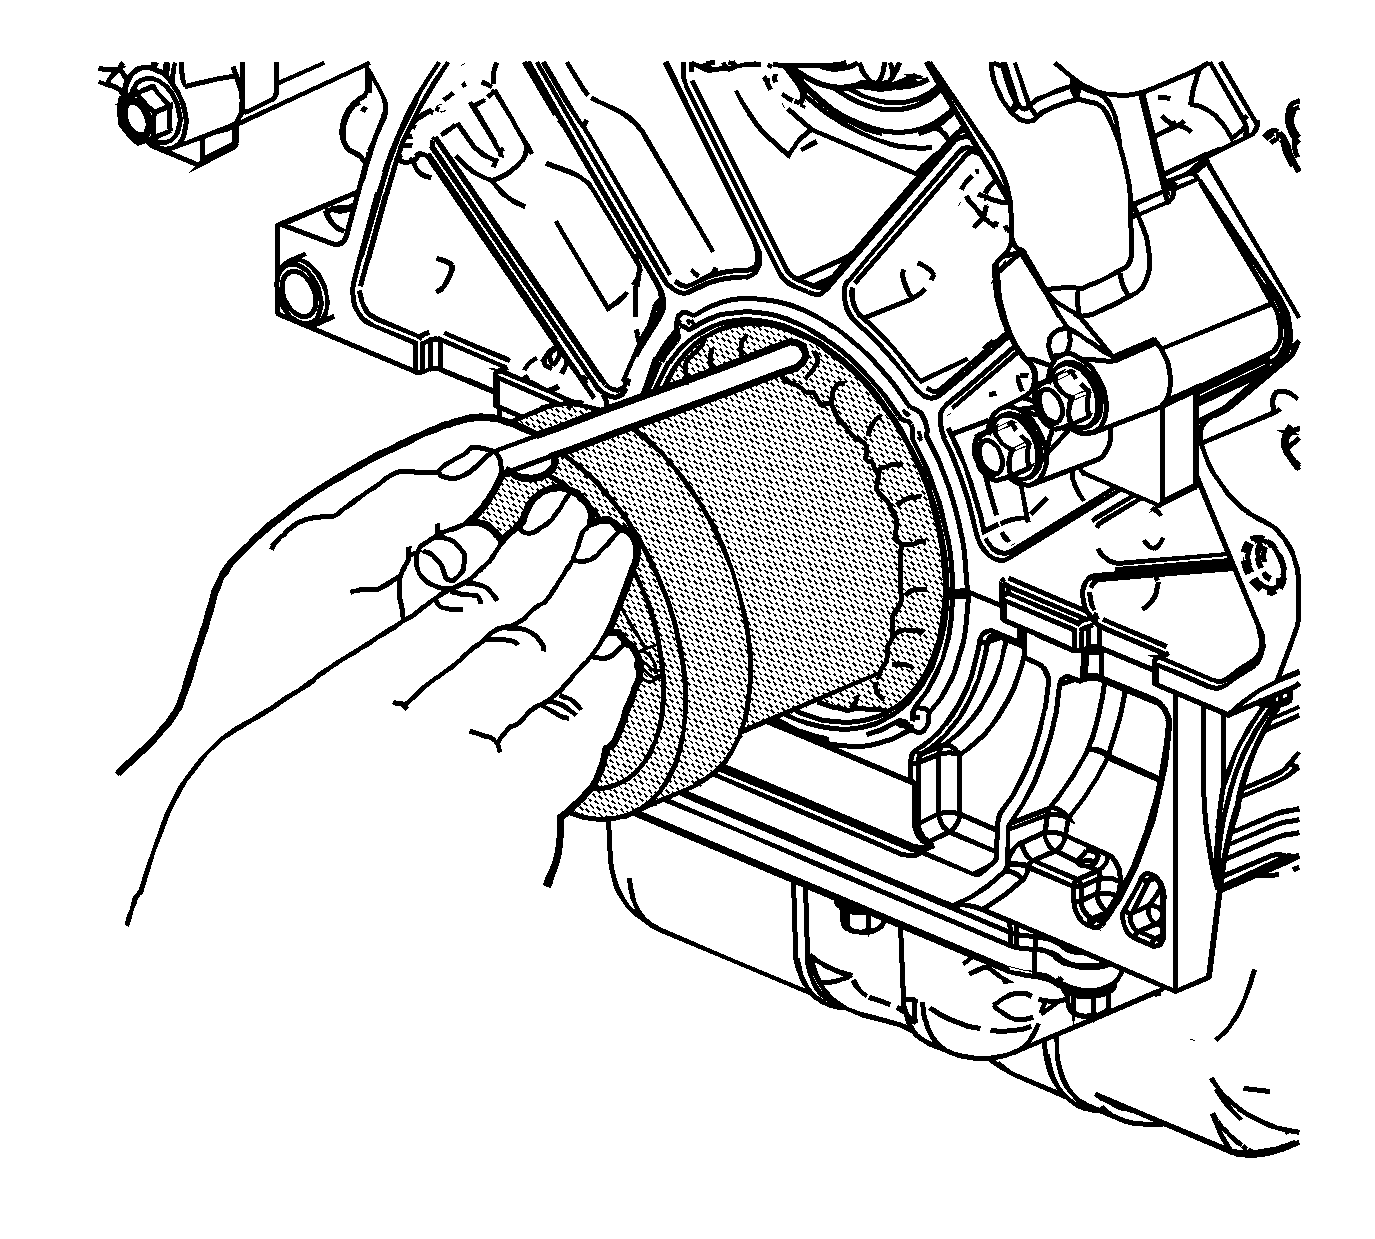
- Using a drill motor, variable speed preferred, with a socket adapter, install eight one-inch self-drilling screws into the seal using the guide holes in the removal tool. When drilling, make sure you reduce the drill speed when the screw begins threading into the seal.
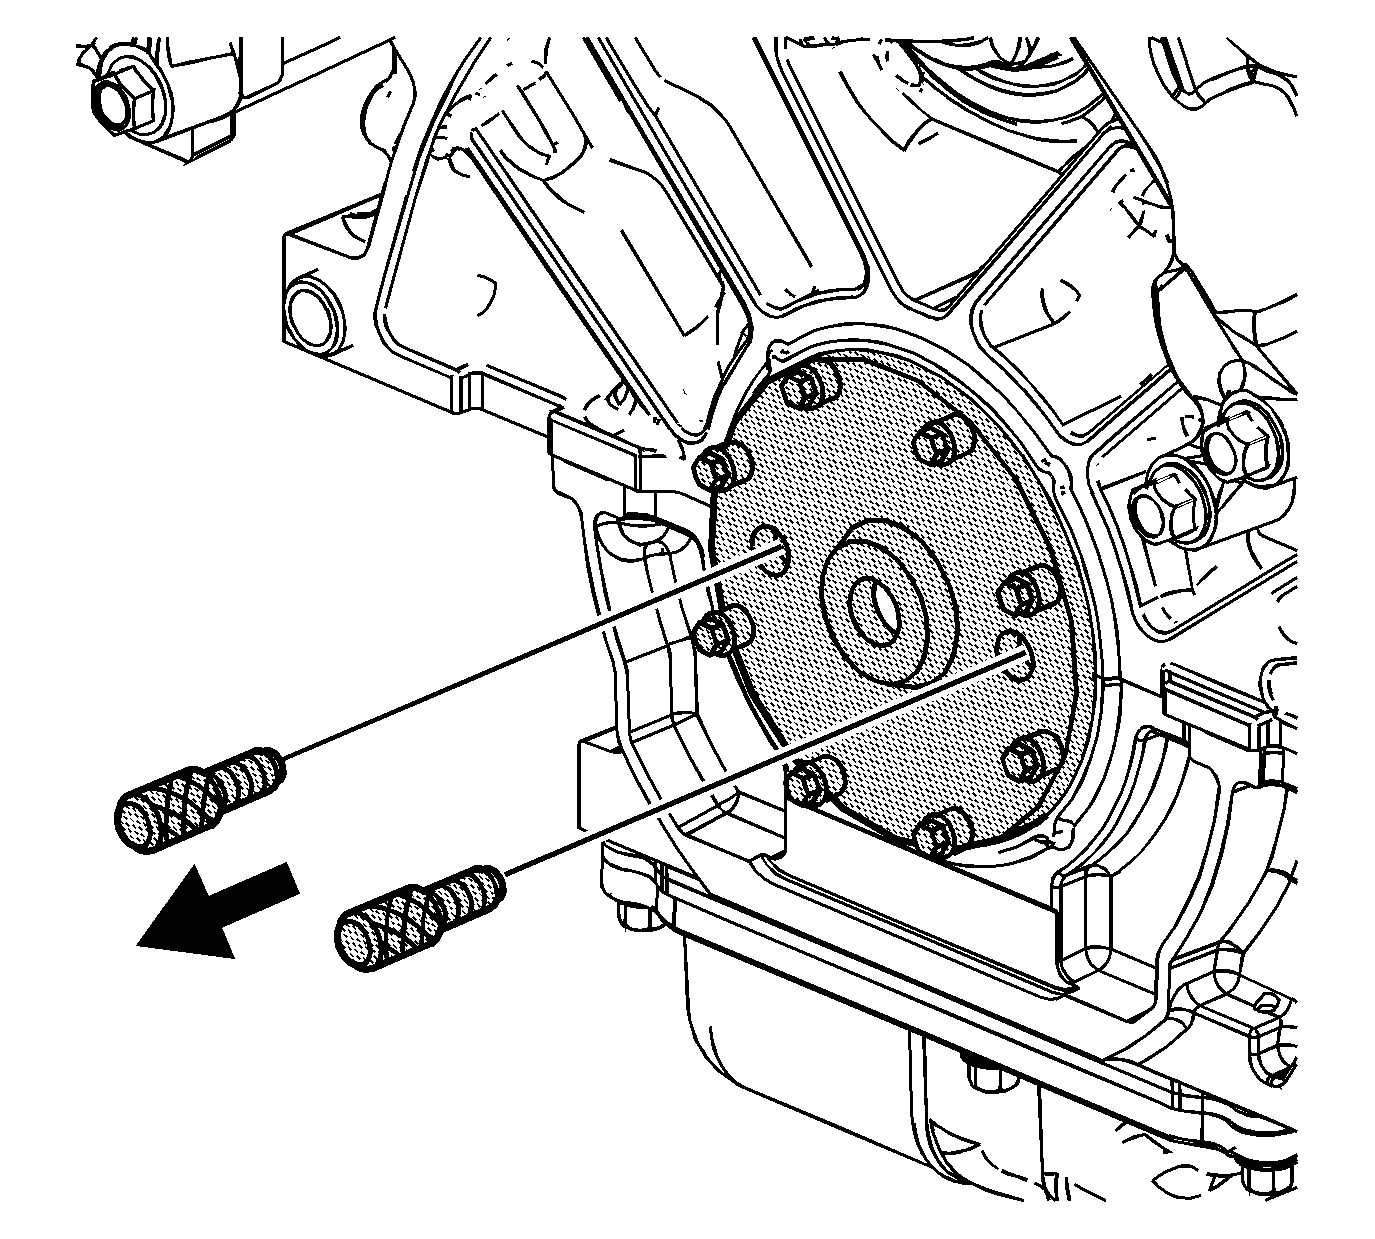
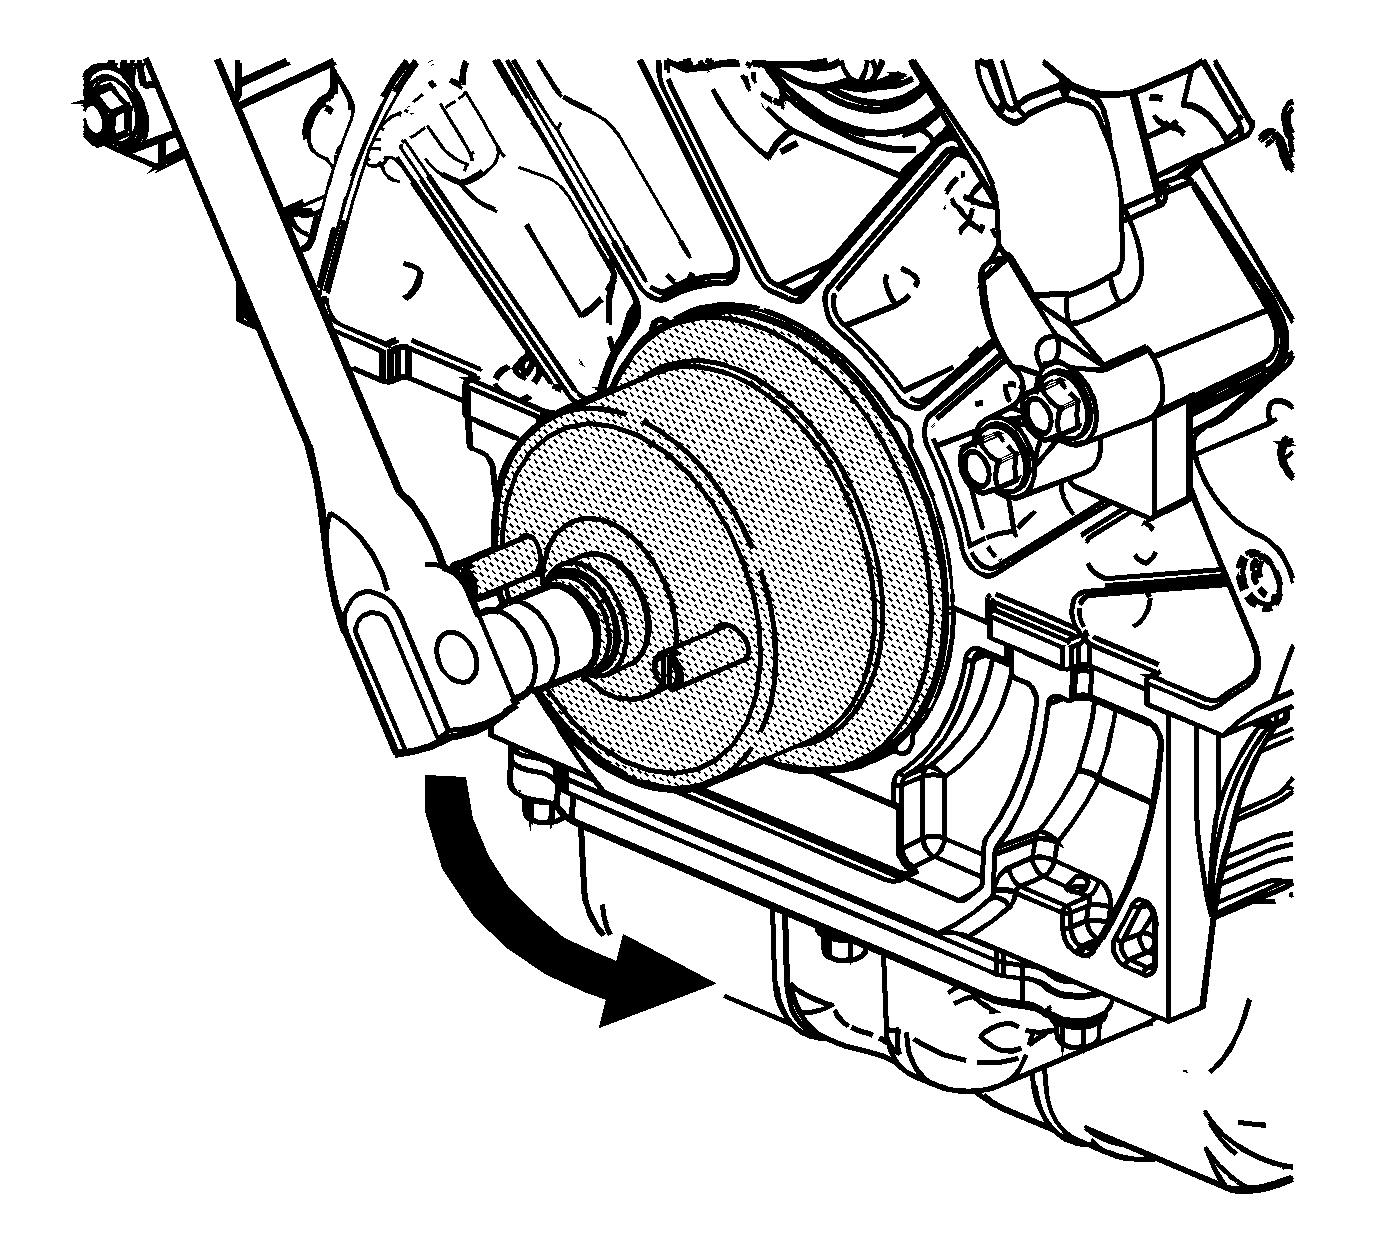
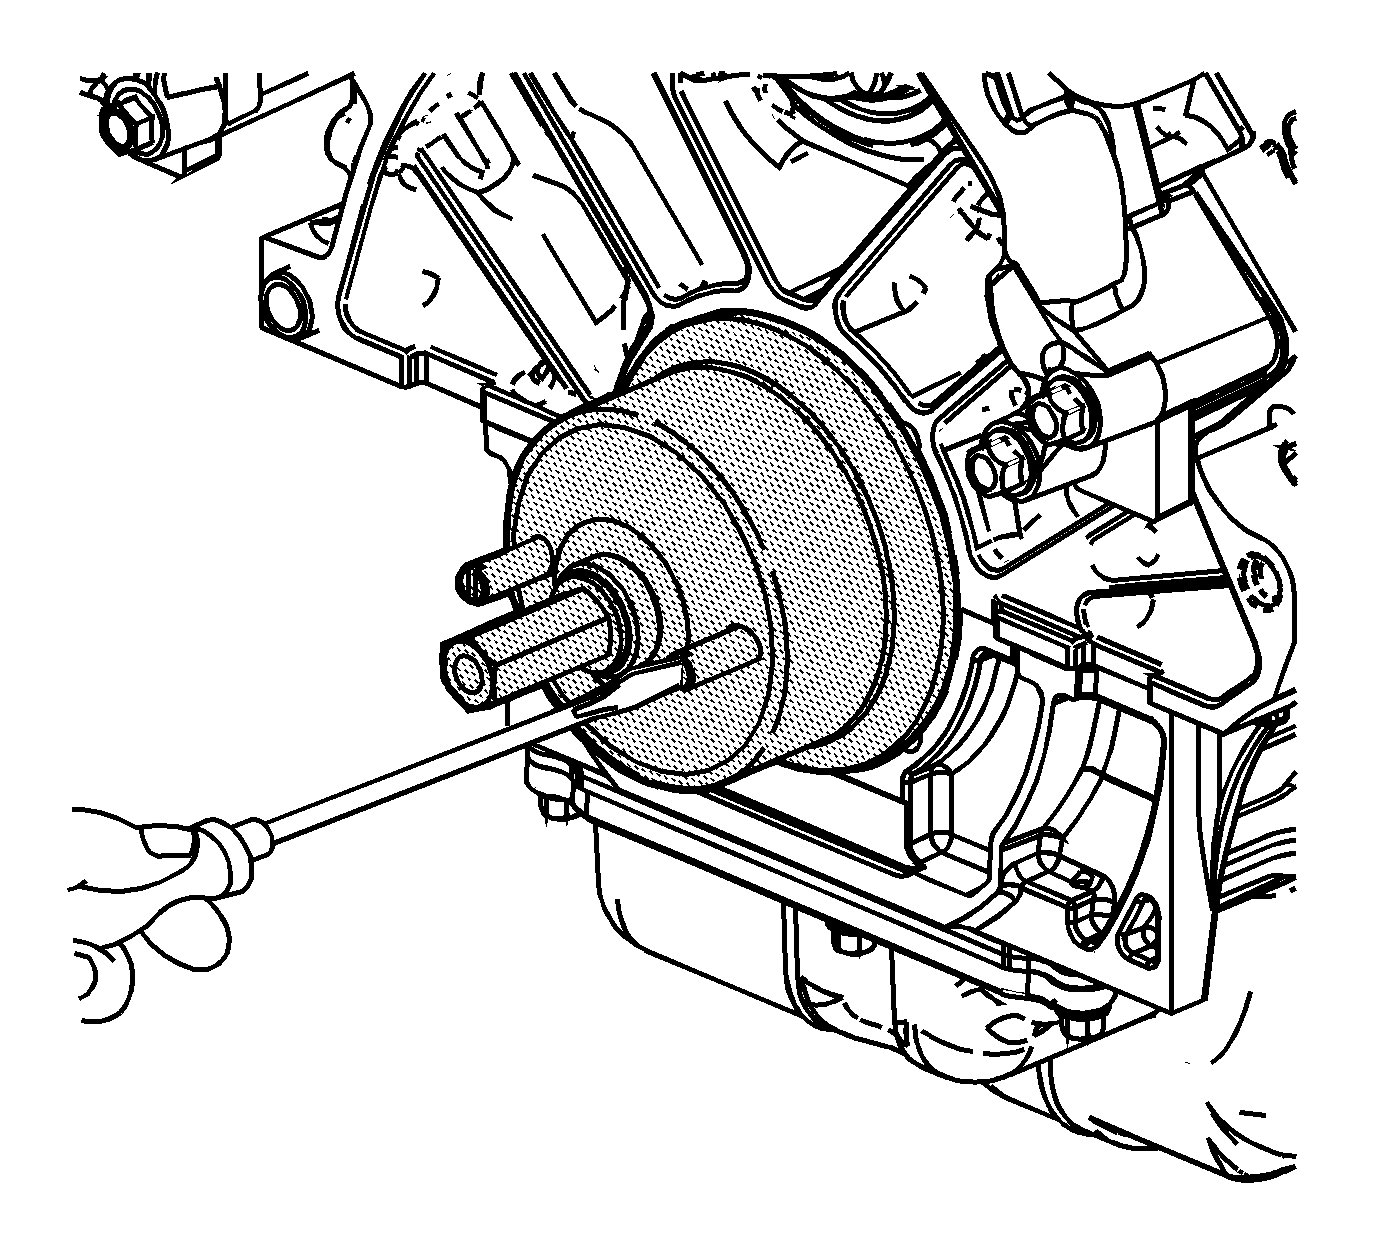
- With all eight removal screws installed, remove the J 42841-A retaining bolts.
- Install the center screw to the J 42841-A .
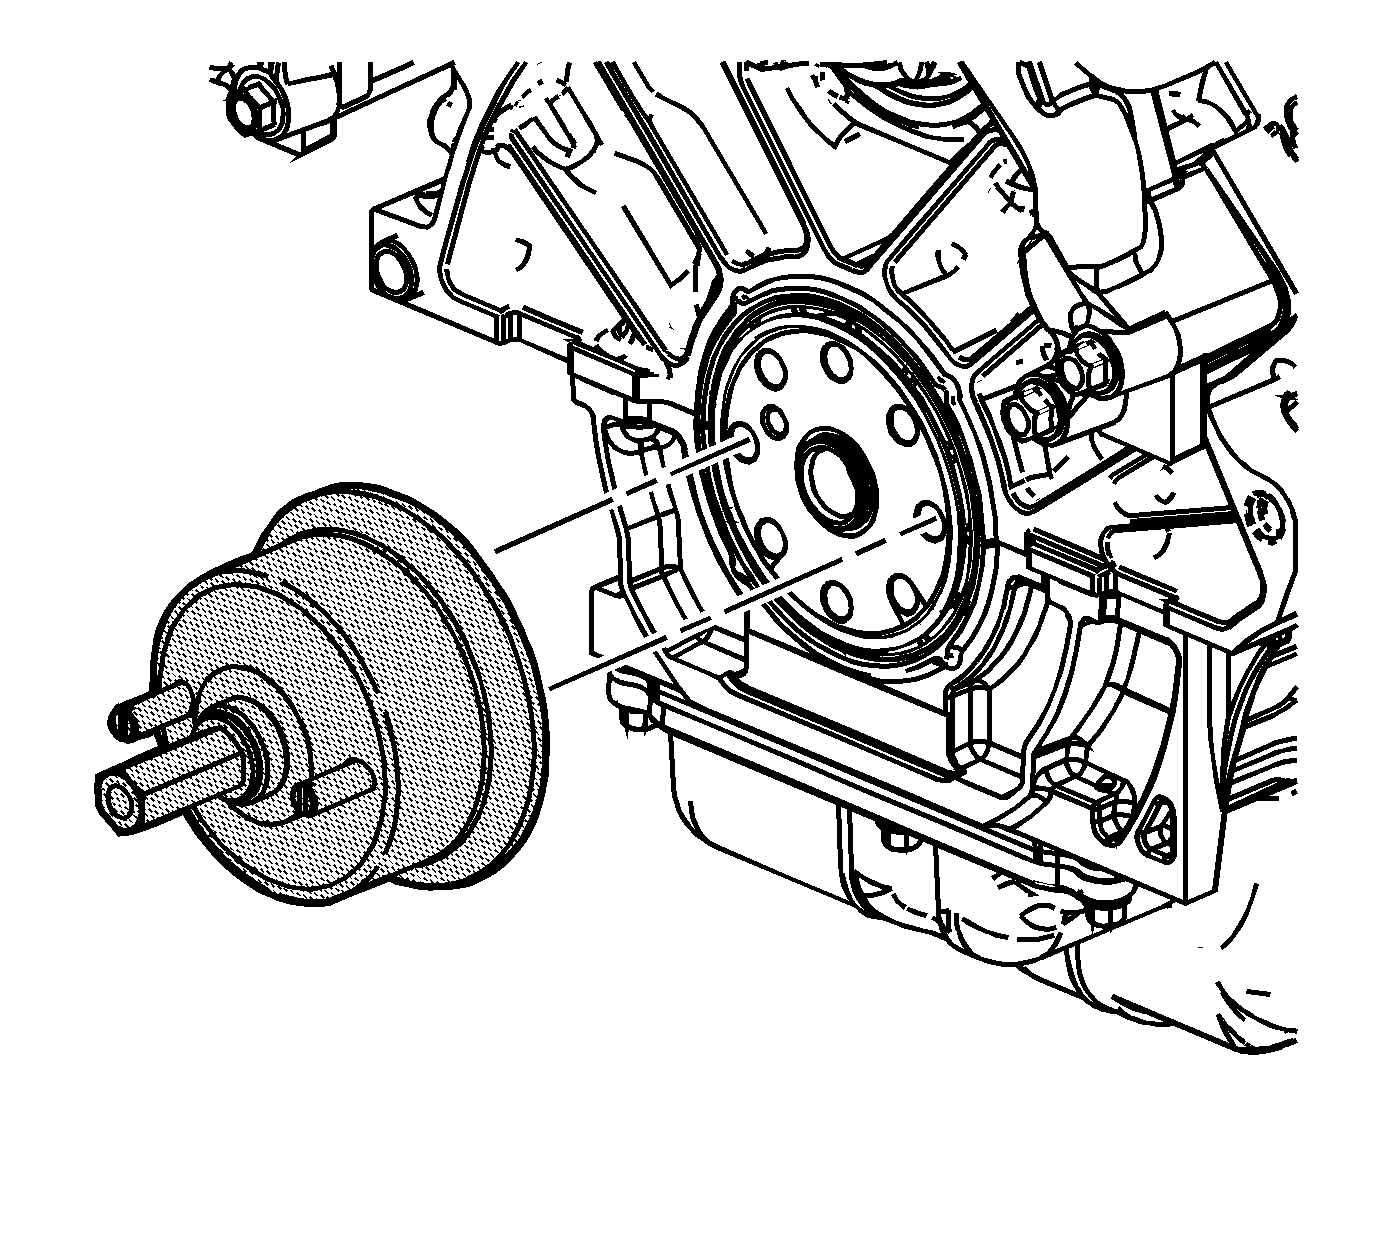
- Tighten the center screw on the J 42841-A to pull the seal assembly off the end of the crankshaft.
Installation Procedure
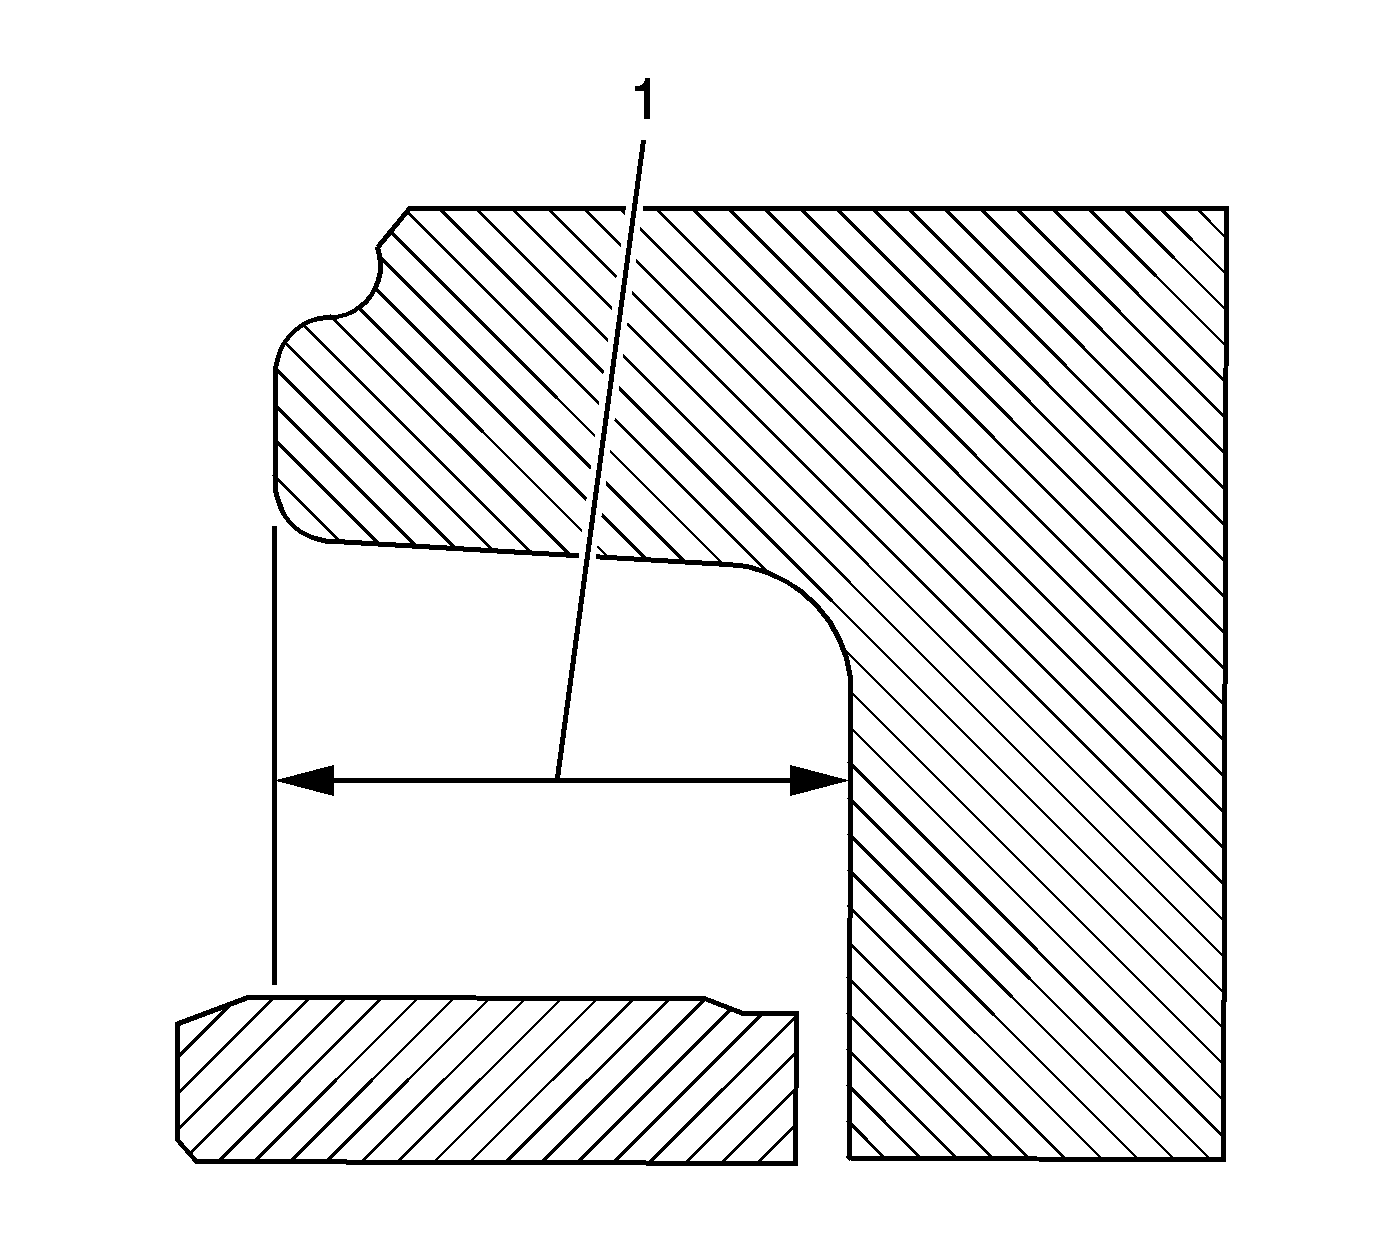
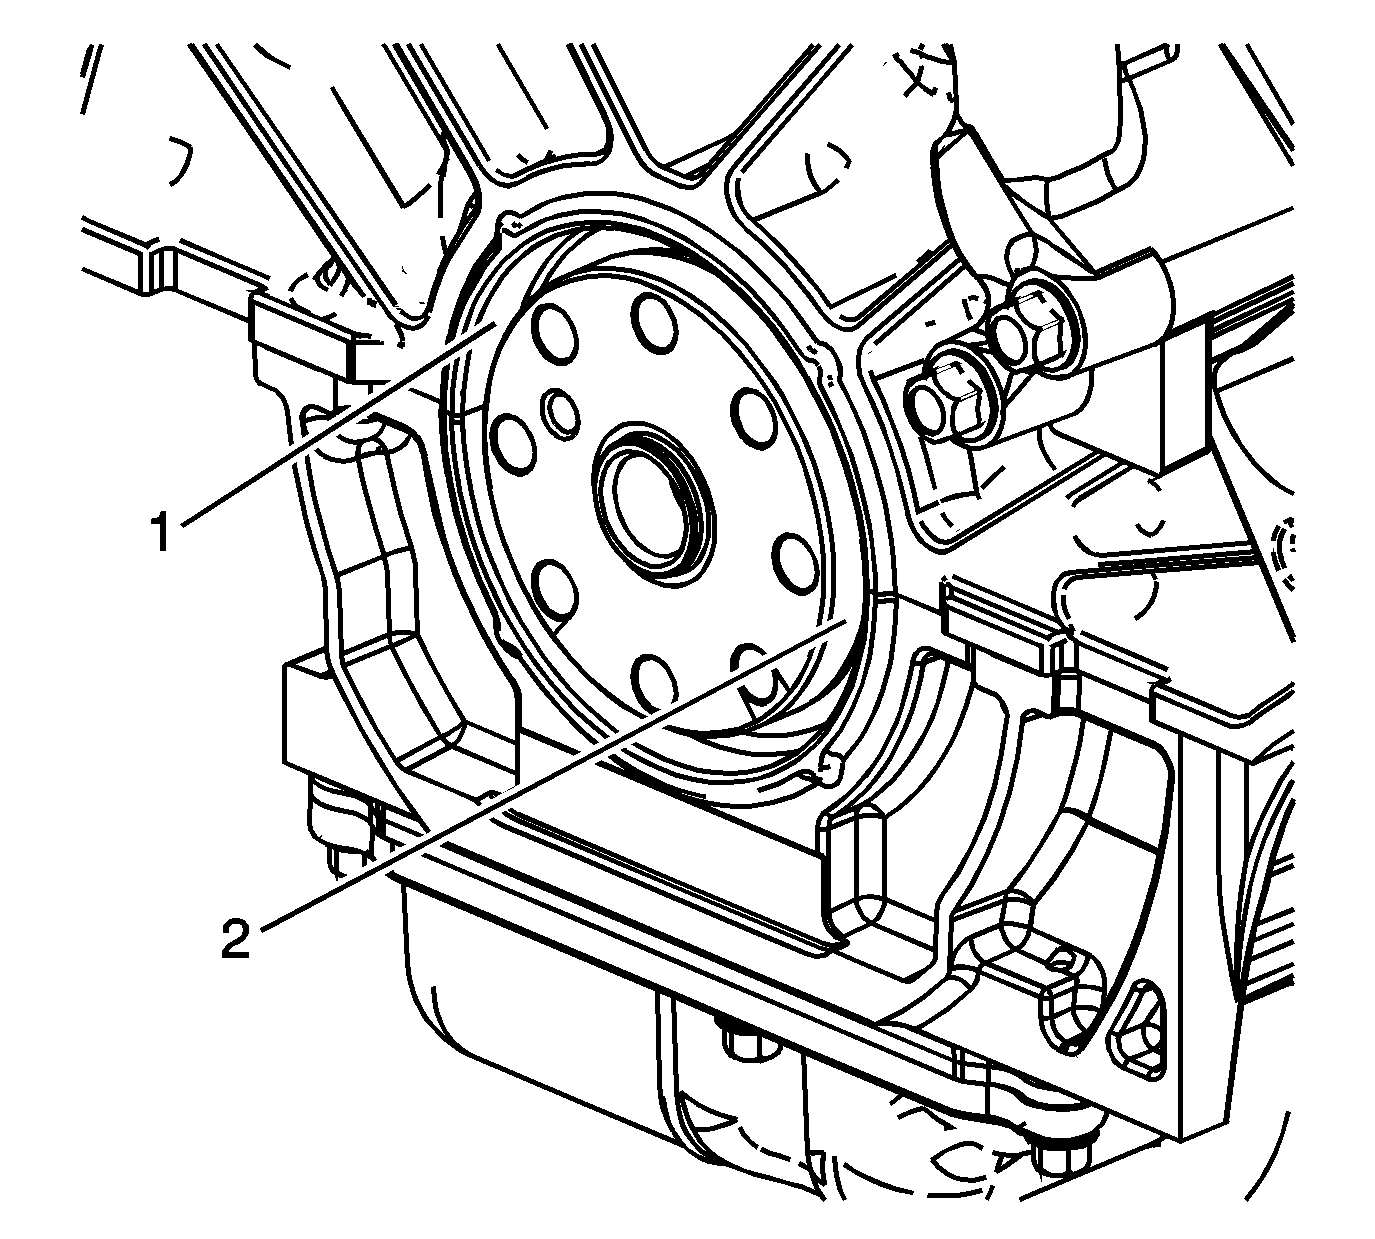
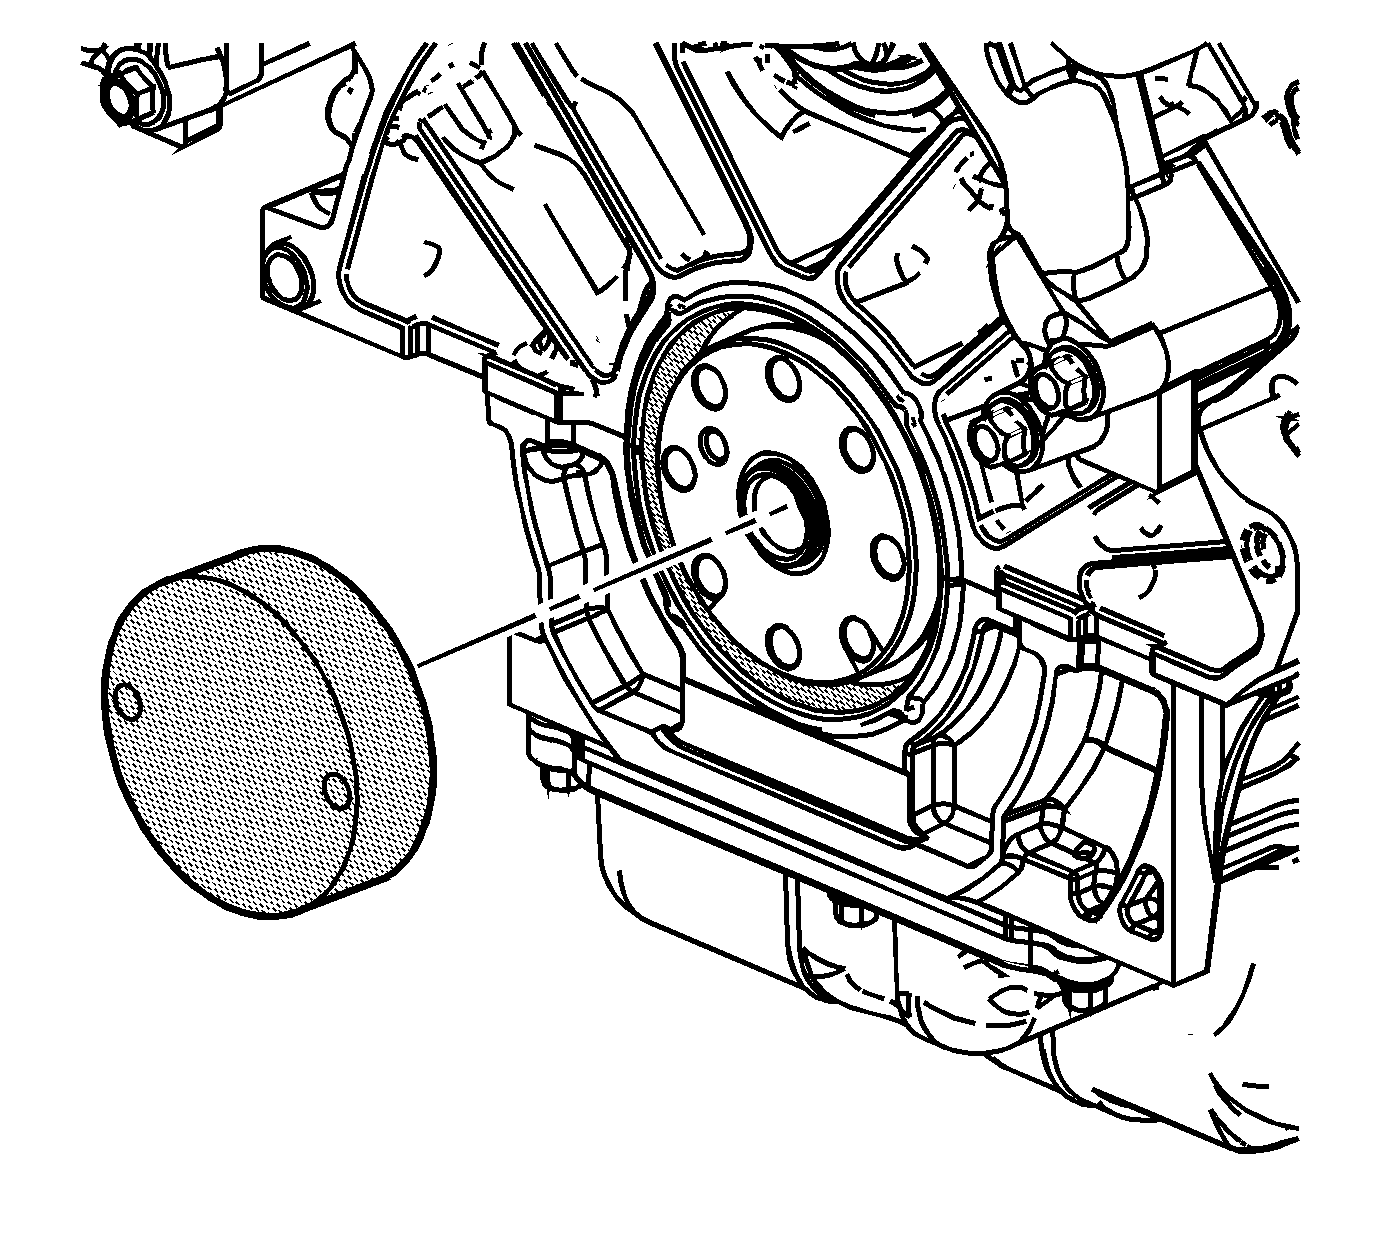
- Ensure the engine block where the crankshaft rear oil seal is installed is a deep bore (1).
- Inspect the engine block bore (1) and the crankshaft flange (2) for the damage. Repair or replace any damaged components.
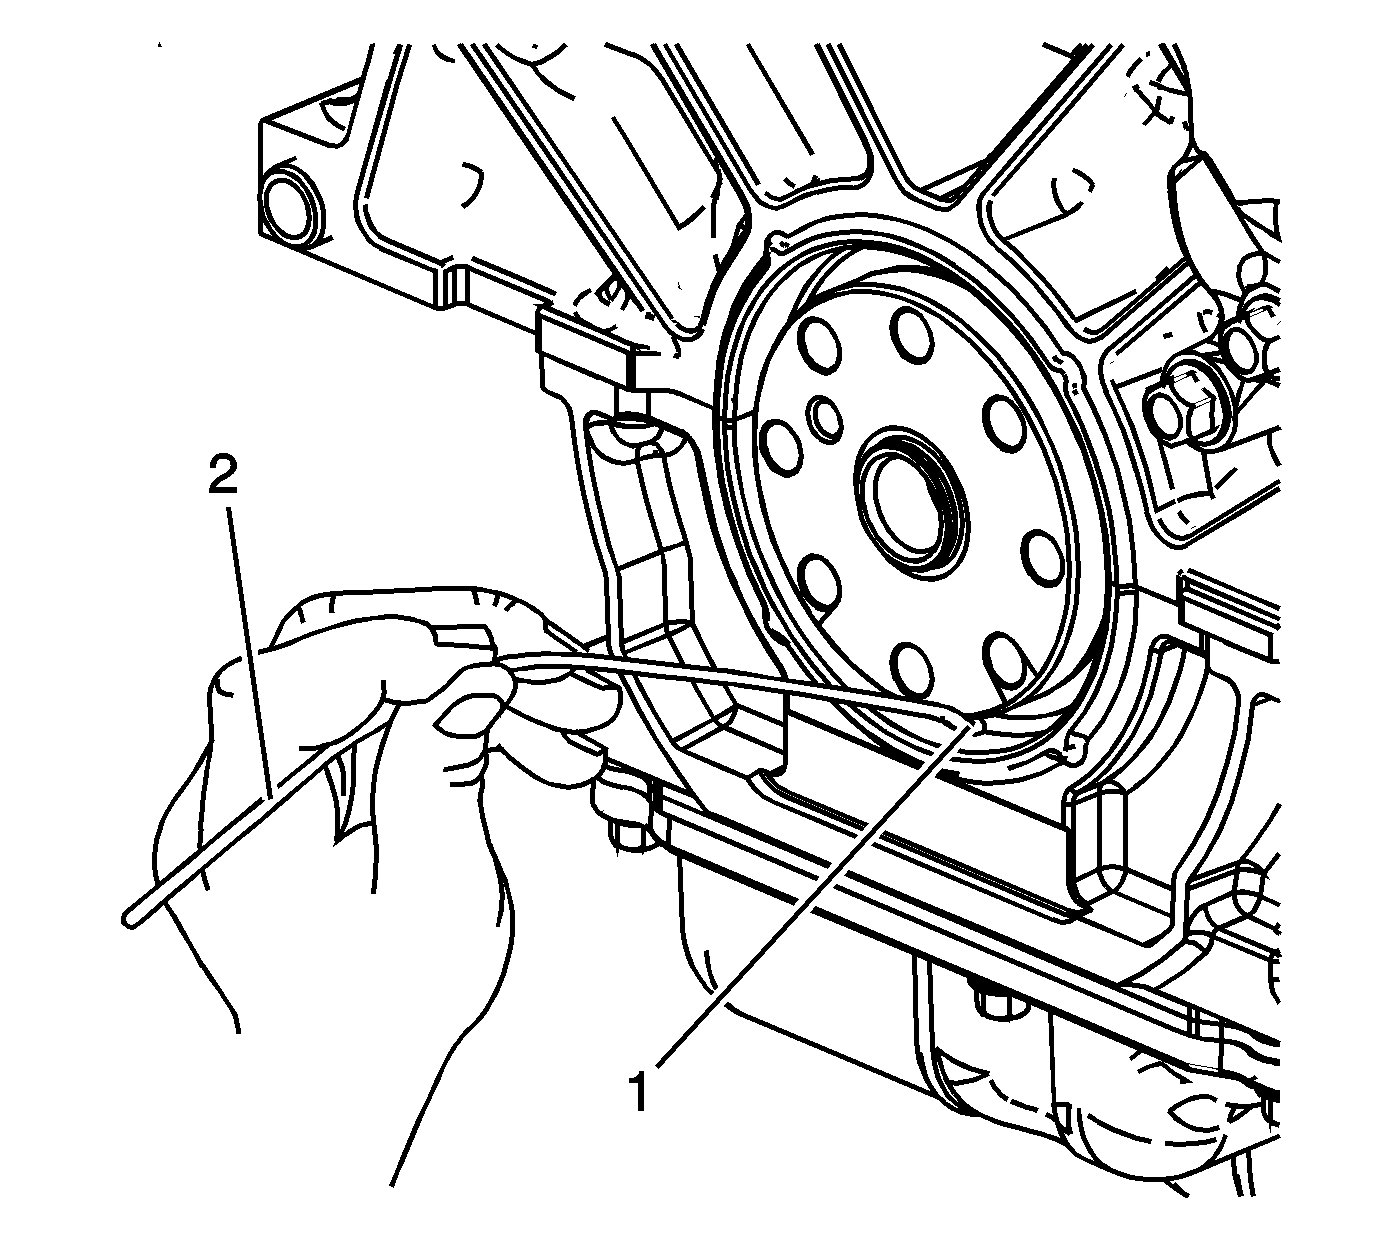
- Ensure the oil drain-back hole (1) is clear of debris using a wire or an unbound plastic tie wrap (2).
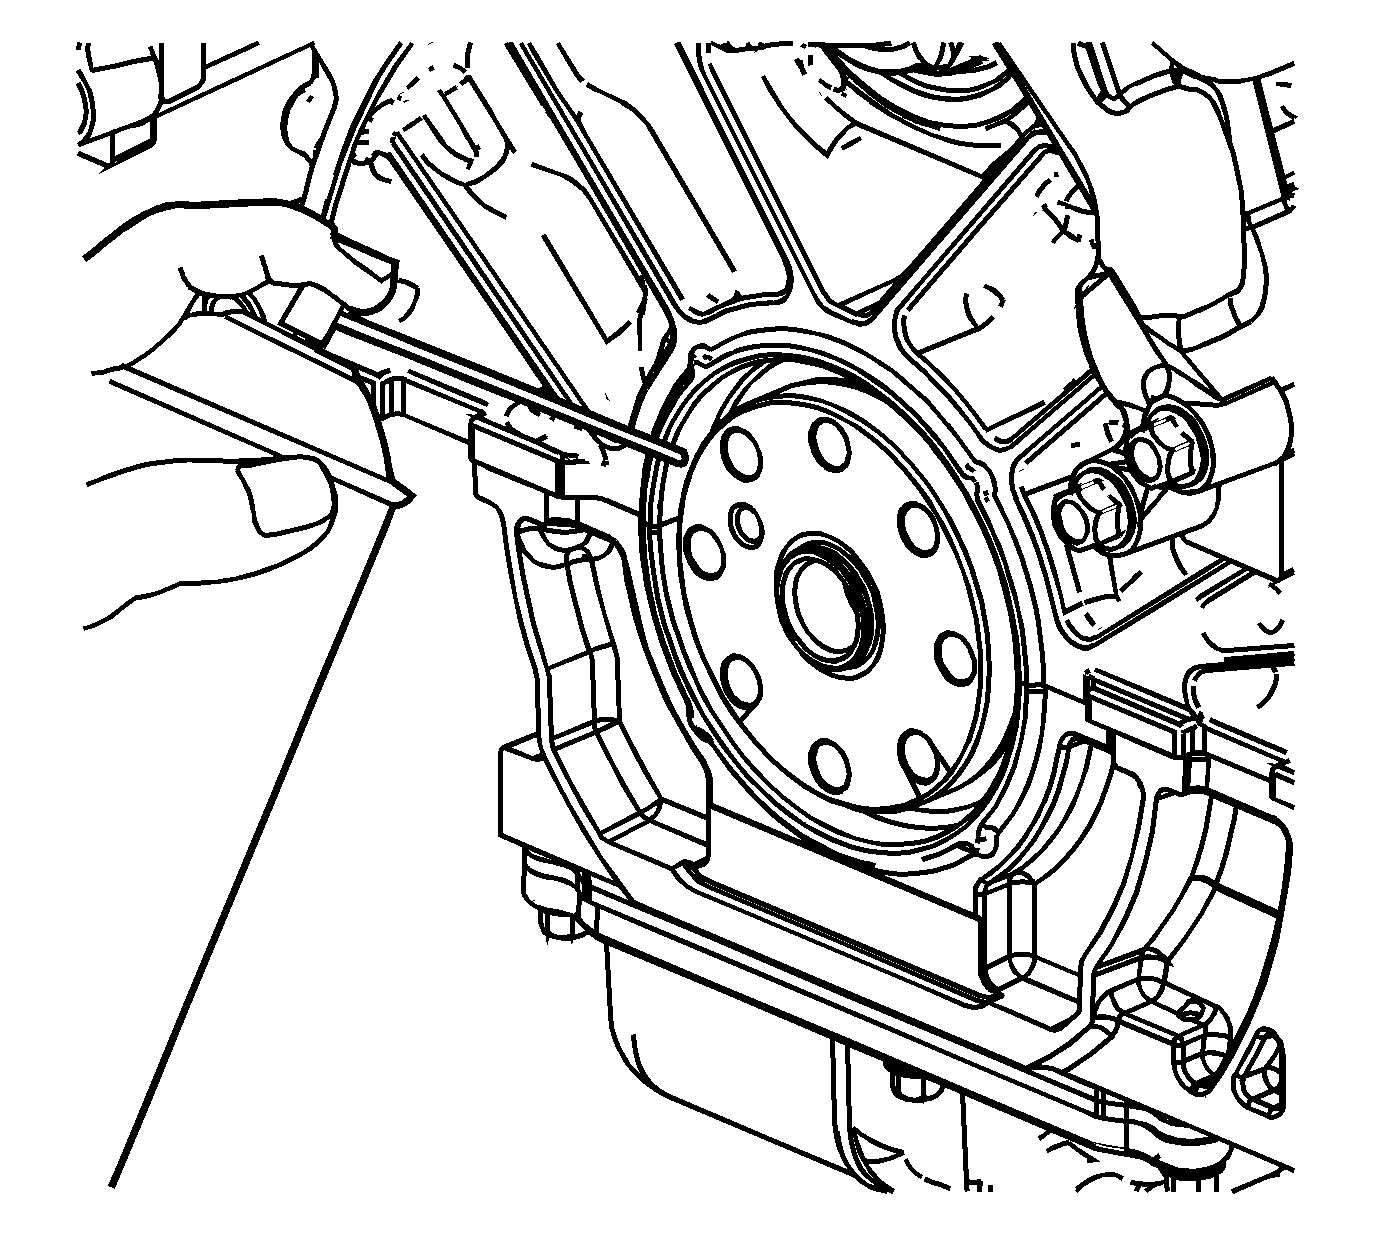
- Clean the bore in the block with cleaner solvent GM P/N 12378392 or 12346139 (Canadian P/N 88901247).
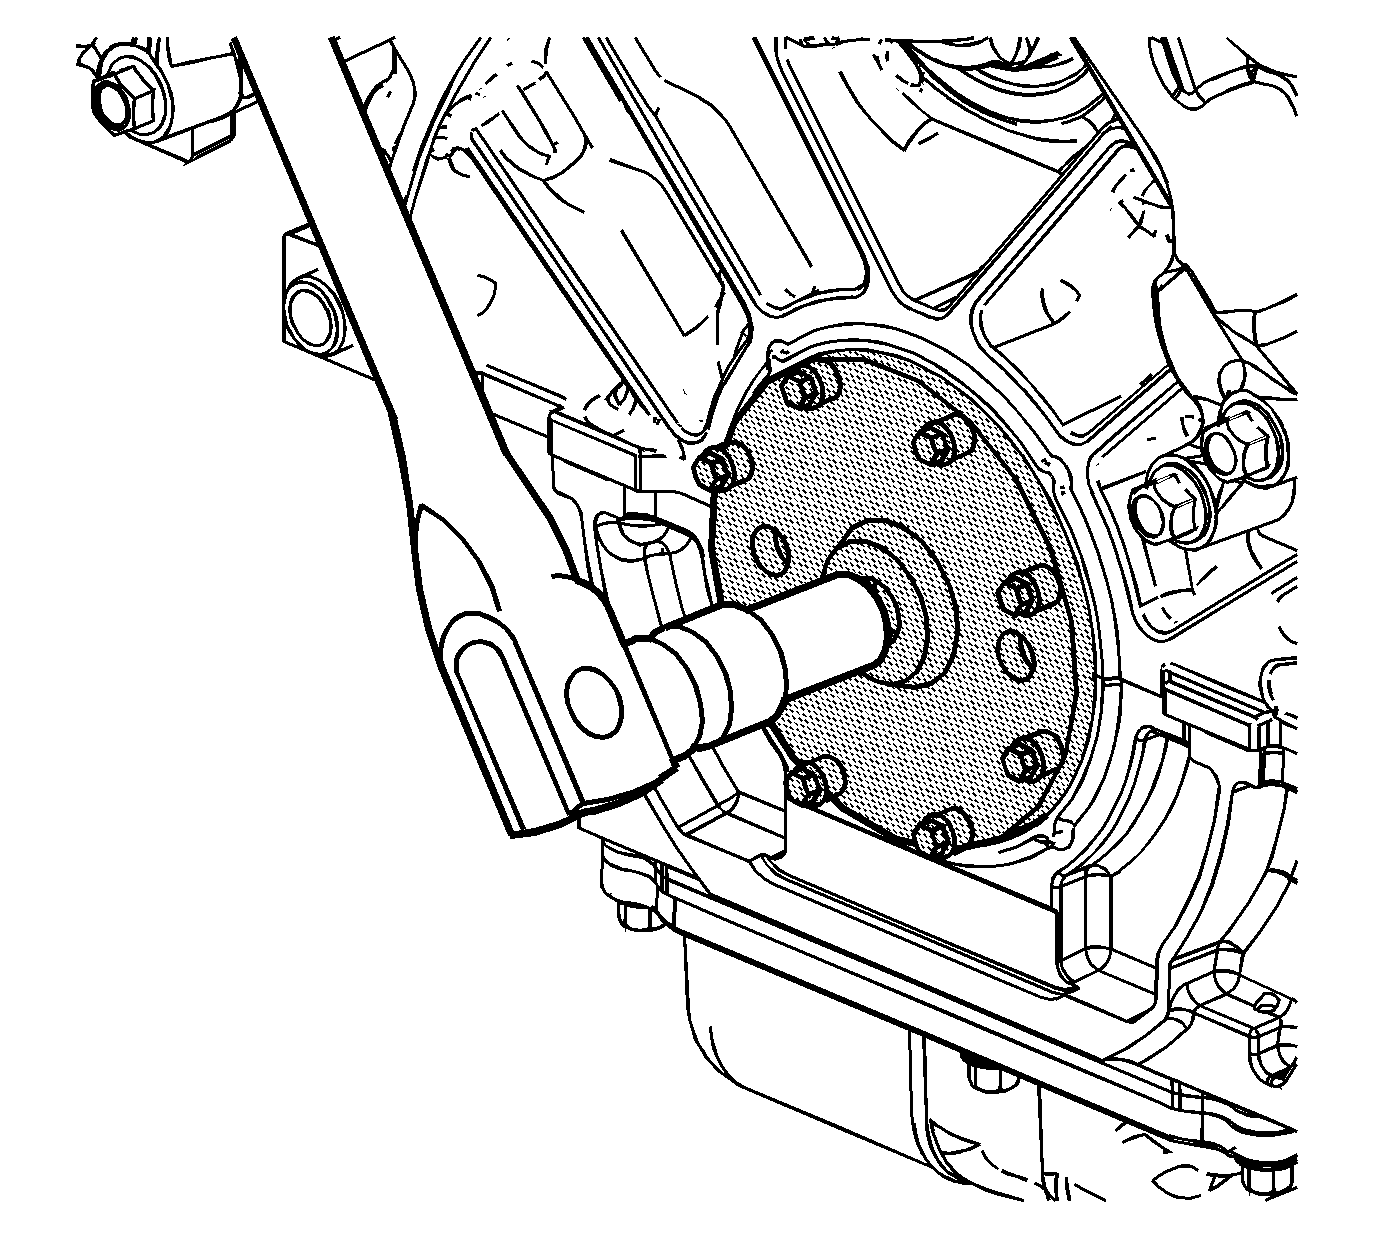
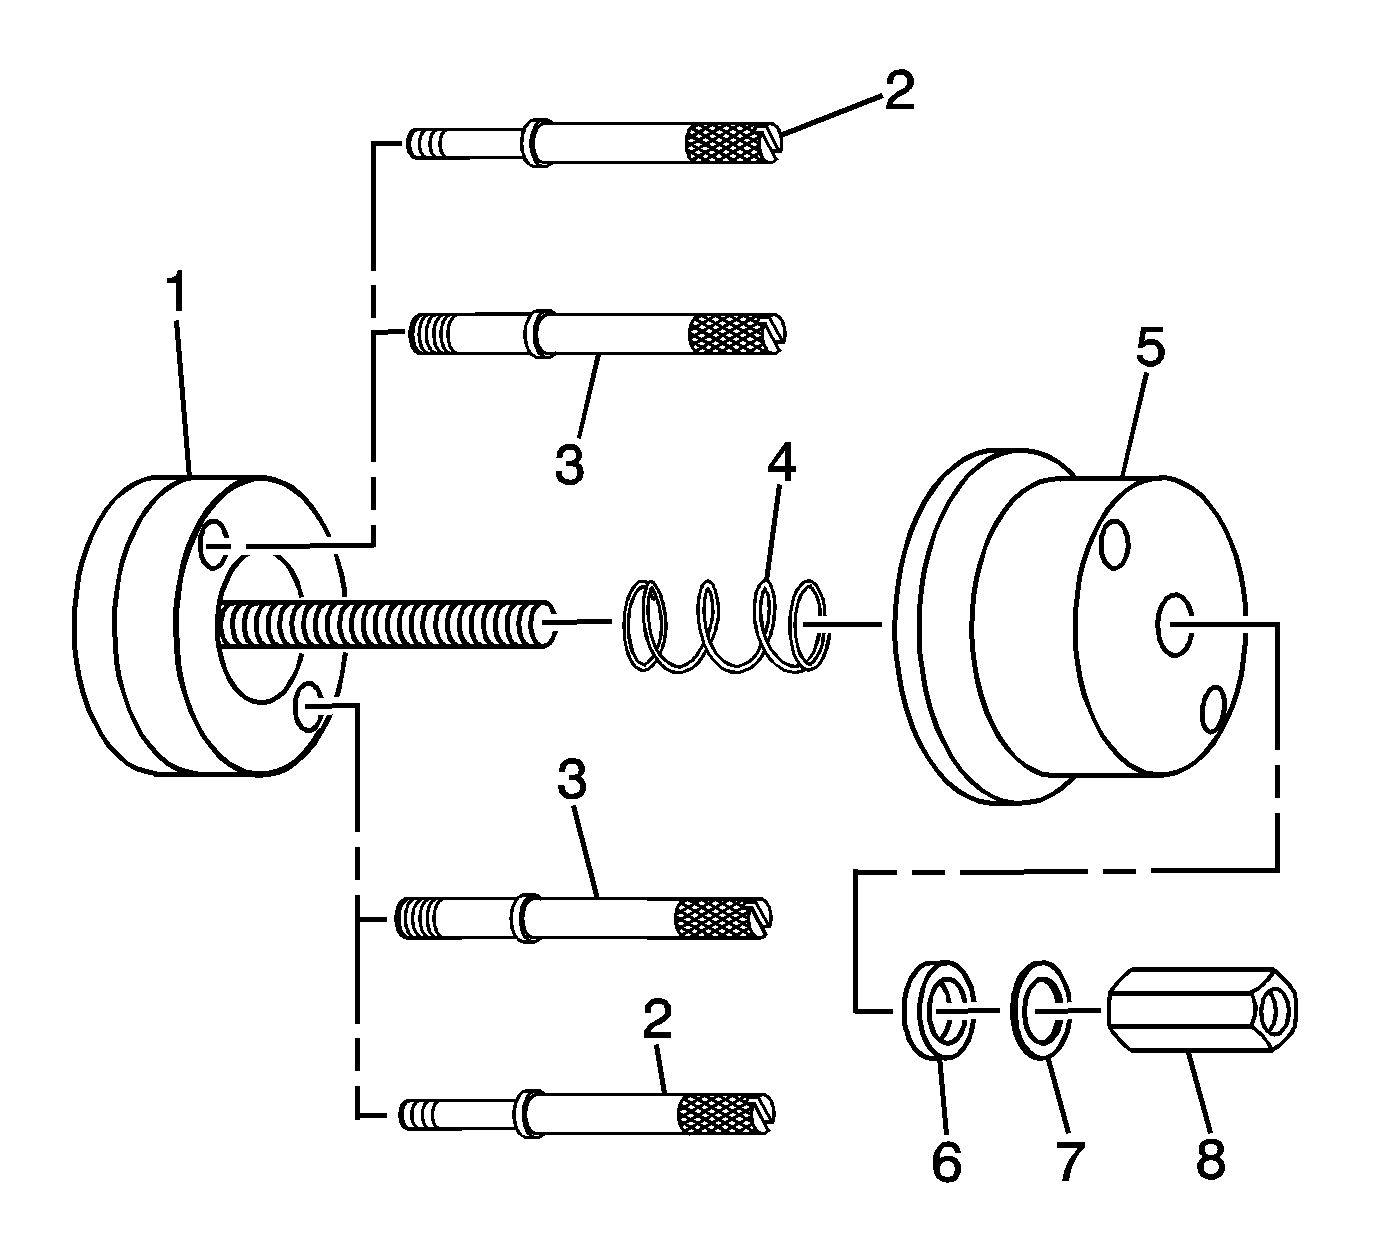
- Remove the proper sized bolts from the J 45930-A . Use the bolts (2) 8 mm or the bolts (3) 11 mm.
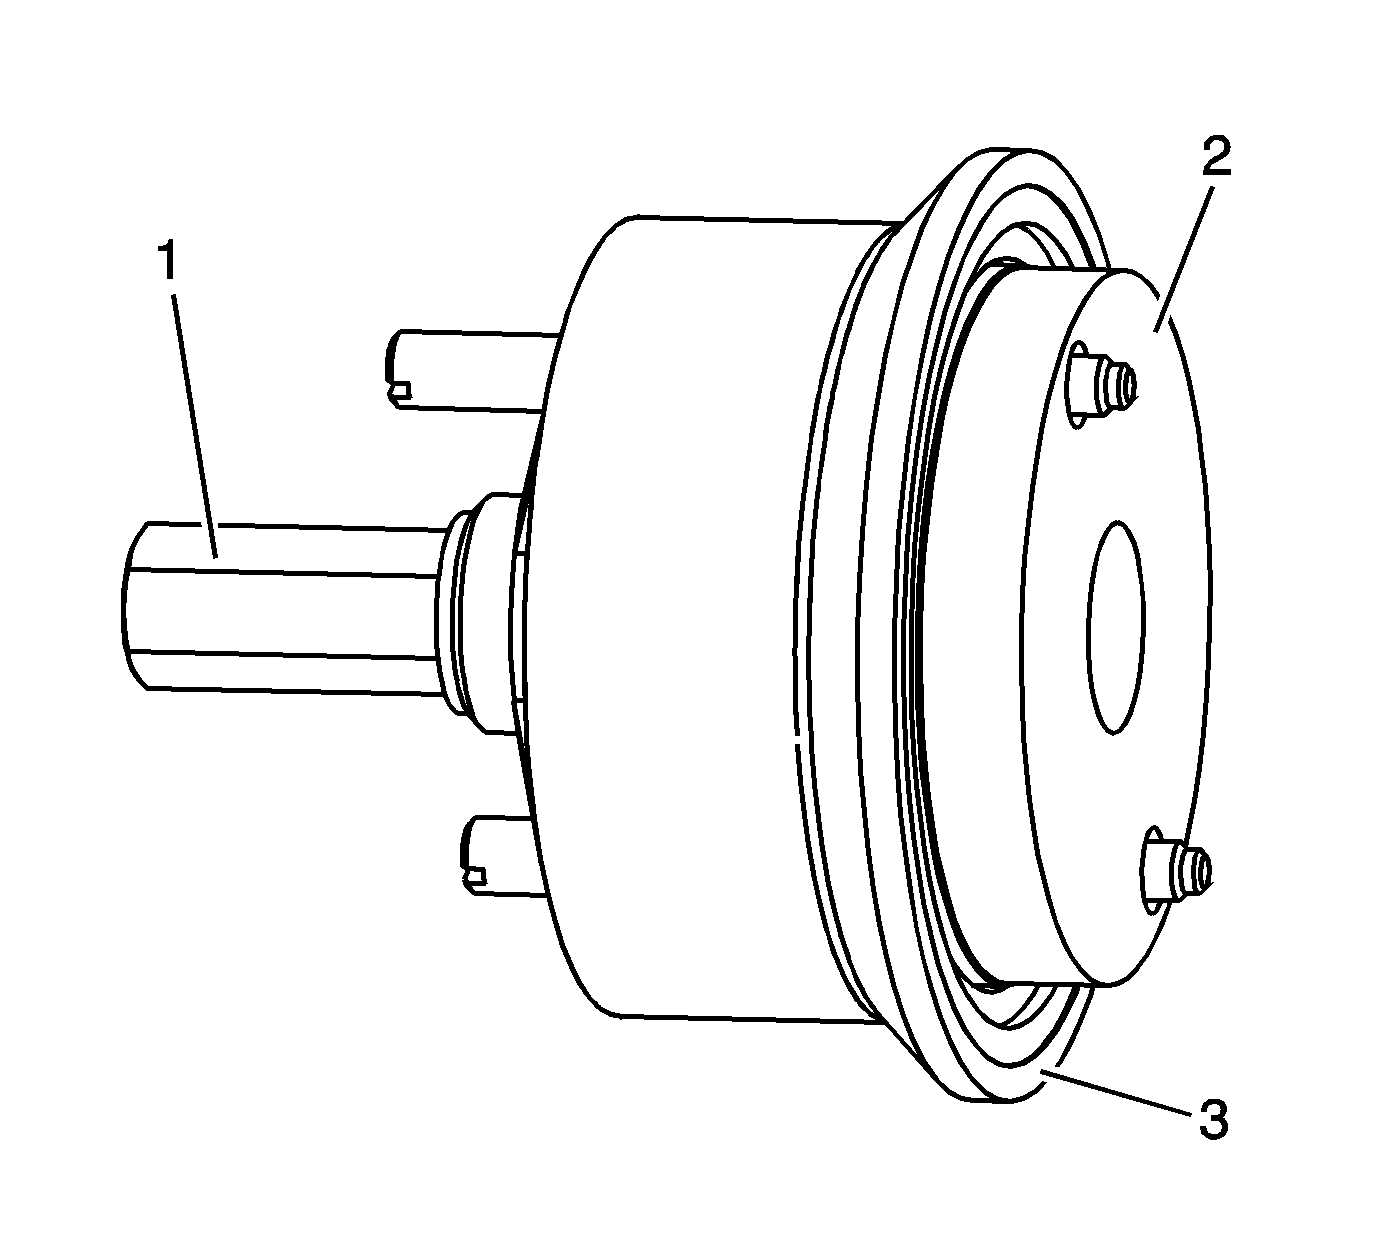
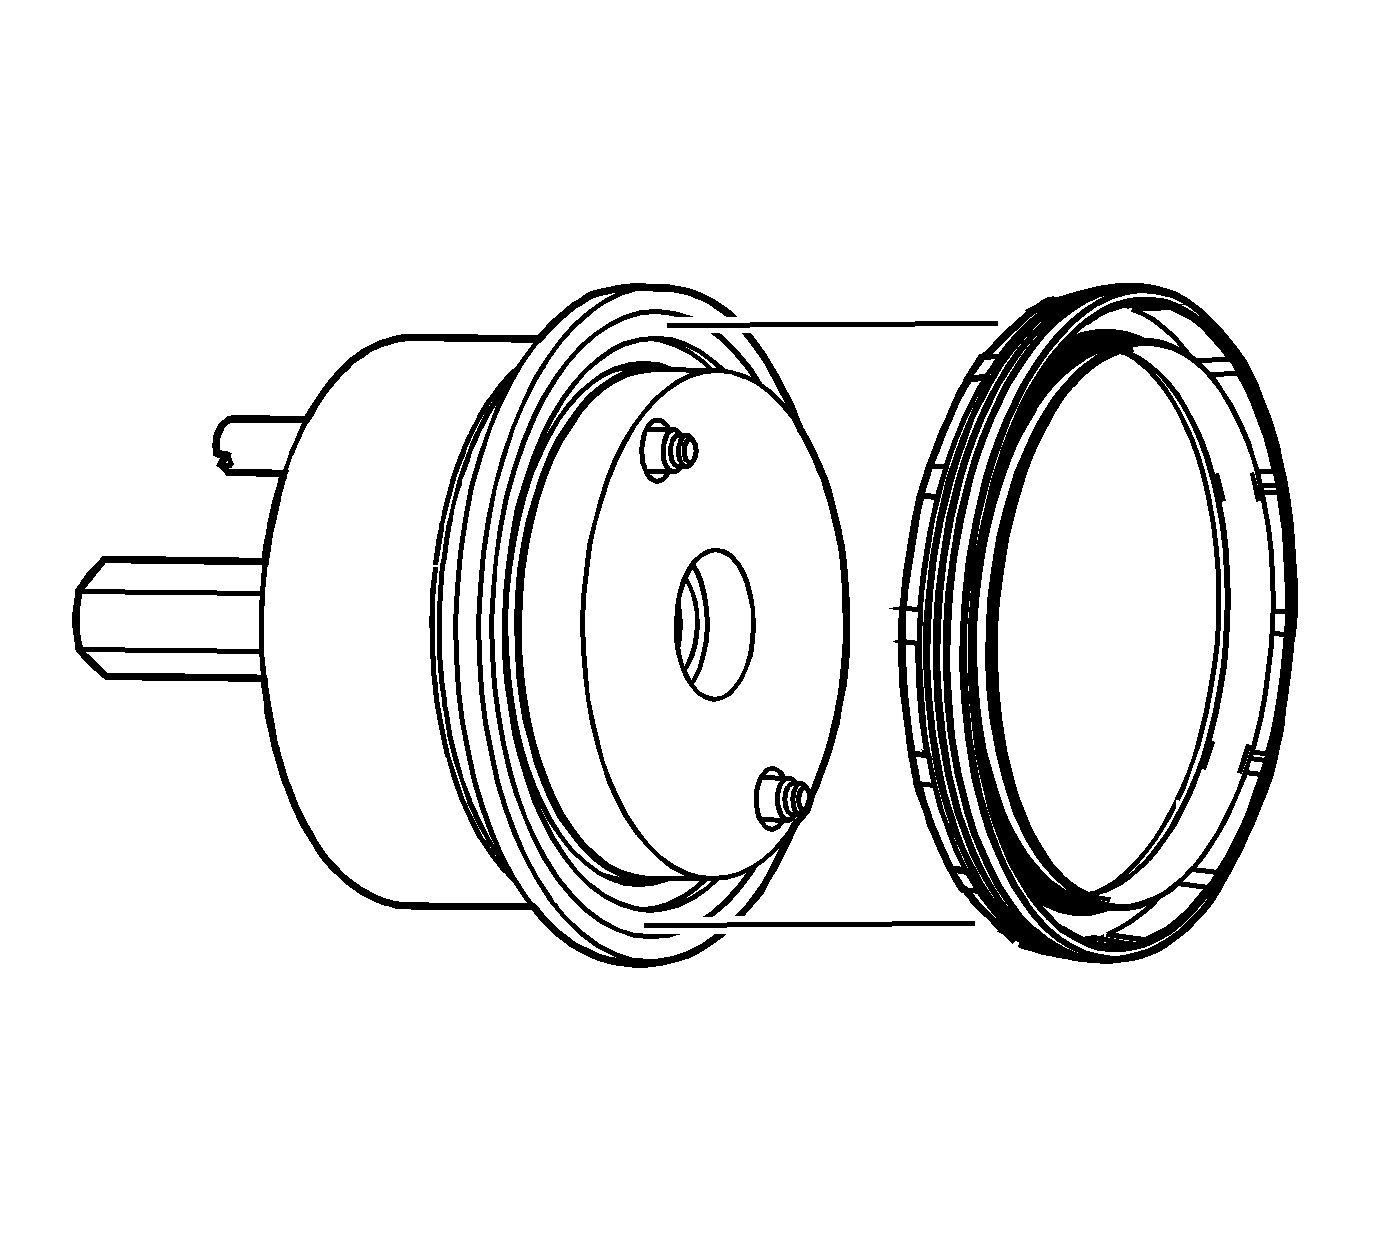
- Install the EN-48072 pilot base onto the crankshaft. The hub on the crankshaft will fit into the recess on the inboard side of the EN-48072 pilot base.
- Use the proper bolts from the J 45930-A to retain the EN-48072 pilot base in place.
- Install the EN-48072 applicator housing over the EN-48072 pilot base. Ensure the EN-48072 applicator housing bottoms in the bore of the block.
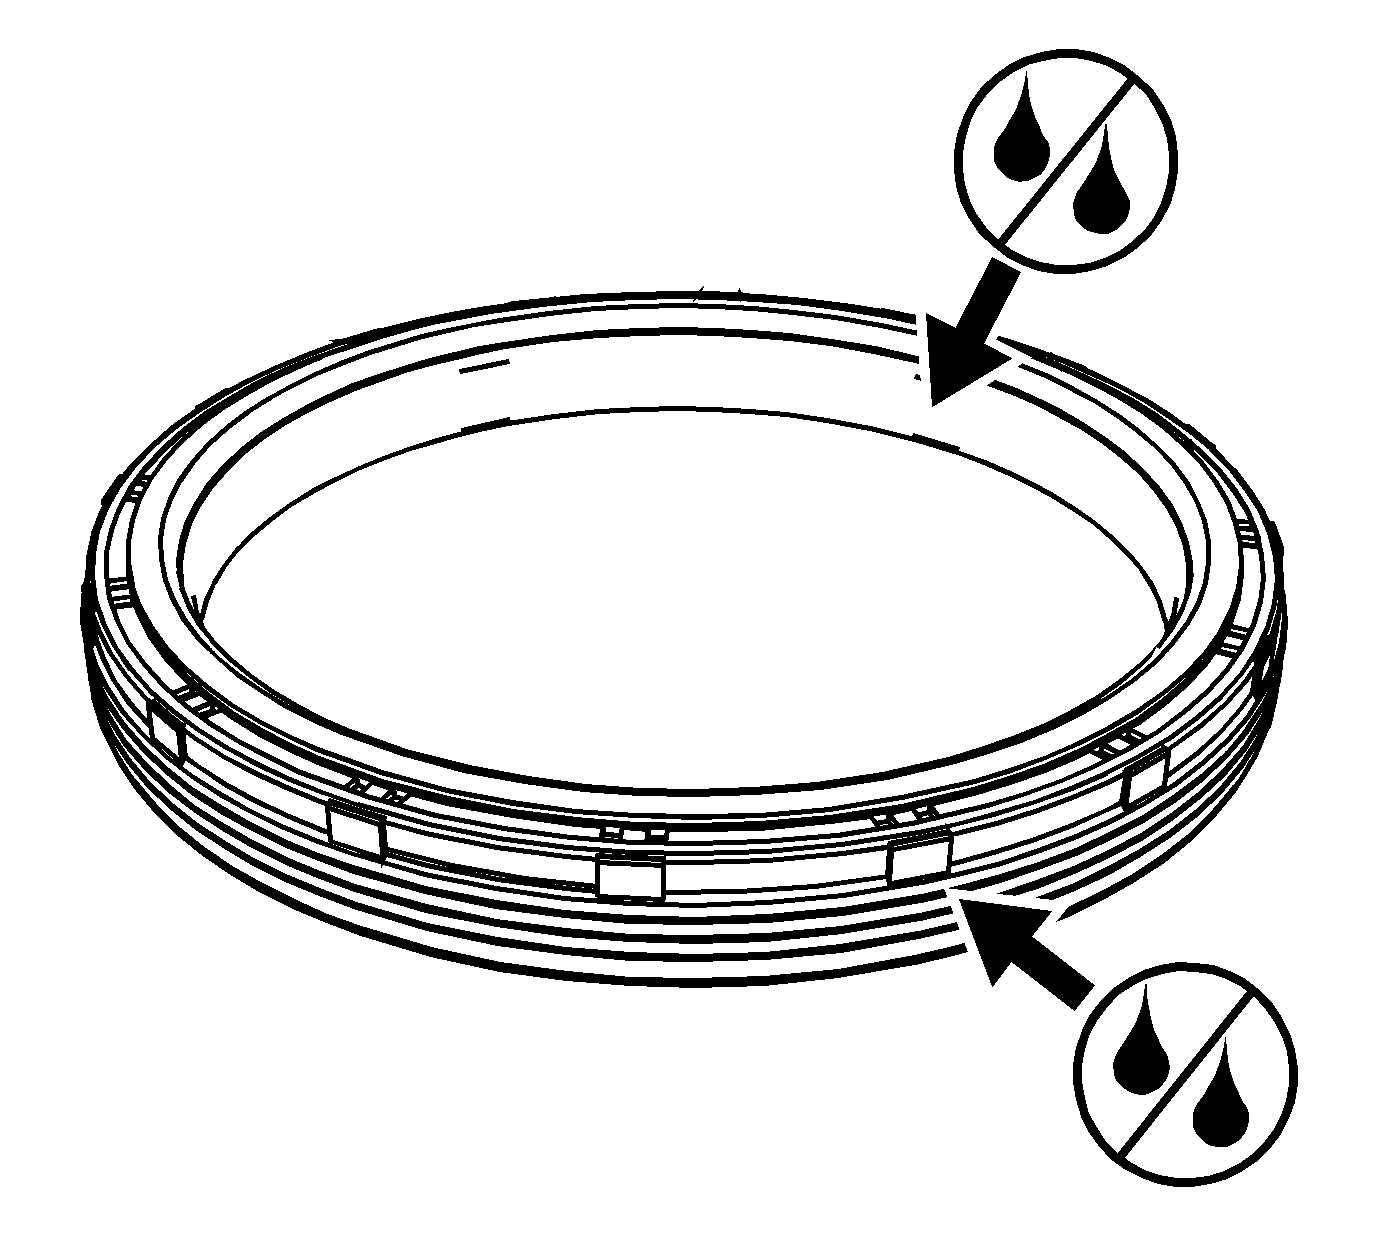
- Apply the sealant GM P/N 12378521 (Canadian P/N 88901148) to the bore outer diameter in the block. Ensure the sealant does not block the drain hole.
- Using a suitable tool spread the sealant within the bore to ensure an even coating across the bore.
- Using both hands, slowly and evenly, pull the EN-48072 applicator housing out of the bore and remove it from the EN-48072 pilot base.
- Remove the J 45930-A bolts from the EN-48072 pilot base.
- Remove the EN-48072 pilot base.
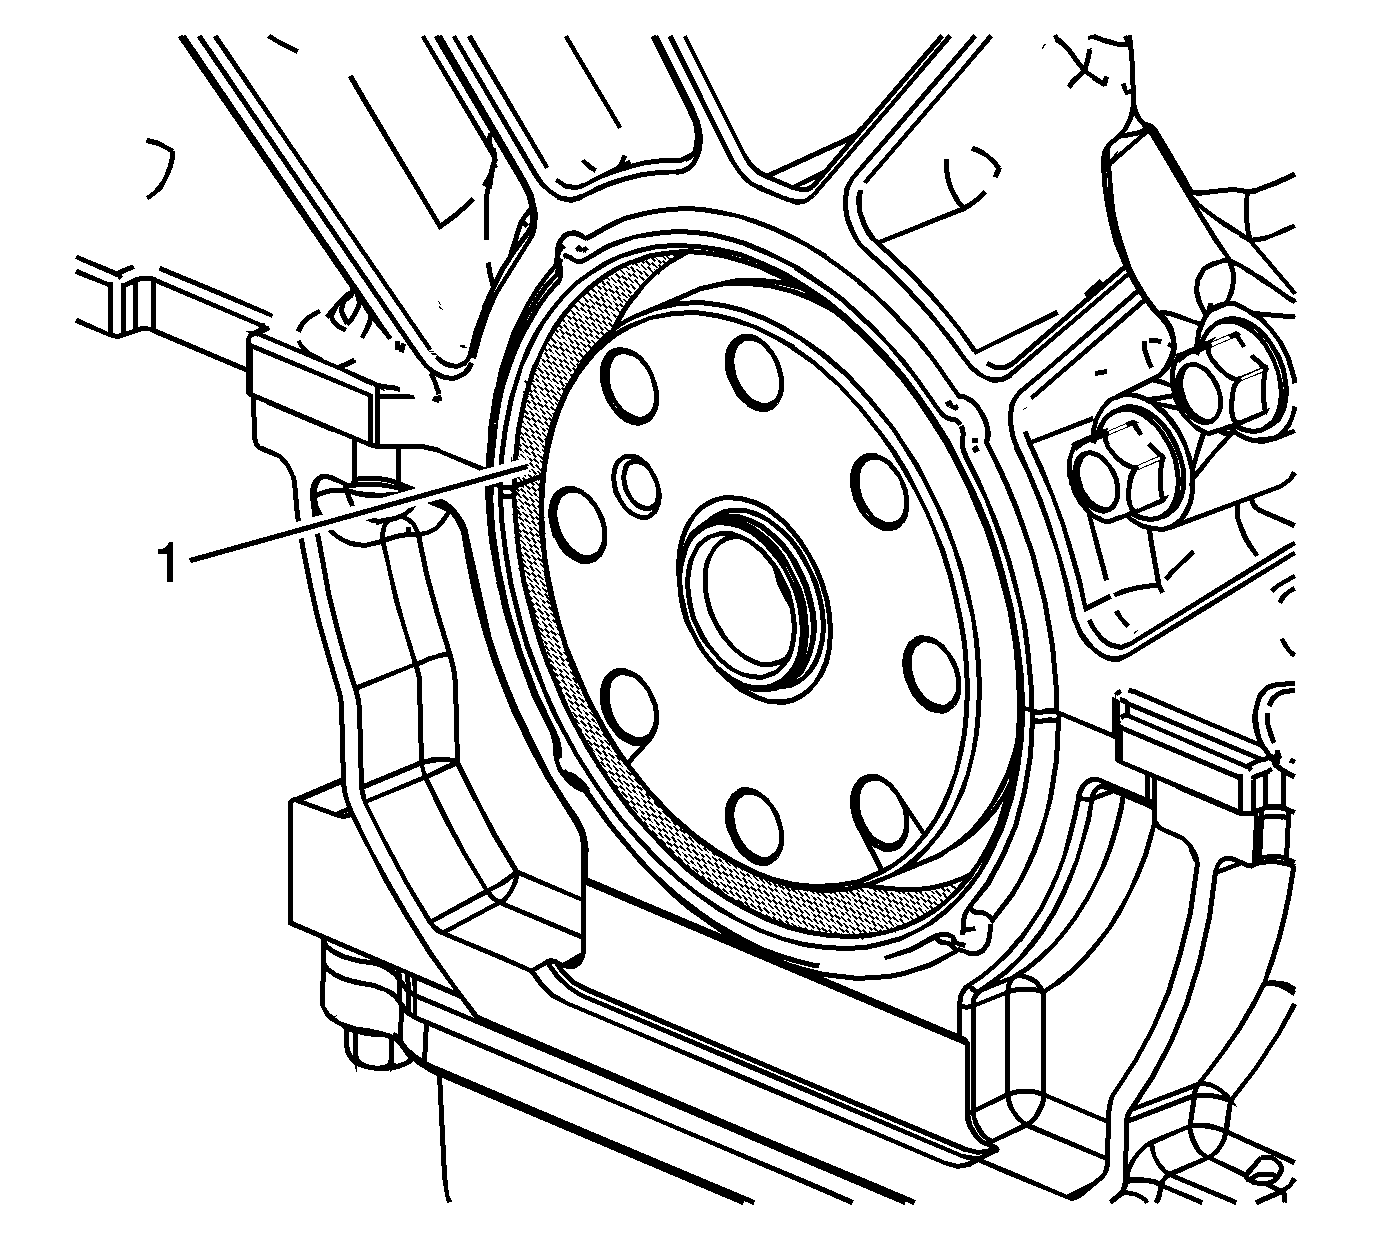
- Ensure that the sealant (1) is evenly spread across the bore of the block.
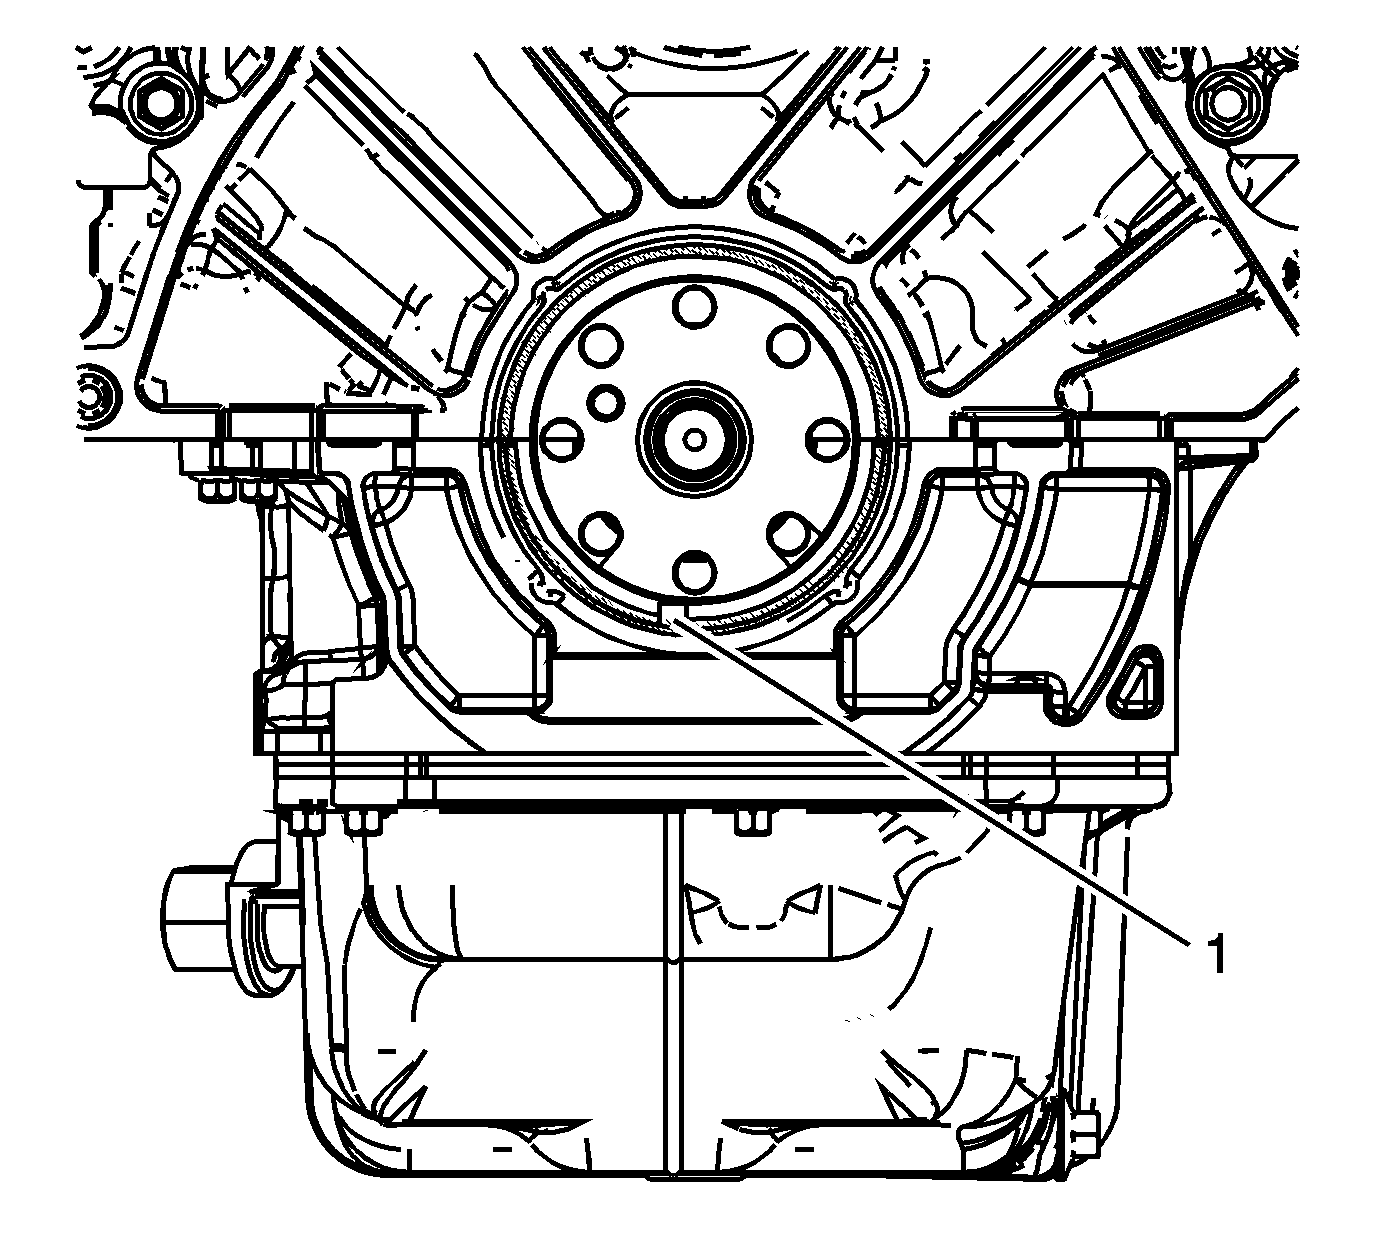
- Ensure the drain back hole (1) is clear of the sealant.
- Ensure the proper size of bolt (2) 8 mm or (3) 11 mm is being installed in the J 45930-A .
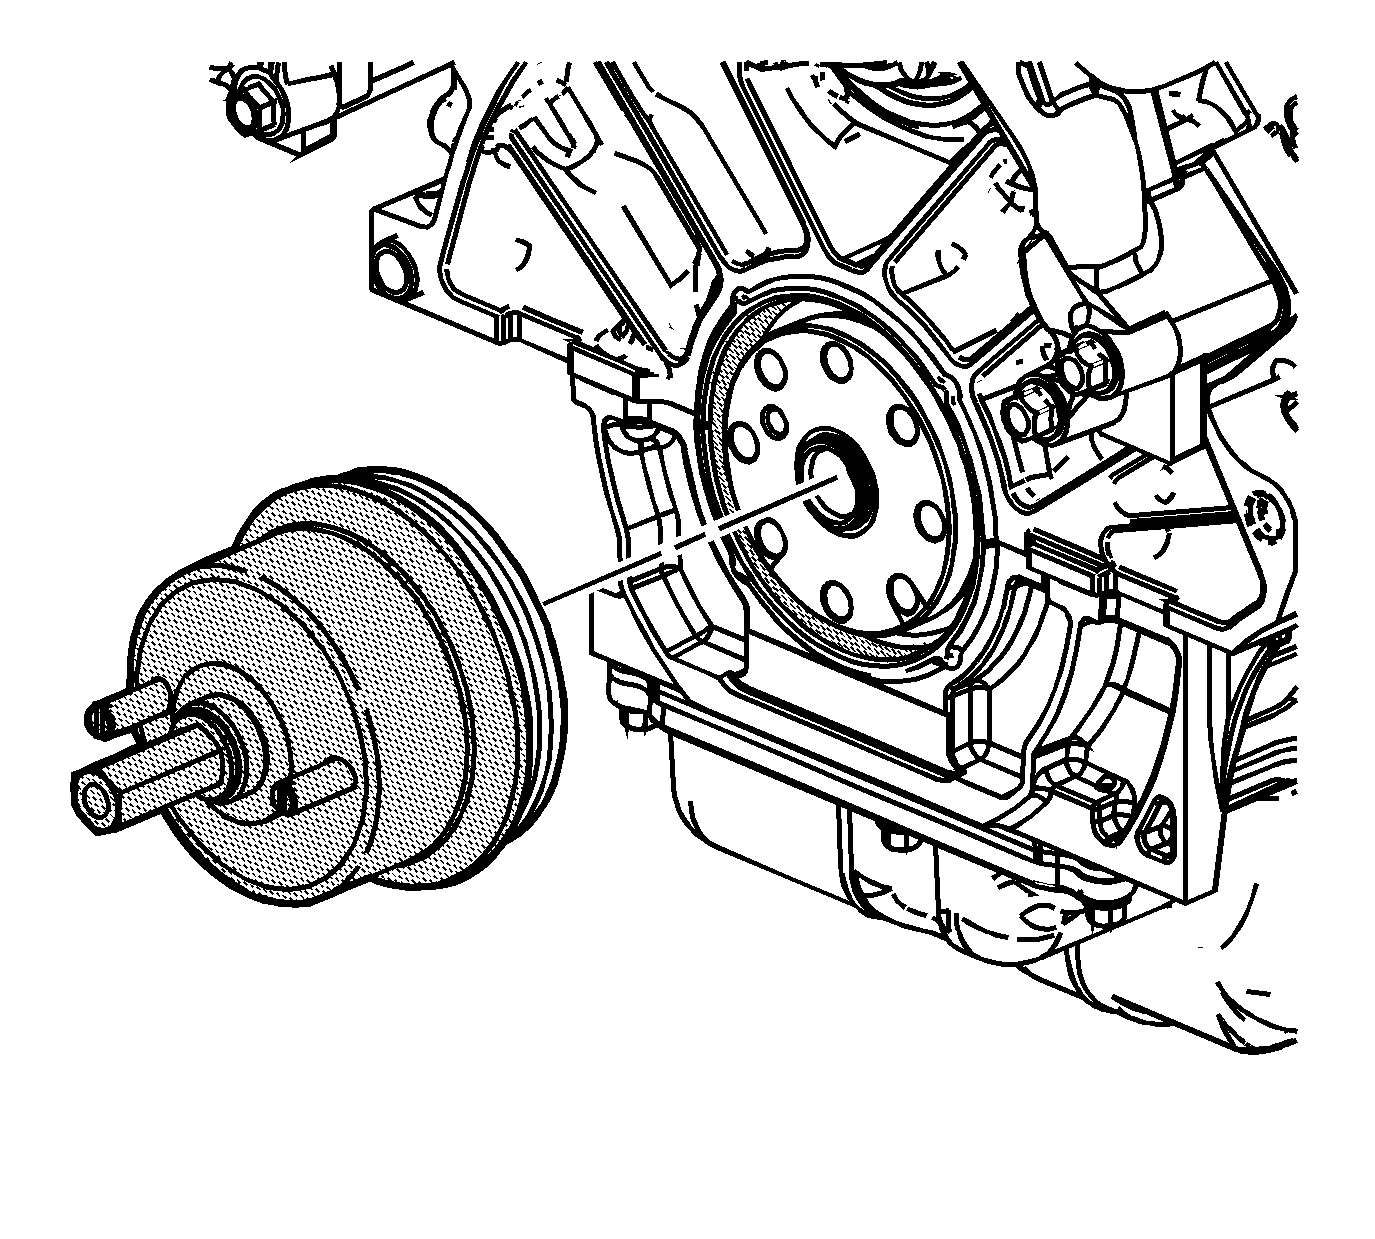
- Turn the center nut (1) of the J 45930-A until the center hub (2) protrudes approximately 15 mm (0.591 in) beyond the outer plate (3).
- Do not lubricate any part of the new cassette style crankshaft rear oil seal.
- Install the new cassette style crankshaft rear oil seal onto the center hub of the J 45930-A .
- Thread the two J 45930-A mounting bolts into the crankshaft flywheel bolt holes.
- Tighten the two mounting bolts until the J 45930-A is firmly mounted on the crankshaft.
- Install the new cassette style crankshaft rear oil seal by turning the nut of the J 45930-A until the drive portion of the J 45930-A bottoms against the crankcase.
- Loosen the center nut to release pressure on the crankcase.
- Loosen the two mounting bolts.
- Remove the J 45930-A from the crankshaft.
- Wipe off any excessive sealant from the block.
- Ensure the new cassette style crankshaft rear oil seal is installed properly.
- Clean all tools to remove any residual sealant.
- Install the flywheel. Refer to Engine Flywheel Replacement .
- Install the transaxle. Refer to Transmission Replacement .
Important:
• The
EN-48072
must be used to ensure even application of the sealant in the bore and to prevent blockage of the drain back hole. • Ensure components that are being sealed with RTV sealant are assembled within 20 minutes. Components assembled after the RTV sealant has skinned-over, approximately 20 minutes, will not bond properly. • Although originally equipped with a lip-style crankshaft rear oil seal, engines built from March 1, 1996 through 1999 should use the cassette-style crankshaft rear oil seal.
| • | A deep bore of approximately 15 mm (0.5906 in) was used on engines from March 1, 1996 and later. |
| • | A shallow bore of approximately 8 mm (0.3150 in) was used on engines from 1993 through February 29, 1996. This block would use a lip-style crankshaft rear oil seal and the J 38817-A for installation. |
Important: In order to ensure proper bonding of the sealant the bore must be clean and dry.
Important: Northstar engines 2005 and older have an 8 x 1.25 mm flywheel/flexplate crankshaft bolt hole thread. Northstar engines 2006 and later have an 11 x 1.5 mm flywheel/flexplate crankshaft bolt hole thread.

Important: Northstar engines 2005 and older have an 8 x 1.25 mm flywheel/flexplate crankshaft bolt hole thread. Northstar engines 2006 and later have an 11 x 1.5 mm flywheel/flexplate crankshaft bolt hole thread.
Important: The sealant must not block the drain back hole. Blockage of the drain back hole can lead to oil leakage.
Important: Apply steady even pressure to the EN-48072 applicator housing.
Important: In order to apply an even coat of the sealant do not twist or turn the EN-48072 applicator housing as it is pulled away from the bottom of the bore.

Important:
• Beginning with the model year 2006 the flywheel/flexplate crankshaft bolt hole thread was changed from 8 x 1.25 mm to 11 x 1.5 mm. The
J 45930-A
will service the cassette seals
installed on engines from March 1, 1996 to 2006. If a J 45930 is to be used on a 2006 or later engine the update kit, J 45930-10, must be used to convert the J 45930 to a
J 45930-A
. • Crankshaft rear oil seal and engine flywheel installation requires adequate space for installation. If the engine stand does not allow suitable space to use the
J 45930-A
install the crankshaft
rear oil seal and engine flywheel with the engine properly supported on the floor or on a bench. • Northstar engines 2005 and older have an 8 x 1.25 mm flywheel/flexplate crankshaft bolt hole thread. Northstar engines 2006 and later have an 11 x 1.5 mm flywheel/flexplate crankshaft bolt hole thread.
Important: DO NOT use any lubricant in order to install the crankshaft rear oil seal. Do not use any lubricant on the coating pre-applied to the inner diameter of the crankshaft rear oil seal. The coating is a sealant that must not be contaminated. Do not use any lubricant on the outer diameter of the crankshaft rear oil seal. The sealant applied to the bore of the engine block will not properly bond to a lubricated crankshaft rear oil seal.

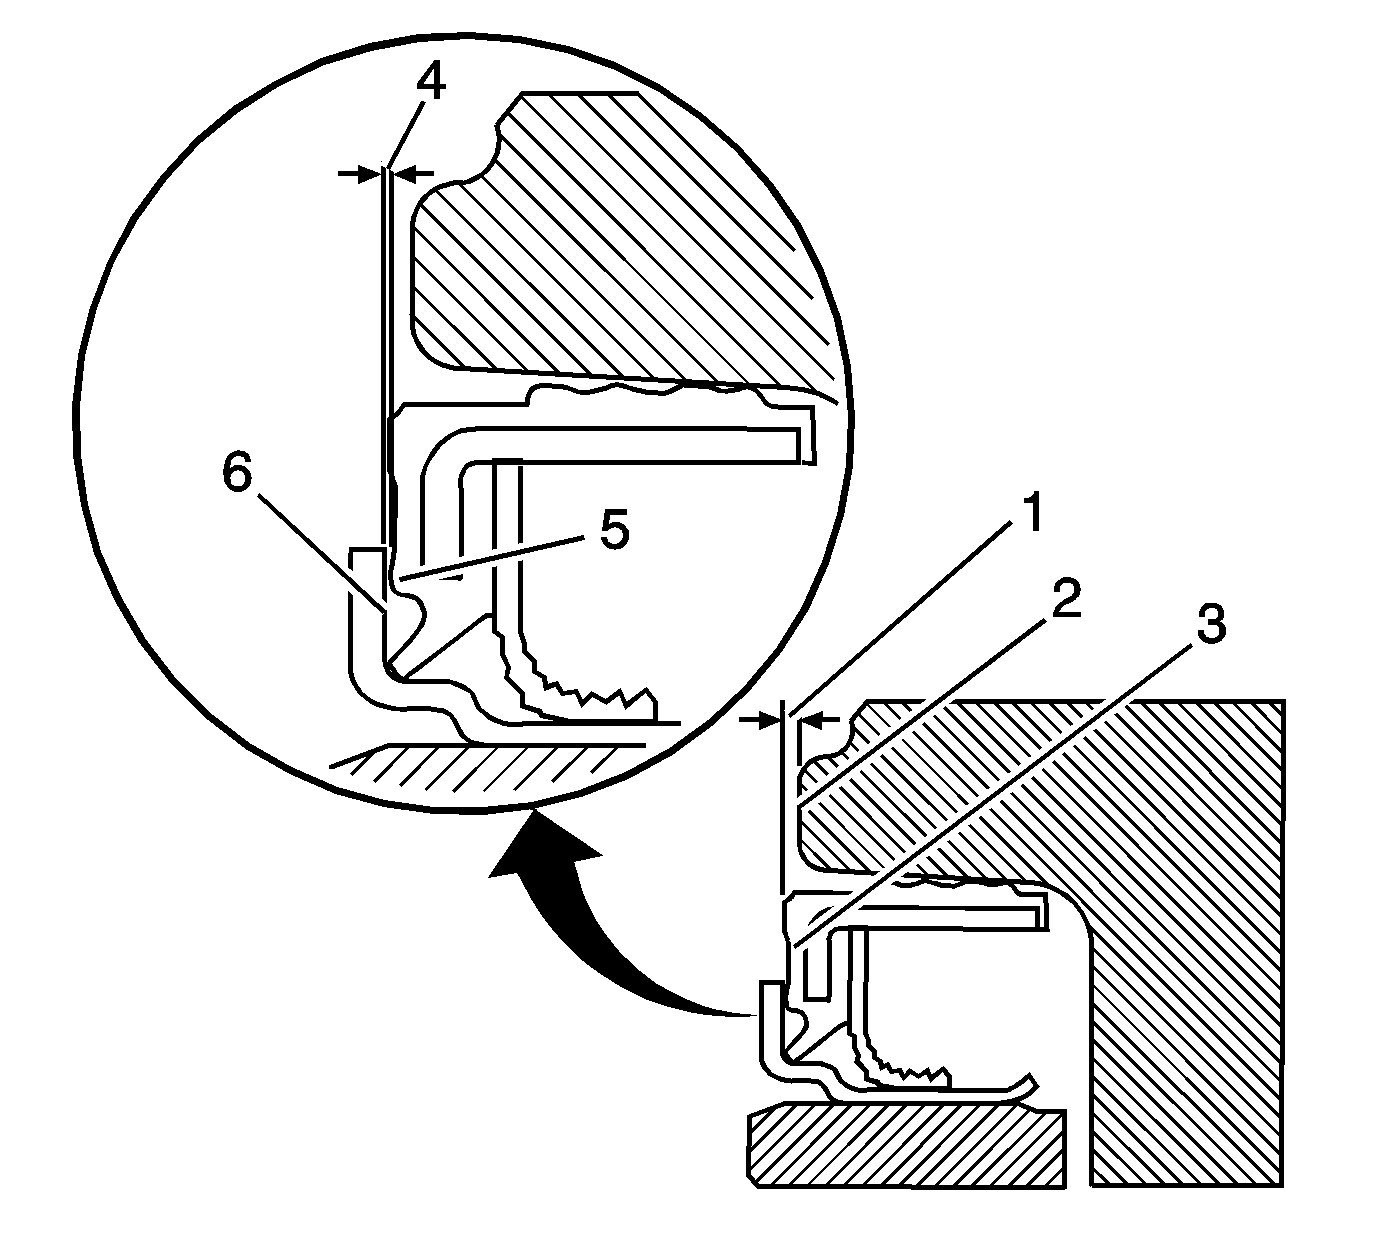
| • | The outer surface of the seal (3) should be 0.500-0.800 mm (0.0197-0.0315 in) (1) below the surface of the engine block (2). |
| • | The inner surface of the sleeve (6) should be 0.400-0.900 mm (0.0158-0.0354 in) (4) below the surface of the outer surface of the seal (5). |
| • | The installed seal and sleeve need to be parallel to the block by 0.000-0.500 mm (0.000-0.0197 in). |
