Removal Procedure
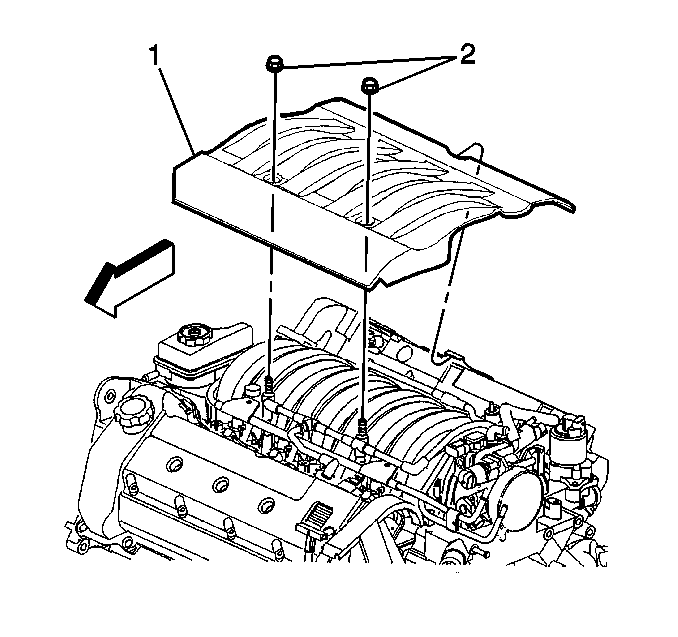
- Remove the 2 nuts (2) from the intake manifold sight shield (1).
- Remove the sight shield (1) from the engine.
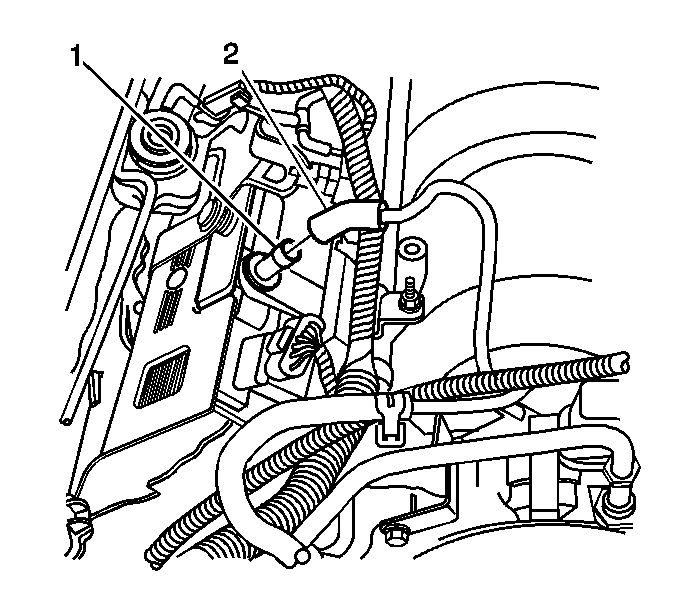
- Disconnect the PCV dirty air tube (2) from the camshaft cover.
- Disconnect the oxygen sensor wire.
- Disconnect the vacuum tubes from the secondary AIR vent solenoid.
- Disconnect the secondary AIR vent solenoid electrical connector.
- Remove the secondary AIR control valve bracket. Refer to Secondary Air Injection Shutoff Valve Replacement - Bank 1 in Engine Controls-4.6L.
- Remove the nut securing the secondary AIR tube.
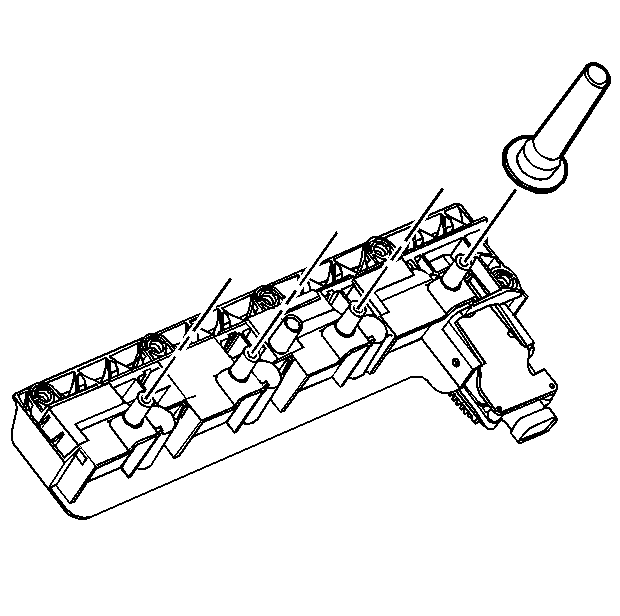
- Remove the ignition coil cassette. Refer to Ignition Control Module Replacement - Bank 1 in Engine Controls-4.6L.
- Remove the 4 spark plug boots.
- Disconnect the cable harness clips at the front of the camshaft cover and position the cable harness aside.
- Raise and support the vehicle. Refer to Lifting and Jacking the Vehicle in General Information.
- Remove the 3 bolts securing the heater pipes to the cylinder head.
- Carefully position aside the heater pipes in order to access the camshaft cover bolt and ease in the removal of the camshaft cover.
- Lower the vehicle.
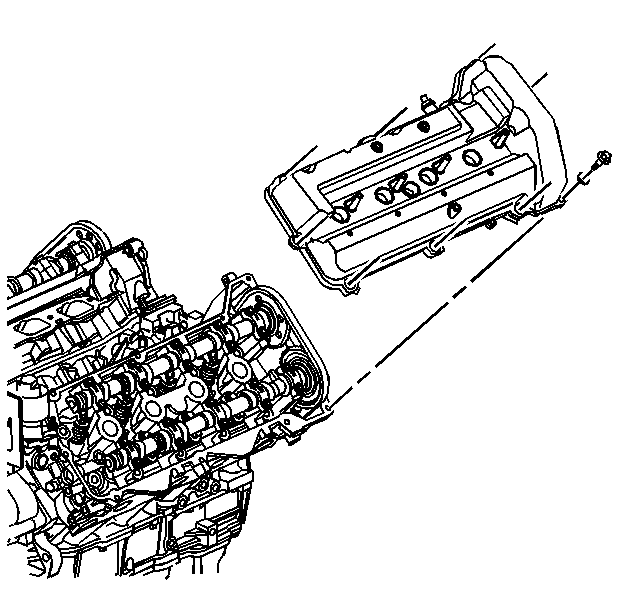
- Remove the 9 camshaft cover bolts.
- Remove the camshaft cover.
- Discard the camshaft cover perimeter seals and spark plug seals if there is any evidence of damage or if the seal comes out of the groove in the cover during removal.
- Clean and inspect the camshaft cover. Refer to Camshaft Cover Cleaning and Inspection in Engine Mechanical 4.6L-Unit Repair.


Installation Procedure
- Install the camshaft cover seal as required.
- Install the camshaft cover.
- Install the 9 camshaft cover bolts.
- Raise and support the vehicle. Refer to Lifting and Jacking the Vehicle in General Information.
- Install the 3 bolts securing the heater pipes to the cylinder head.
- Lower the vehicle.
- Install the spark plug boots onto the coil cassette.
- Install the ignition coil cassette. Refer to Ignition Control Module Replacement - Bank 1 in Engine Controls-4.6L.
- Install the secondary AIR control valve bracket. Refer to Secondary Air Injection Shutoff Valve Replacement - Bank 1 in Engine Controls-4.6L.
- Connect the cable harness clips to the cable harness at the front of the camshaft cover.
- Connect the secondary AIR vent solenoid electrical connector.
- Connect the vacuum tubes to the secondary AIR vent solenoid.
- Connect the oxygen sensor wire.
- Connect the PCV dirty air tube (2) to the camshaft cover.
- Position the intake manifold sight shield (1) to the engine.
- Install the 2 intake manifold sight shield nuts (2).
Important: Be careful to prevent the exposed section of the camshaft cover seal from being damaged by the edge of the cylinder head casting.

Notice: Use the correct fastener in the correct location. Replacement fasteners must be the correct part number for that application. Fasteners requiring replacement or fasteners requiring the use of thread locking compound or sealant are identified in the service procedure. Do not use paints, lubricants, or corrosion inhibitors on fasteners or fastener joint surfaces unless specified. These coatings affect fastener torque and joint clamping force and may damage the fastener. Use the correct tightening sequence and specifications when installing fasteners in order to avoid damage to parts and systems.
Tighten
Tighten the camshaft cover bolts to 10 N·m (89 lb in).
Tighten
Tighten the heater pipe bolts to 11 N·m (97 lb in).

Ensure that the boots are fully seated against the cassette.


Tighten
Tighten the nuts to 3 N·m (27 lb in).
