Removal Procedure
- Raise and support the vehicle. Refer to Lifting and Jacking the Vehicle in General Information.
- Remove the tire and wheel. Refer to Tire and Wheel Removal and Installation in Tires and Wheels.
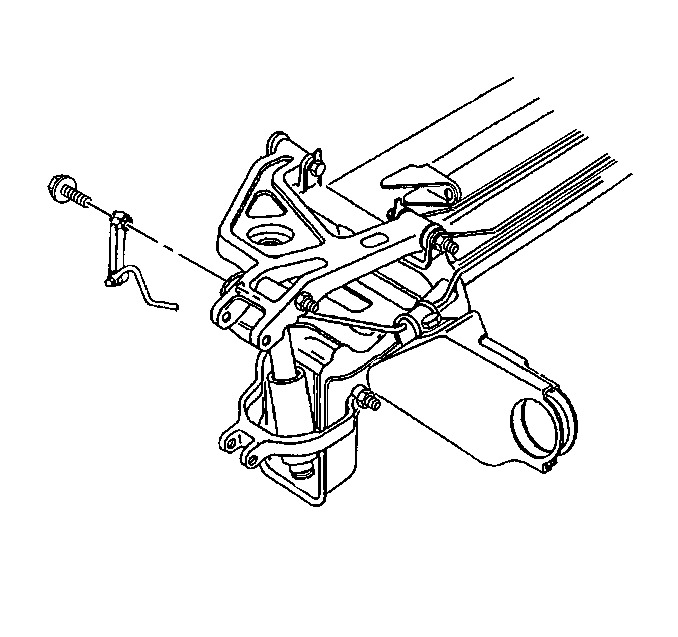
- Support the outboard end of the lower control arm with a suitable jack to securely hold the control arm in position.
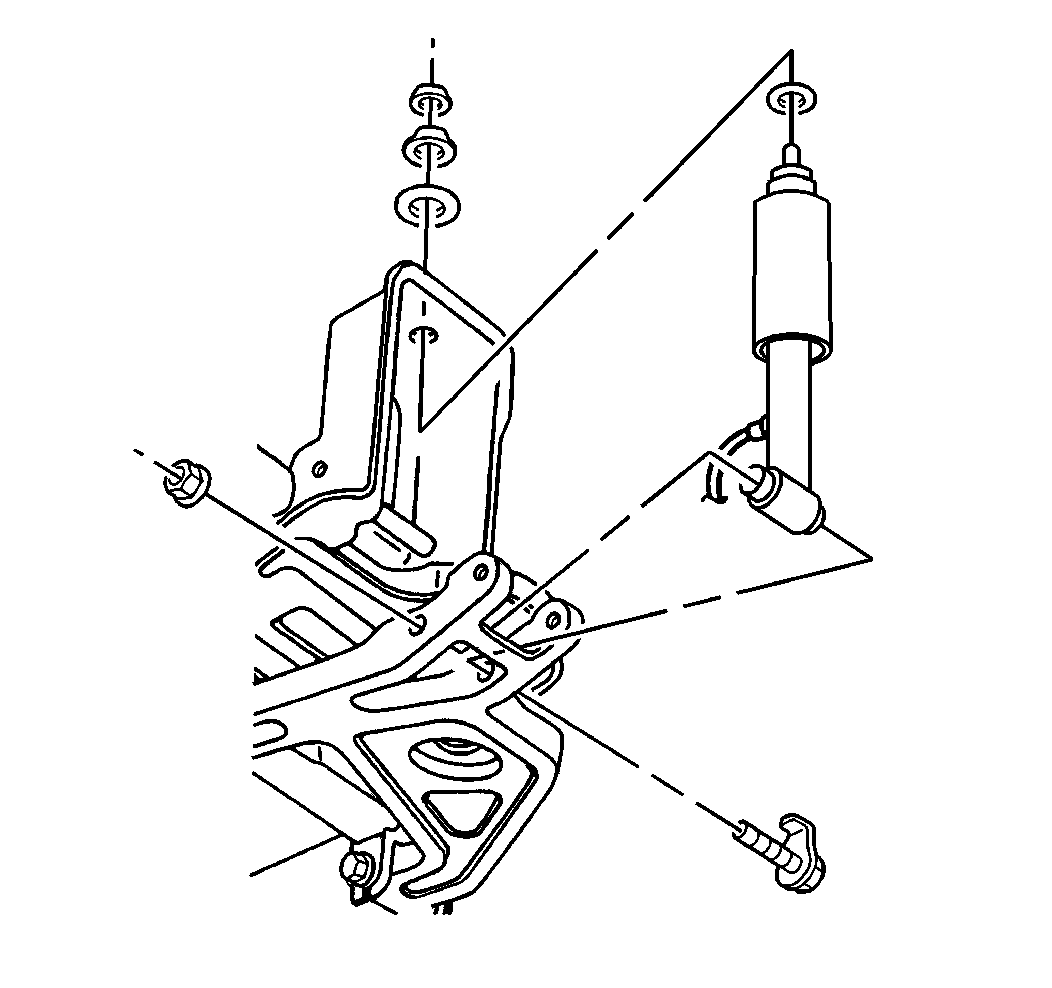
- Remove the stabilizer shaft link lower mounting bolt.
- Remove the shock absorber lower mounting bolt.
- Disconnect the automatic level control sensor link from the lower control arm.
- Slowly lower the control arm down with jack until spring pressure is released.
- Pull the lower control arm downward to remove the spring.
Installation Procedure
- Install the coil spring.
- Raise a jack under the outboard end of the lower control arm.
- Insert the knuckle onto the control arm and attach the nut.
- Attach the shock absorber lower mounting bolt.
- Install the stabilizer shaft link lower mounting bolt.
- Lower the vehicle to allow the suspension to obtain the designed trim height. The inner control arm nuts must be tightened in the designed position to reduce wind up in the bushings. Refer to Trim Height Specifications .
- Install the wheel and tire.
Important: To insure proper orientation of the spring, rest the spring (without insulators) on a flat surface. The spring will stand up straight when resting on its lower end, but will lean or tip when resting on its top end.
Notice: Use the correct fastener in the correct location. Replacement fasteners must be the correct part number for that application. Fasteners requiring replacement or fasteners requiring the use of thread locking compound or sealant are identified in the service procedure. Do not use paints, lubricants, or corrosion inhibitors on fasteners or fastener joint surfaces unless specified. These coatings affect fastener torque and joint clamping force and may damage the fastener. Use the correct tightening sequence and specifications when installing fasteners in order to avoid damage to parts and systems.
Tighten
Tighten the lower control arm nut to 102 N·m (75 lb ft).
Tighten
Tighten the shock absorber lower mounting nut to 102 N·m
(75 lb ft).
Important: Before lowering the vehicle onto its wheels (or before driving the vehicle, if it was not on a lift) turn the ignition on and wait approximately 45 seconds. This will permit the ALC system to execute the ARC, ensuring that the air adjustable shock absorbers are filled with residual pressure.
Tighten
| • | Tighten the lower control arm inner nuts to 108 N·m (80 lb ft). |
| • | Tighten the stabilizer link lower attachment to 52 N·m (38 lb ft). |
Tighten
Tighten the wheel nuts to 190 N·m (140 lb ft).
