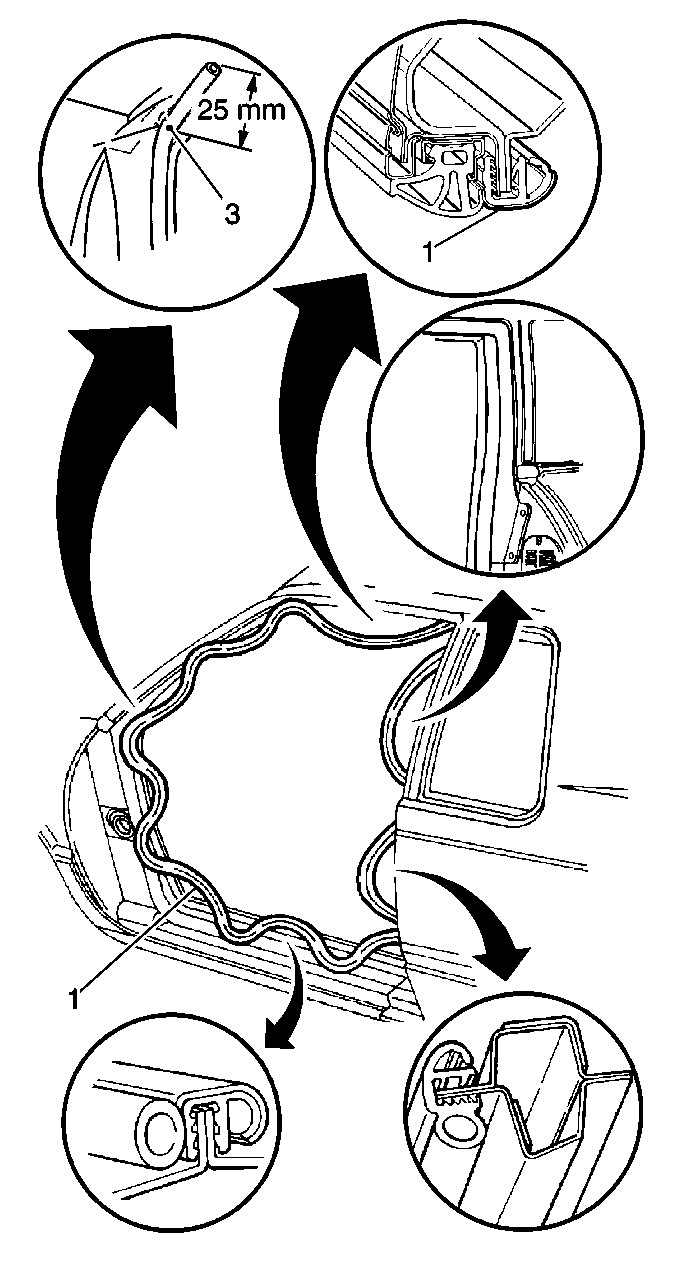
For 1990-2009 cars only
Removal Procedure
- Open the doors.
- Remove the carpet retainer. Refer to Carpet Retainer Replacement in Interior Trim.
- Remove the weatherstrip (1) by pulling the weatherstrip out of the retainer.

Installation Procedure
- Spray the soap/water solution onto the pinch-weld flange.
- Locate the weatherstrip (1) paint dot, blue for RH and pink for LH to the base of the windshield pillar.
- Locate the mitered corner to the upper rear of the door opening.
- Locate the upper weatherstrip to the bend at the roof rail and A-pillar.
- Locate the forward portion of the weatherstrip to the lower A-pillar.
- Align the blue paint dot (RH) or pink paint dot (LH) to the sheet metal trim line of the quarter panel.
- From the quarter trim panel line, loop down from the B-pillar and forward towards the hinge pillar.
- Starting at the base of the windshield pillar, work upward and rearward to the upper rear corner.
- From the upper corner of the B-pillar, work the weatherstrip downward and forward back the base of the windshield pillar.
- Firmly press the weatherstrip onto the pinch weld flange in order to secure the weatherstrip.
- Check the weatherstrip to the door opening fit.
- Install the carpet retainer. Refer to Carpet Retainer Replacement in Interior Trim.
- Close the doors.
Important: To aid in the weatherstrip installation, spray the pinch-weld flange with a soap/water solution, excluding the area around the B-pillar.

Important: Ensure that the weatherstrip fully seats at the following areas:
• The corners • The thick flange areas
