For 1990-2009 cars only
Tools Required
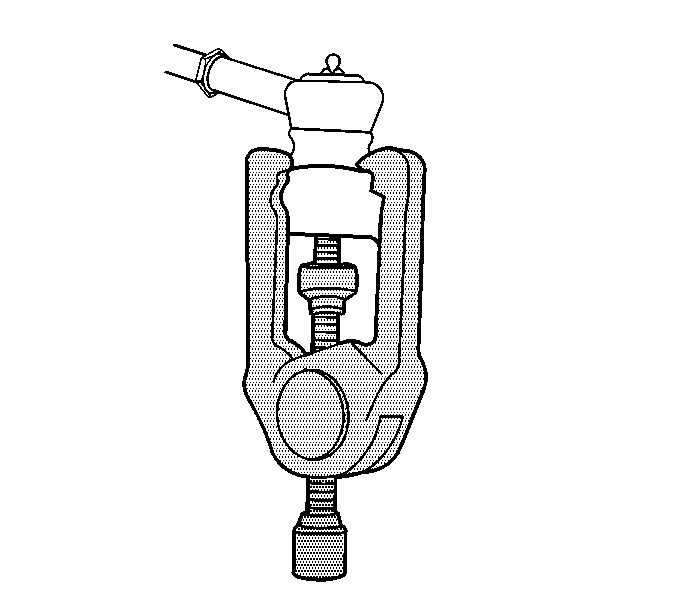
J 24319-B Steering Linkage and Tie Rod Puller
Removal Procedure
Notice: Do not attempt to free the ball stud by using a pickle fork or wedge type tool, because seal or bushing damage could result. Use the proper tool to separate all ball joints.
- Remove the engine shield, if equipped. Refer to Engine Shield Replacement .
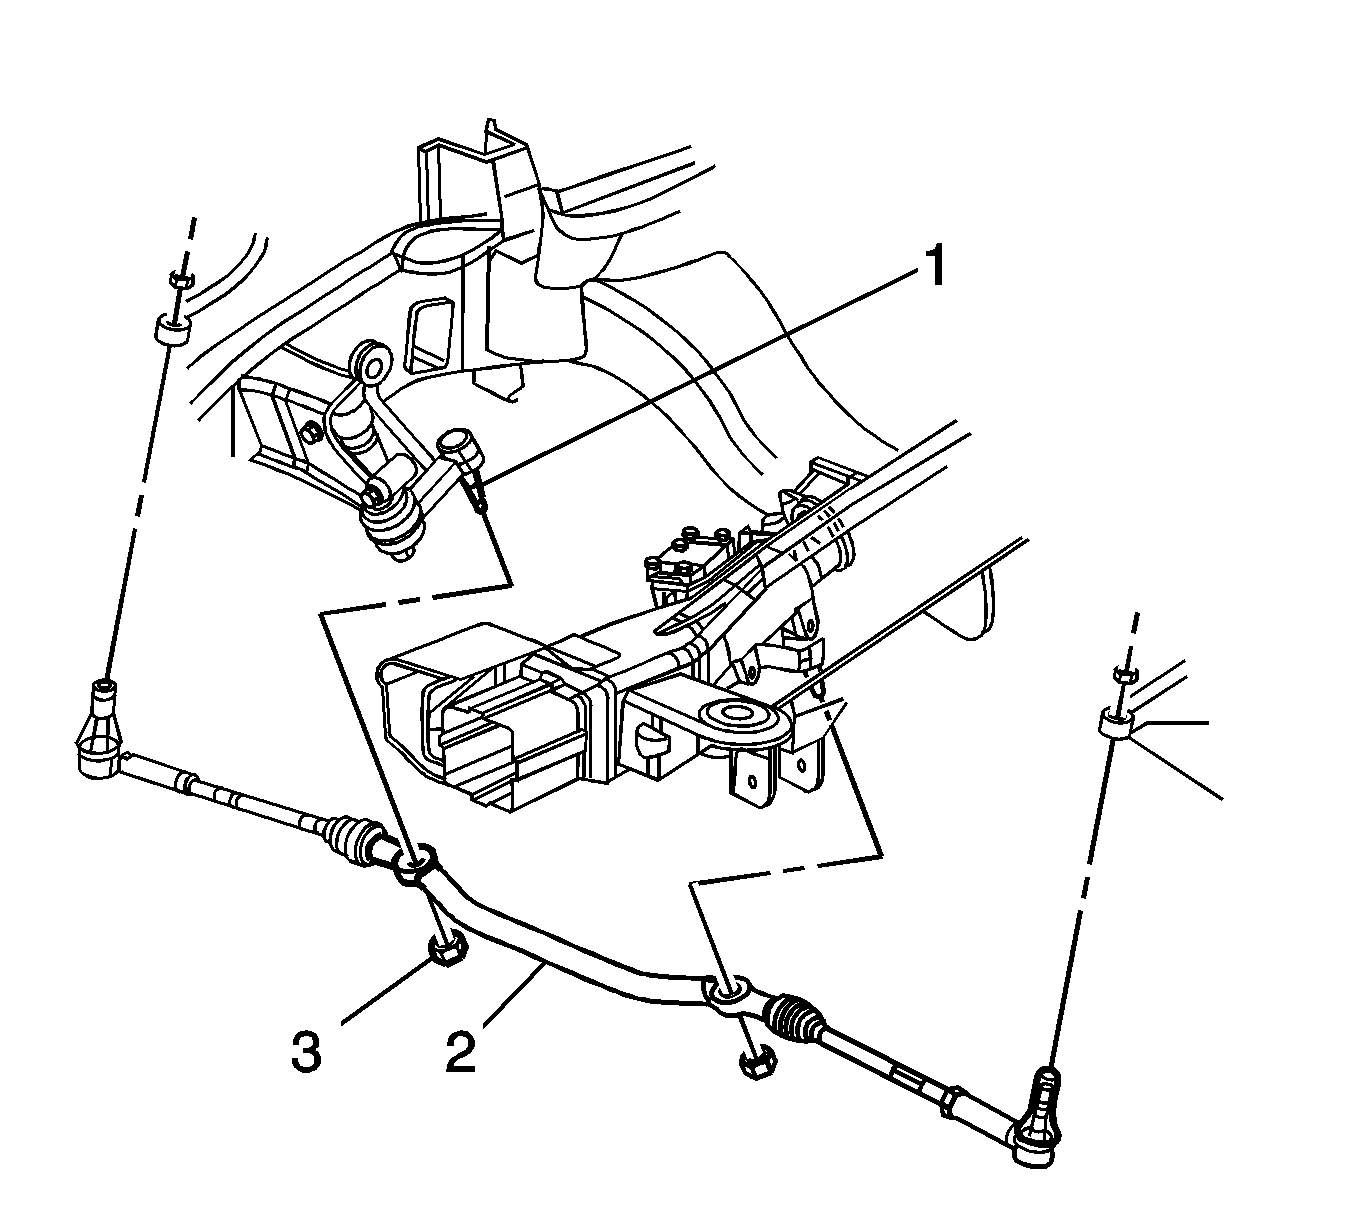
- Remove the idler arm nut (3) from the idler arm (1).
- Separate the idler arm (1) from the relay rod (2).
- Remove the idler arm from the relay rod using puller J 24319-B .
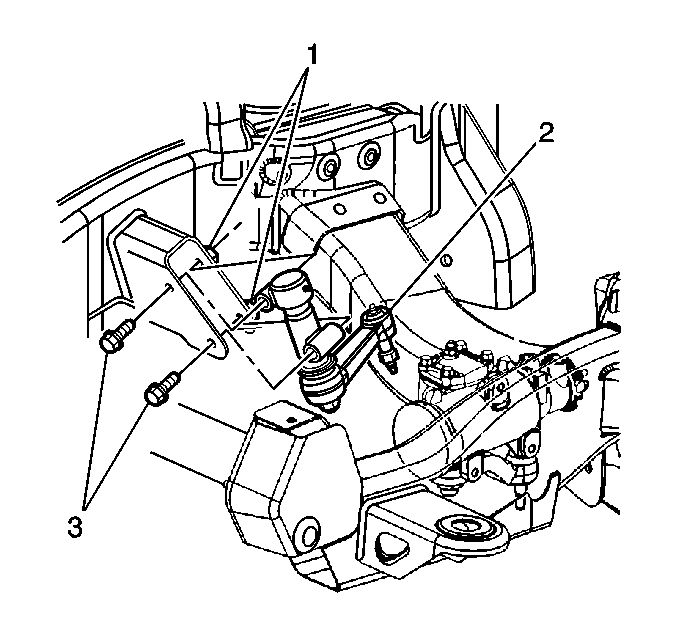
- Remove the idler arm bolts (3) and the nuts (1) at the vehicle frame.
- Remove the idler arm (2) from the vehicle.

Important: Discard the idler arm nut.


Installation Procedure
- Position the idler arm (2) to the vehicle frame.
- Install the idler arm bolts (3) and nuts (1) to the frame.
- Install the idler arm (1) to the relay rod (2).
- Install the new idler arm nut (3) to the idler arm (1).
- Install the engine shield, if equipped. Refer to Engine Shield Replacement .
- Adjust the front toe. Refer to Front Toe Adjustment .

Notice: Refer to Fastener Notice in the Preface section.
Tighten
Tighten the bolts and nuts to 105 N·m (78 lb ft).

Important: Do not reuse the old idler arm nut.
Tighten
Tighten the nut to 62 N·m (46 lb ft).
