
| Subject: | Front Seat Cooling Performance Poor (Retrofit Front Seat Cooling
System) |
| Models: | 2004-2005 Cadillac Escalade ESV Platinum |
This bulletin is being revised to update the repair, part and labor code information.
Please discard Corporate Bulletin Number 04-08-50-14 (Section 08-Body
and Accessories)
Condition
Some customers may comment on the poor cooling performance of the LH and/or
RH front heated and cooled seat assemblies.
Cause
This condition may be due to a restriction that causes some of the warm exhaust
air from the Micro Thermal Module (MTM) to remain within the seat assembly.
Correction
Important: In order to ensure customer satisfaction,
the following repair should be done on both the LH and RH front seat assemblies.
To retrofit both front seat assemblies, the following materials are recommended:
| • | Clear Vinyl Tube -- Qty 2 (L-3 3/8 inch (86 mm), OD-1
7/8 inch (48 mm), ID-1 1/2 inch (38 mm), Thick-3/16 inch
(5 mm)) |
| • | Soft Nylon Window Screen-Qty 2 (L-5 x 3 1/2 inch (127 x 89 mm)) |
| • | Hook & Loop (Velcro™) Strips-Qty 2 (5 x 3/4 inch (127
x 19 mm)), Qty 2 (4 x 3/8 inch(102 x 10 mm)) |
Seat Back Retrofit Procedure
- Remove the front seat assembly from the vehicle. Refer to Seat Replacement-Front
Bucket in the Seats sub-section of the Service Manual or SI document #827609.
- On a clean flat surface, place the seat assembly upside down.
- Disconnect the front seat back trim cover J channels.
- Gain access to the MTM exhaust tube:
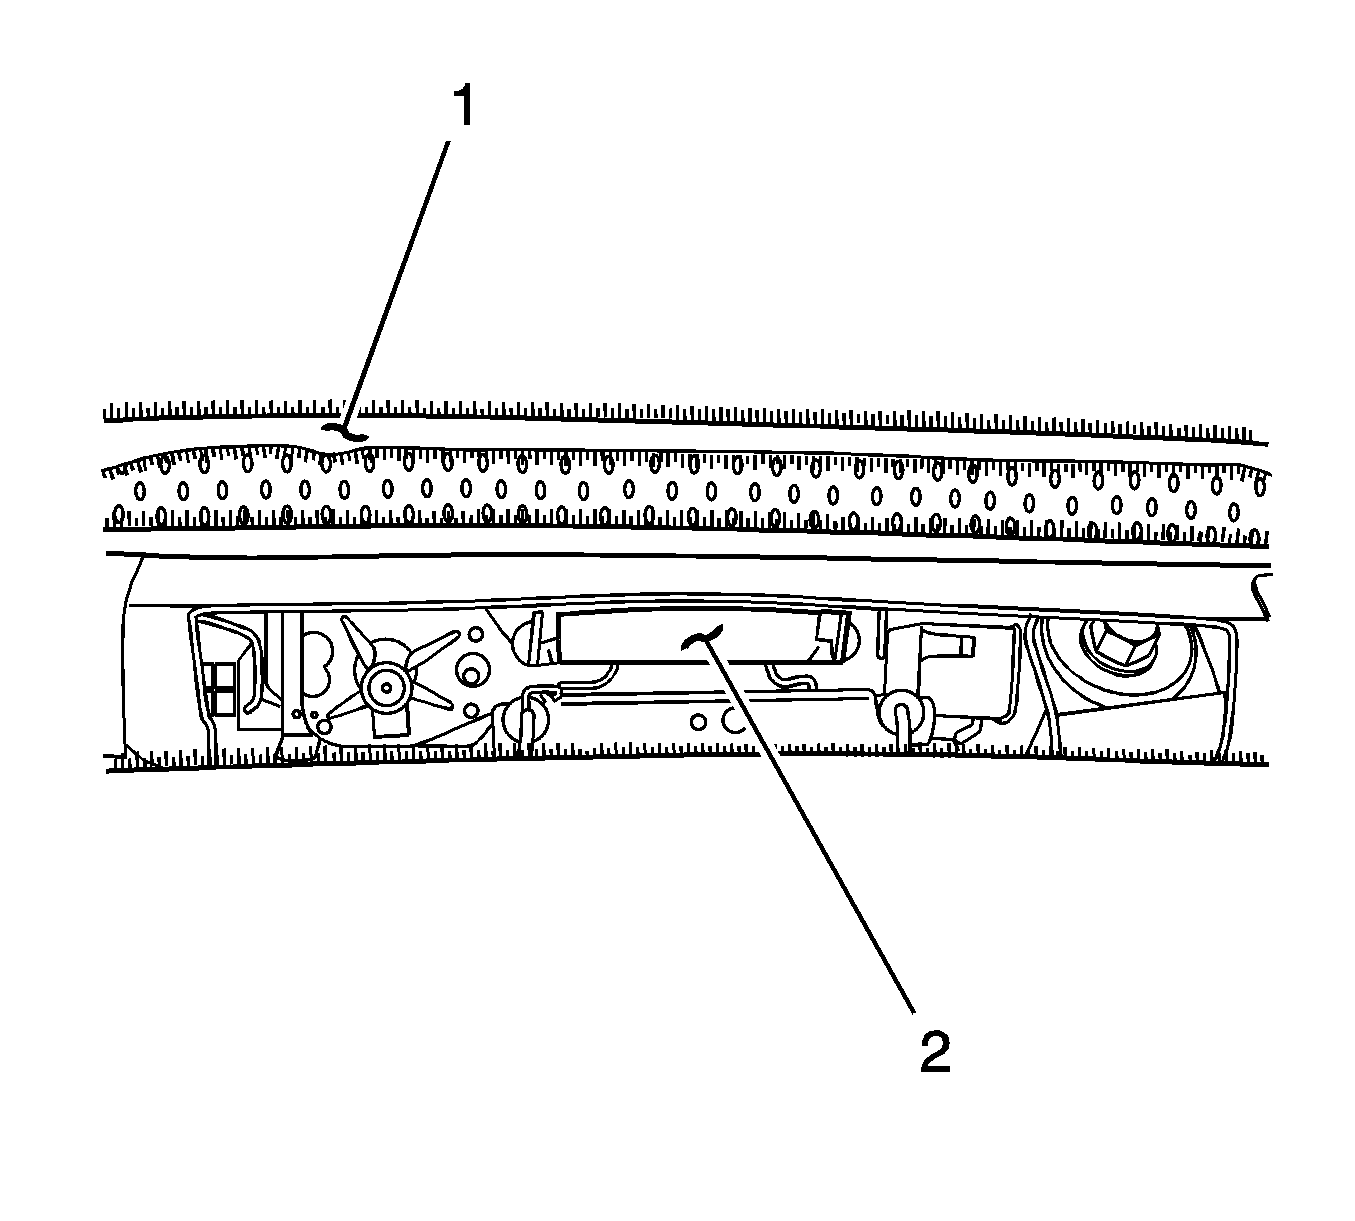
| 4.1. | Fold the J channel under the seat back trim cover
(1). |
| 4.2. | Use a razor blade or knife to remove the center cardboard piece from the
bottom of the seat back cardboard backer. |
| 4.3. | Carefully disassemble and flatten the existing cardboard exhaust vent
(2). |
- On one end of the vinyl tube, slight bevel the inside edge. Remove all "flash"/debris.
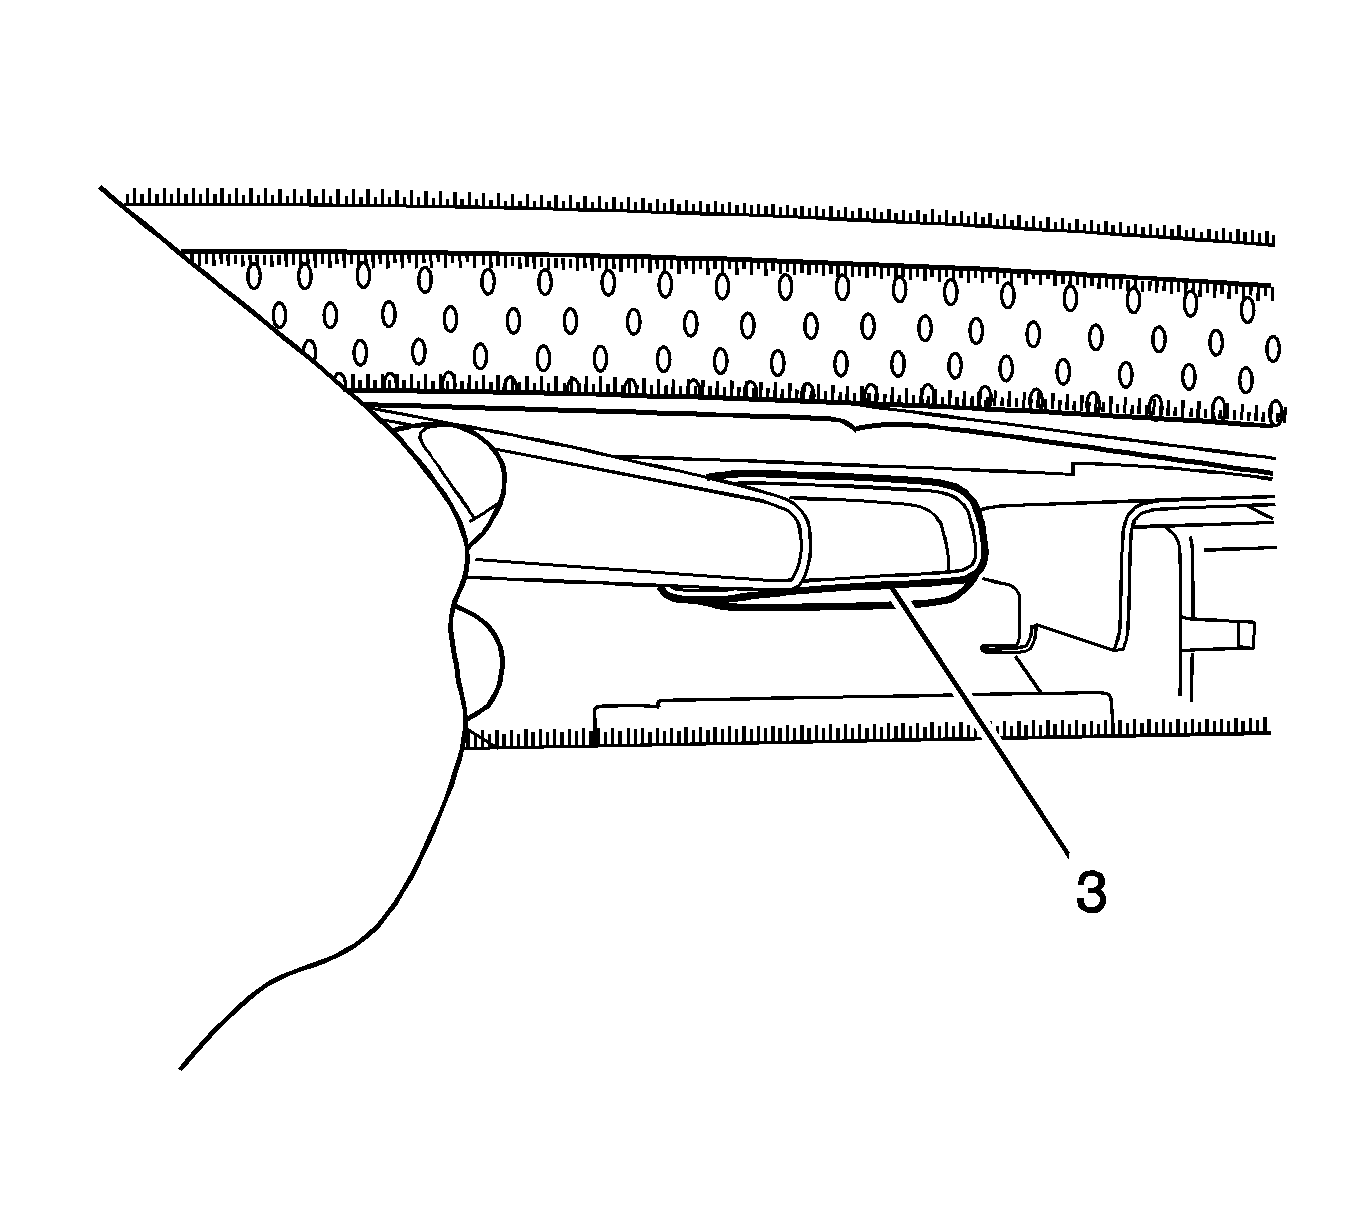
- Insert a ruler or similar object into the end of the
MTM's exhaust tube (3) in order to widen the opening.
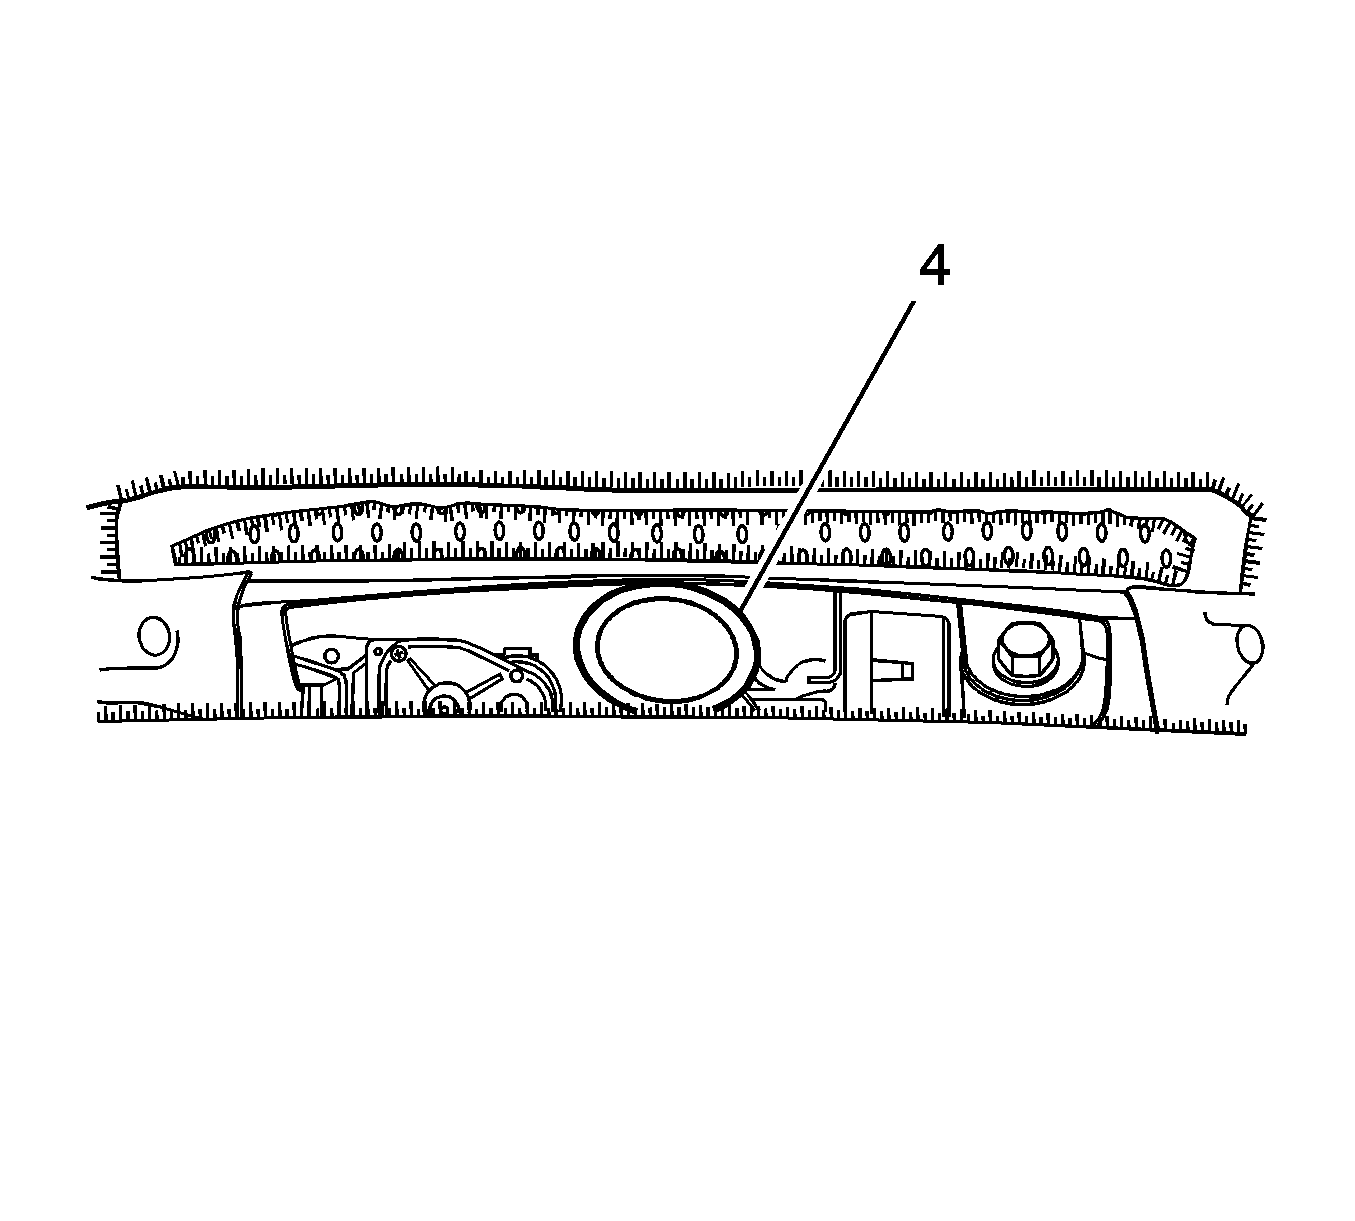
- Squeeze the beveled end of the vinyl tube (4) and
carefully insert it into the exhaust tube opening. Approximately one inch (25 mm)
of the vinyl tube should be inside the MTM opening.
Important: Ensure the end of the vinyl tube sits over
the mesh material of the trim cover.
- Connect the front seat back trim cover J channels.
Seat Cushion Retrofit Procedure
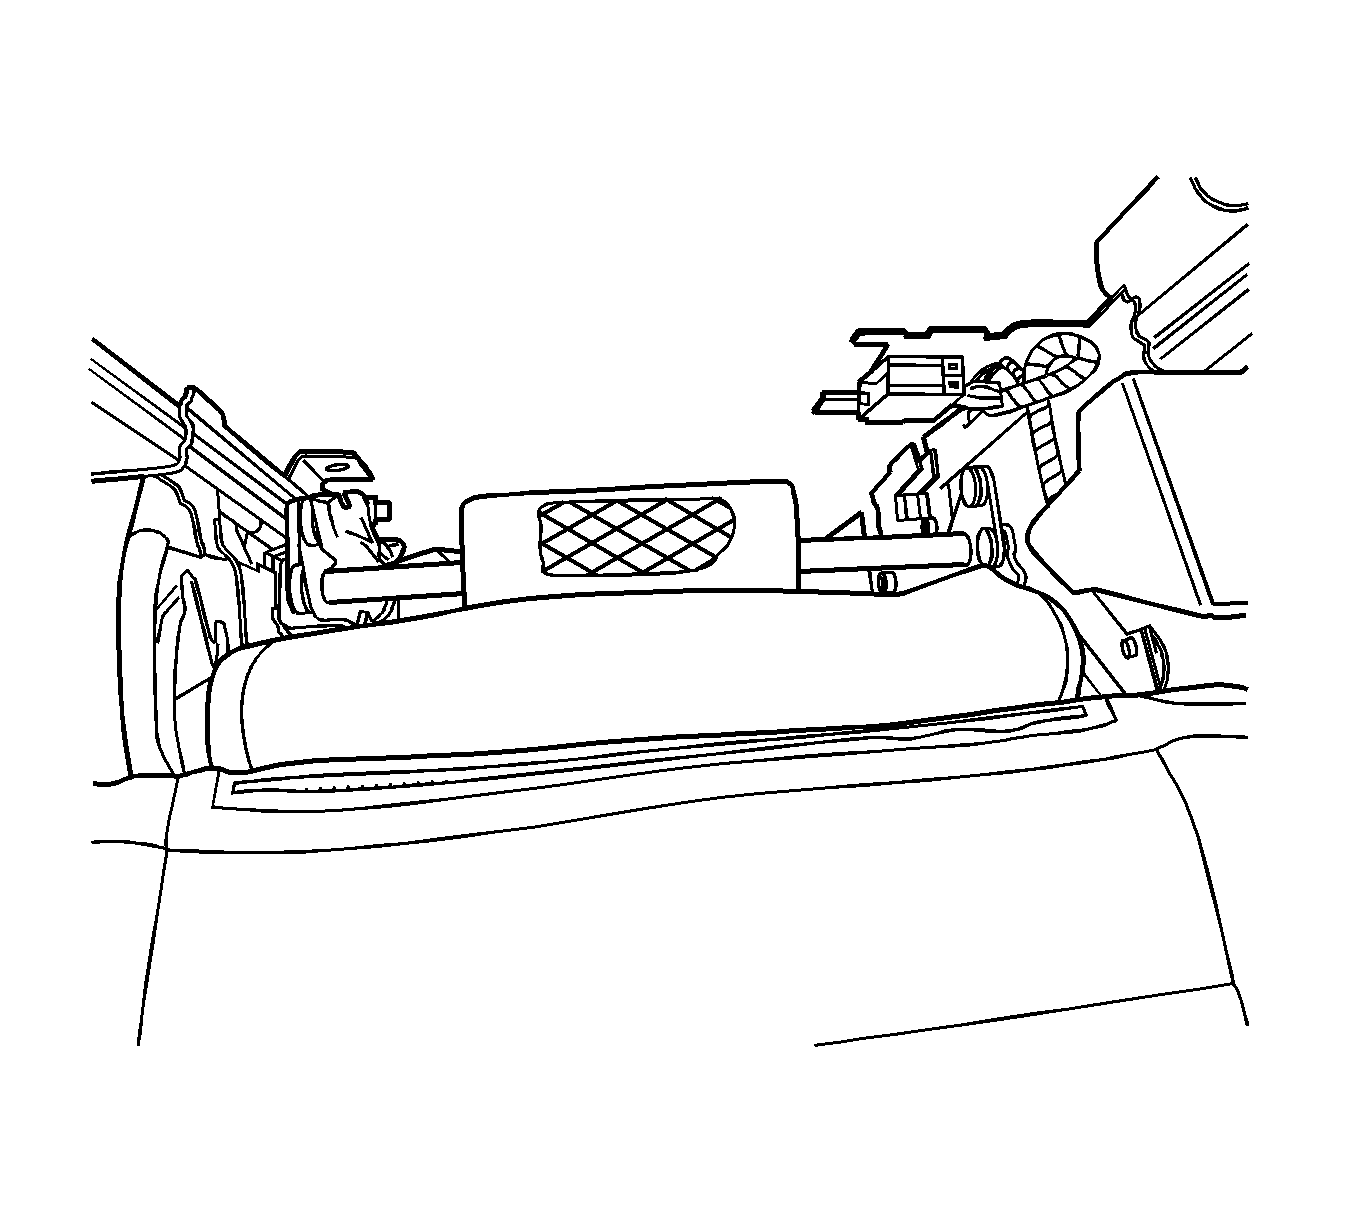
- Detach the two Velcro™ ends of the seat adjuster
stabilizer bar flap/cover from the front seat cushion trim cover.
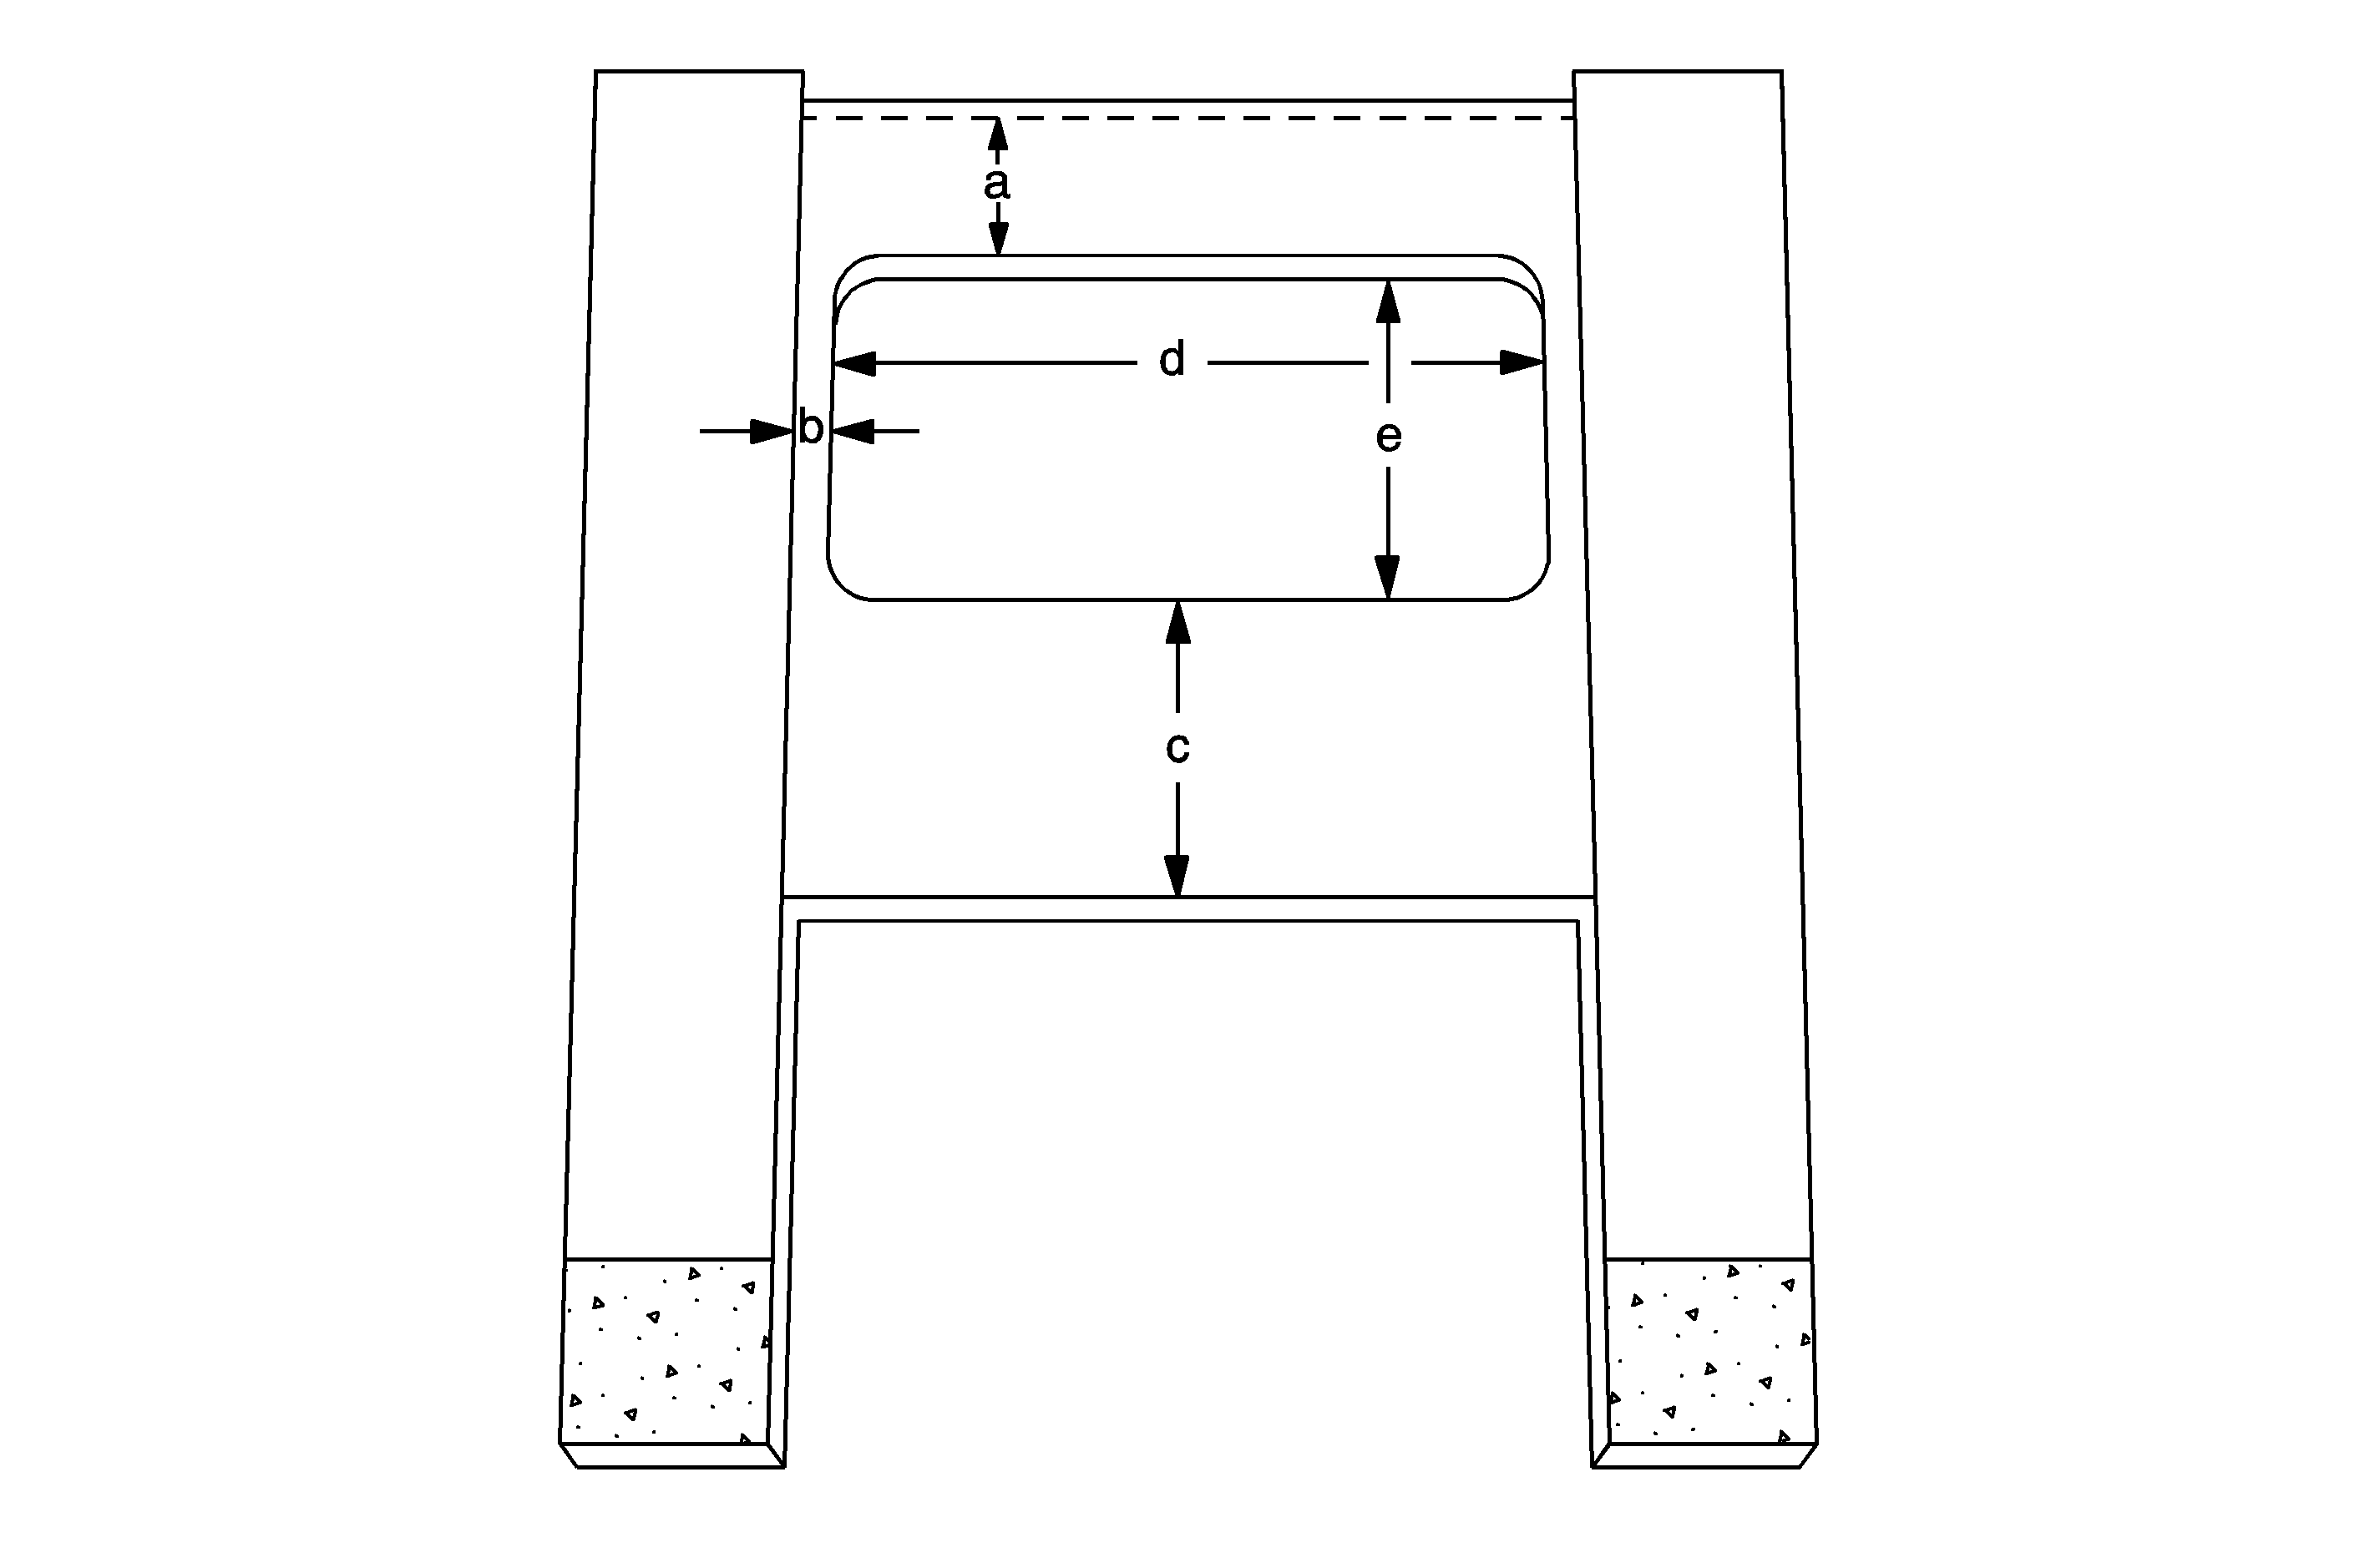
- Remove material from the center portion of the flap.
Refer to the illustration and the following dimension information:
| • | a = 1/2 inch (13 mm) Distance from stitch line to top of
opening. |
| • | b = 1/4 inch (6 mm) Distance from fabric edge to side of
opening. |
| • | c = 1 1/2 inch (38 mm) Distance from bottom of flap to bottom
of opening. |
| • | d = 3 1/2 inch (89 mm) Length of opening. |
| • | e = 1 3/4 inch (44 mm) Width of opening. |
- Mark the cut lines on the inside of the flap.
- Use a razor blade or similar tool and carefully cut along cut lines.
- Ensure the cut out edges on the flap are smooth and straight.
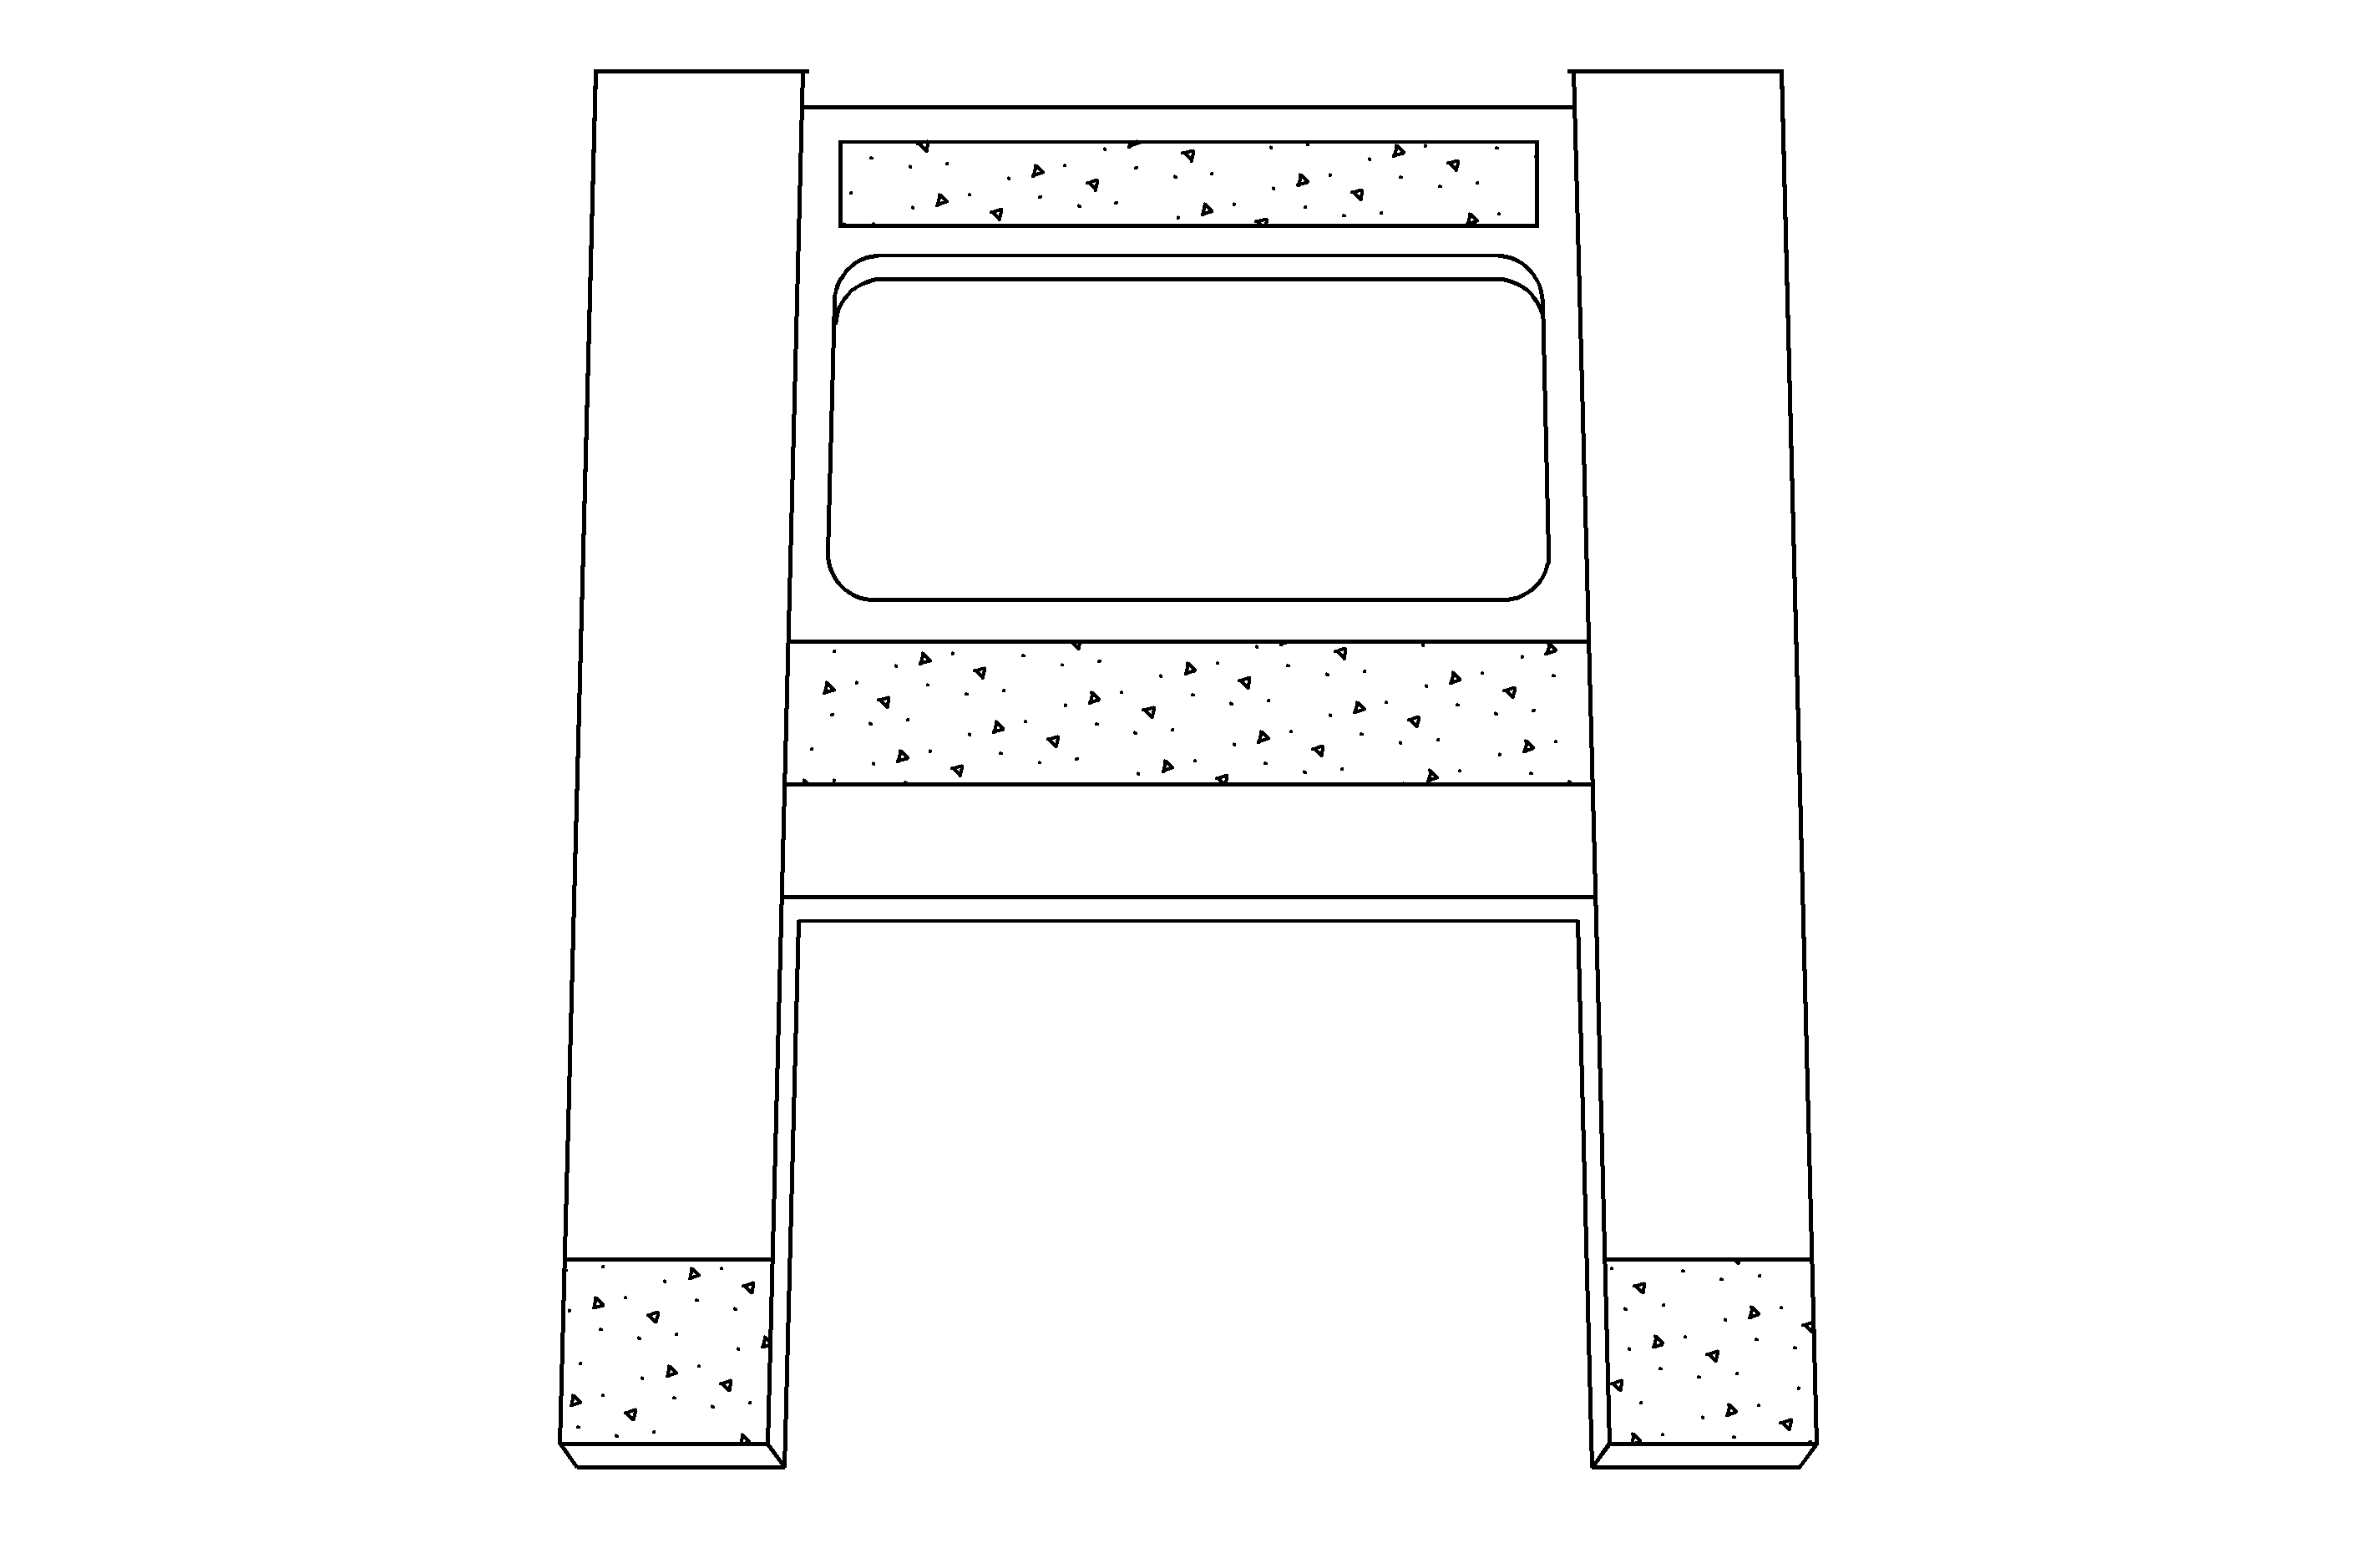
- Install the hook and loop (Velcro™) strips:
| 6.1. | Attach the same size hook and loop strips together and remove the backing
paper from one side. |
| 6.2. | On the inside of the flap, place the 4 x 3/8 inch (102 x 10 mm)
hook and loop strips across the top of the flap, 1/8 inch (3 mm) from
the top of the opening. |
| 6.3. | Place the 5x 3 3/4 inch (127 x 19 mm) hook and loop strips
across the bottom of the flap and under the fabric, 1/4 inch (6 mm)
from the bottom of the opening. |
| 6.4. | Remove the backing paper. |
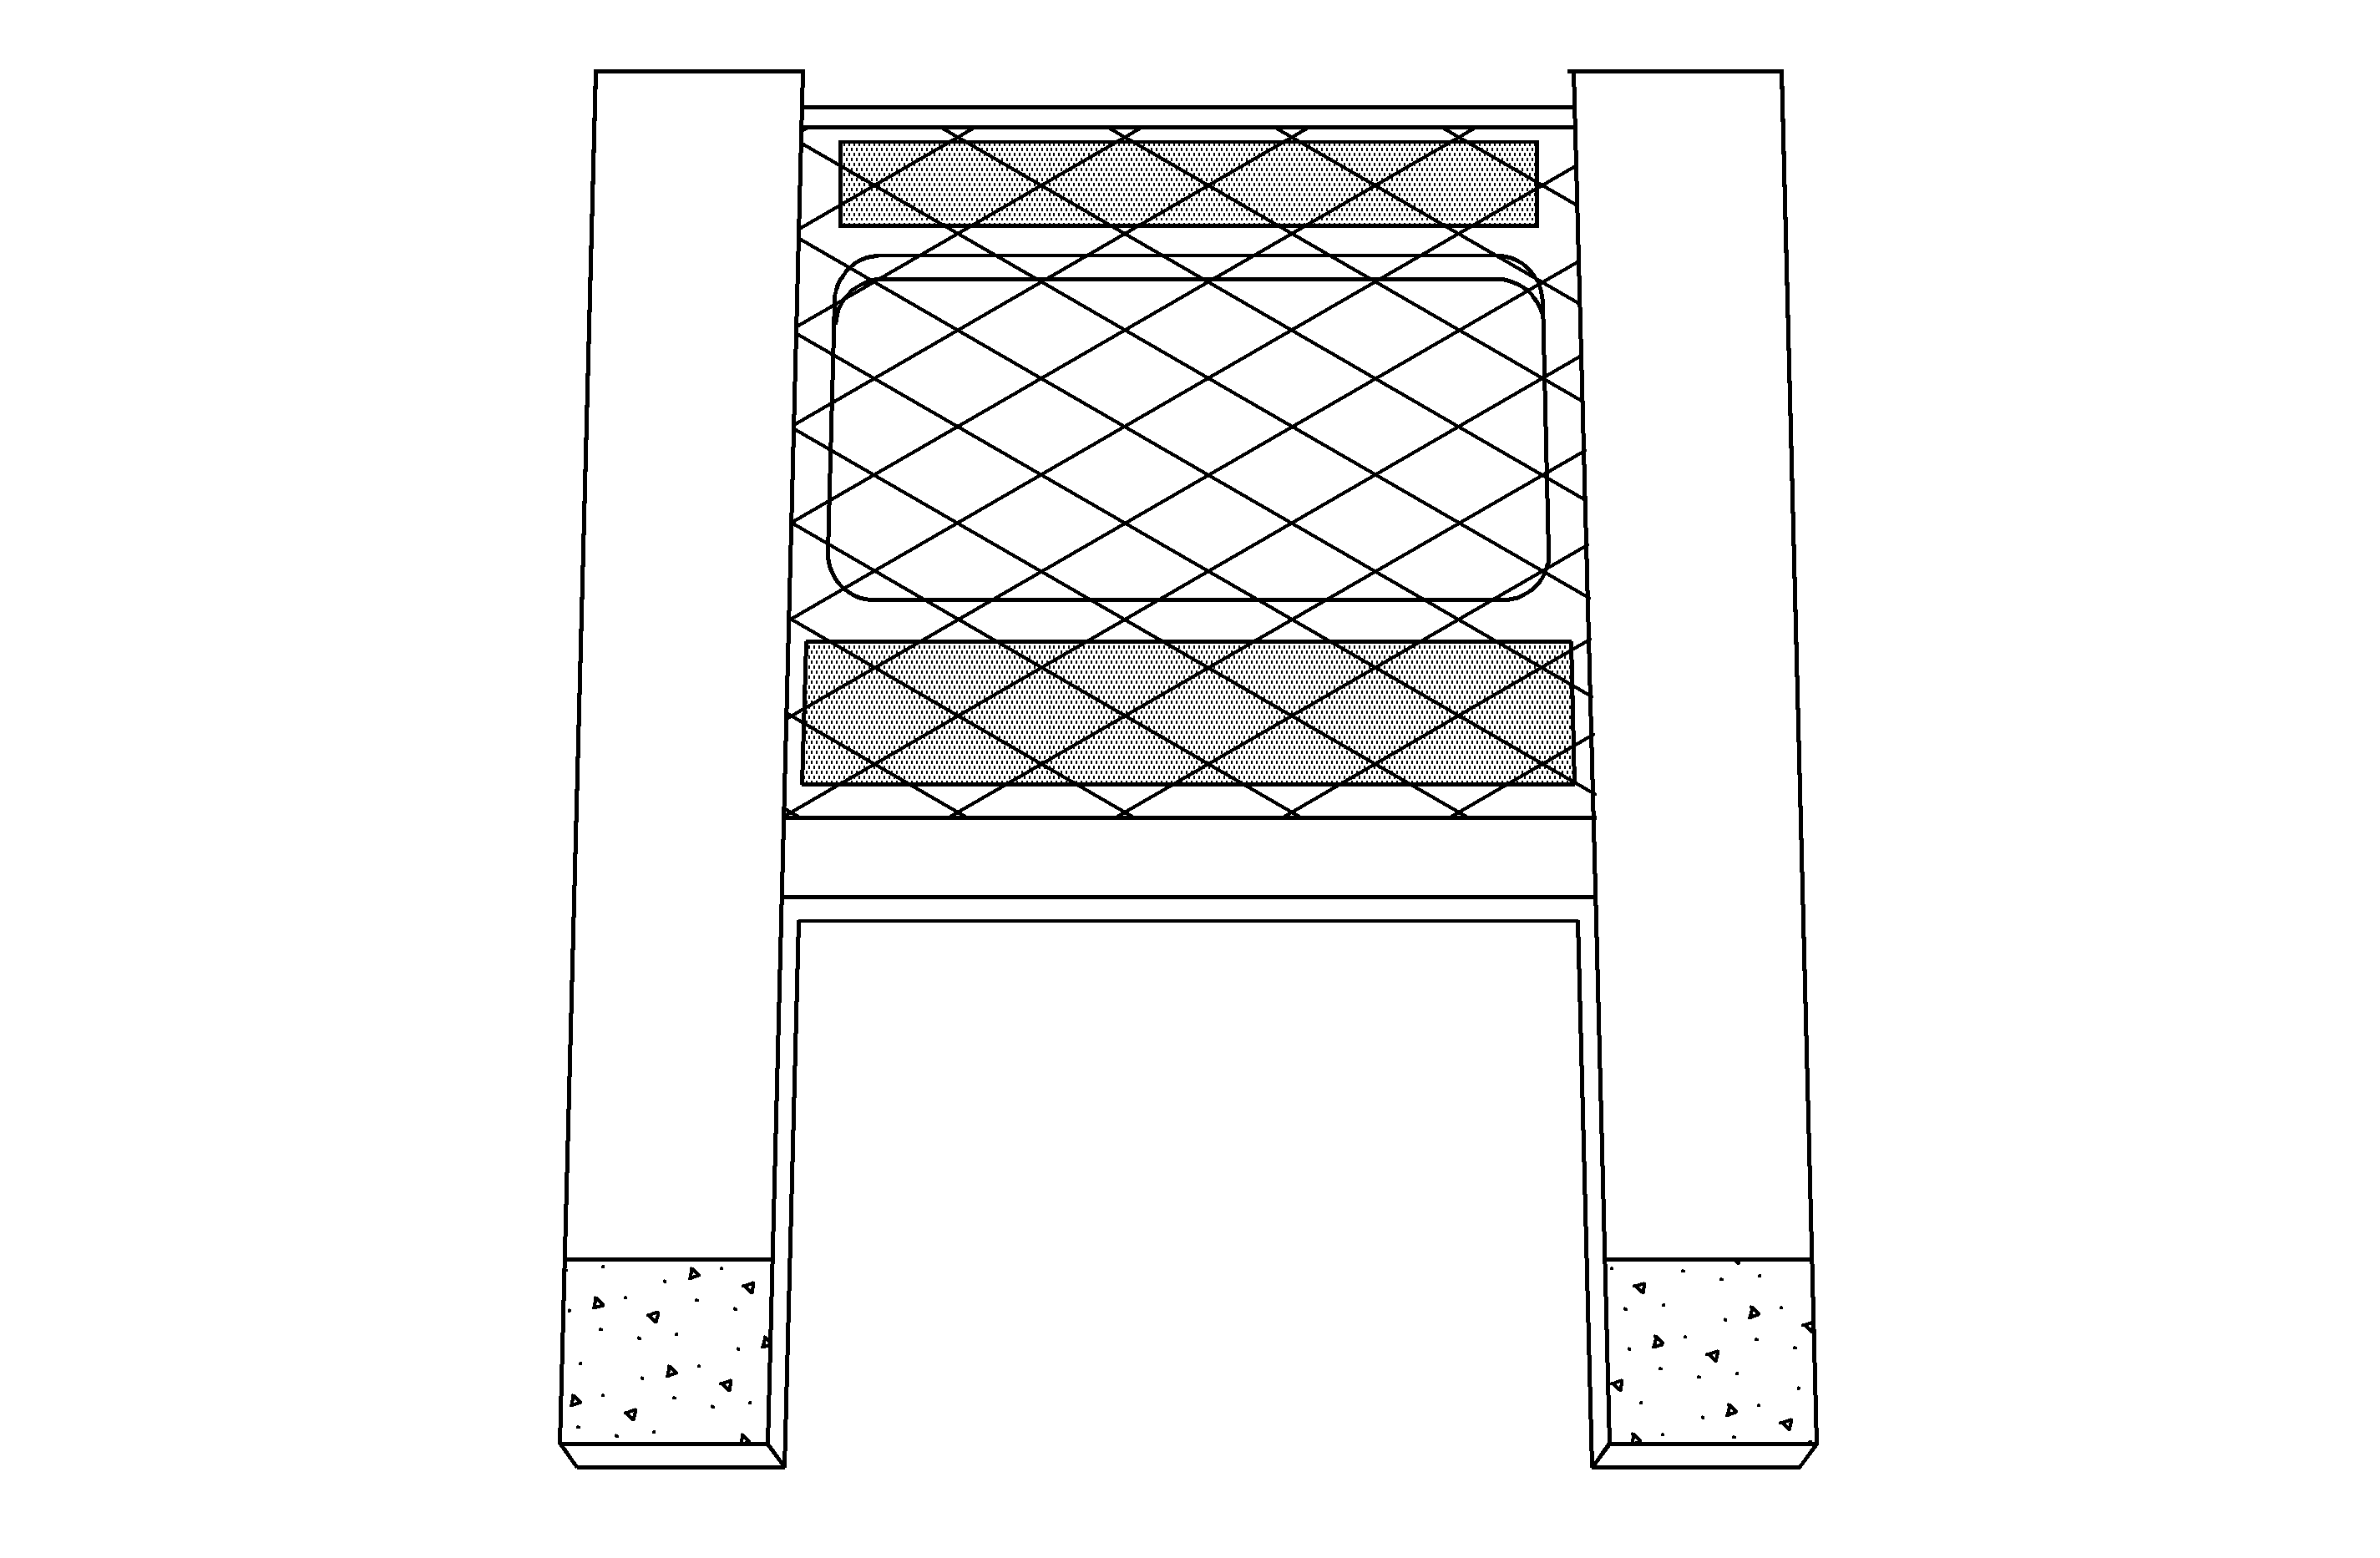
- Carefully place the soft screen material over the
Velcro™ strips.
- Apply pressure to the screen material along the strips.
- Tuck the outside edges of the screen material under the fabric and ensure
the screen material is laying smooth and flat. It may be necessary to trim the two
upper corners.

- Fold the flap back over the seat adjuster stabilizer
bar.
- Attach the two Velcro™ ends of the seat adjuster stabilizer bar
flap/cover to the front seat cushion trim cover.
- Install the front seat assembly from the vehicle. Refer to Seat Replacement-Front
Bucket in the Seats sub-section of the Service Manual or SI document #827609.
- Repeat above procedure on the other front seat assembly.
Parts Information
Code
| Description
|
AB
| Material Allowance
|
Warranty Information
For vehicles repaired under warranty, use:
Labor Operation
| Description
| Labor Time
|
C9715*
| Front Seat Cooling System, LH & RH-Retrofit
| 1.3 hr
|
*This is a unique labor operation and is to be used only with this bulletin.
|


