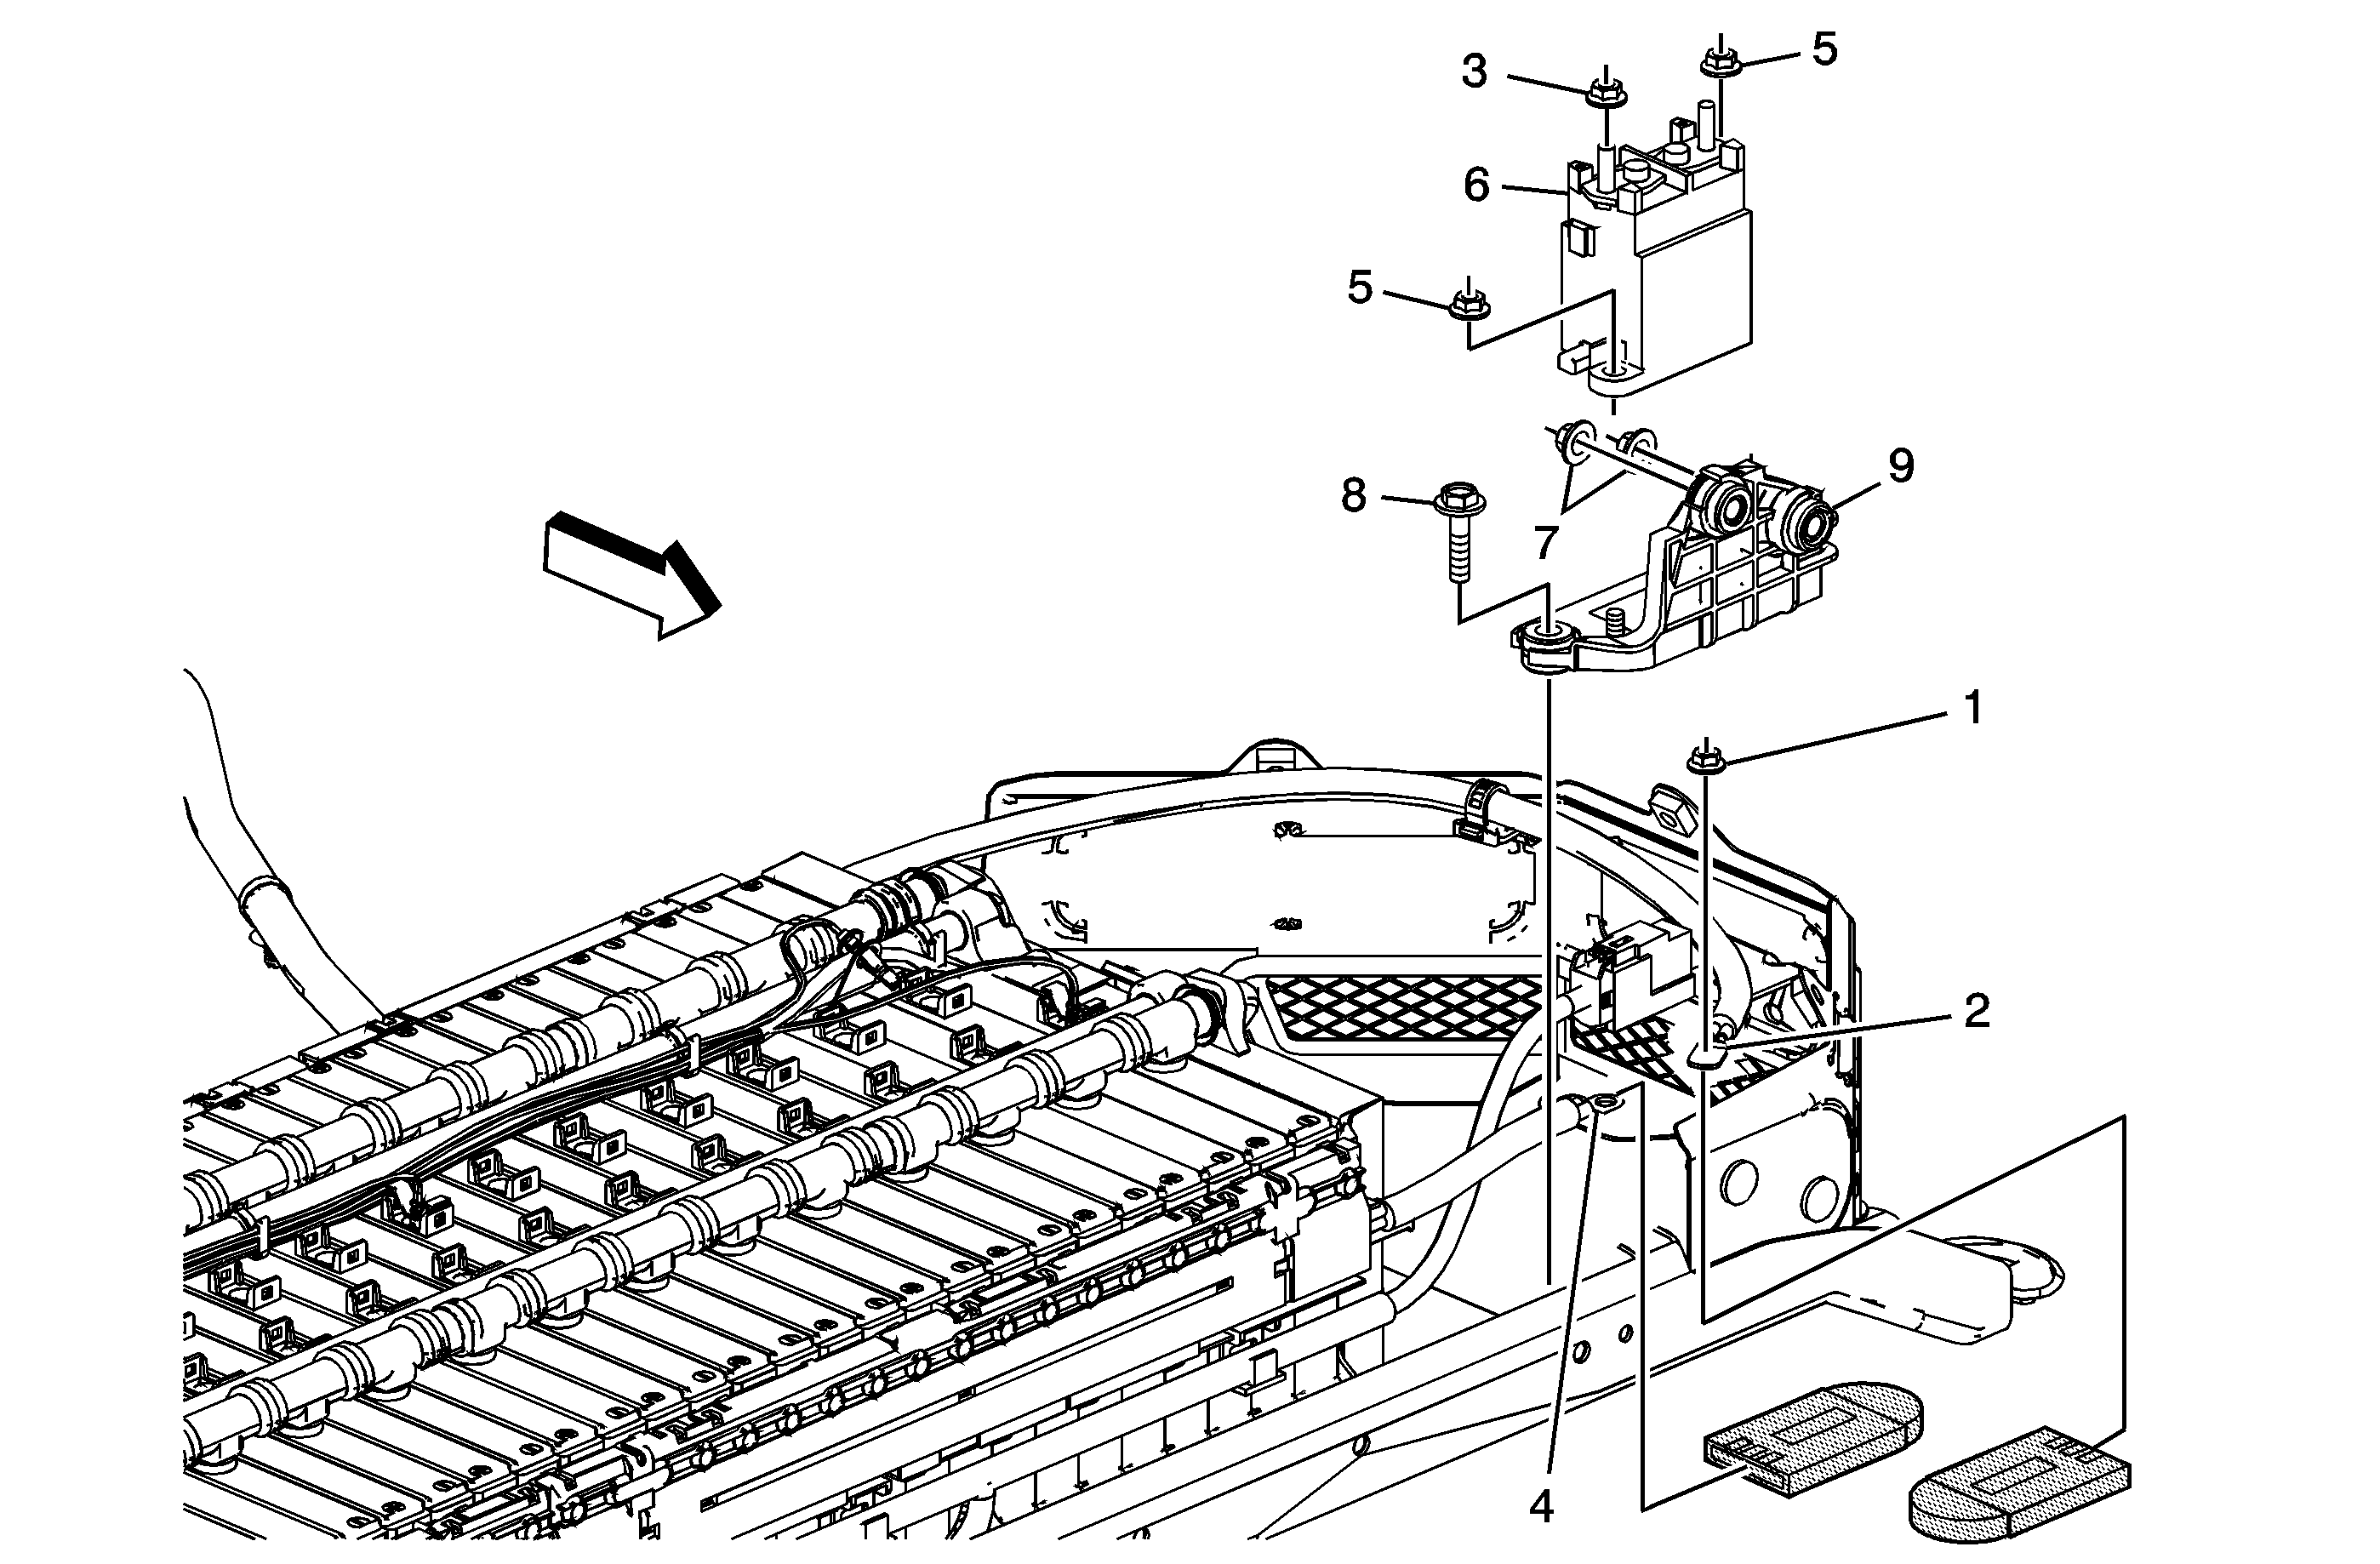
Callout | Component Name | ||||||
|---|---|---|---|---|---|---|---|
|
Danger: Always perform the High Voltage Disabling procedure prior to servicing any High Voltage component or connection. Personal Protection Equipment (PPE) and proper procedures must be followed. The High Voltage Disabling procedure will perform the following tasks:
Preliminary Procedures
| |||||||
1 | Drive Motor Battery Cable Terminal Nut Caution: Refer to Fastener Caution in the Preface section. Tighten | ||||||
2 | Drive Motor Battery Positive and Negative Cable w/Wiring Harness Assembly | ||||||
3 | Drive Motor Battery Cable Terminal Nut Tighten | ||||||
4 | Drive Motor Battery Negative Relay Cable Assembly Warning: High Voltage (HV) cables are not repairable. After disconnecting HV cables, protect and insulate ring terminal ends immediately with the EL-48569 terminal covers and UL® Listed, or equivalent, insulation tape rated at a minimum of 600 volts. Damage caused to unprotected terminal ends will result in cable replacement. Special ToolsEL-48569 Terminal Covers | ||||||
5 | Drive Motor Battery Housing Relay Nut (Qty: 2) Tighten | ||||||
6 | Drive Motor Battery Negative High Voltage Contactor Relay Assembly | ||||||
7 | Drive Motor Generator Battery Negative Relay Bracket Nut (Qty: 2) Tighten | ||||||
8 | Drive Motor Battery Negative Relay Bracket Bolt Tighten | ||||||
9 | Drive Motor Battery Negative Relay Bracket ProcedureAfter the negative contactor relay or bracket has been replaced and the re-assembly of the drive motor generator battery, enable the HV system. Refer to High Voltage Enabling. | ||||||
