Locking Differential Cam Unit Assemble 8.6 Inch Axle
- Apply axle lubricant to the locking differential clutch (friction disc) contact area. Refer to Adhesives, Fluids, Lubricants, and Sealers.
- Install the locking differential cam (3) on the locking differential side gear (2).
- Install the locking differential clutch disc set (1) on the locking differential side gear (2).
- Compress the locking differential clutch disc set assembly.
- Using the appropriate tool, install the external span ring retainer.
- Apply a small amount of chassis grease to hold the locking differential clutch disc guide (5). Refer to Adhesives, Fluids, Lubricants, and Sealers.
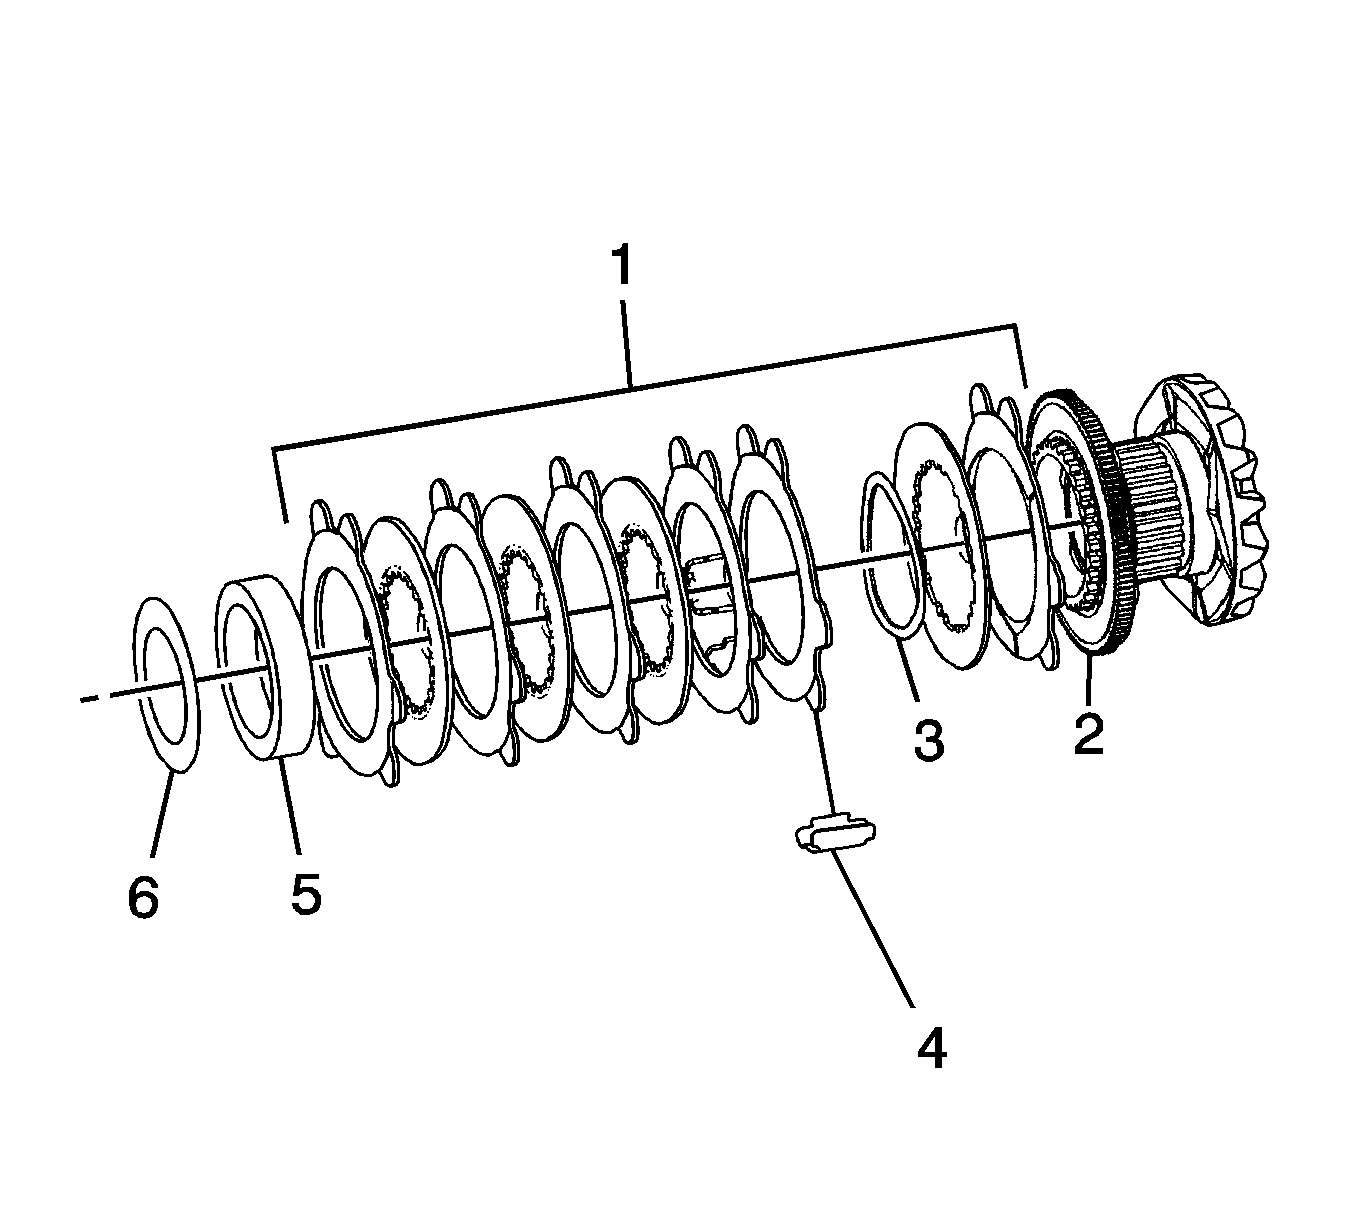
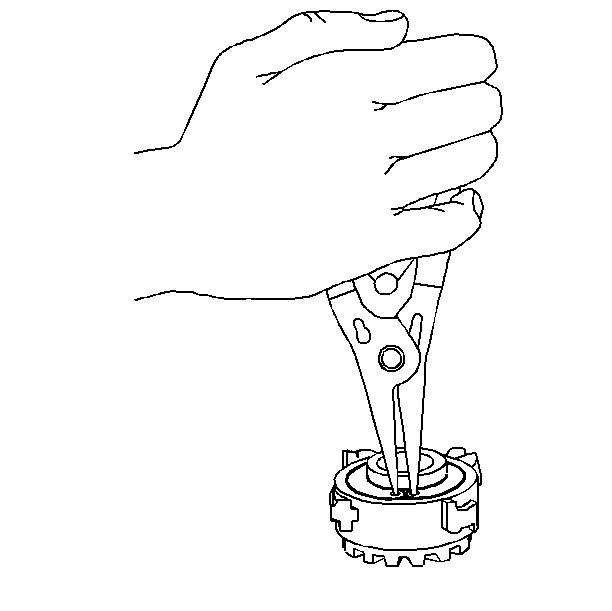

Note: Applying a small amount of grease to the locking differential guides will hold them in place during the installation procedure.
Locking Differential Cam Unit Assemble 9.5 Inch Axle
Special Tools
J 29710 Differential Side Bearing Installer
- Apply axle lubricant to each of the locking differential clutch (friction disc) contact area. Refer to Adhesives, Fluids, Lubricants, and Sealers.
- Install the locking differential cam (3) on the locking differential side gear (2).
- Install the locking differential clutch disc set (1) on the locking differential side gear (2).
- Position the locking differential side gear thrust sleeve (5).
- Using the J 29710 installer and a hydraulic press, install the locking differential side gear thrust sleeve until it is fully seated on the locking differential side gear.
- If the locking differential cam side gear or the locking differential thrust sleeve has been replaced, measure the overall length of the gear assembly by doing the following:
- Align the ears of all the clutch discs.
- Install the guide clips to the clutch disc assembly and apply chassis grease to the locking differential guides. Refer to Adhesives, Fluids, Lubricants, and Sealers.

Note: When installing the locking differential clutch disc set, align the splined discs with the teeth on the cam in order to compress the clutch disc assembly.
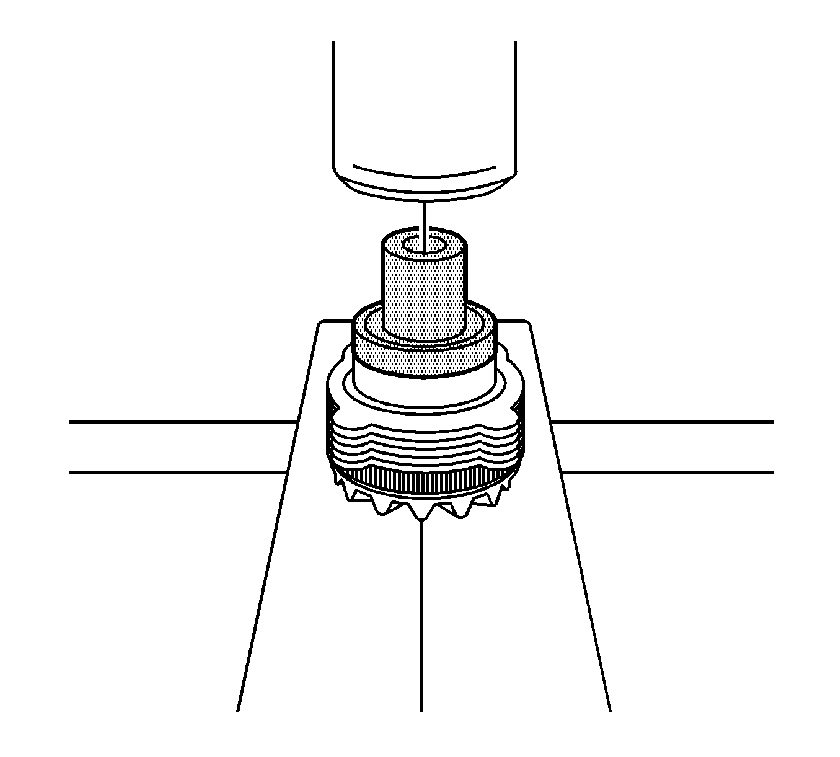
Note: If reusing the locking differential side gear thrust sleeve, proceed to step 5. If replacing the locking differential side gear thrust sleeve, proceed to step 6.
| 6.1. | Place the locking differential clutch disc thrust washer on top of the thrust sleeve. |
| 6.2. | Measure the overall length of the gear assembly from the front of the cam side gear to the back of the locking differential clutch disc thrust washer. |
| 6.3. | Compare this measurement to the measurement obtained during disassembly. |
| 6.4. | If the new reading is more than 0.762 mm (0.003 in) higher or lower than the original, select a locking differential clutch disc thrust washer that will return the reading closest to the original reading. |
Note: Applying a small amount of grease on the locking differential guides will hod them in place during the installation procedure.
Locking Differential Cam Unit Assemble 10.5 Inch Axle
Special Tools
J 29710 Differential Side Bearing Installer Differential Side Bearing Installer
- Apply axle lubricant to each of the locking differential clutch (friction disc) contact area. Refer to Adhesives, Fluids, Lubricants, and Sealers
- Install the locking differential cam (2) on the locking differential side gear (1).
- Install the locking differential clutch disc set (7).
- Position the locking differential side gear thrust sleeve (5) on the locking differential side gear (1).
- Using the J 29710 installer and a hydraulic press, install the locking differential side gear thrust sleeve until it is fully seated on the locking differential side gear.
- If the cam side gear or the thrust sleeve has been replaced, measure the overall length of the gear assembly by doing the following:
- Align the locking differential clutch disc set.
- Install the and apply a small amount of chassis grease to the locking differential guides. Refer to Adhesives, Fluids, Lubricants, and Sealers.
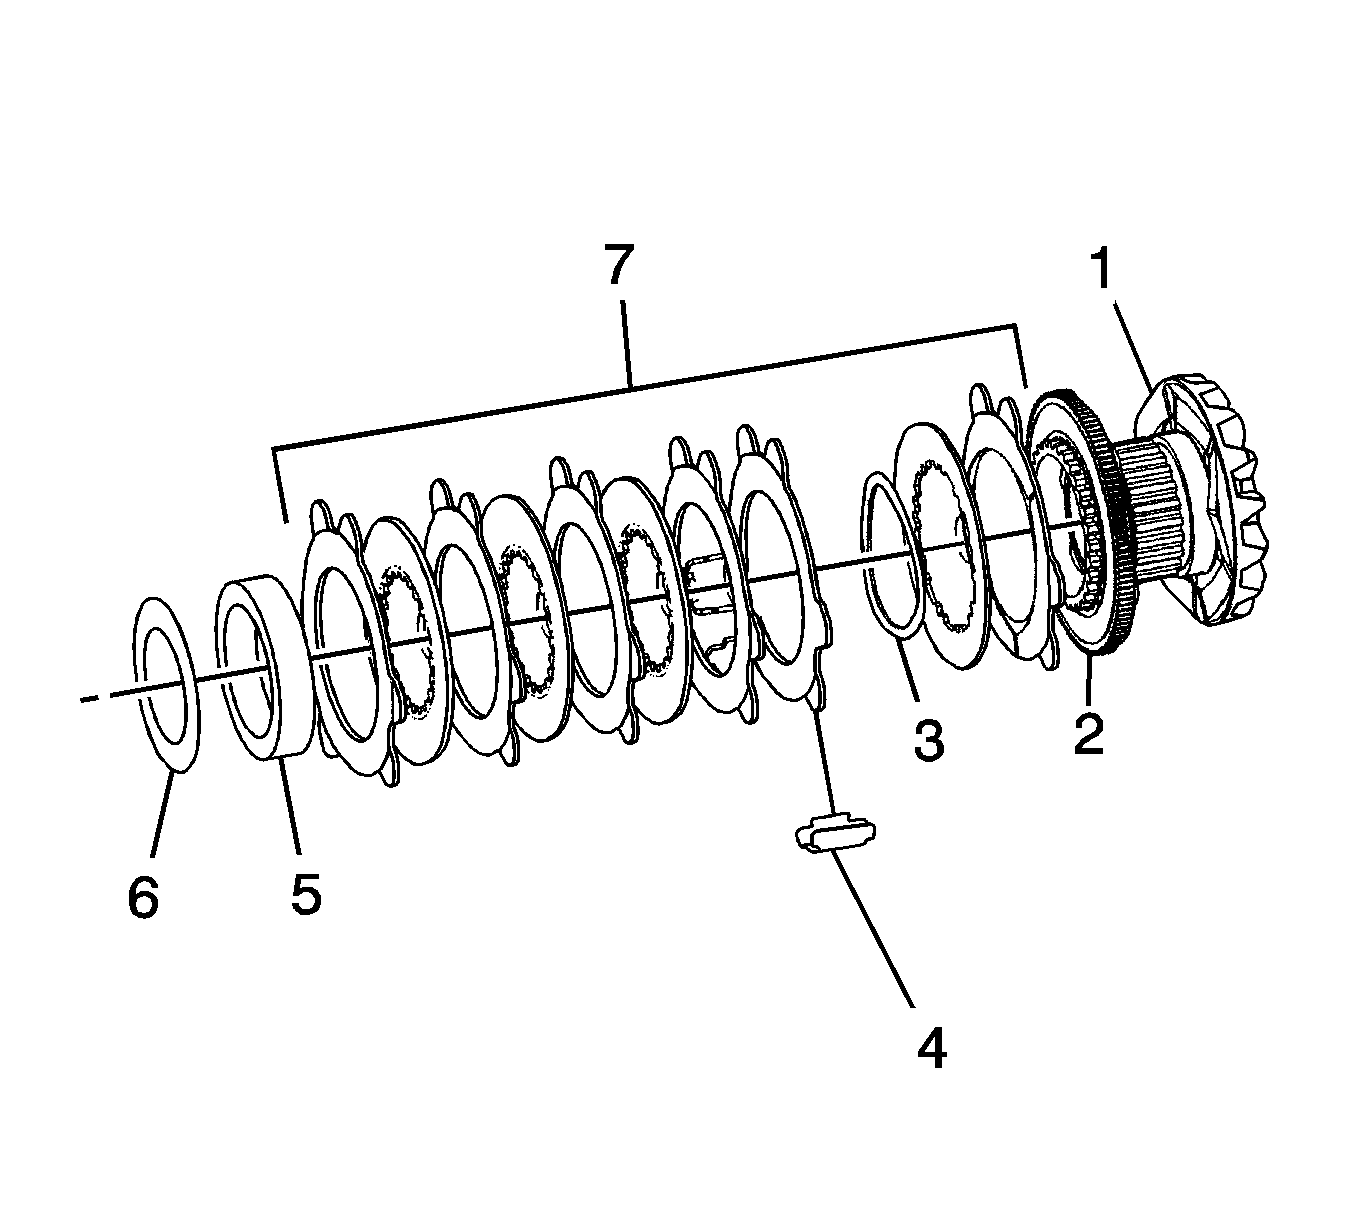
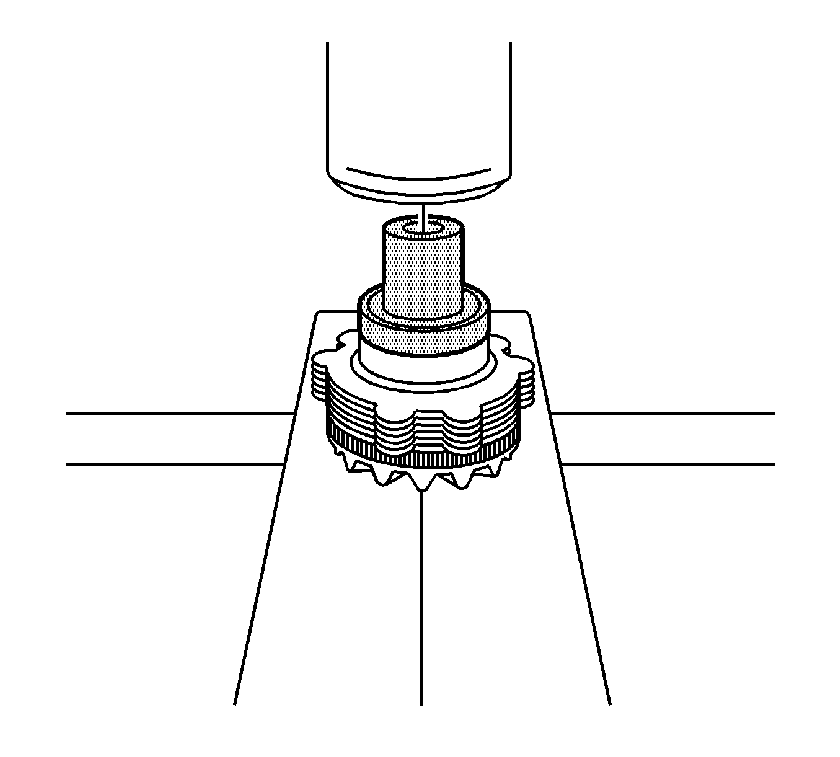
Note: If reusing locking differential side gear thrust sleeve, proceed to step 5. If replacing the locking differential side gear thrust sleeve, proceed to step 6.
| 6.1. | Place the locking differential clutch disc thrust washer on top of the thrust sleeve. |
| 6.2. | Measure the overall length of the gear assembly from the front of the cam side gear to the back of the locking differential clutch disc thrust washer. |
| 6.3. | Compare this measurement to the measurement obtained during disassembly. |
| 6.4. | If the new reading is more than 0.762 mm (0.003 in) greater than or less than the original, select a locking differential clutch disc thrust washer that will return the reading closest to the original reading. |
Note: Applying a small amount of chassis grease to the locking differential guides will hold them in place during the installation procedure.
