Removal Procedure
Warning: The high pressure accumulator (HPA) and the chambers of the brake modulator assembly to which it attaches, store brake fluid at extremely high pressures. Fluid pressure must be relieved before attempting to service the HPA. Ensure that the recommended procedures are followed to relieve system pressure, including using the manual pressure release steps. Failure to properly follow procedures to depressurize the system may result in personal injury.
Warning: Refer to Brake Fluid Irritant Warning in the Preface section.
Caution: Refer to Brake Fluid Effects on Paint and Electrical Components Caution in the Preface section.
- Turn the ignition to OFF, without pausing at ACCESSORY, and remove the ignition key.
- Raise and support the vehicle. Refer to Lifting and Jacking the Vehicle.
- Remove the brake pressure modulator valve assembly. Refer to Brake Pressure Modulator Valve Replacement.
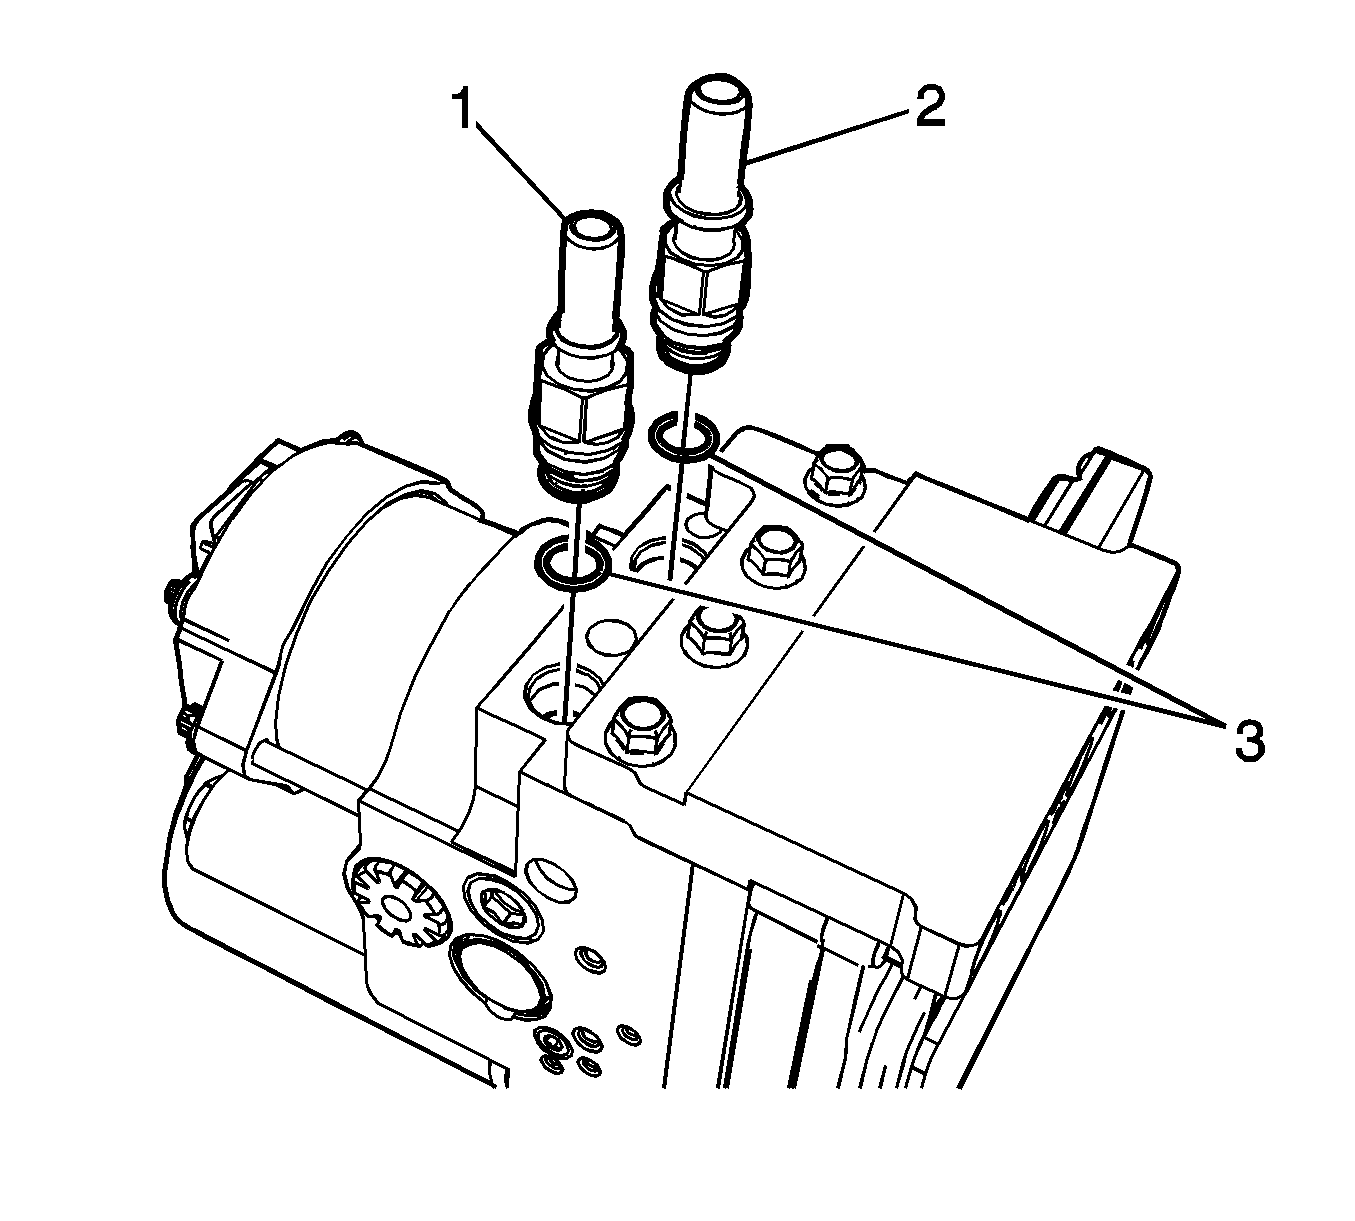
- Remove the master cylinder return hose fitting (1).
- Remove the master cylinder supply hose fitting (2).
- Remove and discard the O-ring seals (3).
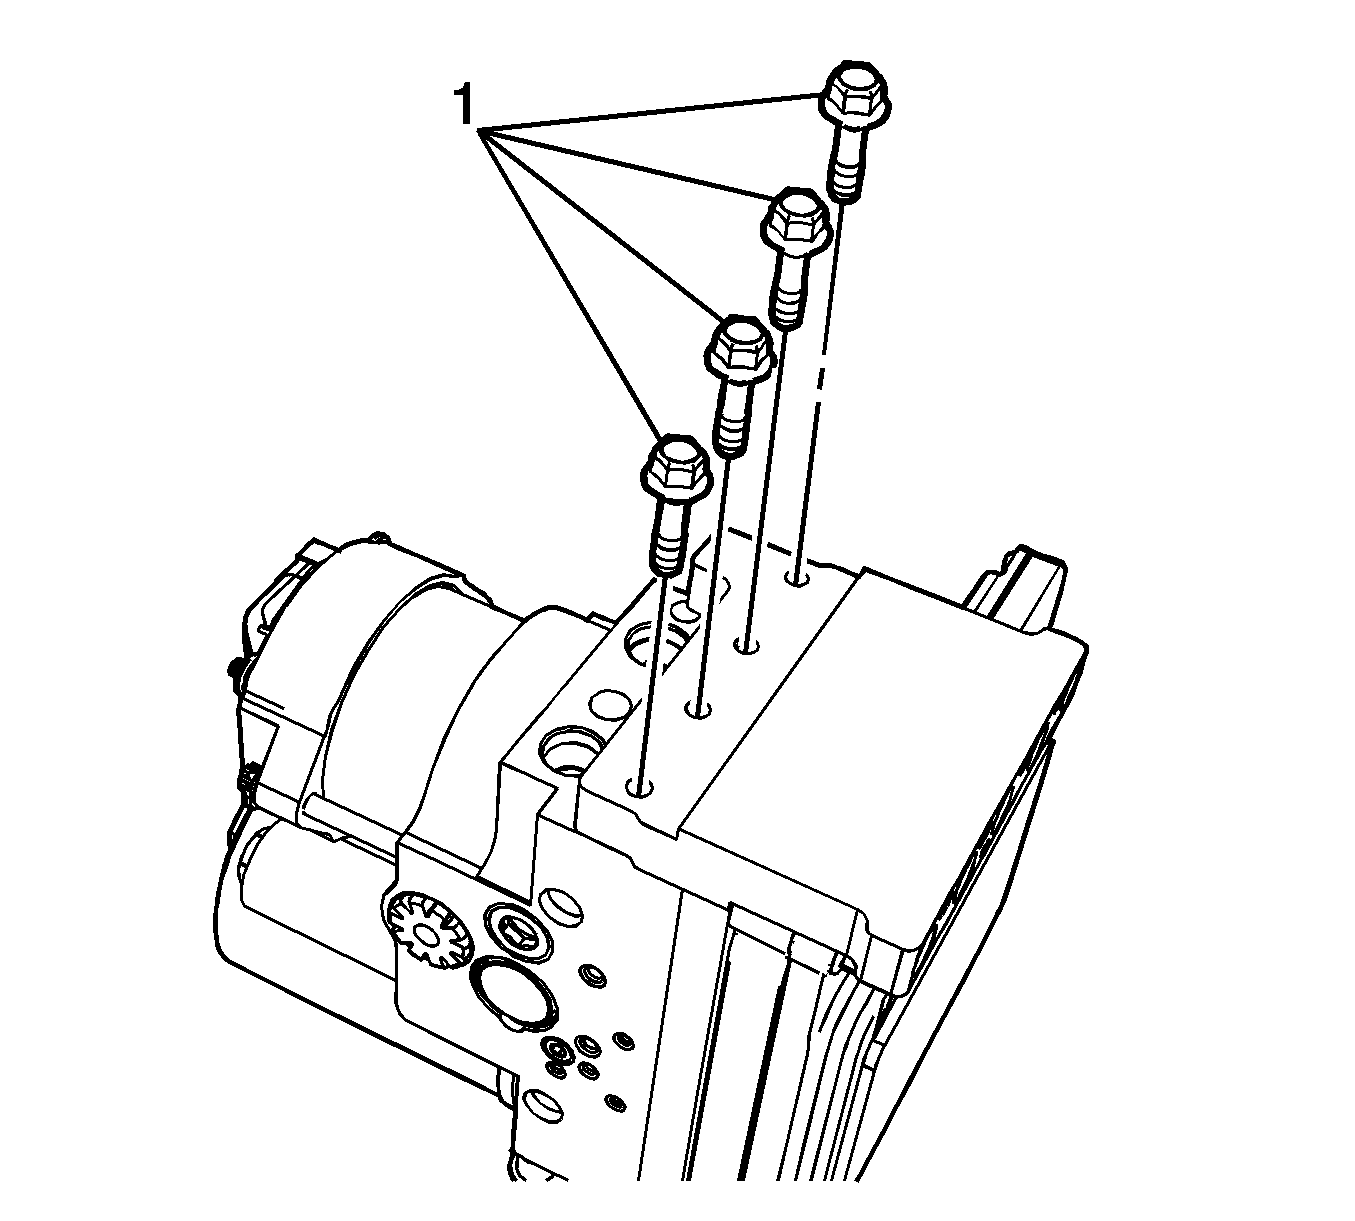
- Remove the brake pipe manifold bolts (1).
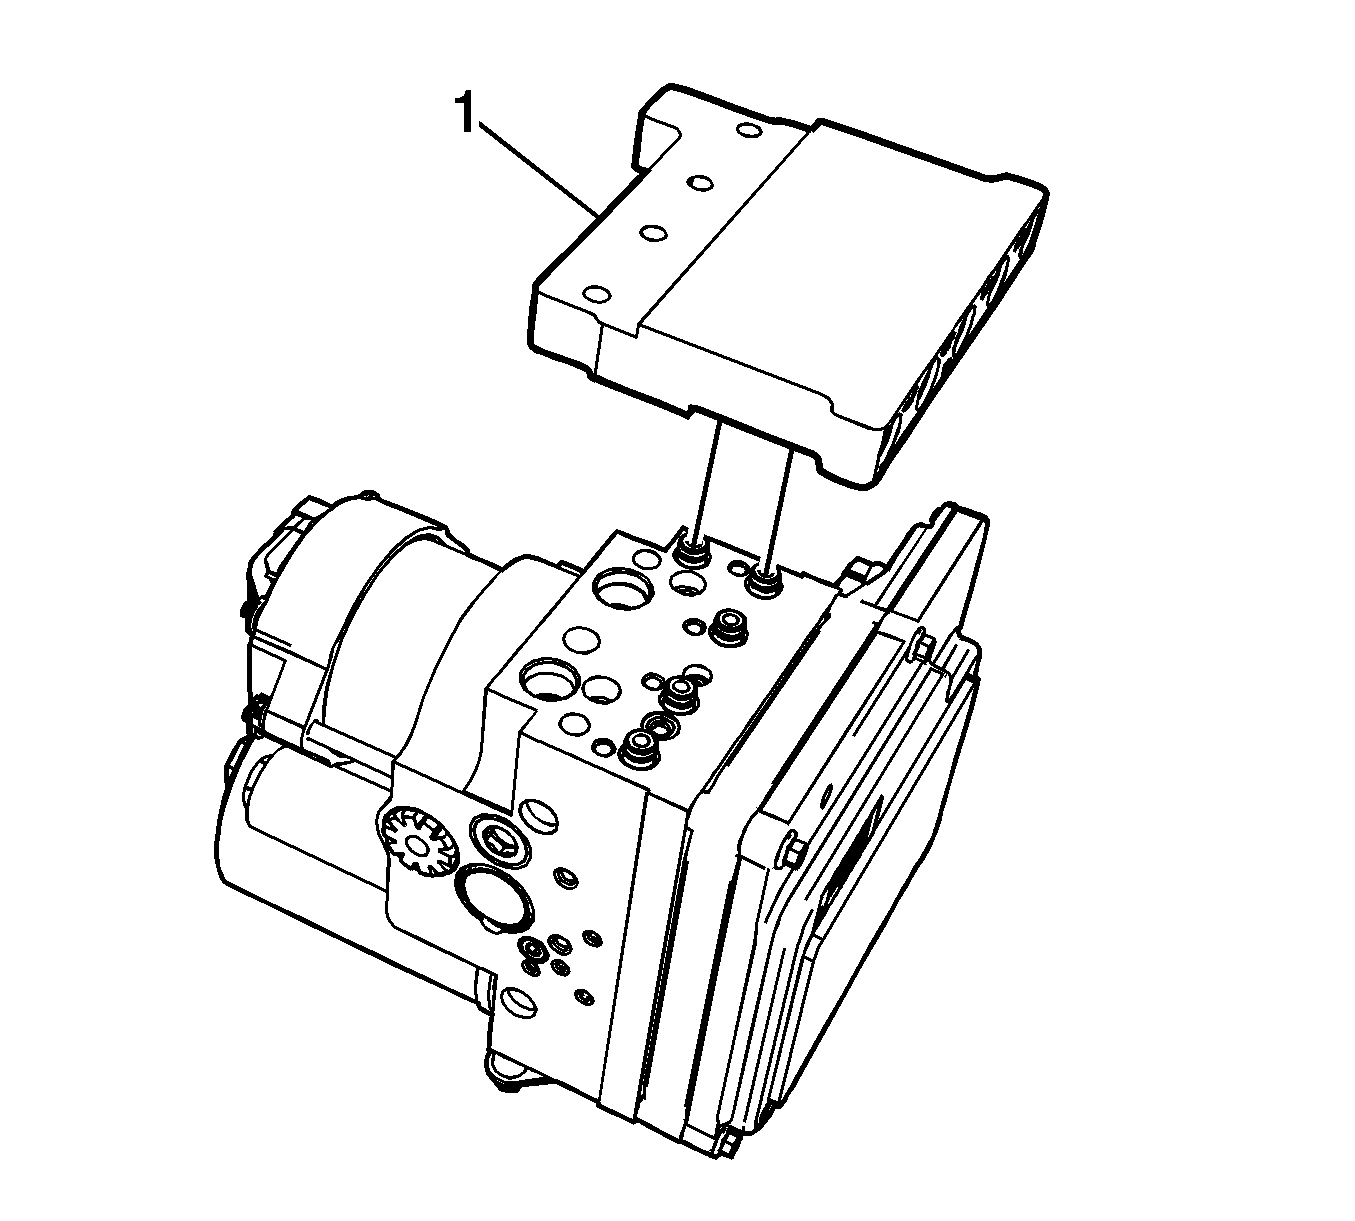
- Remove the brake pipe manifold (1).
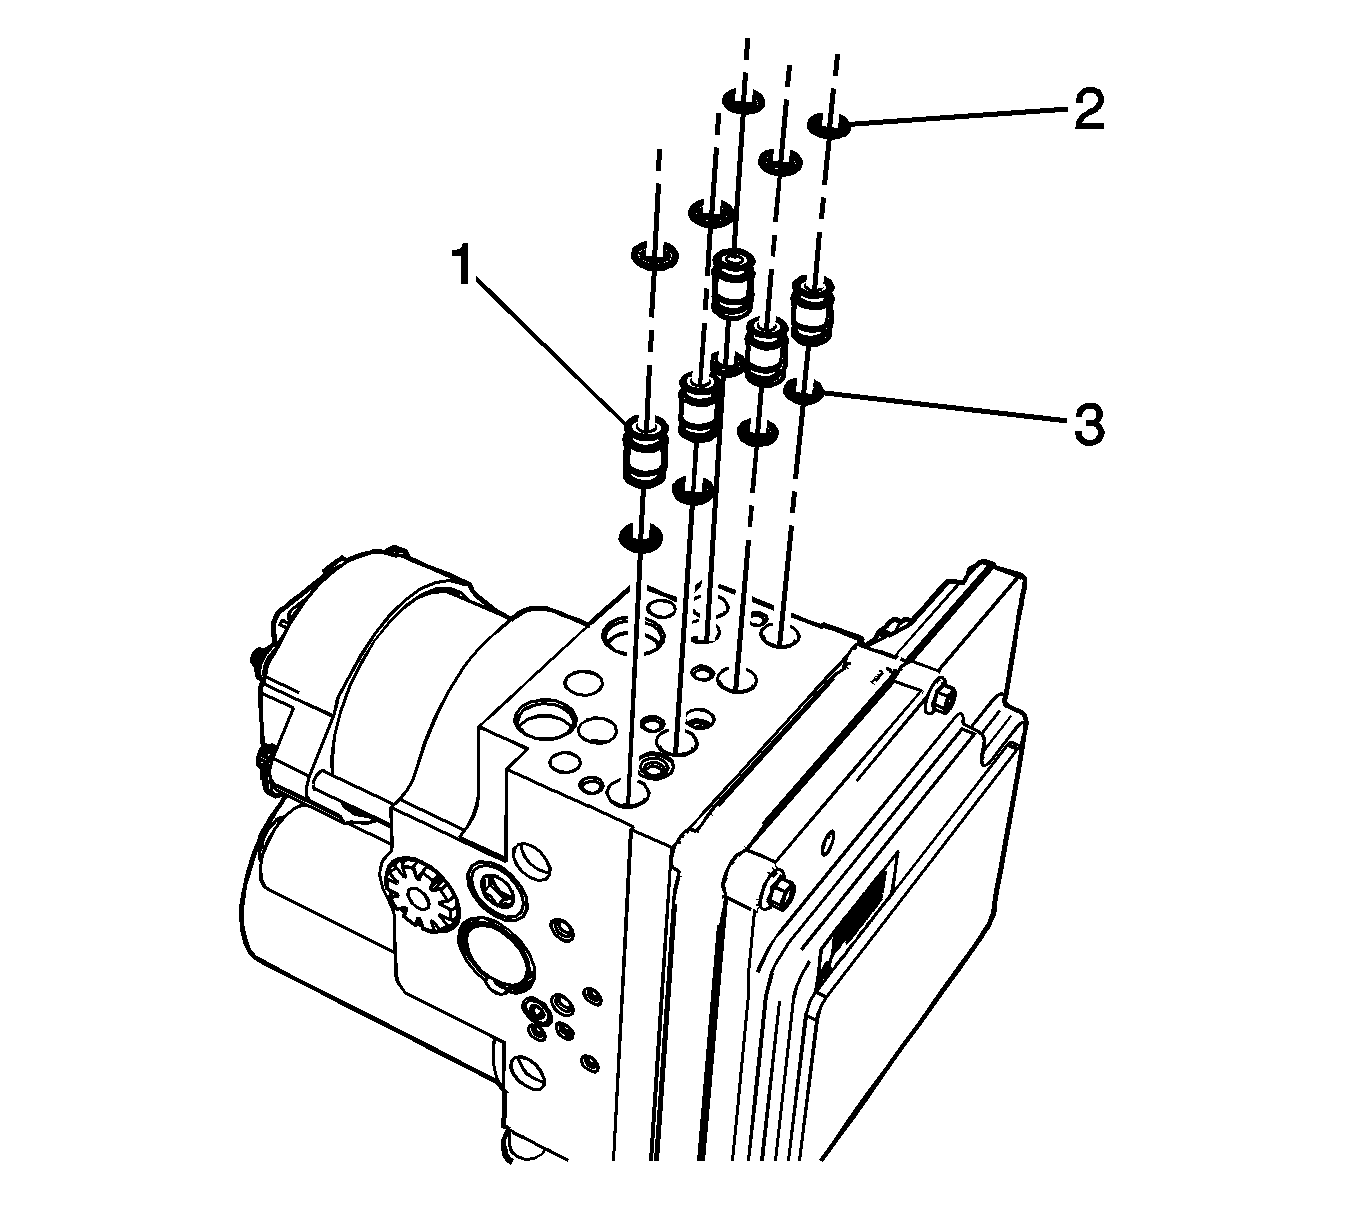
- Remove the 5 transfer tubes (1).
- Remove and discard the 5 upper transfer tube O-ring seals (2).
- Remove discard the 5 lower transfer tube O-rings seals (3).
Note: The ignition must be in the OFF position, without pausing at ACCESSORY, and without applying the brake pedal to ensure the brake modulator and high pressure accumulator (HPA) pressure relief occurs. This process will take approximately 1 to 3 minutes.


Installation Procedure
- Assemble the 5 transfer tubes (1) to 5 new upper transfer tube O-ring seals (2).
- Install the 5 new lower transfer tube O-ring seals (3).
- Lubricate the new O-ring seals with Delco Supreme 11®, GM P/N 12377967 (Canadian P/N 992667), or equivalent DOT-3 brake fluid from a clean, sealed brake fluid container.
- Install the transfer tube assemblies to the brake modulator valve assembly.
- Install the brake pipe manifold (1).
- Install the brake pipe manifold bolts (1).
- Assemble the master cylinder return hose fitting (1) and the master cylinder supply hose fitting (2) to the new O-ring seals (3).
- Lubricate the new O-ring seals with Delco Supreme 11®, GM P/N 12377967 (Canadian P/N 992667), or equivalent DOT-3 brake fluid from a clean, sealed brake fluid container.
- Install the return and supply hose fittings to the brake modulator valve assembly.
- Install the brake modulator assembly. Refer to Brake Pressure Modulator Valve Replacement.


Caution: Refer to Fastener Caution in the Preface section.

Tighten
Tighten the bolts to 11 N·m (97 lb in).

Tighten
Tighten the fittings to 8 N·m (71 lb in).
