Notice: Use the correct fastener in the correct location. Replacement fasteners
must be the correct part number for that application. Fasteners requiring
replacement or fasteners requiring the use of thread locking compound or sealant
are identified in the service procedure. Do not use paints, lubricants, or
corrosion inhibitors on fasteners or fastener joint surfaces unless specified.
These coatings affect fastener torque and joint clamping force and may damage
the fastener. Use the correct tightening sequence and specifications when
installing fasteners in order to avoid damage to parts and systems.
- Perform
the following steps in order to install the transmission range switch:
| 1.1. | Turn the manual shaft rearward. |
| 1.2. | Turn the shaft back two notches. |
| 1.3. | Set the shaft to the N range. |
| 1.6. | Install the lock washer. |
| 1.7. | Install the set nut. |
Tighten
Tighten the set nut to 5 N·m (44 lb in).
- Bend the lock washer claws over the set nut.
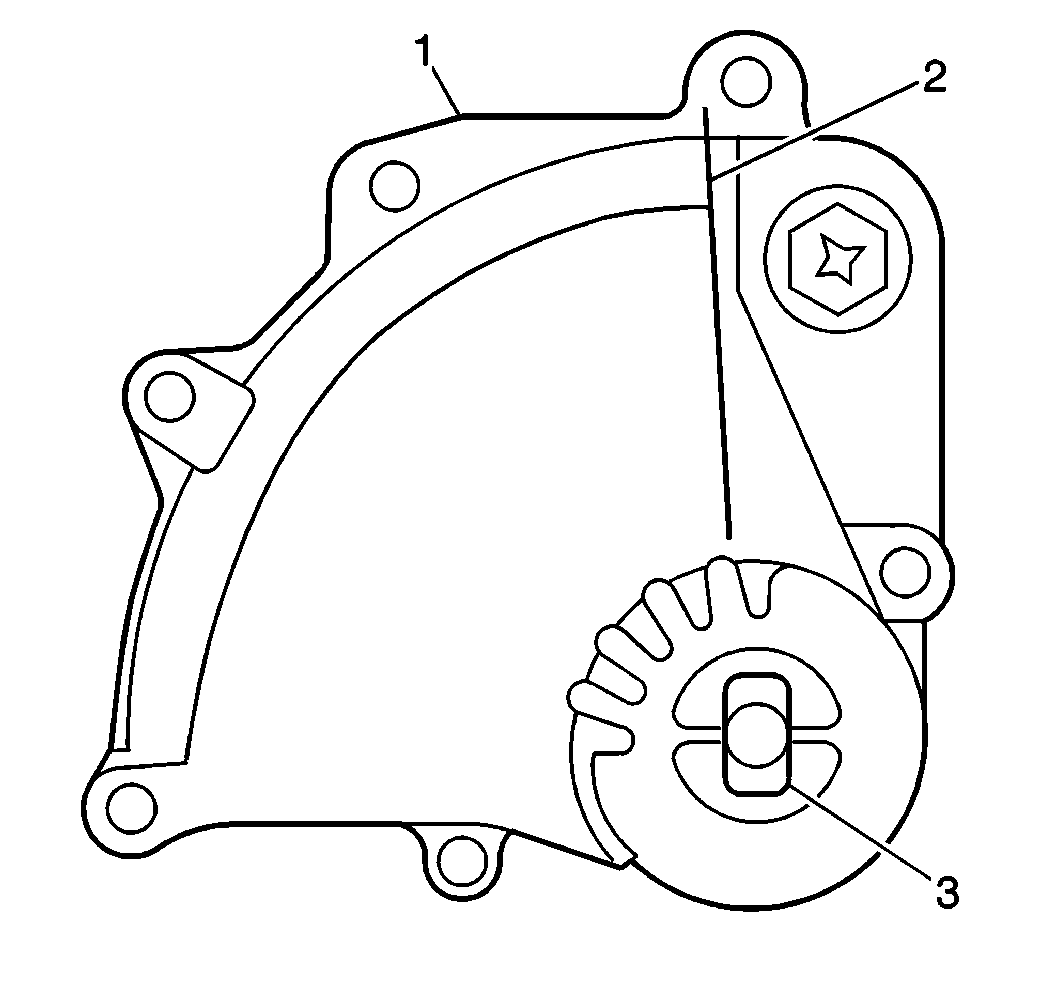
- With the neutral reference line (2) and the cutout in the switch
(3) aligned, tighten the switch bolt.
Tighten
Tighten the bolt to 5 N·m (44 lb in).
- Install the manual lever to the manual shaft.
- Install the manual shaft lever nut.
Tighten
Tighten the nut to 13 N·m (115 lb in).
- Install the vent hose to the vent elbow at the top of the transmission
case.
- Install the vent hose clamp.
- Install a new O-ring to the fluid filler tube.
- Install the fluid filler tube to the transmission case.
- Install the fluid filler tube bolt.
- Install the fluid level indicator to the fluid filler tube.
- Remove the J 41626
with the transmission case from the J 3289-20
.
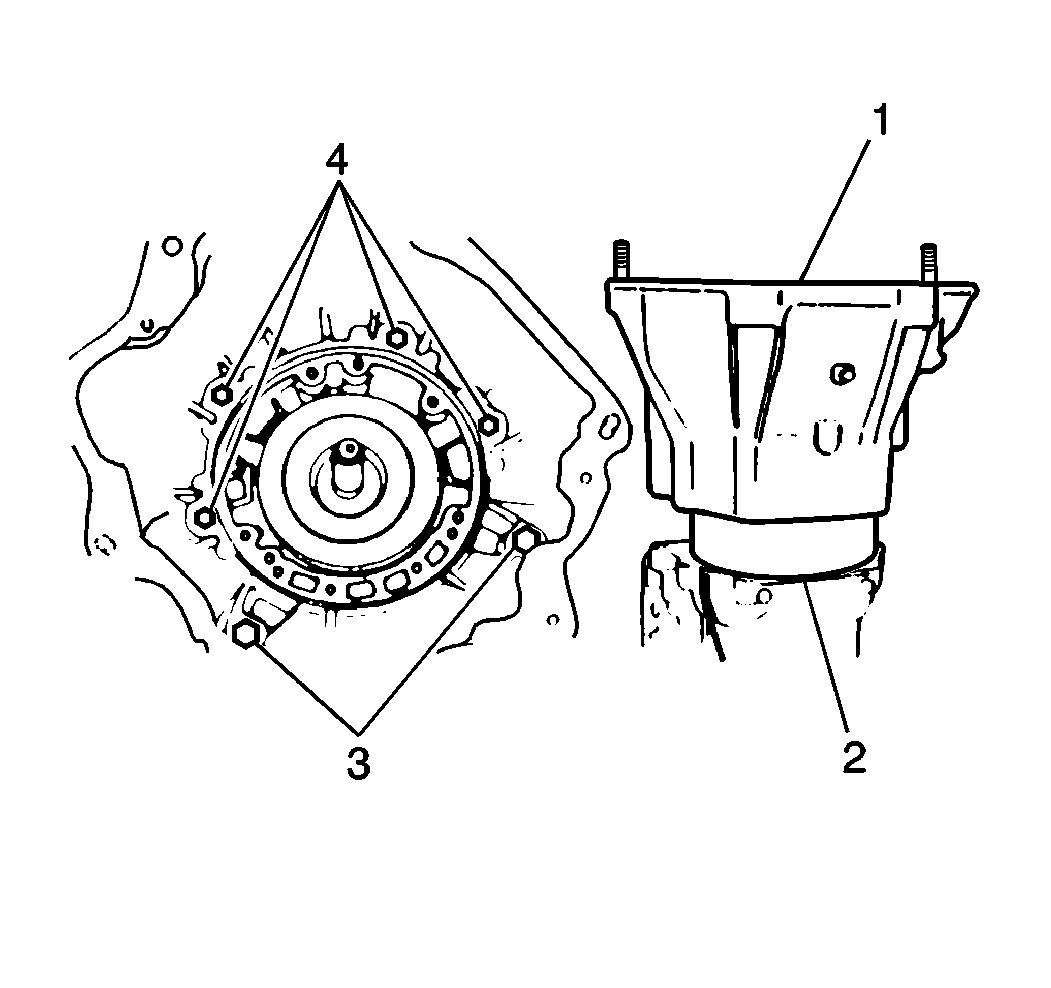
- Remove the J 41626
from the transmission case (1).

- Install the 3 remaining
converter housing bolts (2).
Tighten
| • | Tighten the bolts (4) to 36 N·m (27 lb ft). |
| • | Tighten the bolts (3) to 58 N·m (43 lb ft). |


