The vehicle has a three-piece cargo cover system with cargo panels that can be removed and stored in the cargo area of the vehicle.
Caution: Improperly stored cargo cover panels could be thrown about the vehicle during a collision or sudden maneuver. Someone could be injured. If a panel is removed, always store it in the proper storage location. When putting it back, always make sure that it is securely reattached.
Notice: Exceeding the weight limit of 250 lbs (113 kg) can damage the cargo covers, and the repairs would not be covered by the vehicle warranty. Do not put anything on top of the cargo covers over the weight limit.
To remove a cargo panel(s):
- Lower the tailgate. See Tailgatefor more information on the tailgate.
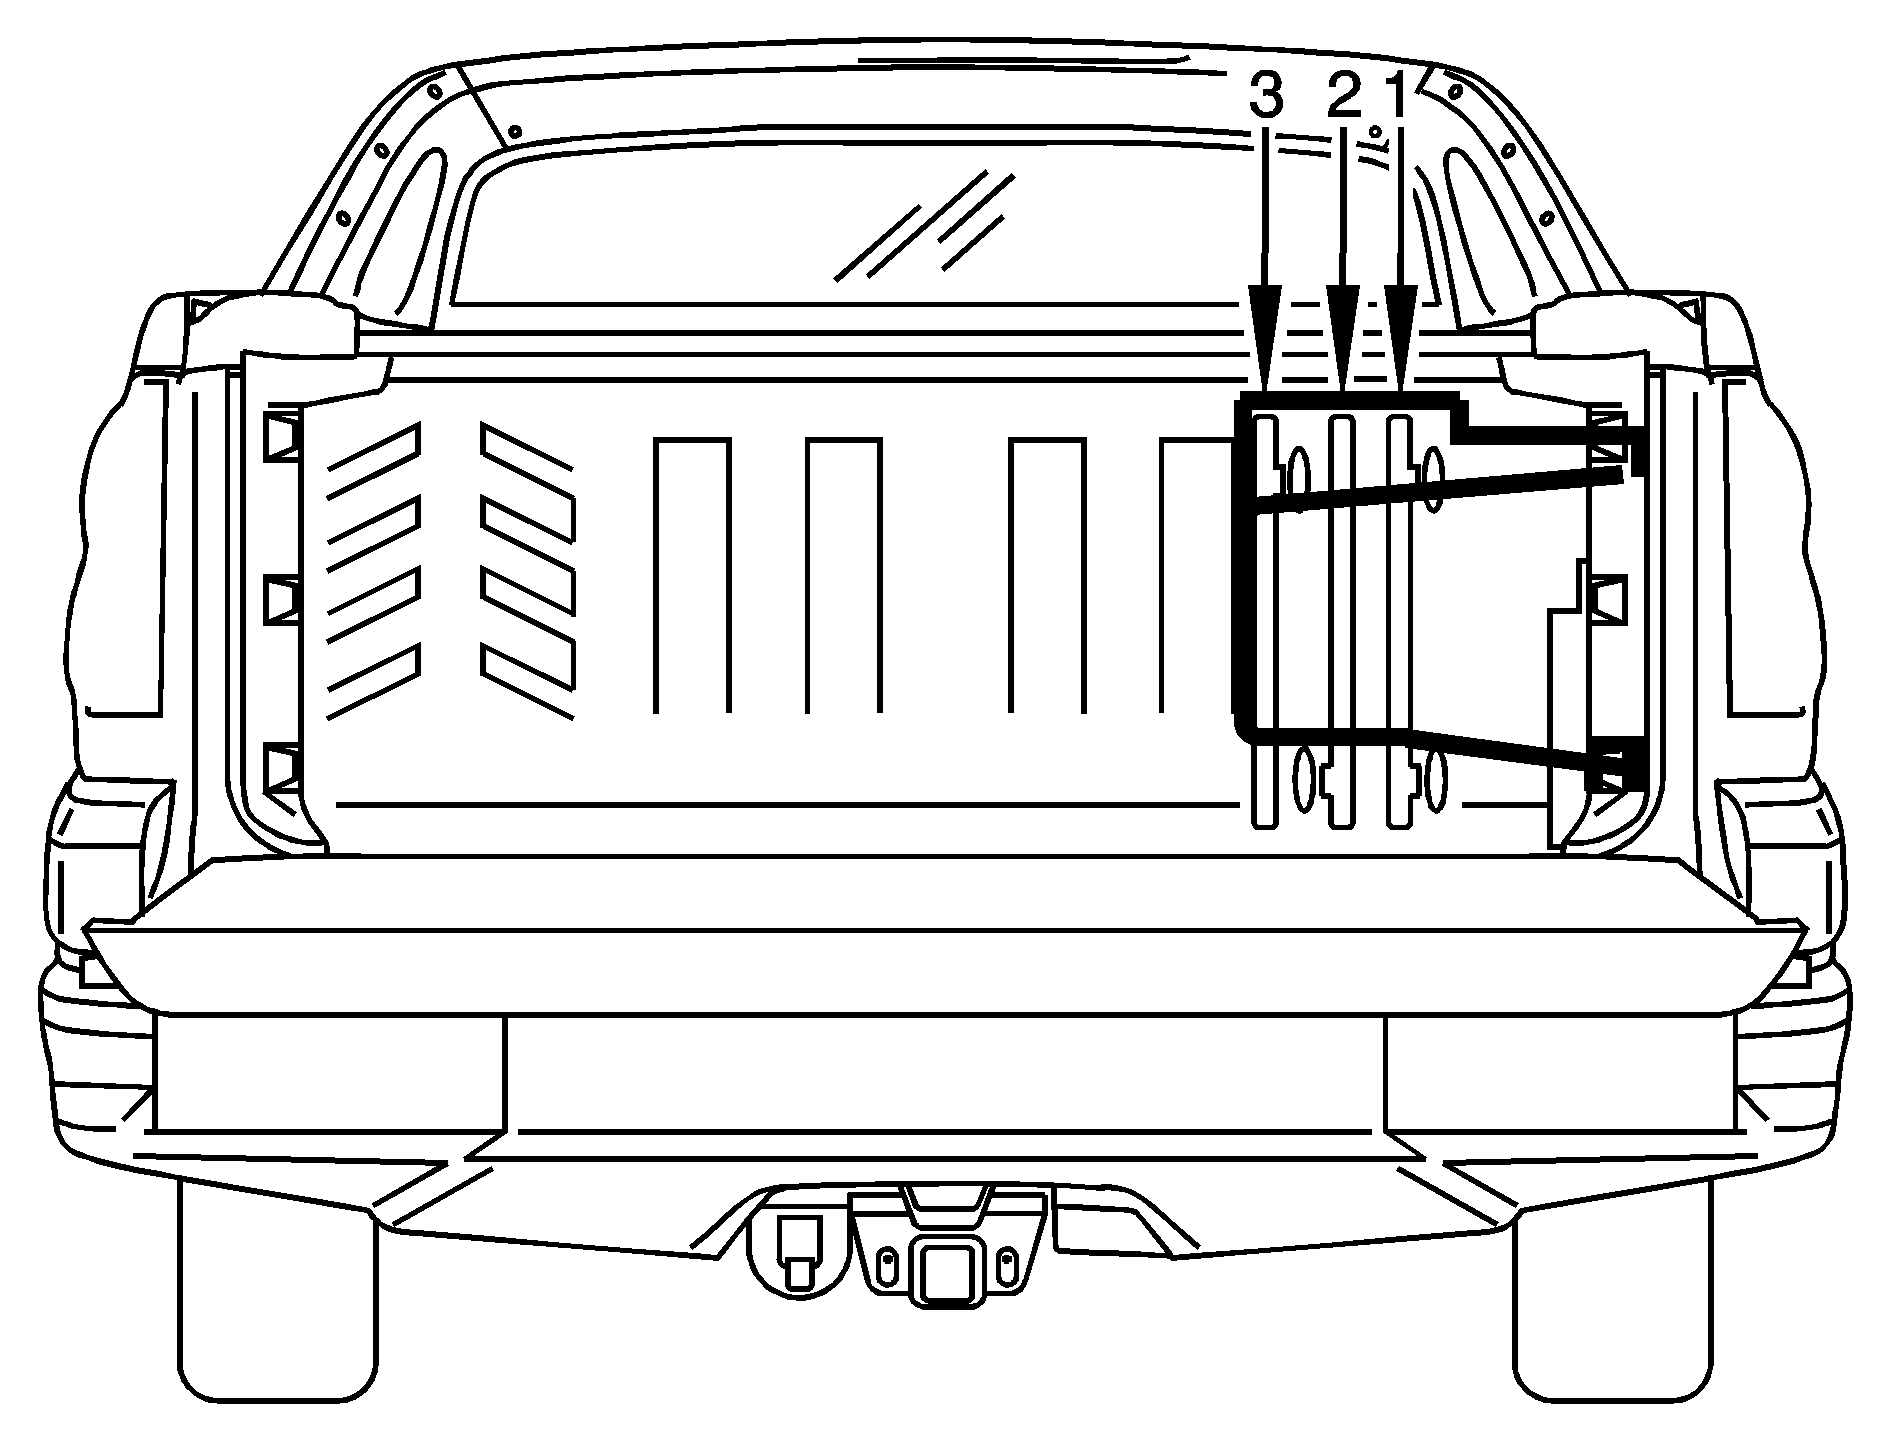
- The panels are embossed on the upper center portion with the numbers 1, 2 and 3. There are also numbered labels on the bottom of the panels. The numbers on the top and bottom of the panels will be used as reference when removing, storing and reinstalling the panels.
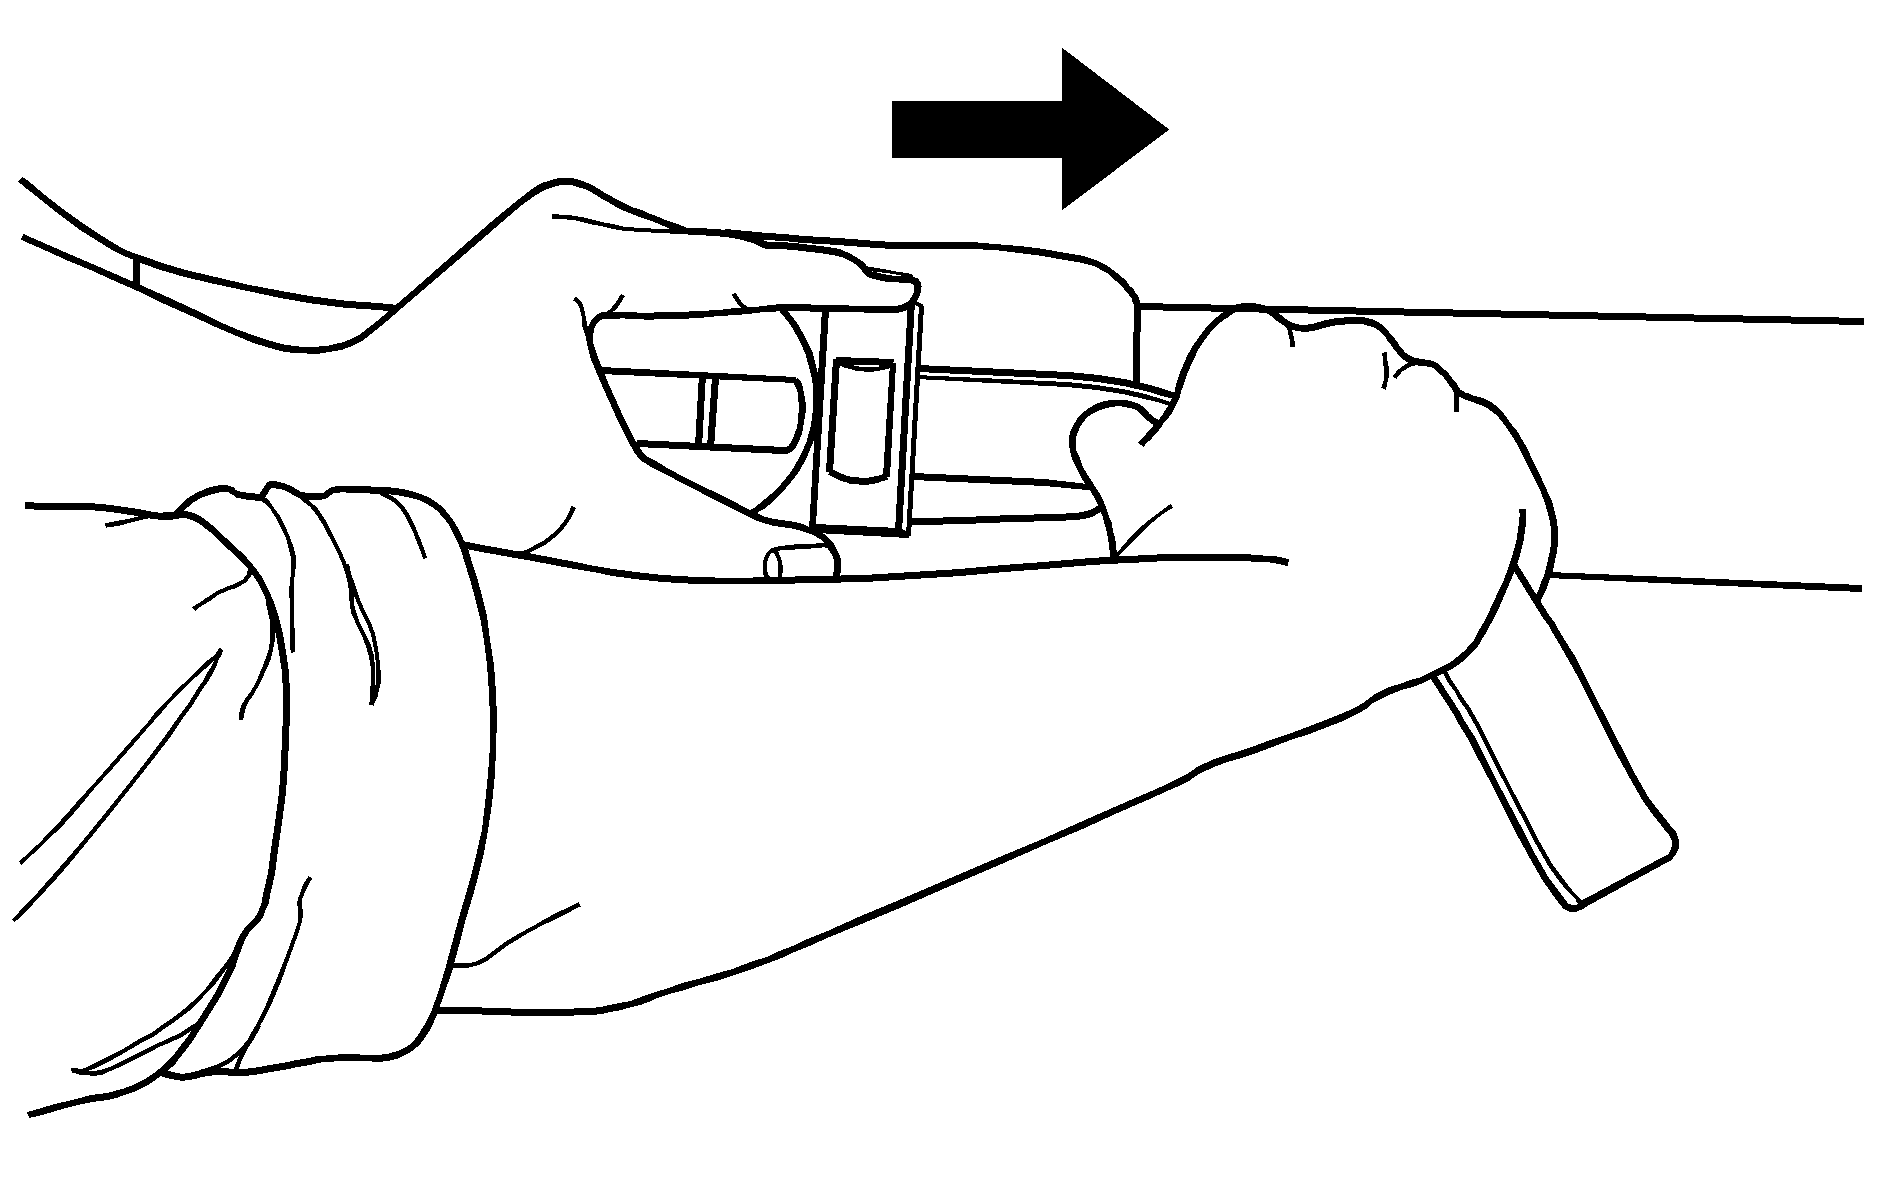
- Remove cargo panel 3 by pulling forward on the left and right cargo panel latches, located on the bottom of each cargo panel, forward to unlock the cargo panel latches.
- Pull each cargo panel up and then out from the side rails and set it aside. Remove as many cargo panels as needed.
- If cargo panel 1 needs to be removed. There are latches on both sides that need to be released.
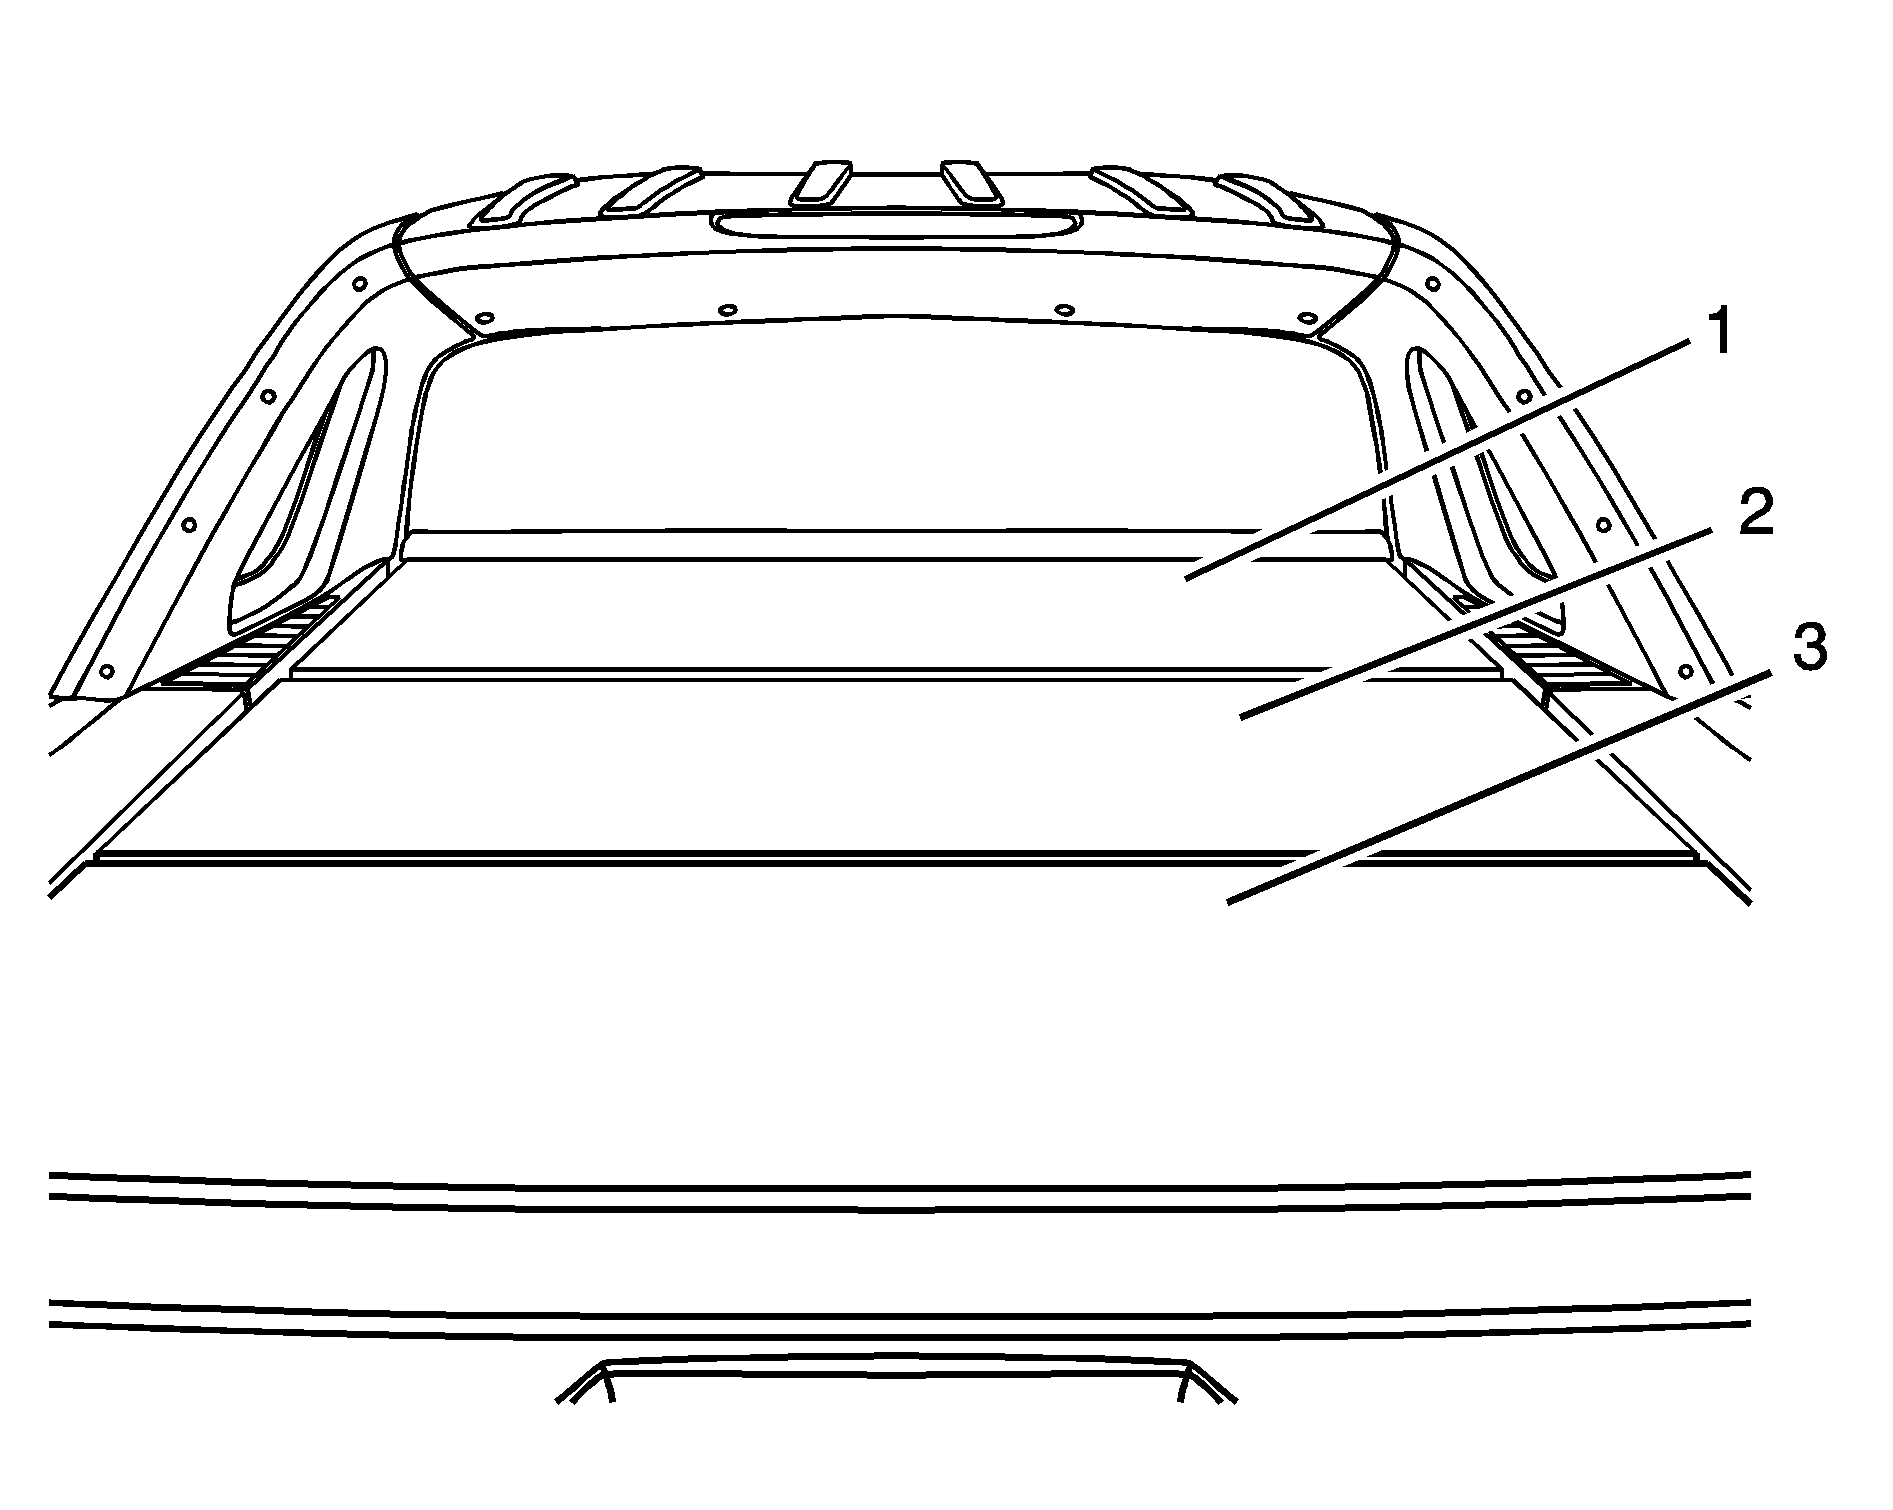
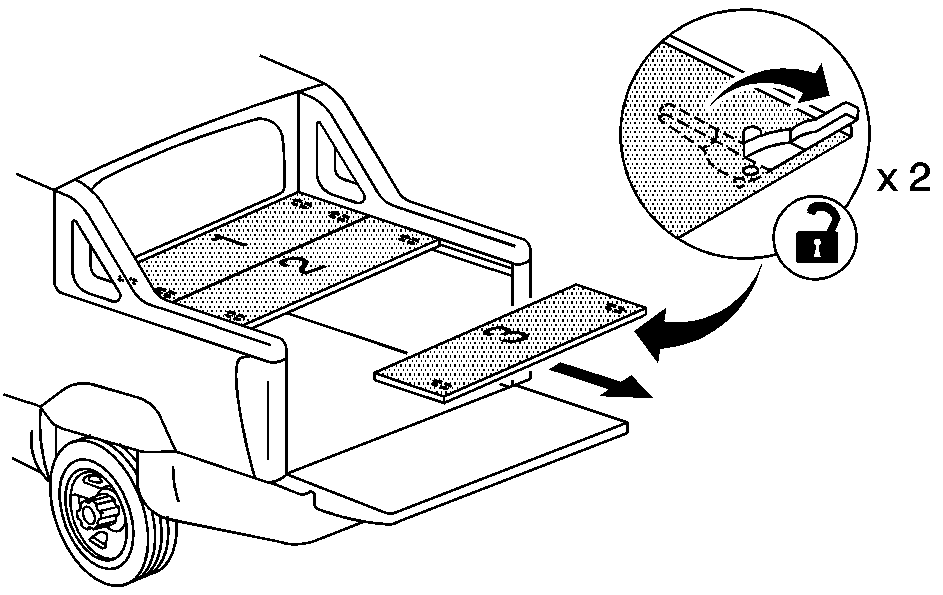
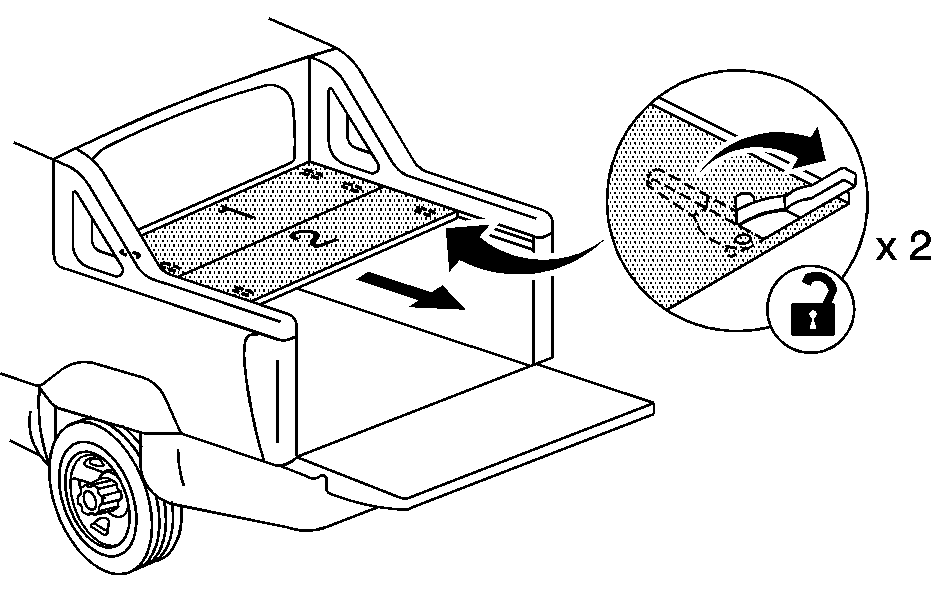
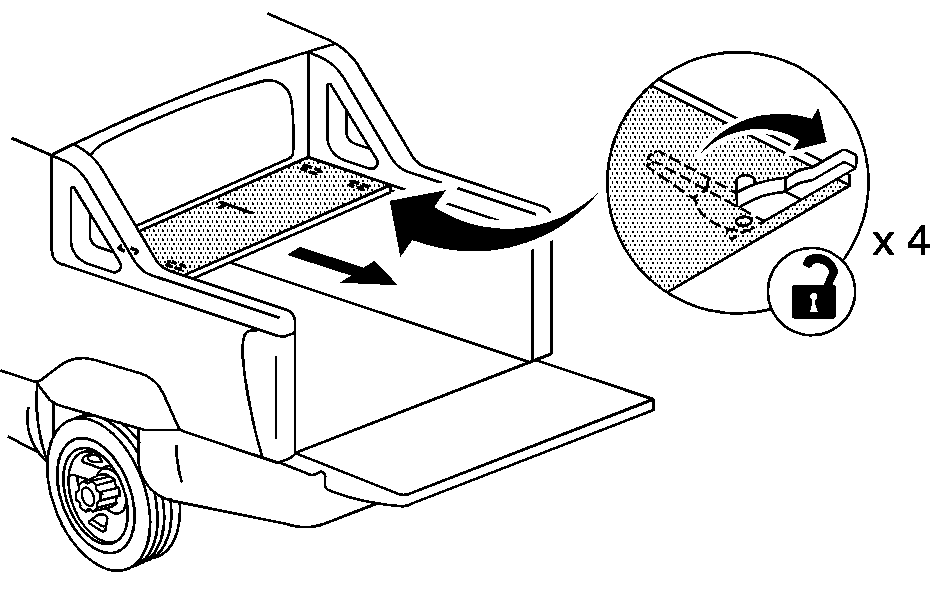
After each cargo panel is removed, store them within the cargo storage area using the cargo panel storage system.
Cargo Panel Storage System
The three cargo panels can be stored in the cargo area using the storage strap system. Always use the storage strap system to store the cargo panels while driving.
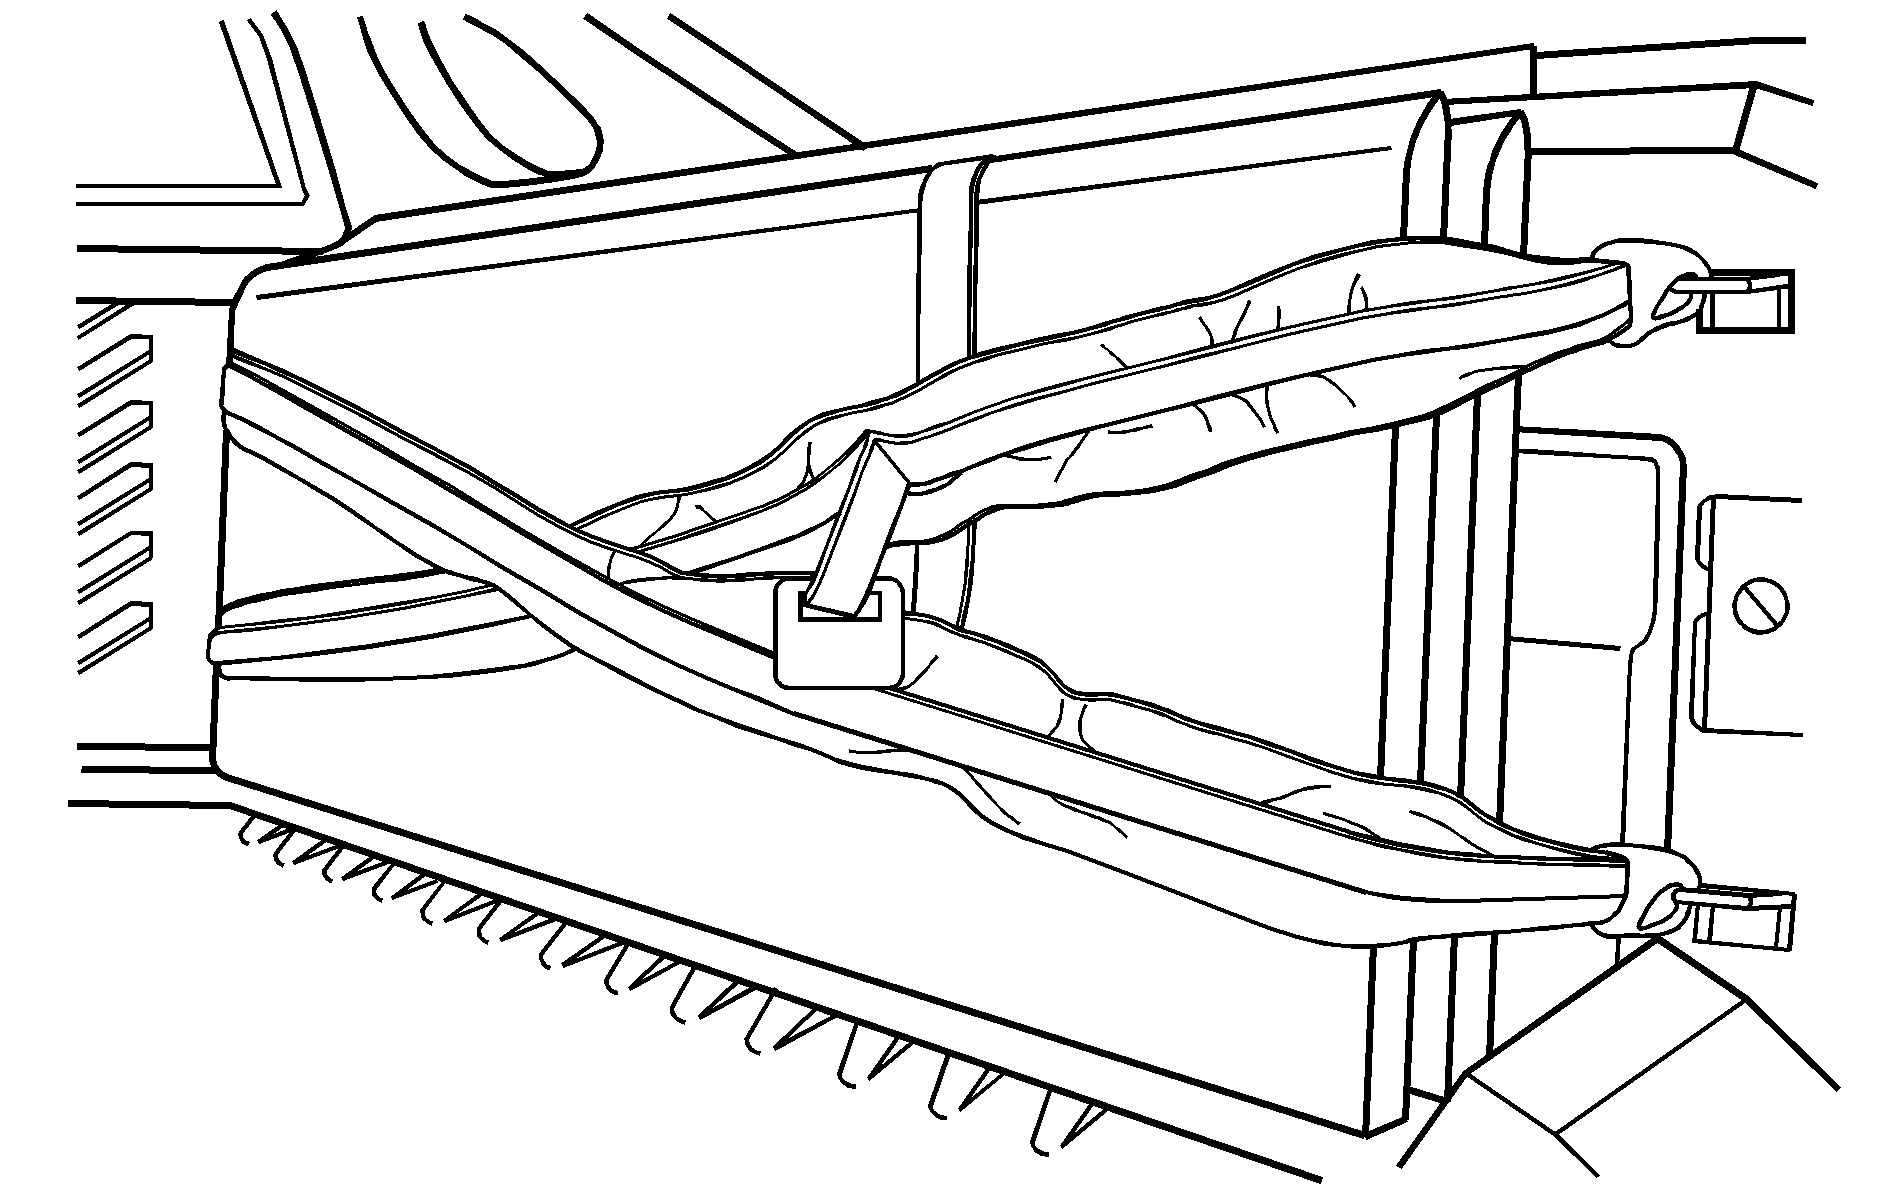
To store the panels:
- Always use the storage strap system to store the cargo panels during driving.
- A. Secure clip A on the secondary strap.
- Starting with cargo panel 1, load the cargo panel with the latches up and facing away from you.
- Store cargo panel 2 by loading the cargo panel with latches down and facing toward you.
- Store cargo panel 3 by loading the cargo panel with latches up and facing away from you.
- Place the primary straps over the three cargo covers (A). Fasten the four strap clips (B).
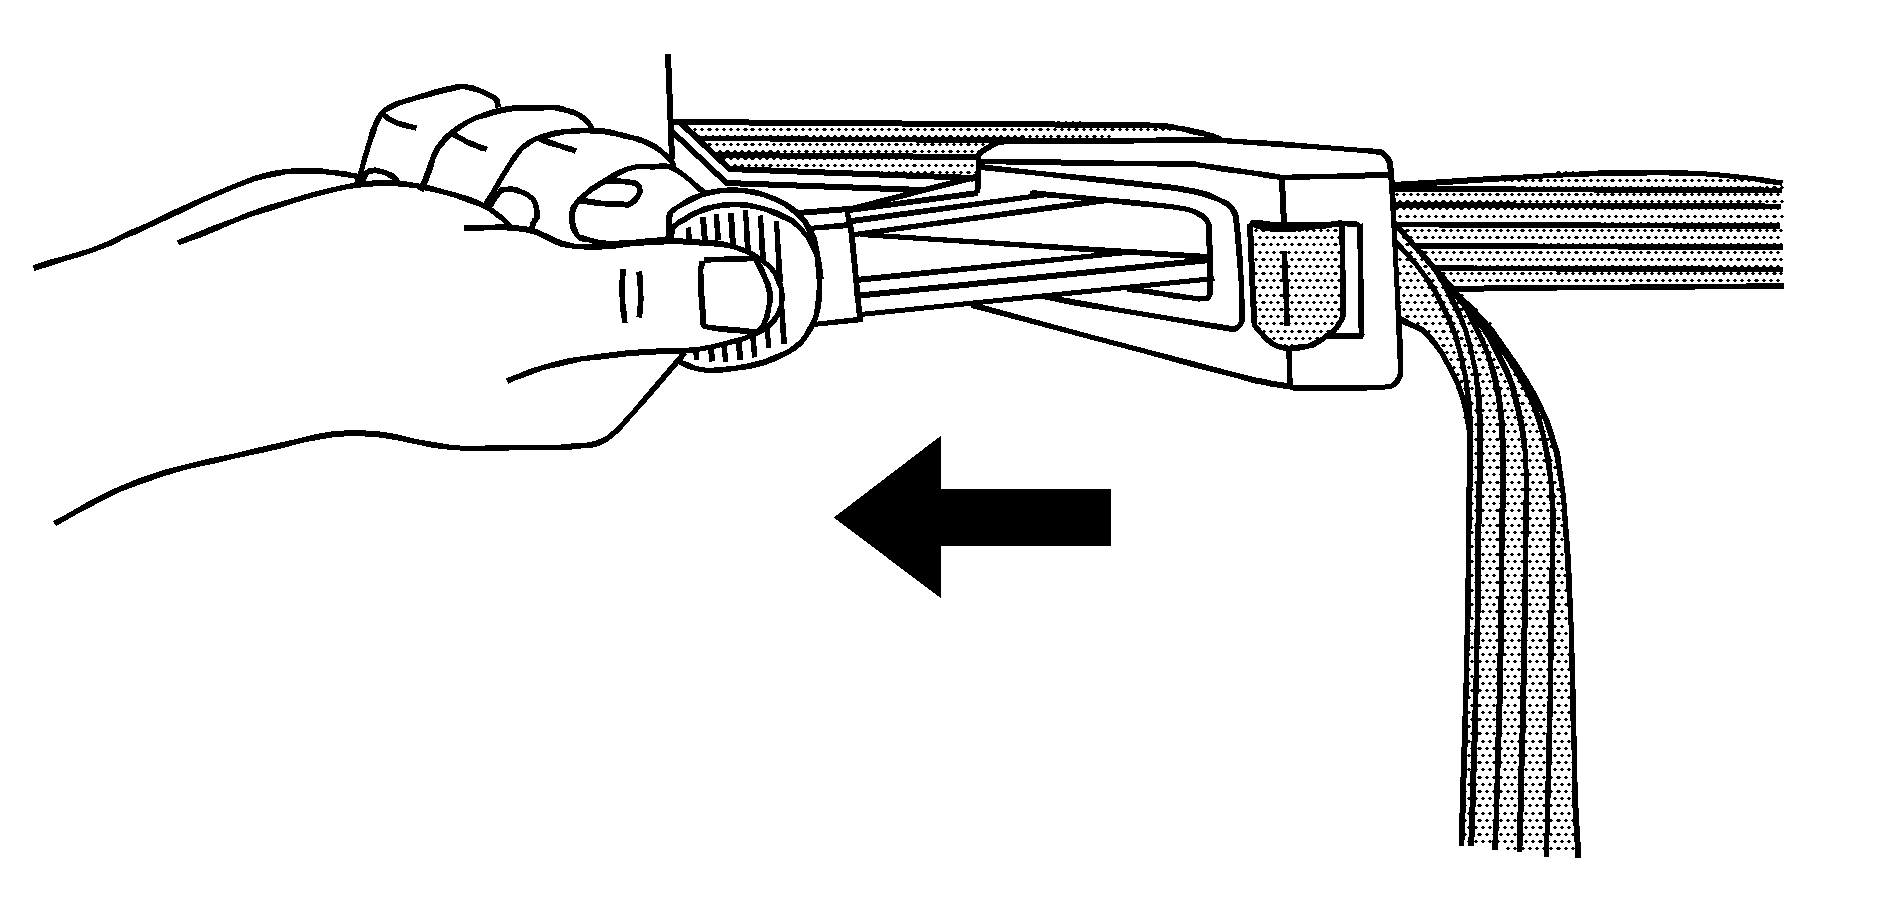
- Tighten all straps by pulling on the free end of each strap.
- Close both cross locks at the center of the strap system to secure tightly.
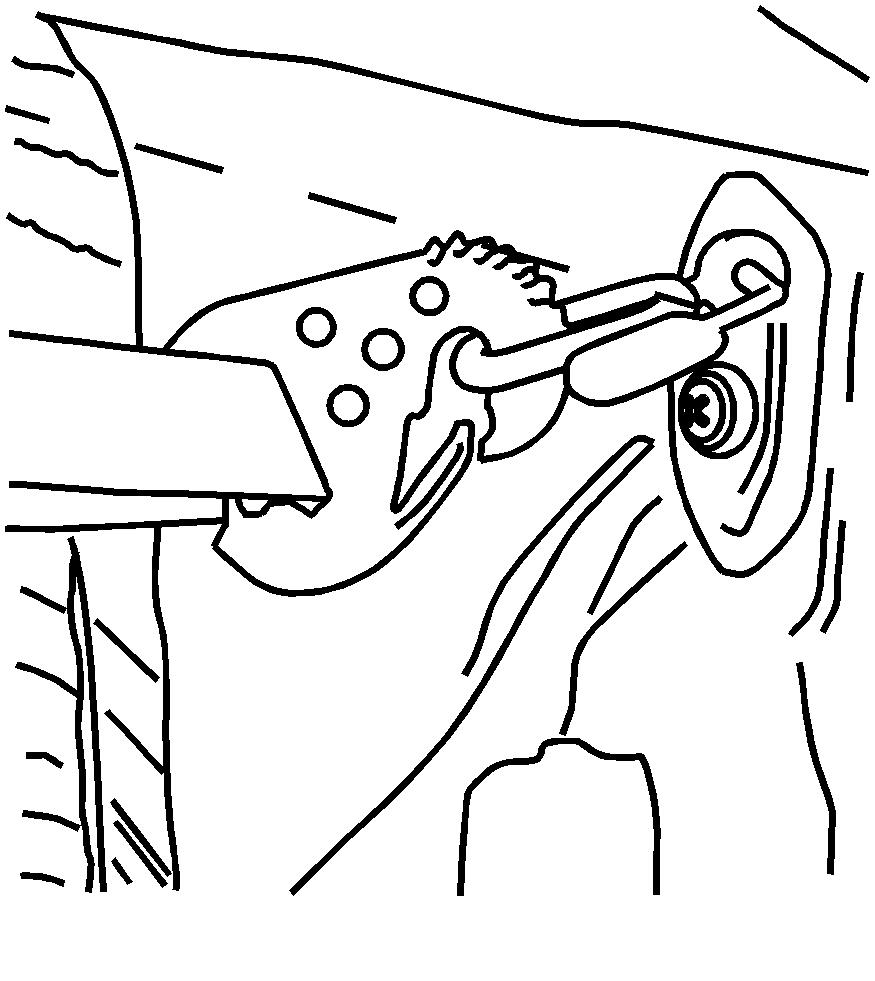
Secure the storage strap system in the cargo storage area by attaching the six clips on the cargo strap system to the tie down locations on either side of the storage area.
Before storing the cargo panels, be sure that the latches are in the locked position. The latches are in the locked position when they are parallel to the front and back edge of the panel.
Use the following instructions for the proper storage sequence and location for each panel:
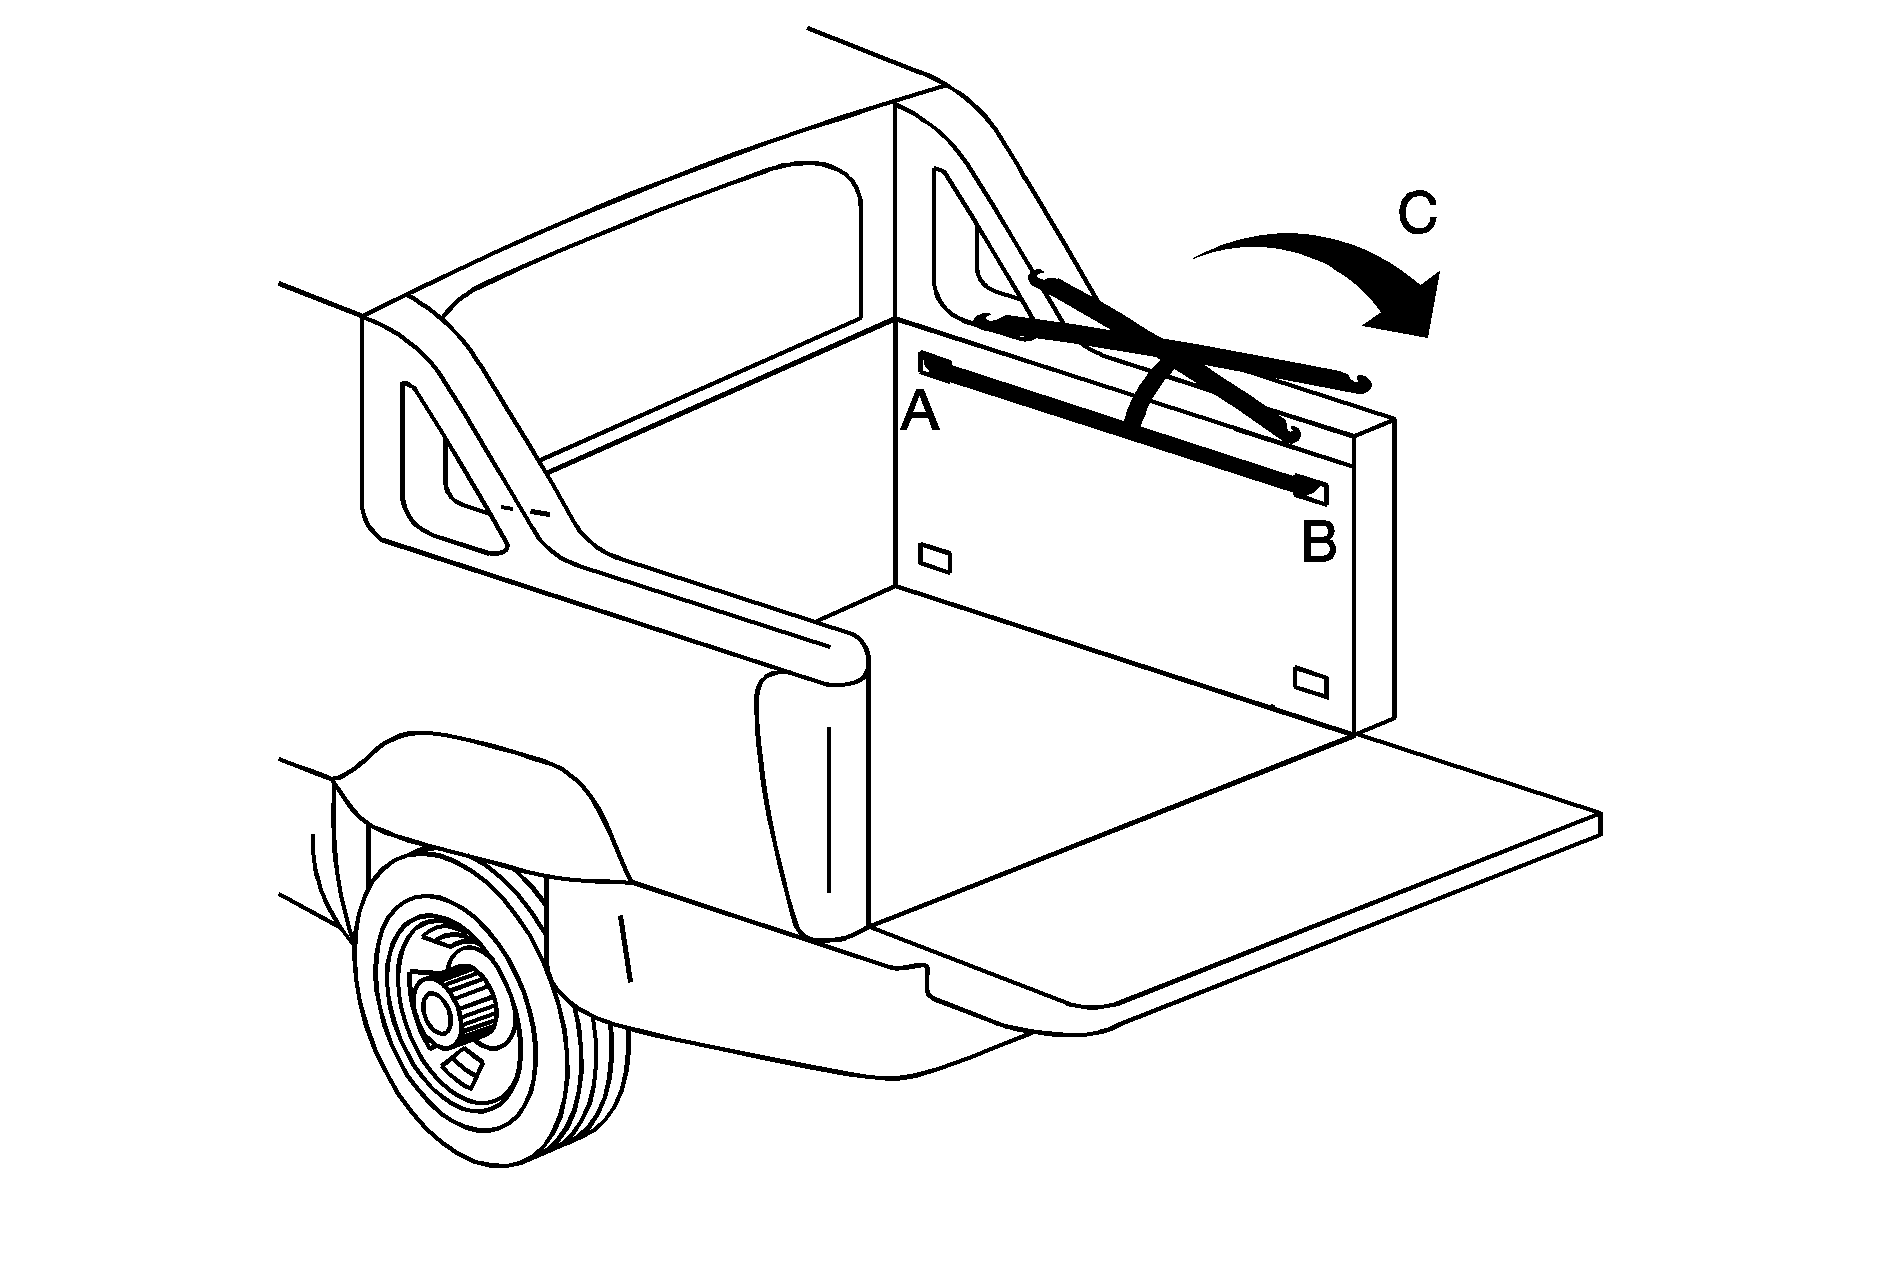
B. Secure clip B on the secondary strap.
C. Place the remaining primary straps on top of the lid and tray at the top of the cargo area.
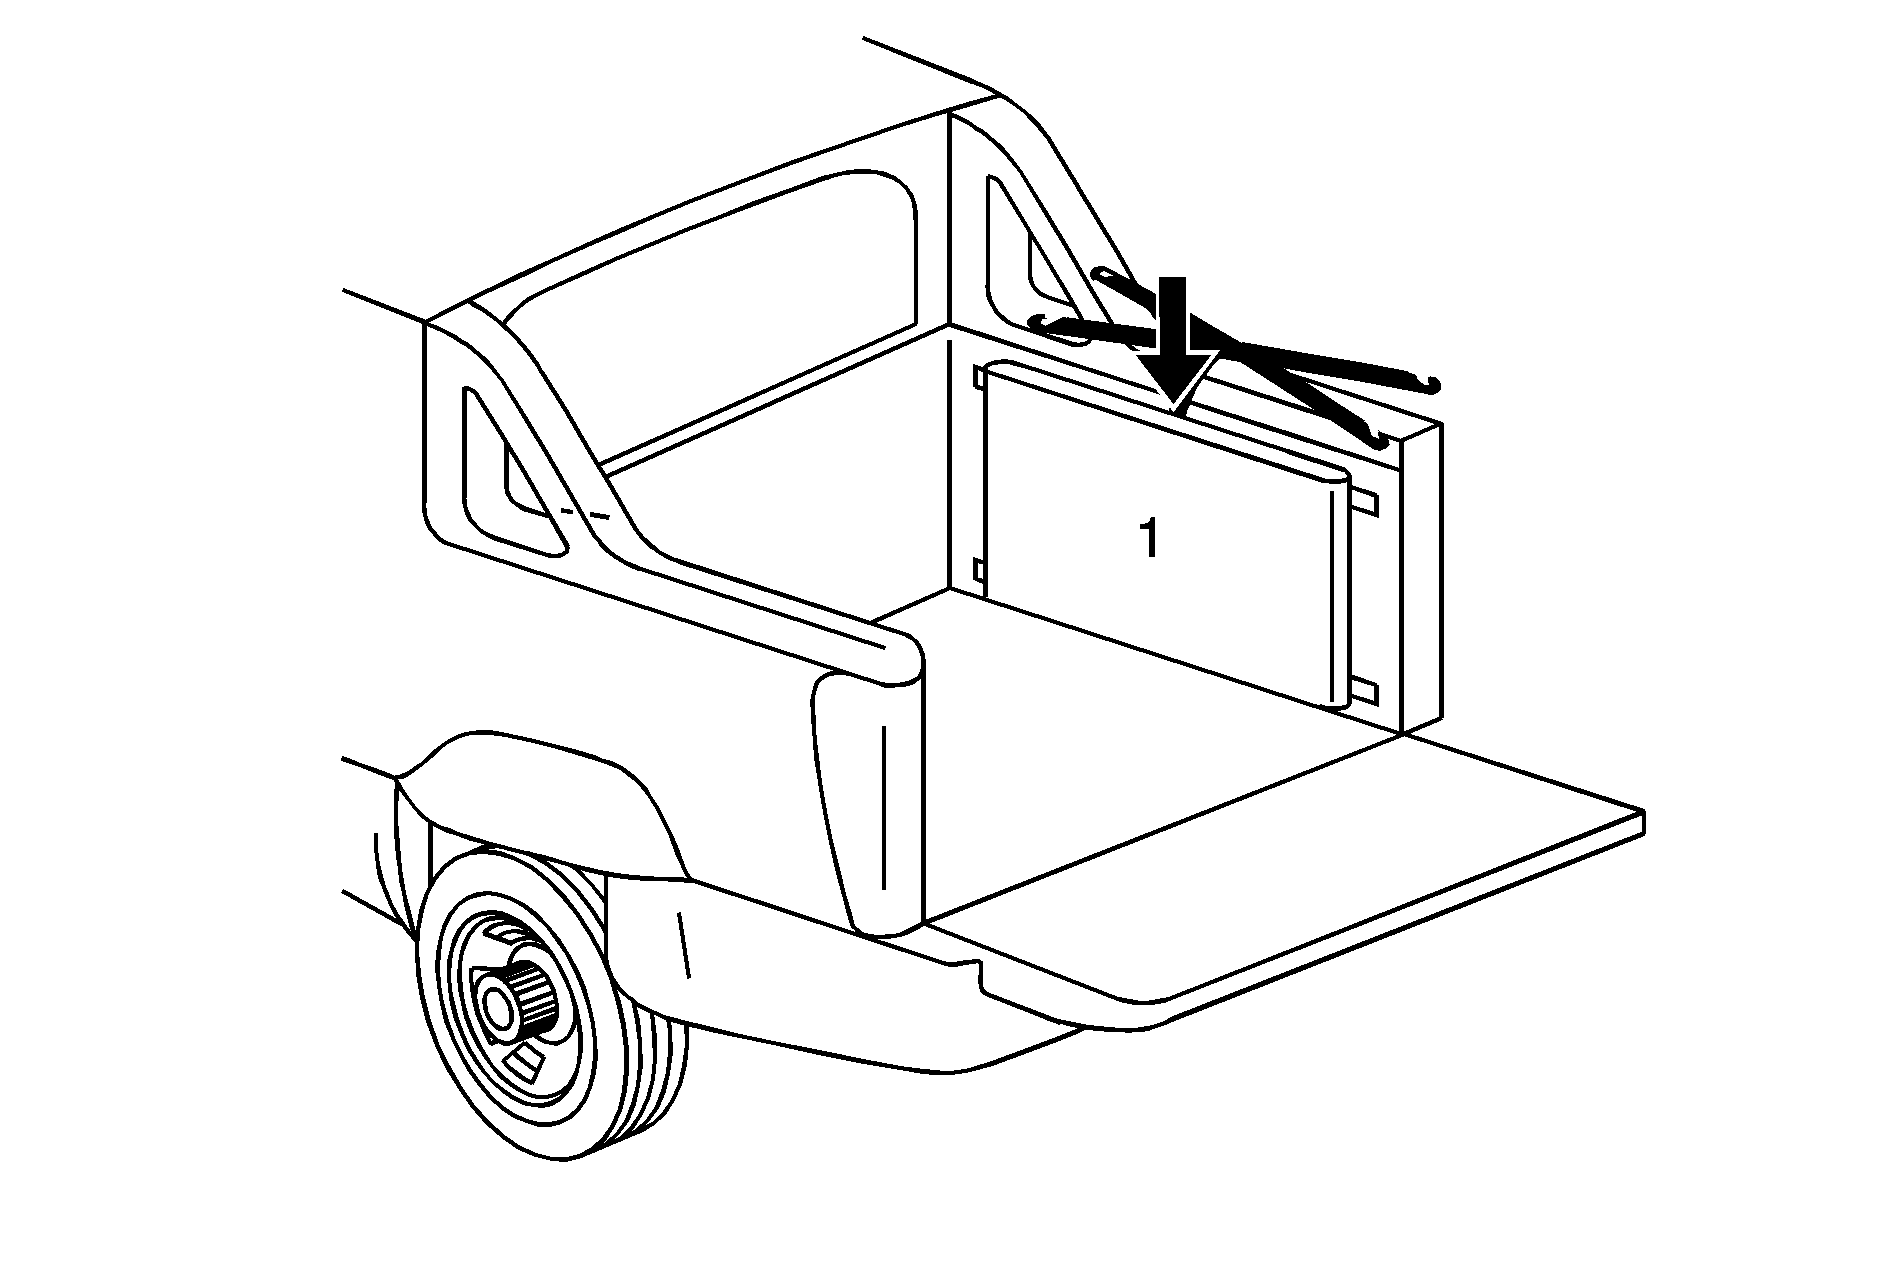
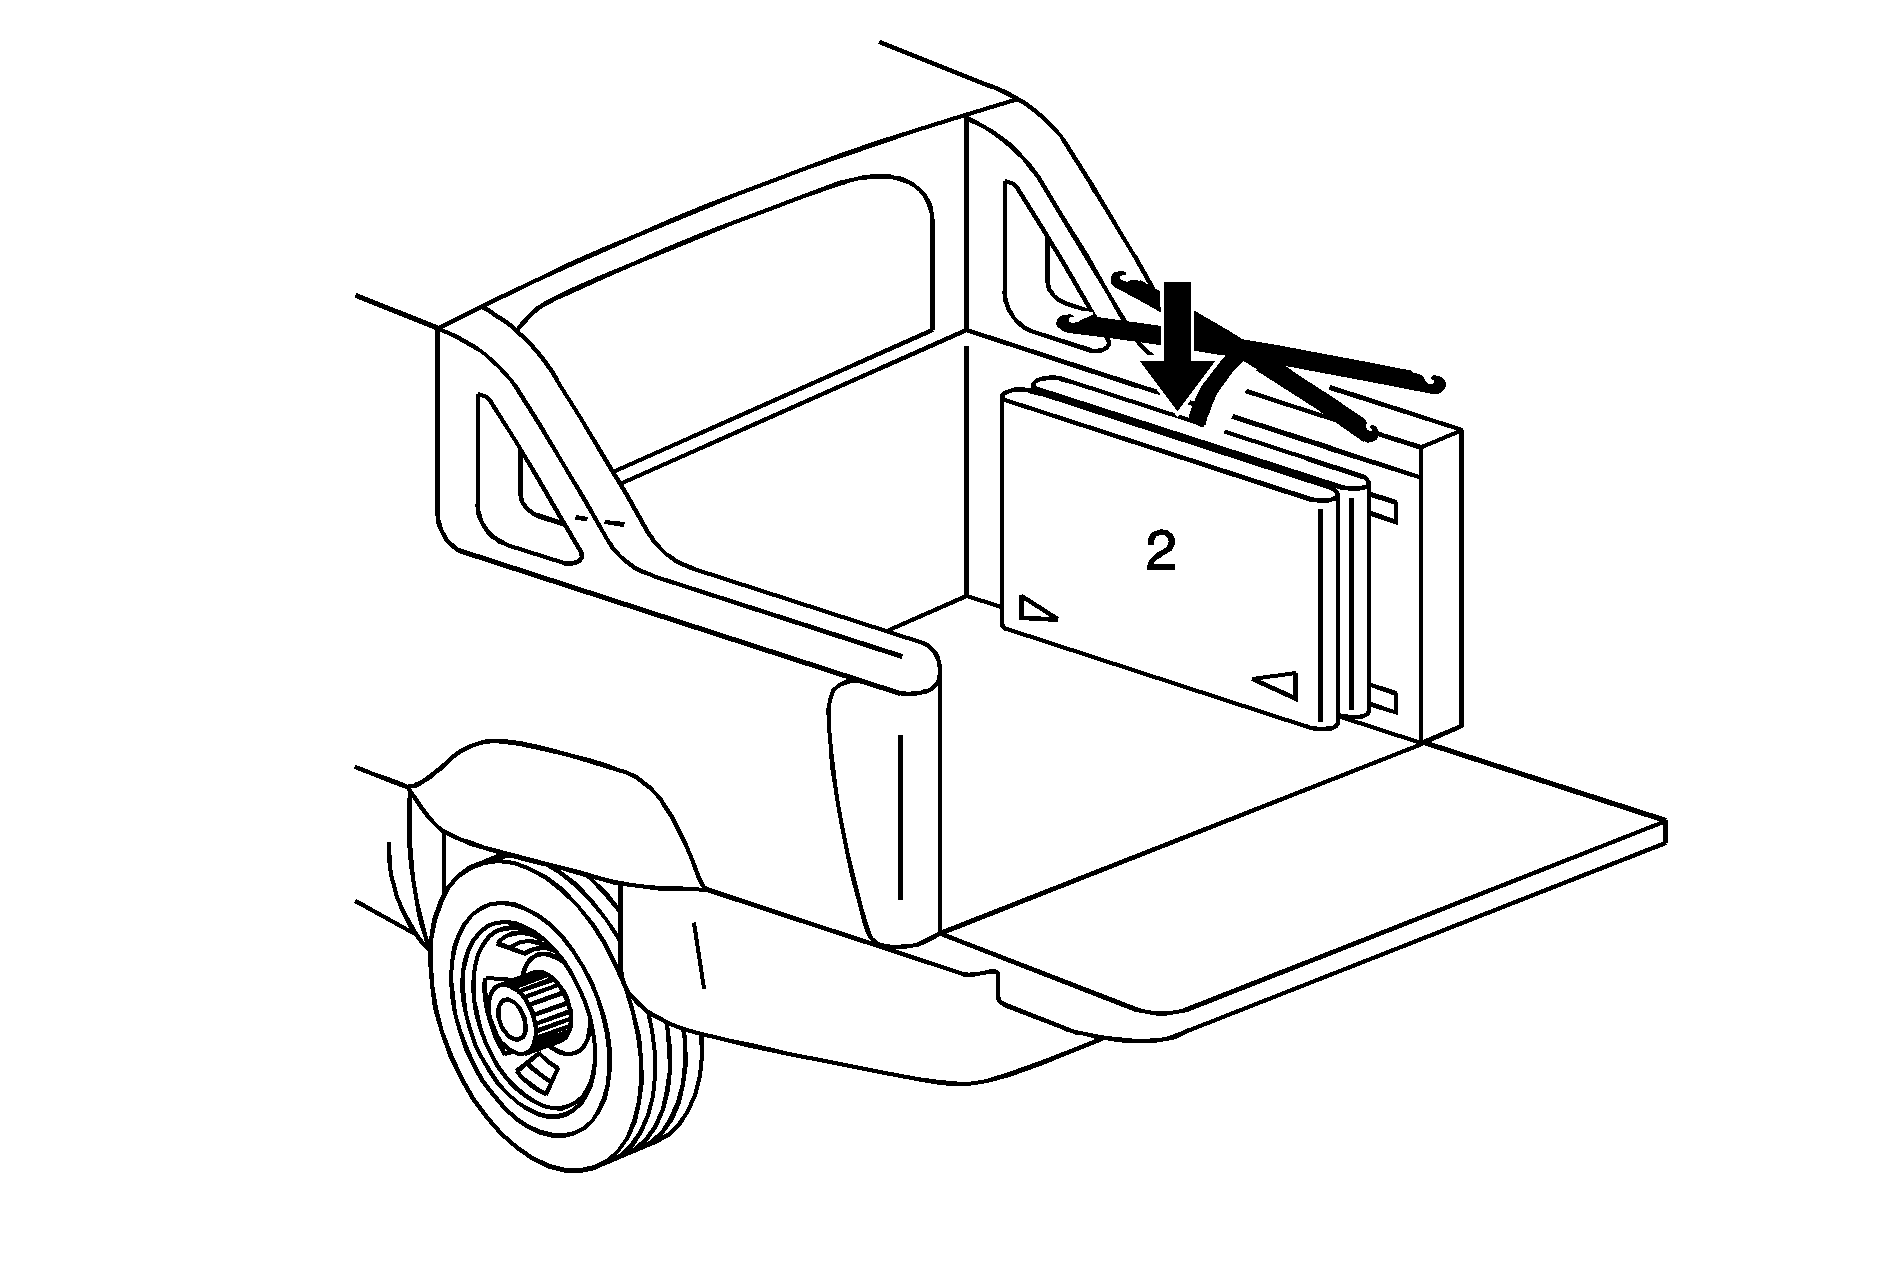
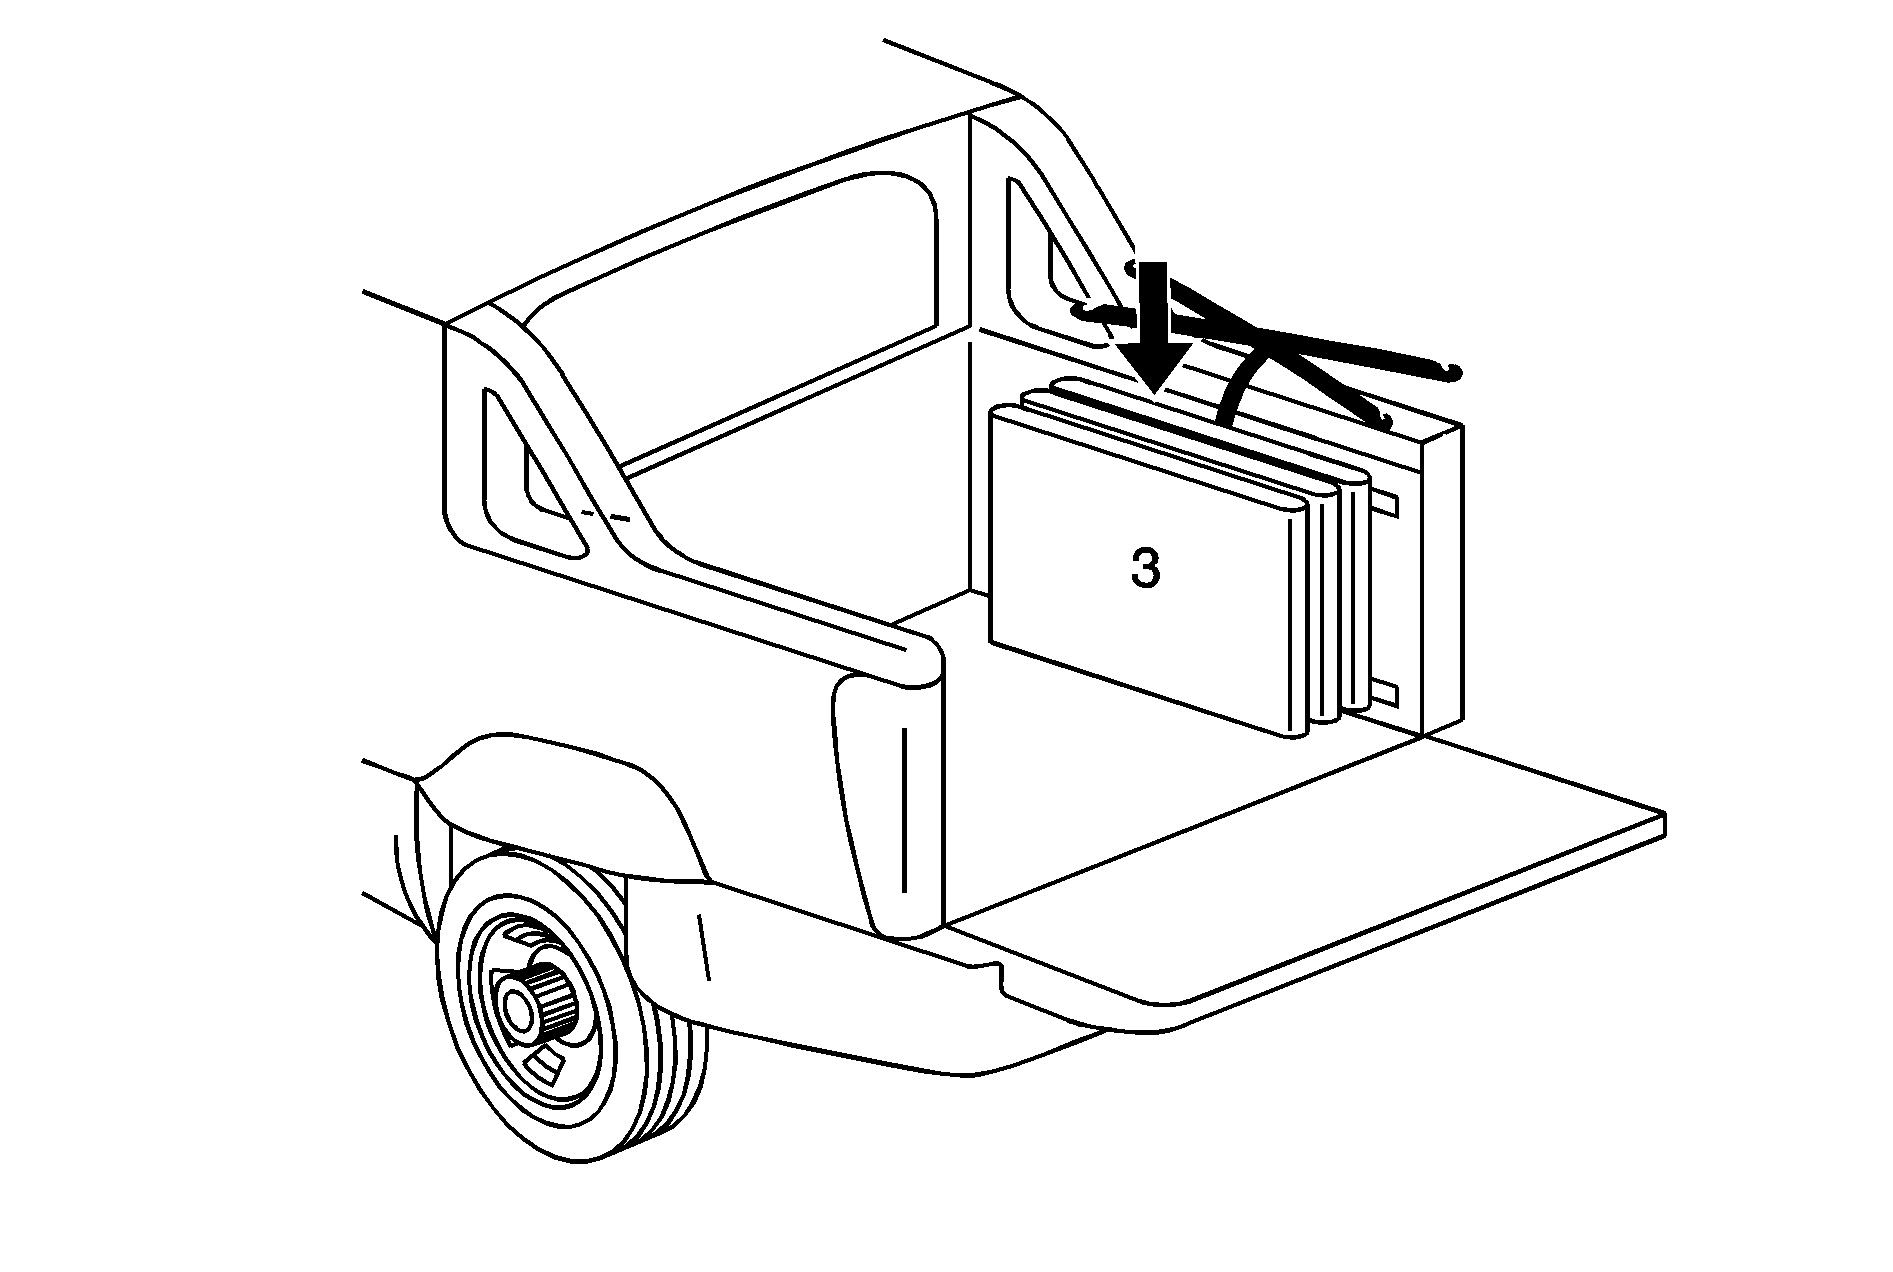
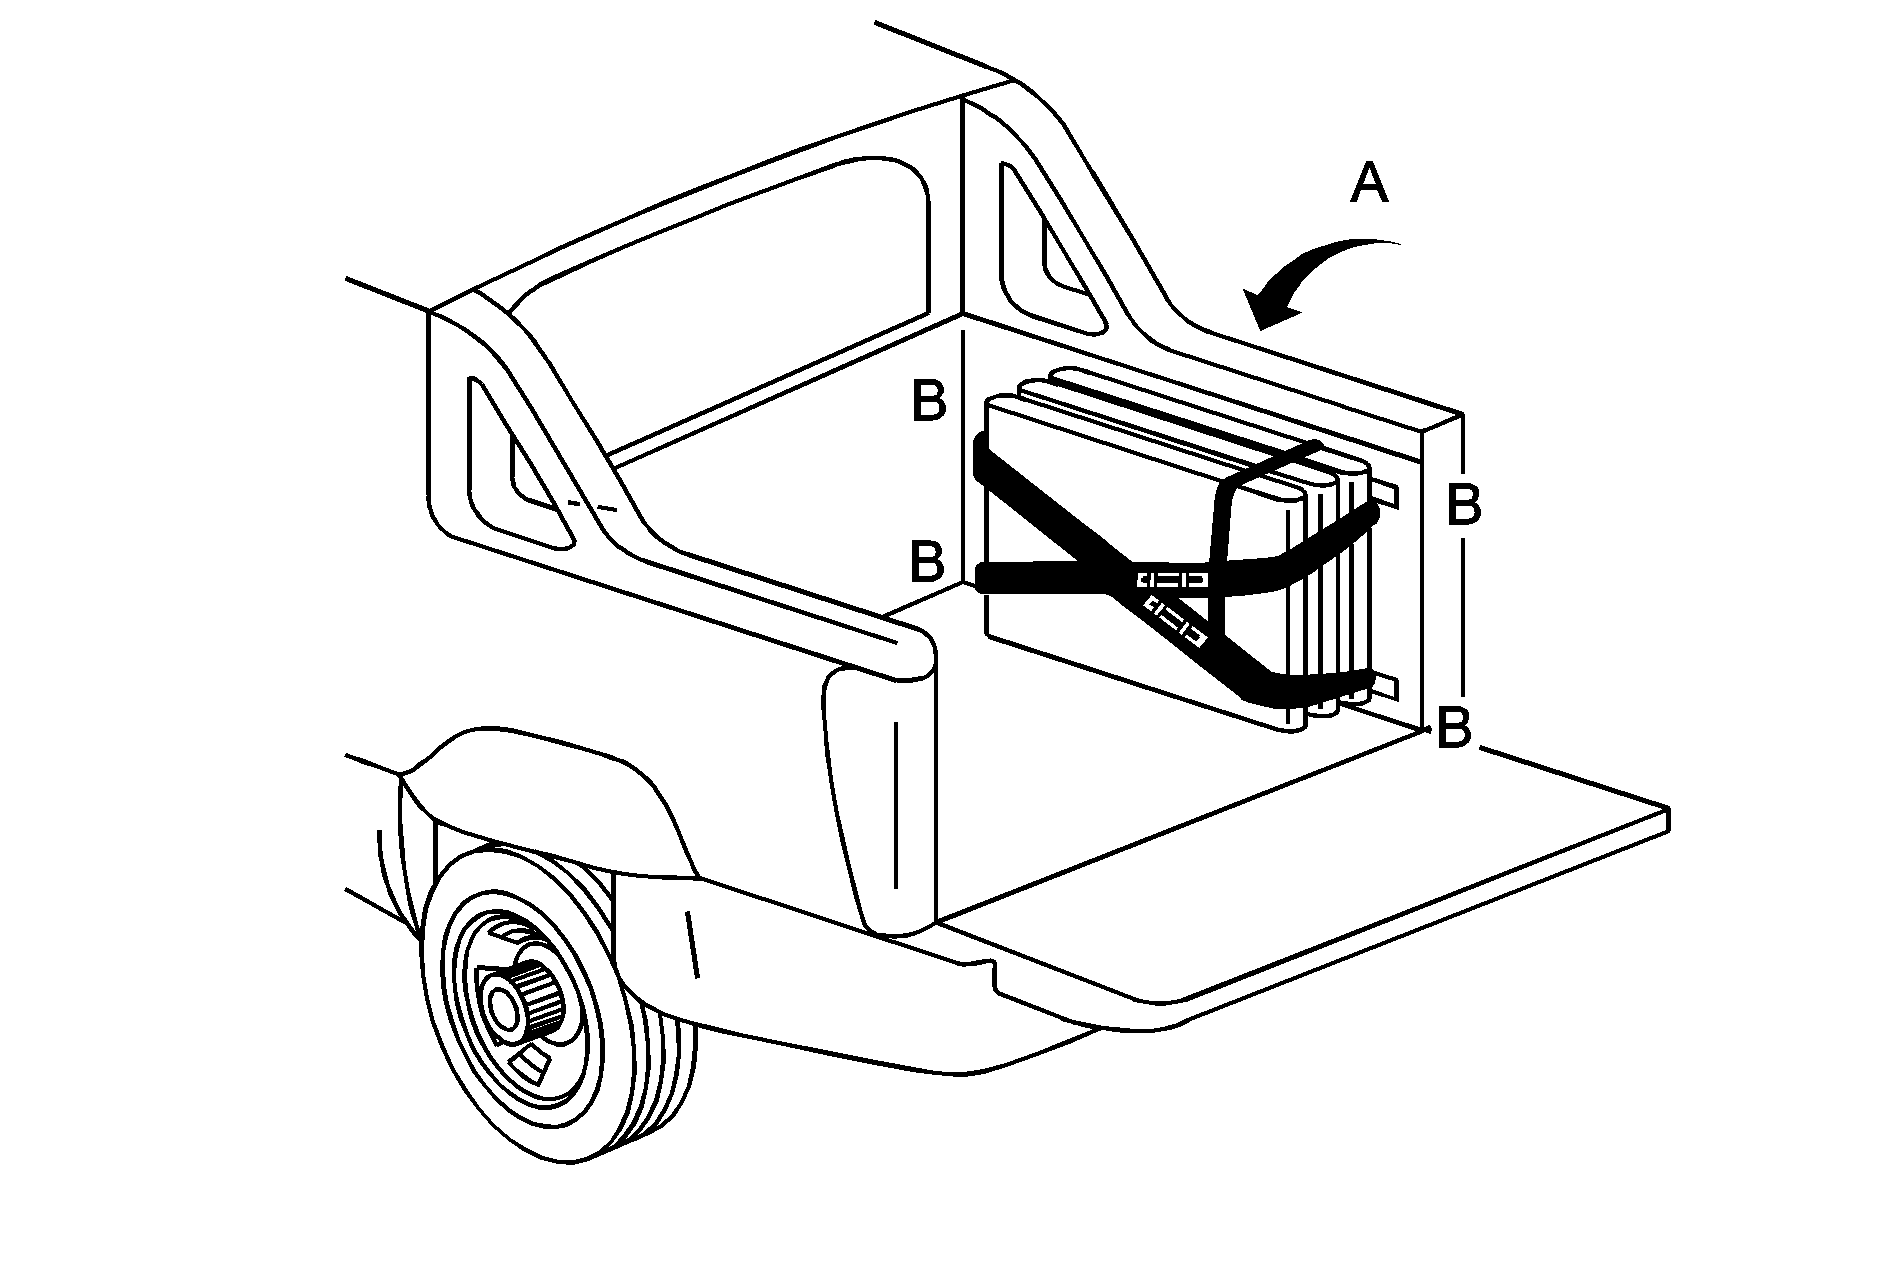
Panels 3, 2, 1 Loaded
Reinstalling the Cargo Cover Panels
The strap system can remain attached to the side of the cargo area while it is not in use, or it can be stored inside the top box storage compartment. See Top-Box Storage for more information.
To reinstall a cargo panel do the following:
- Starting with cargo panel 1, place the latches in the unlocked position. Place cargo panel 1 on the cargo area rails while holding the back of the cargo panel up.
- Push the panel forward until it is snug against the Midgate® and then let the back of the panel down making sure that the pegs align with the receivers.
- . Push both left latches away from you to lock latches. Remember that there are a total of four latches total for panel 1. A click sounds when each latch locks. Lock the remaining two right latches on panel 1.
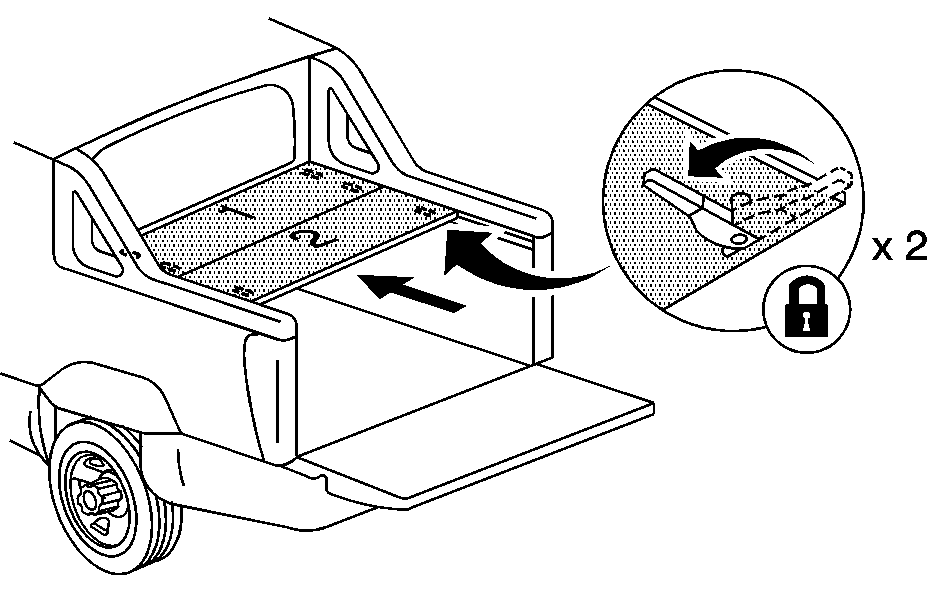
- Install cargo cover 2 next. Place the latches in the unlocked position. Place the cargo cover panel on the cargo area rails while holding the back of the cargo panel up.
- Push the panel forward until it is snug against the other panel and then let the back of the panel down making sure that the pegs align with the receivers.
- Push both left latches away from you, starting with the left latch, to lock the panel in place. You should hear a click when each latch locks correctly. A click sounds when each latch locks correctly.
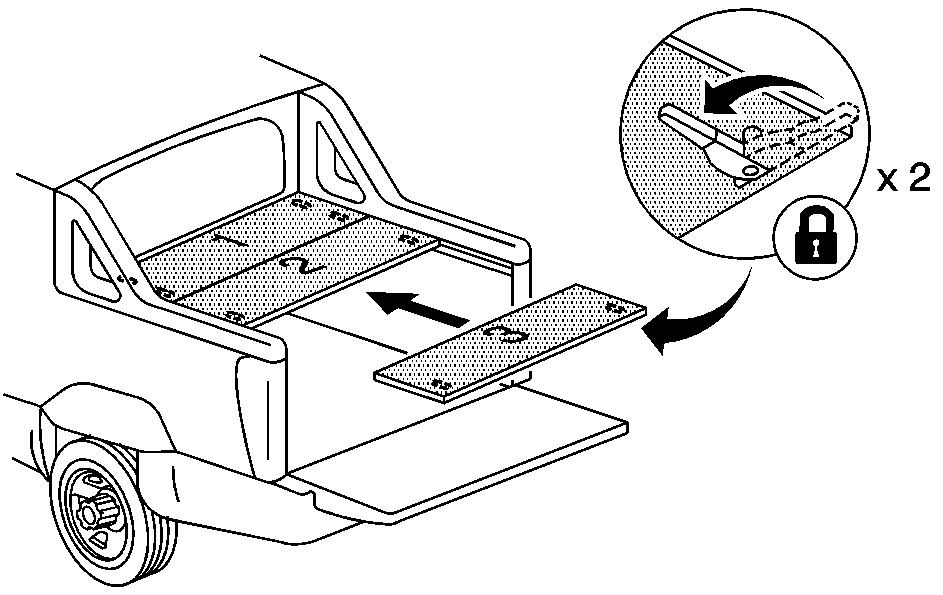
- Install cargo cover 3 next. Place the latches in the unlocked position. Place the cargo cover panel on the cargo area rails while holding the back of the cargo panel up.
- Push the panel forward until it is snug against the other panel and then let the back of the panel down making sure that the pegs align with the receivers.
- Push the latches away from you, starting with the left latch, to lock the panel in place. A click sounds when each latch locks correctly.
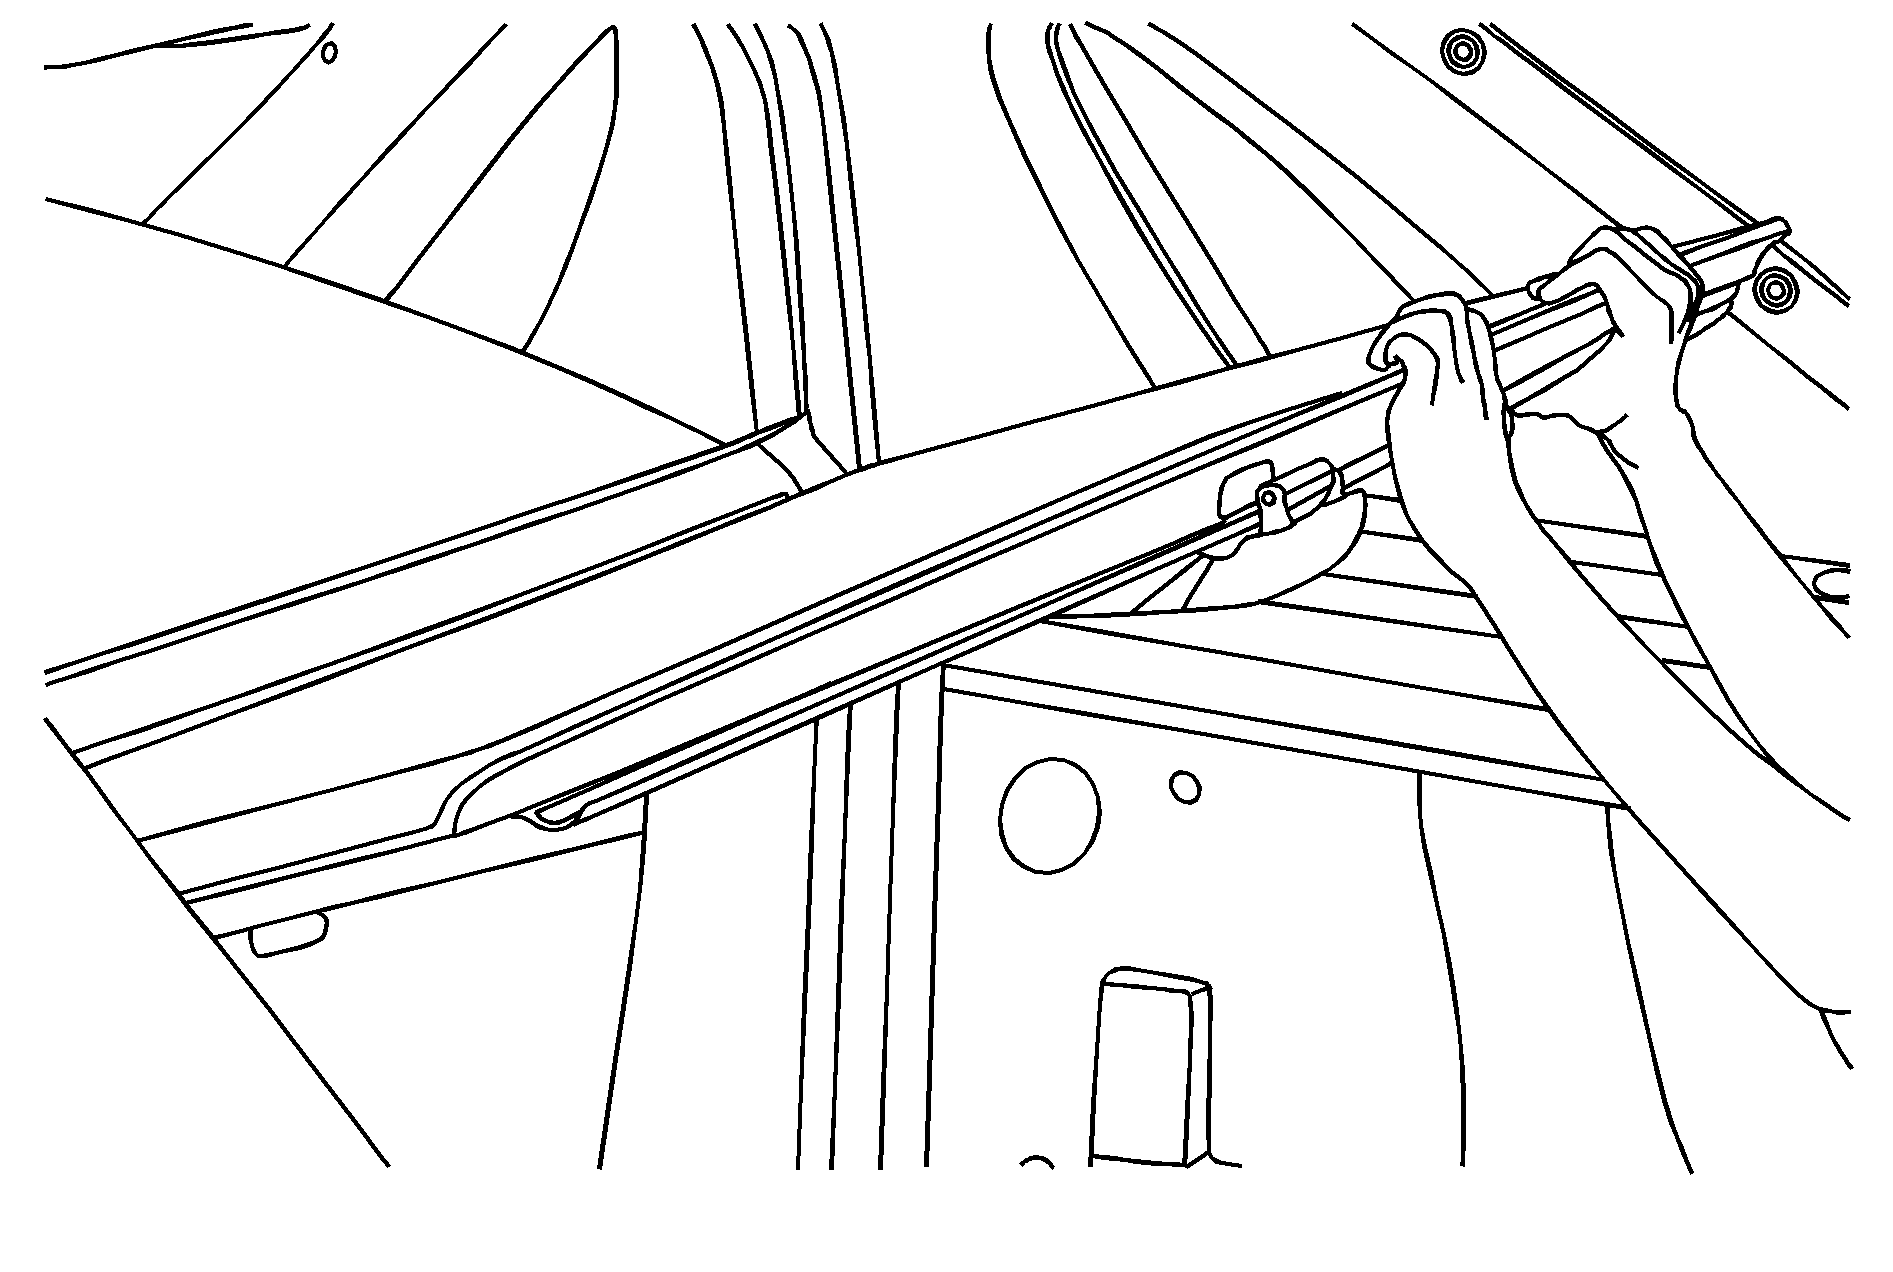
Left Side Shown, Right Side Similar
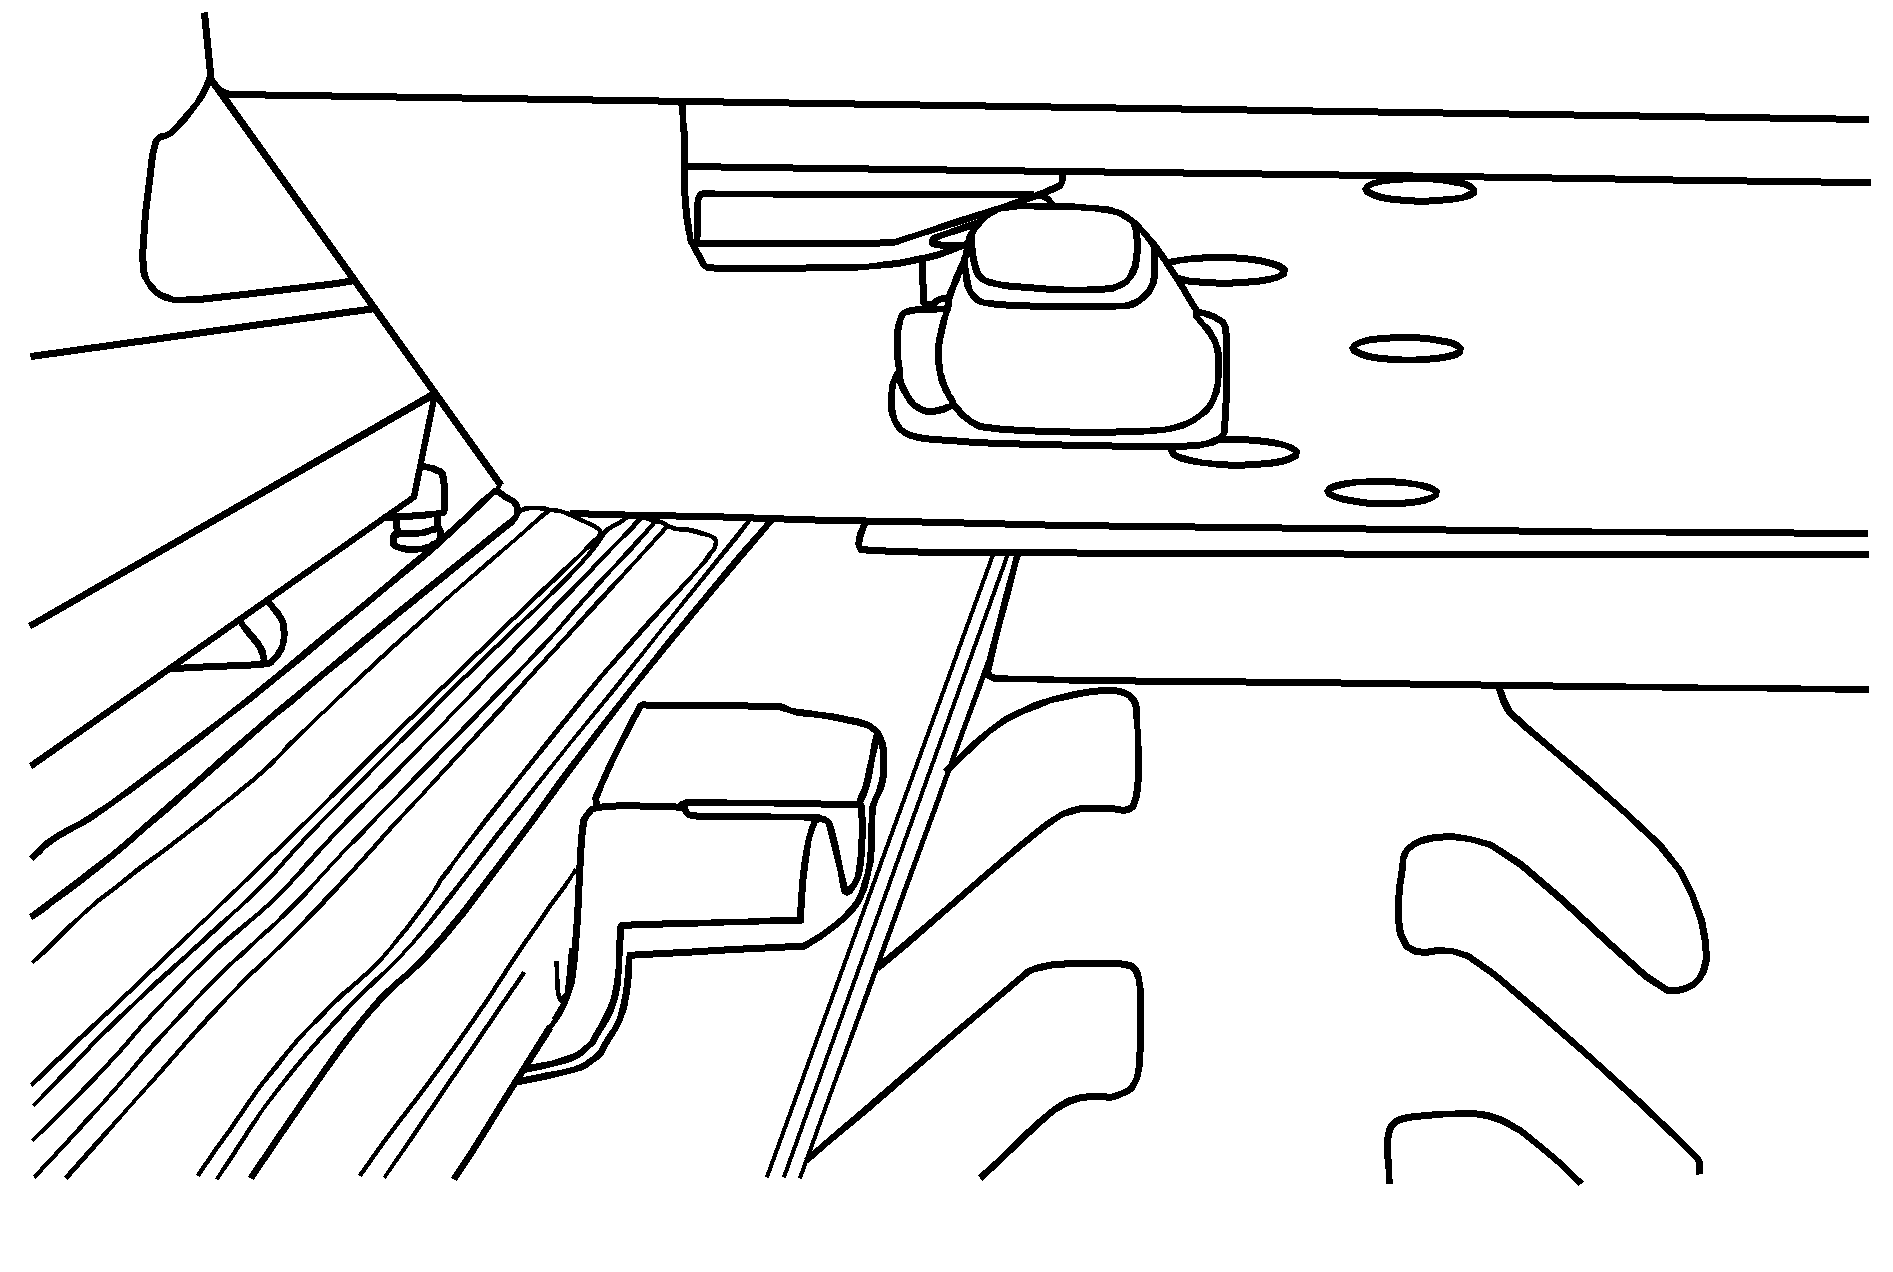
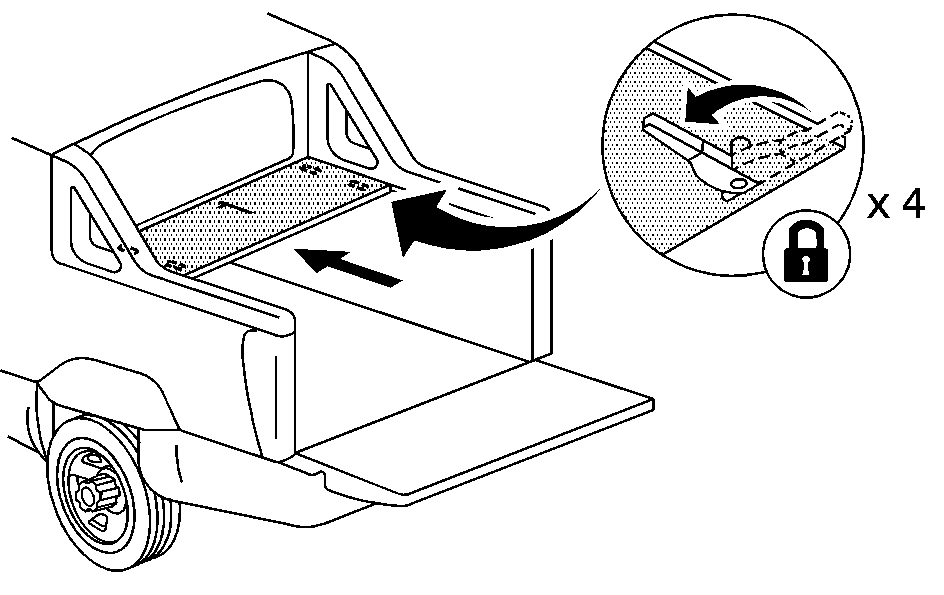
For any cargo cover panel you must lock the left latch in place before you can lock the right latch. If this procedure is not followed exactly, the cargo cover panels might not correctly lock in place.
Left Side Shown, Right Side Similar

Left Side Shown, Right Side Similar

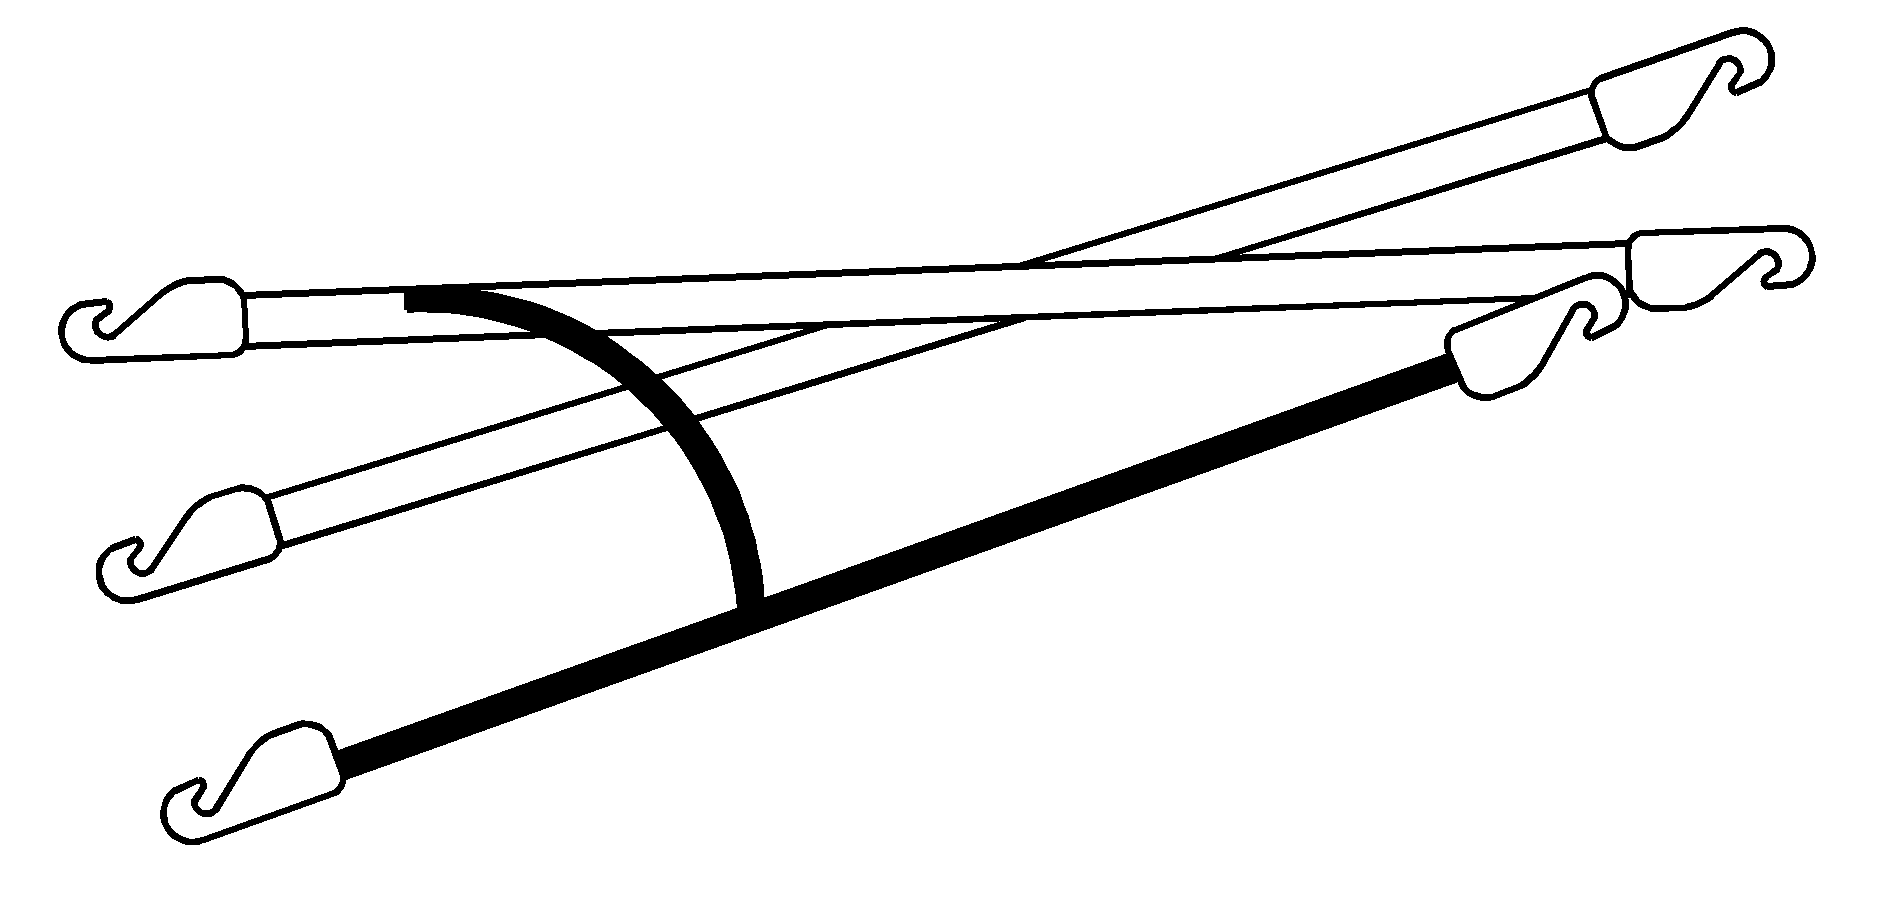
Folding and Storage of Straps
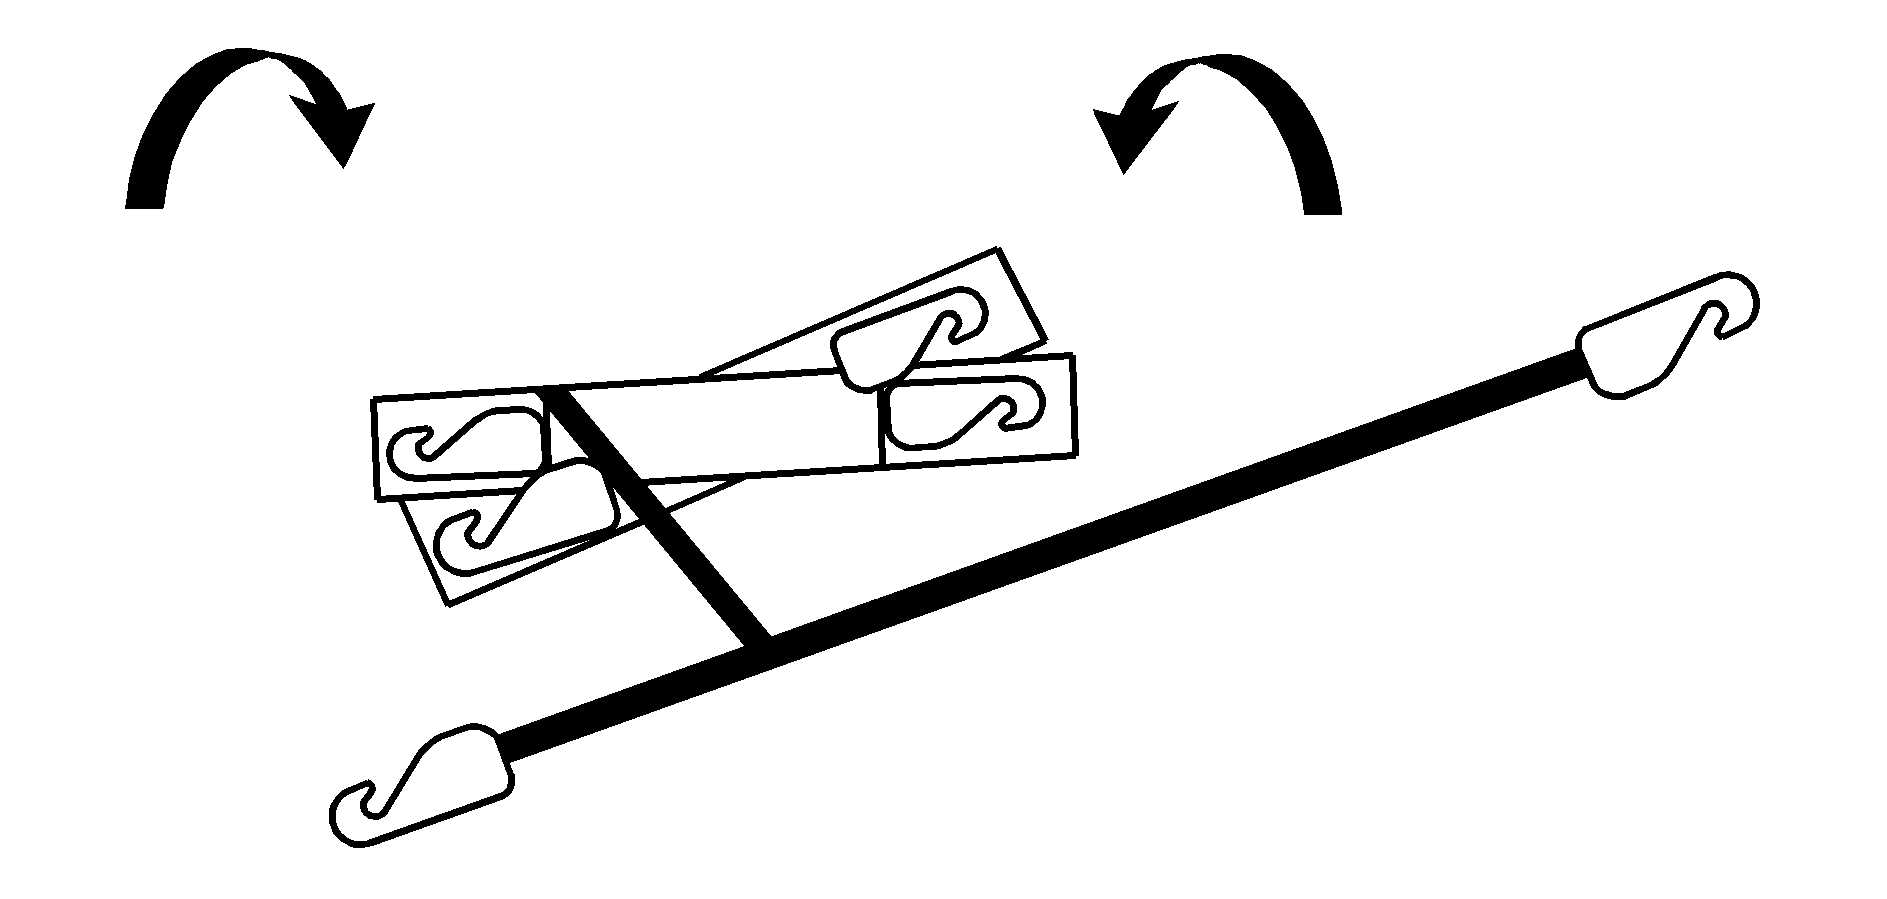
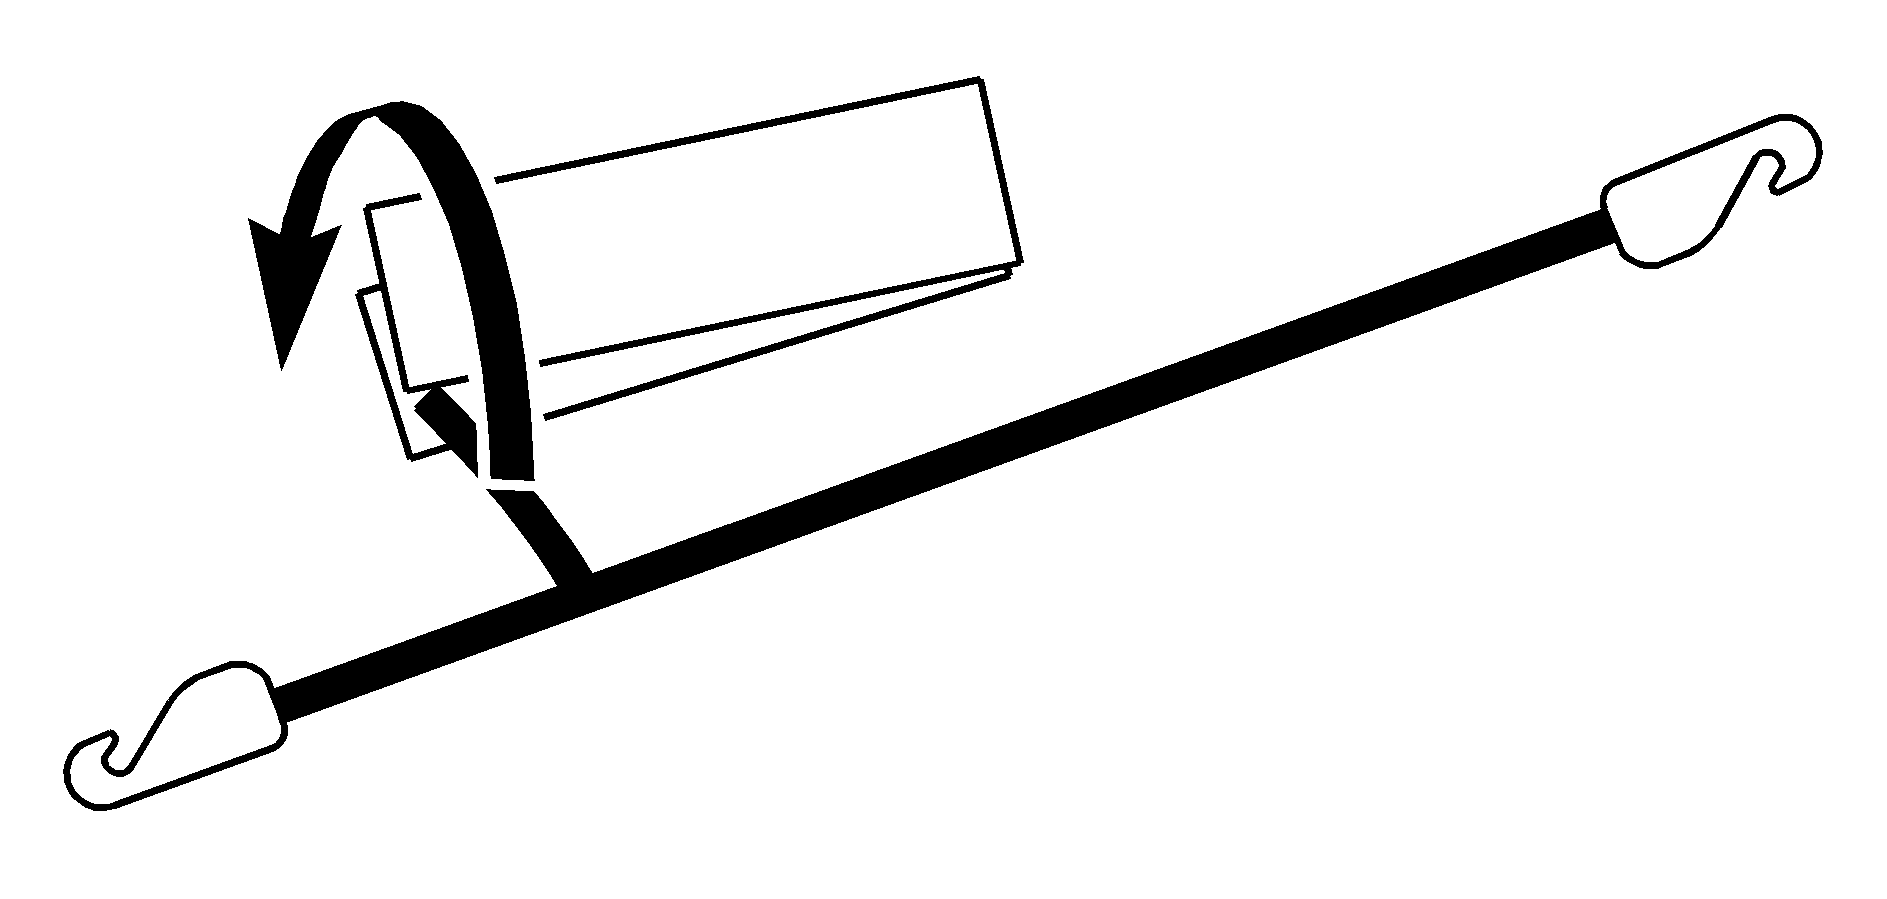
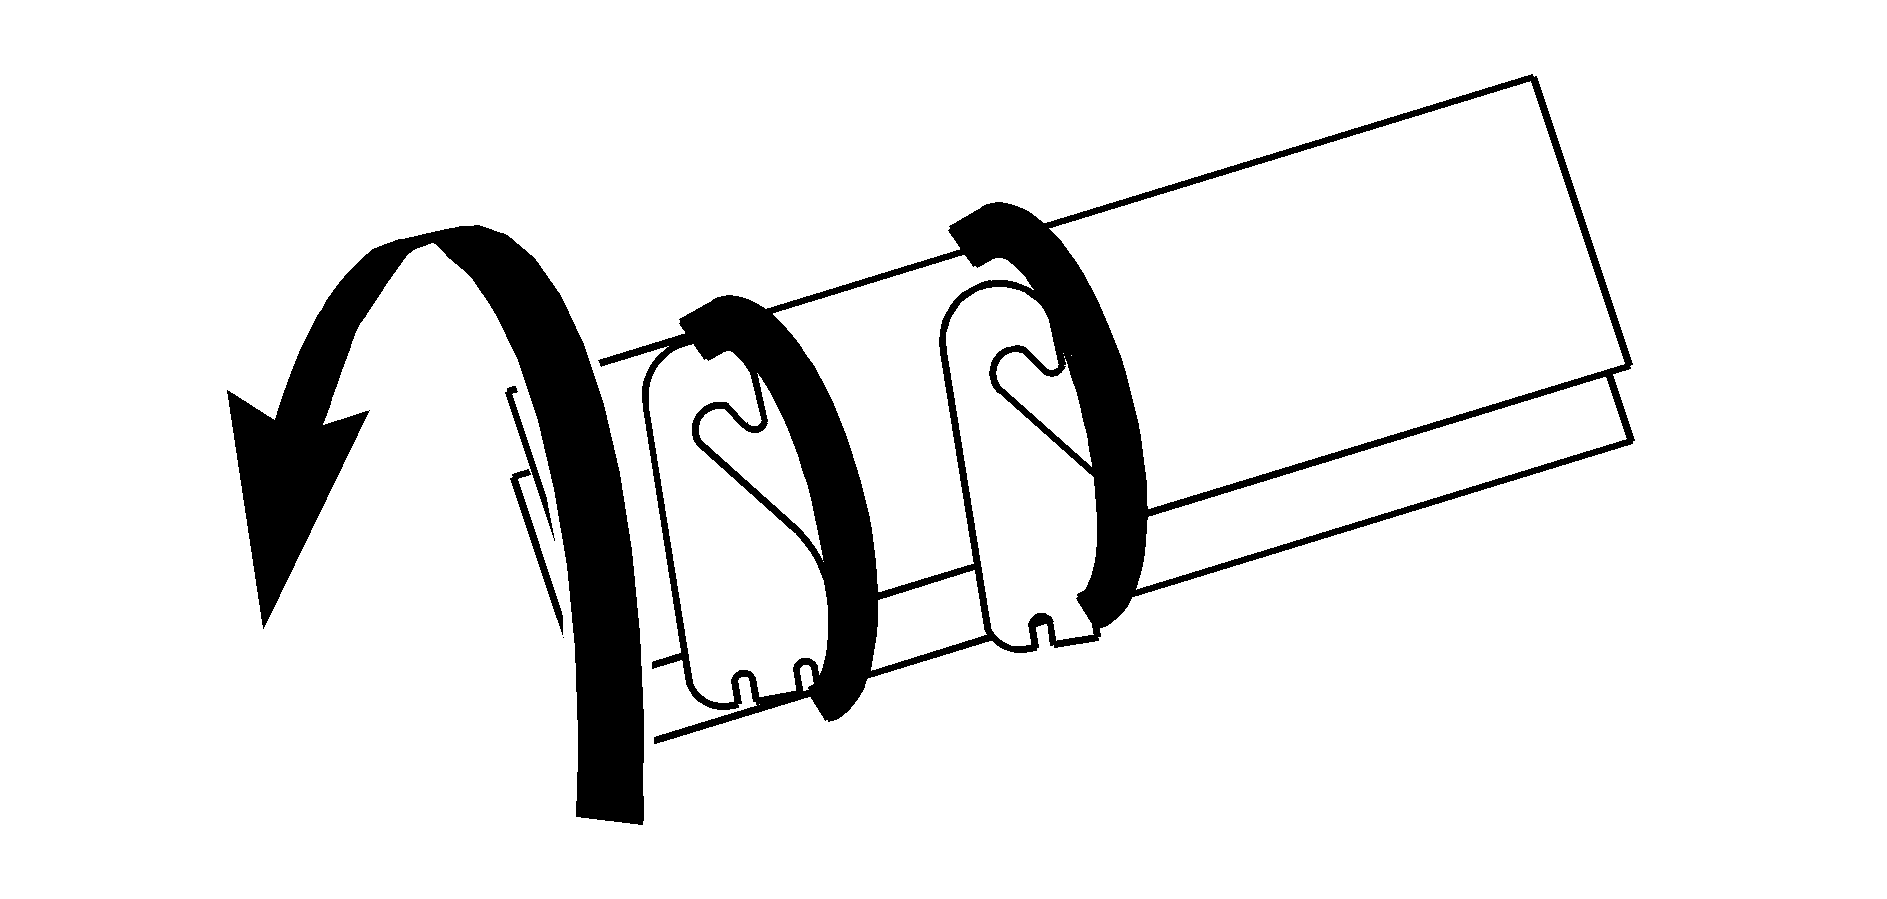
Fold the straps for storing inside the top box storage compartment:
- Extend the six strap ends on a flat surface.
- Fold the four primary strap ends towards the center as shown.
- Take the short strap and surround the folded webbing, forming a package.
- Take the secondary strap and wrap it around the folded webbing , forming a package. Finally, attach the hooks to the webbing and place inside the top box storage compartment.
Cargo Tie Downs
Cargo tie downs in the rear cargo area can be used to secure cargo.
