GM Service Manual Online
For 1990-2009 cars only

Rear Floor Panel Carpet Replacement Extended Wheelbase
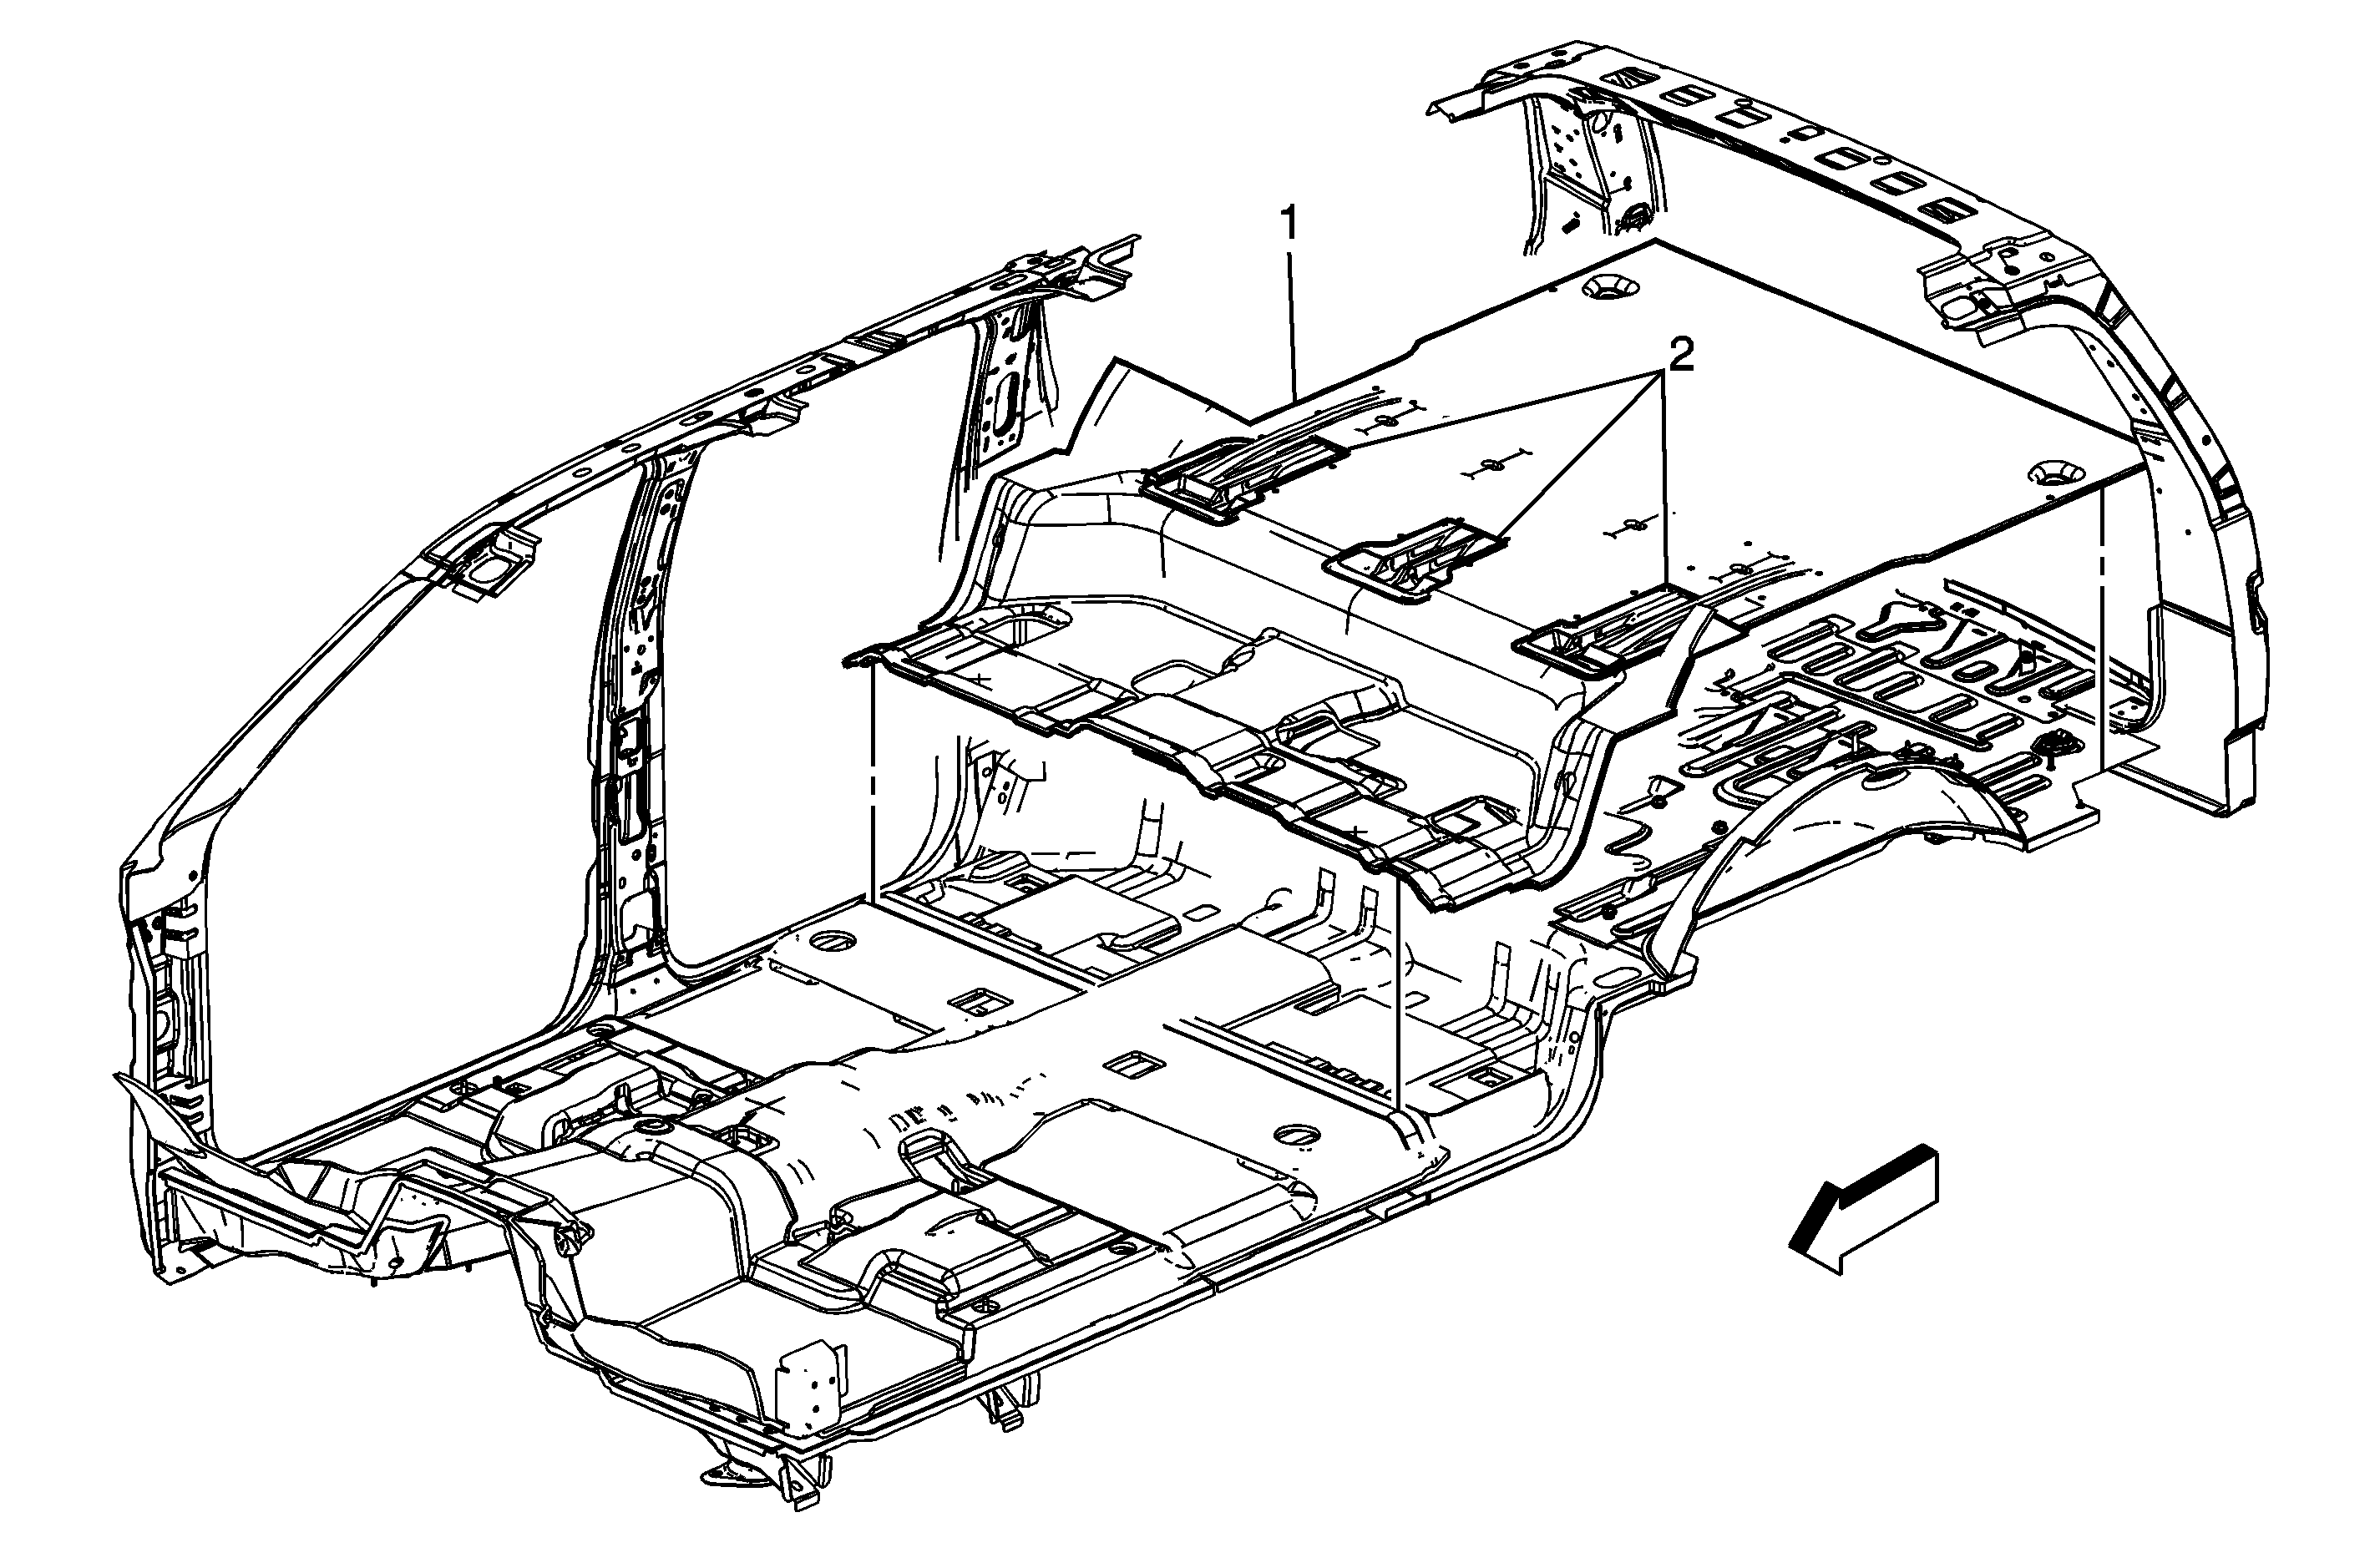

Object Number: 1694599  Size: MF

Callout

Component Name

Preliminary Procedures

  1. Disable the roof rail SIR system. Refer to SIR Disabling and Enabling .
  2. Remove the rear seats. Refer to Rear Seat Replacement and Rear Number 2 Seat Replacement .
  3. Remove the rear seat belt buckles. Refer to Rear Seat Belt Buckle Replacement .
  4. Remove the back body opening molding. Refer to Rear Door Upper Garnish Molding Replacement .
  5. Remove the back rear corner upper molding. Refer to Body Rear Corner Garnish Molding Replacement - Right Side and Body Rear Corner Garnish Molding Replacement - Left Side .
  6. Remove the rear door sill plate. Refer to Rear Side Door Sill Plate Replacement .
  7. Remove the lock pillar molding. Refer to Body Lock Pillar Garnish Molding Replacement .
  8. Remove the body side trim panel. Refer to Rear Quarter Trim Panel Replacement - Left Side and Rear Quarter Trim Panel Replacement - Right Side .

1

Rear Floor Panel Carpet Assembly

2

Rear Floor Panel Carpet Escutcheon

Tip
Escutcheon to be installed prior to locating carpet to floor studs.

Rear Floor Panel Carpet Replacement Standard Wheelbase w/AS3 and AW2
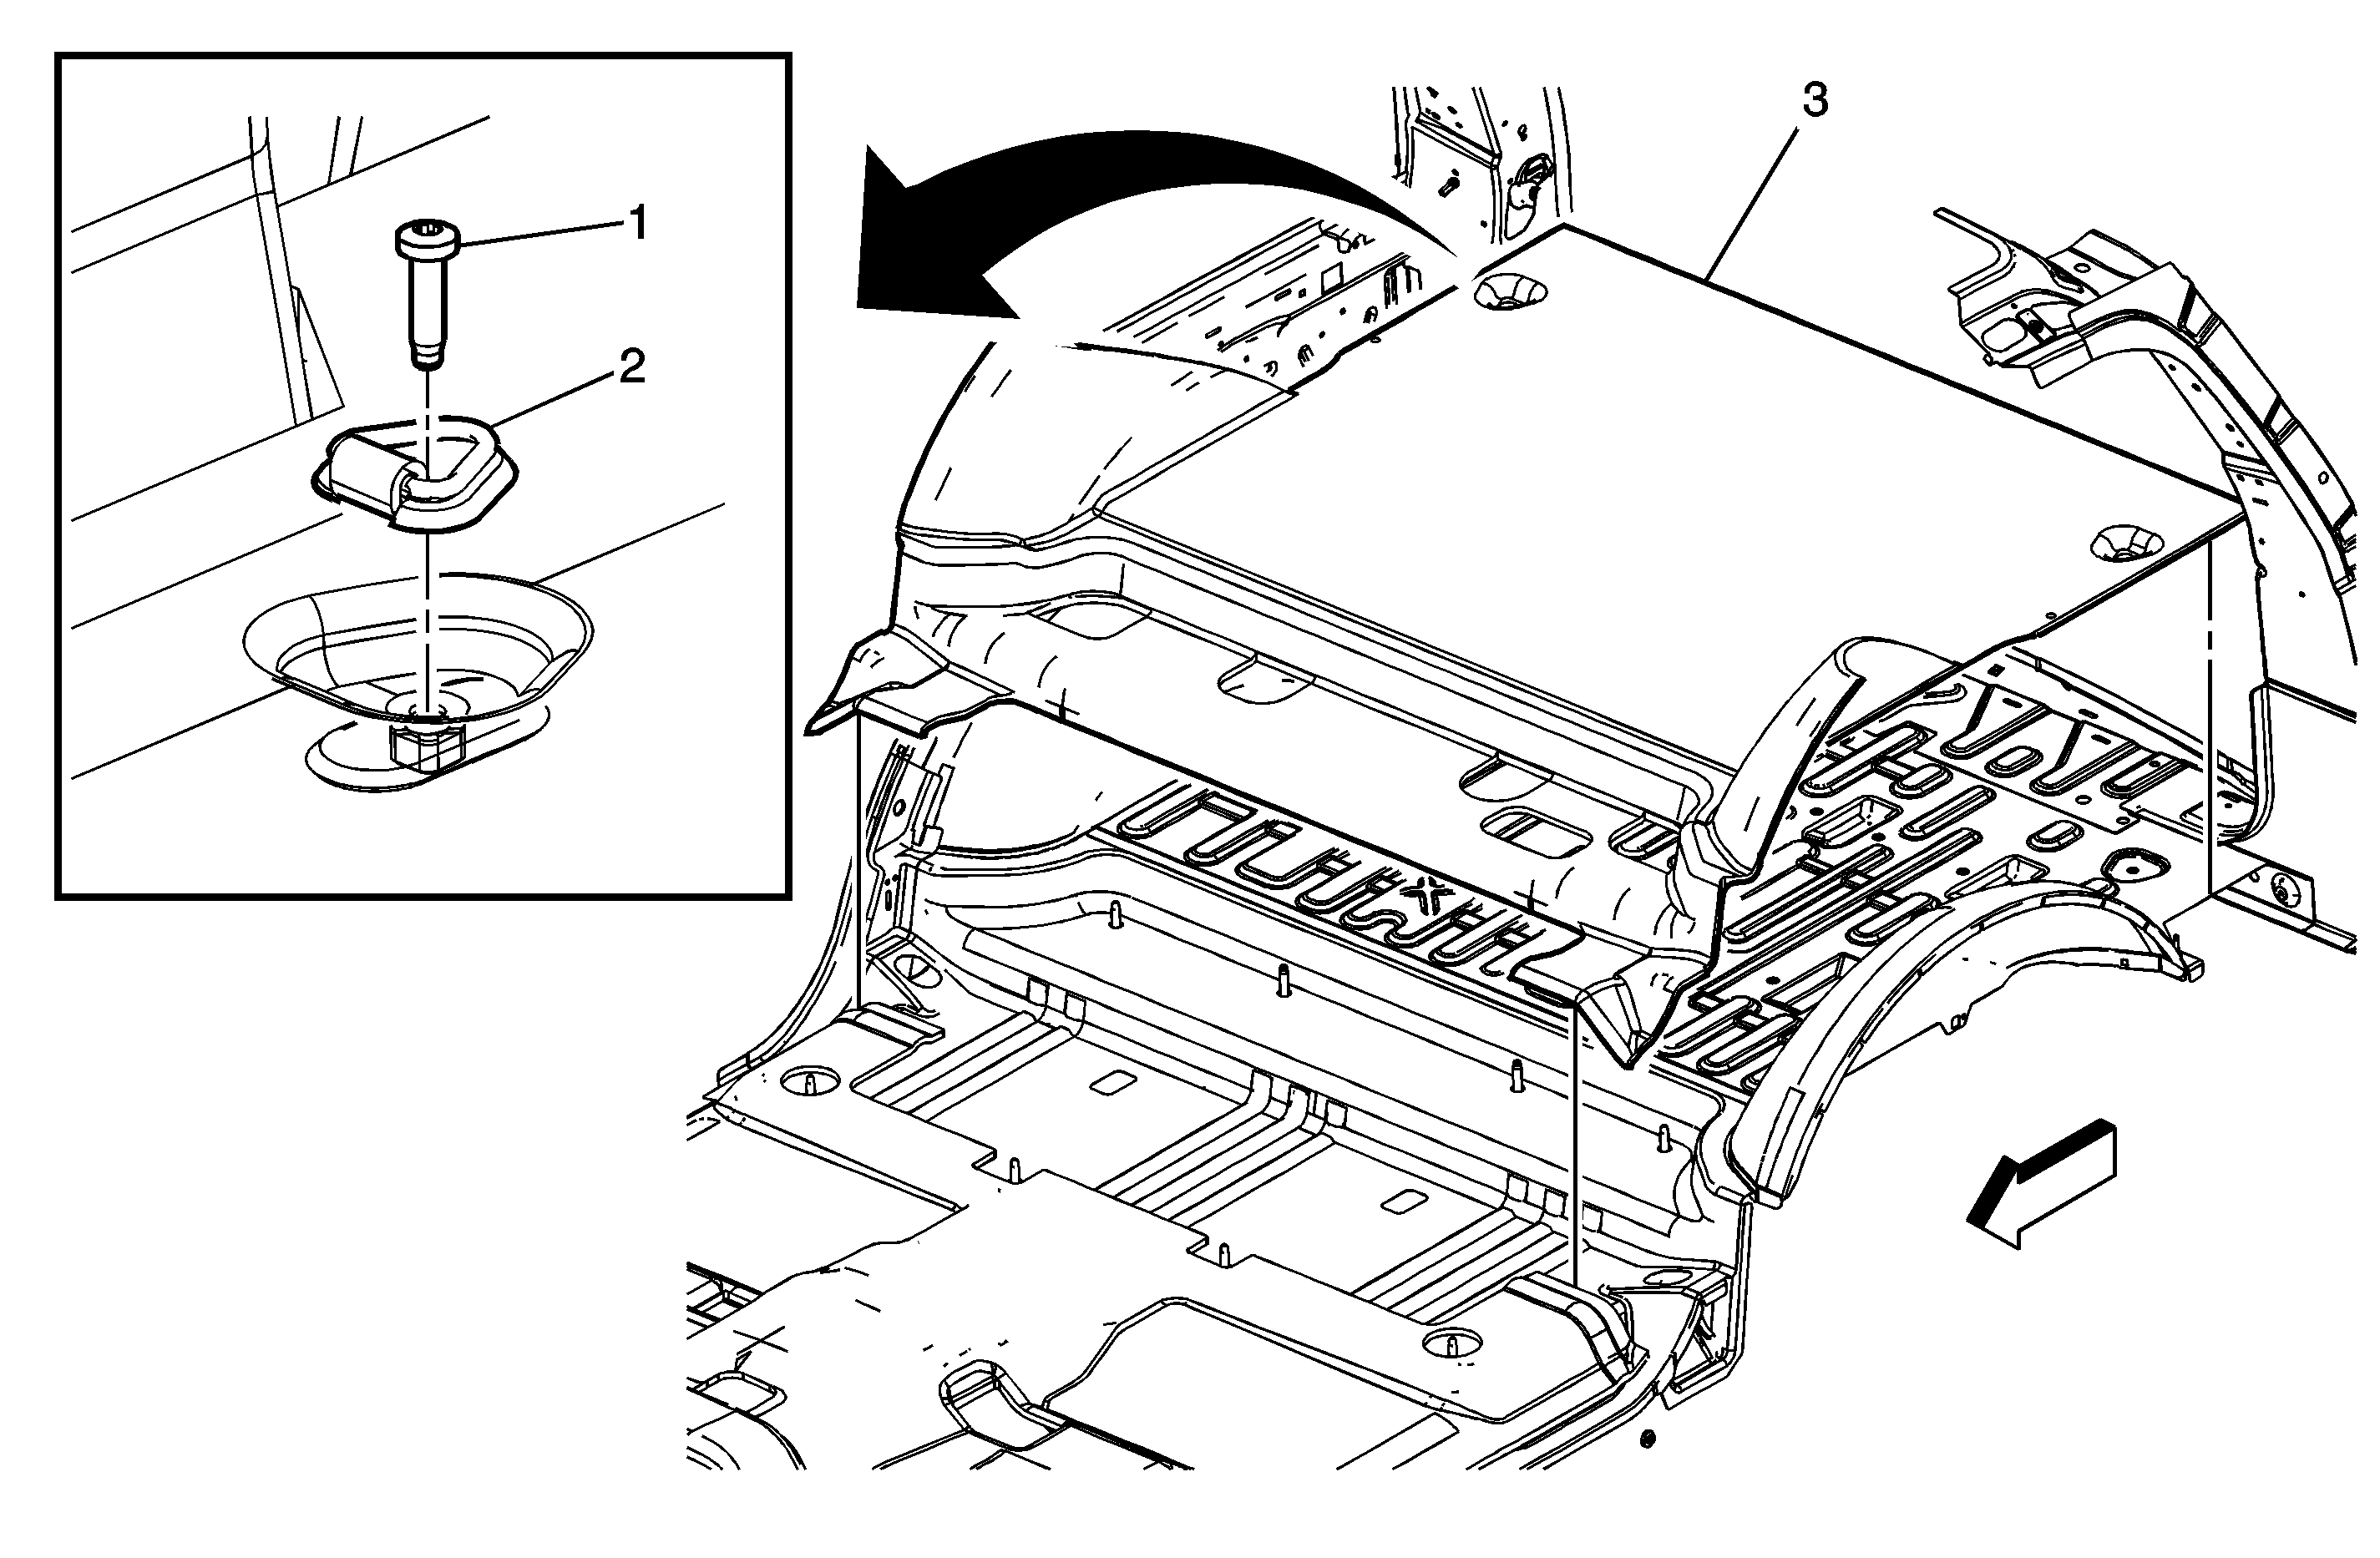

Object Number: 1671343  Size: MF

Callout

Component Name

Preliminary Procedures

  1. Disable the roof rail SIR system. Refer to SIR Disabling and Enabling .
  2. Remove the rear seats. Refer to Rear Seat Replacement and Rear Number 2 Seat Replacement .
  3. Remove the rear seat belt buckles. Refer to Rear Seat Belt Buckle Replacement .
  4. Remove the back body opening molding. Refer to Rear Door Upper Garnish Molding Replacement .
  5. Remove the back rear corner upper molding. Refer to Body Rear Corner Garnish Molding Replacement - Right Side and Body Rear Corner Garnish Molding Replacement - Left Side .
  6. Remove the rear door sill plate. Refer to Rear Side Door Sill Plate Replacement .
  7. Remove the lock pillar molding. Refer to Body Lock Pillar Garnish Molding Replacement .
  8. Remove the body side trim panel. Refer to Rear Quarter Trim Panel Replacement - Left Side and Rear Quarter Trim Panel Replacement - Right Side .

1

Cargo Tie Down Loop Bolt

Notice: Refer to Fastener Notice in the Preface section.

Tighten
35 N·m(25 lb ft)

2

Cargo Tie Down Loop Assembly

3

Rear Floor Panel Carpet Assembly

Rear Floor Panel Carpet Replacement Standard Wheelbase w/o AS3 and AW2
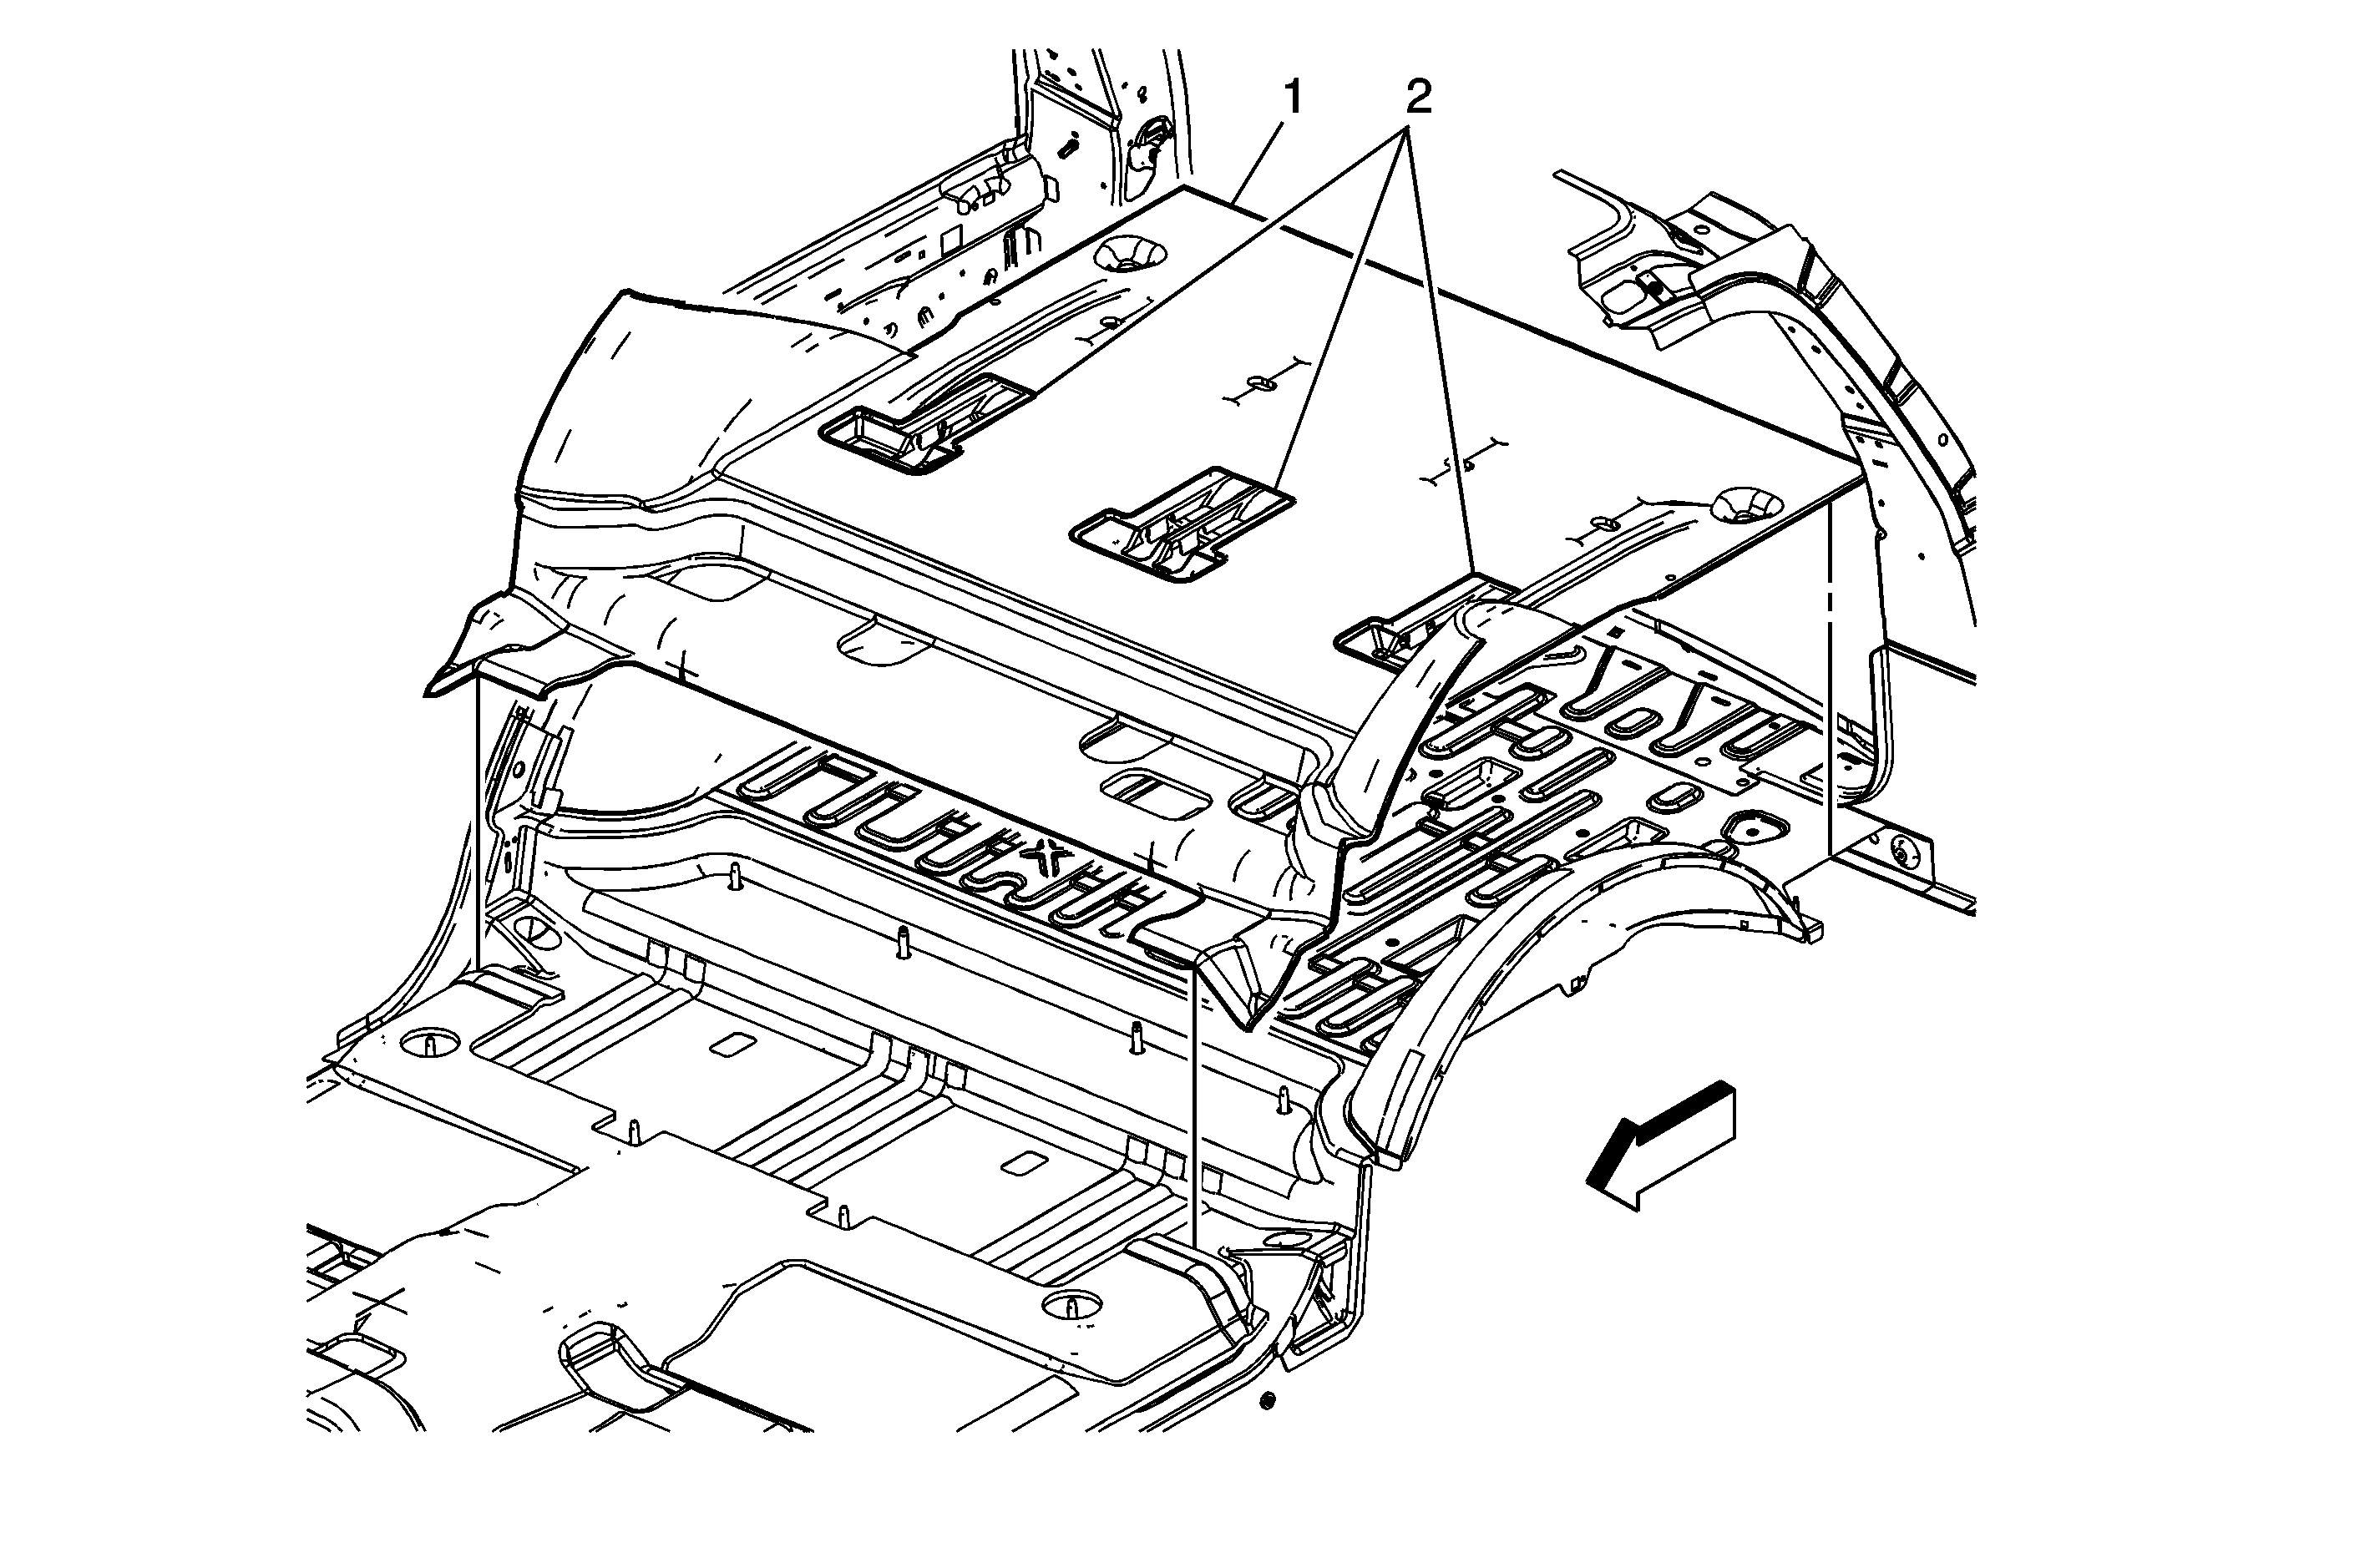

Object Number: 1671388  Size: MF

Callout

Component Name

Preliminary Procedures

  1. Disable the roof rail SIR system. Refer to SIR Disabling and Enabling .
  2. Remove the rear seats. Refer to Rear Seat Replacement and Rear Number 2 Seat Replacement .
  3. Remove the rear seat belt buckles. Refer to Rear Seat Belt Buckle Replacement .
  4. Remove the back body opening molding. Refer to Rear Door Upper Garnish Molding Replacement .
  5. Remove the back rear corner upper molding. Refer to Body Rear Corner Garnish Molding Replacement - Right Side and Body Rear Corner Garnish Molding Replacement - Left Side .
  6. Remove the rear door sill plate. Refer to Rear Side Door Sill Plate Replacement .
  7. Remove the lock pillar molding. Refer to Body Lock Pillar Garnish Molding Replacement .
  8. Remove the body side trim panel. Refer to Rear Quarter Trim Panel Replacement - Left Side and Rear Quarter Trim Panel Replacement - Right Side .

1

Rear Floor Panel Carpet Assembly

2

Rear Floor Panel Carpet Escutcheon

Tip
Escutcheon to be installed prior to locating carpet to floor studs.

Rear Floor Panel Carpet Replacement with HP2


Object Number: 1671343  Size: MF

Callout

Component Name

Danger: Always perform the High Voltage Disabling procedure prior to servicing any High Voltage component or connection. Personal Protection Equipment (PPE) and proper procedures must be followed.

The High Voltage Disabling procedure will perform the following tasks:

   • Identify how to disable high voltage.
   • Identify how to test for the presence of high voltage.
   • Identify condition under which high voltage is always present and personal protection equipment (PPE) and proper procedures must be followed.
Failure to follow the procedures exactly as written may result in serious injury or death.

Preliminary Procedures

  1. Disable the roof rail SIR system. Refer to SIR Disabling and Enabling .
  2. Remove the rear seats. Refer to Rear Seat Replacement and Rear Number 2 Seat Replacement .
  3. Remove the drive motor generator battery storage box. Refer to Drive Motor Generator Battery Replacement .
  4. Remove the body side trim panel. Refer to Rear Quarter Trim Panel Replacement - Left Side and Rear Quarter Trim Panel Replacement - Right Side .

1

Cargo Tie Down Loop Bolt

Notice: Refer to Fastener Notice in the Preface section.

Tighten
35 N·m (25 lb ft)

2

Cargo Tie Down Loop Assembly

3

Rear Floor Panel Carpet Assembly

Procedure

Enable the hybrid high voltage system. Refer to High Voltage Enabling .