WINDNOISE INSPECTION/SEALING SERVICE INFORMATION/PROCEDURES

SUBJECT: WIND RUSH NOISE (WINDNOISE INSPECTION AND SEALING PROCEDURES)
VEHICLES AFFECTED: 1986-1992 "D" MODELS
Some 1986-1992 Broughams may exhibit excessive outside wind rush noise from the windshield and door areas. To repair this condition use the following service procedures:
NOTE: Analyze the vehicle to determine if specific air leaks are present. Refer to Product Service bulletin 91-2-193 for diagnosis techniques. Repair any air leaks prior to attempting corrections for outside wind rush noise as described below.
NOTE: All areas listed below must be checked and repairs performed if necessary to correct as much wind rush as possible.
Body and Weatherstrip Adjustments
1. Verify hood is flush to front end panel and adjust if necessary. Refer to the appropriate year Service Information Manual.
2. Verify front doors are slightly inboard of front fenders at leading edges. Adjust doors if necessary. Refer to the appropriate year Service Information Manual.
3. Verify door weatherstrip is securely bonded to door around entire length. Inspect areas 25-30 cm (10-12 inches) on either side of the belt line very carefully. Reseal with 3M 08011 weatherstrip adhesive or equivalent if necessary.
Windshield Area:
1. Check for windshield sealer voids as described in Product Service bulletin 91-2-193. If any voids in the windshield sealer are located, reseal with urethane sealer as described in Service bulletin 91-2-193.
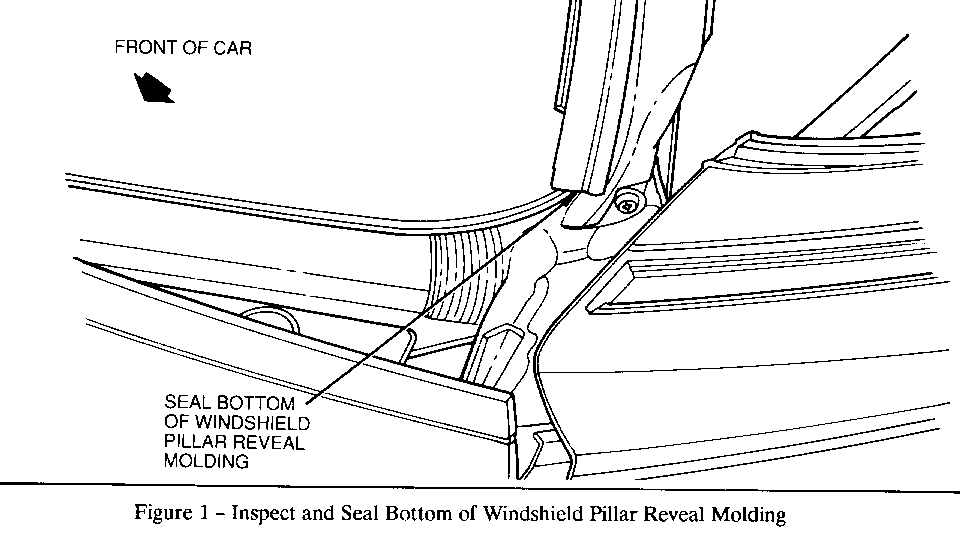
2. Inspect lower corners or windshield pillar reveal mouldings for openings. Seal any openings with silicon sealer. Refer to Figure 1.
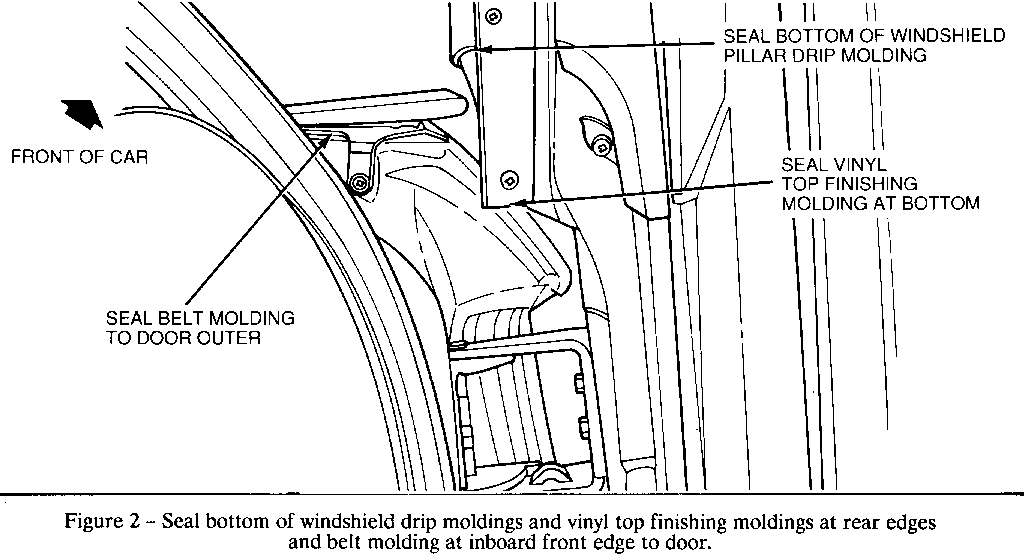
3. Seal bottom of windshield pillar drip mouldings and vinyl top finishing mouldings at rear edges. Refer to Figure 2.
4. Inspect windshield reveal mouldings for flush fit to windshield. If not flush, remove and shape moulding so that black lace on reveal moulding fits tight against windshield.
5. Remove interior A-pillar garnish moulding and foam pillars using procedure outlined in Product Service bulletin 91-2-189.
Doors:
------ 1. Inspect the belt moulding at the inboard front edge to door. Seal opening with silicon sealer if necessary. Refer to Figure 2.
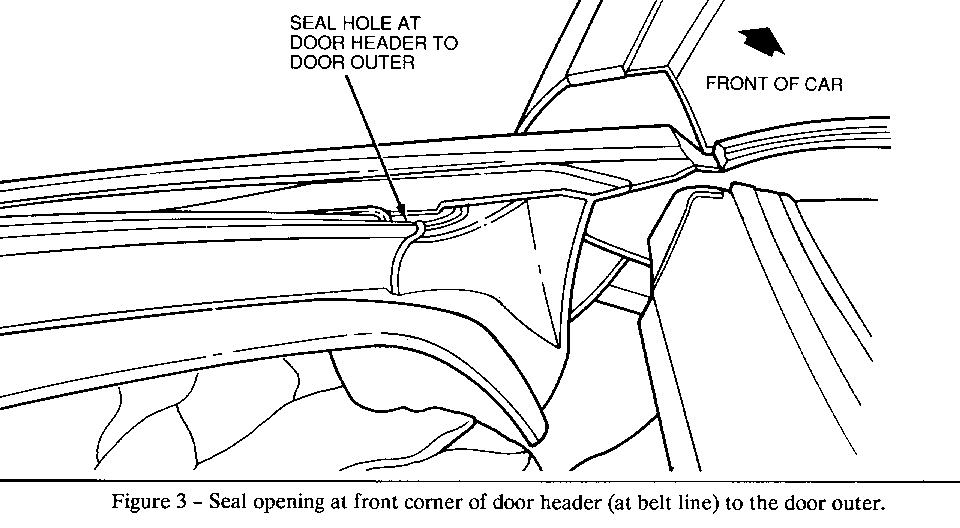
2. Inspect the front corner of the door header at belt line for an opening to the door outer. Seal opening with silicon sealer. Refer to Figure 3.
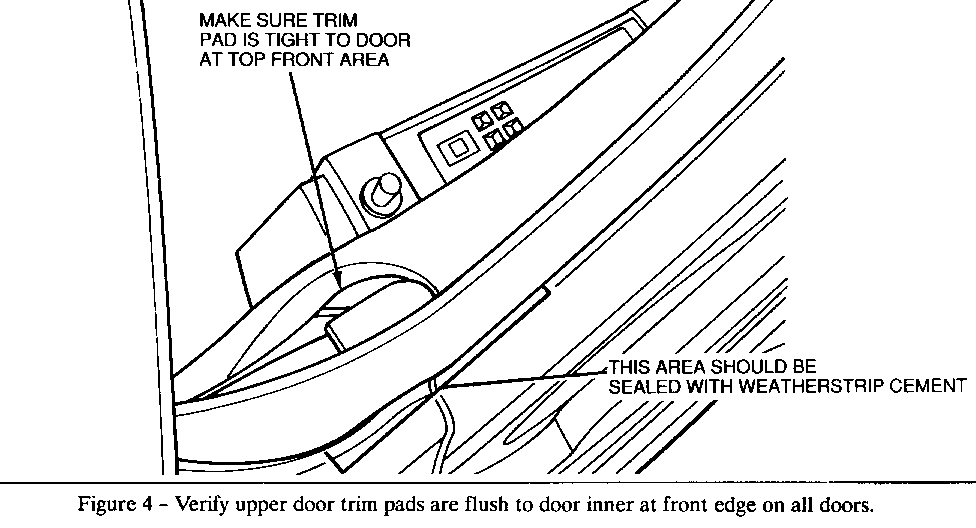
3. Verify upper door trim pads are flush to door inner at front edge on both the front and rear doors. Refit if necessary. Refer to Figure 4.
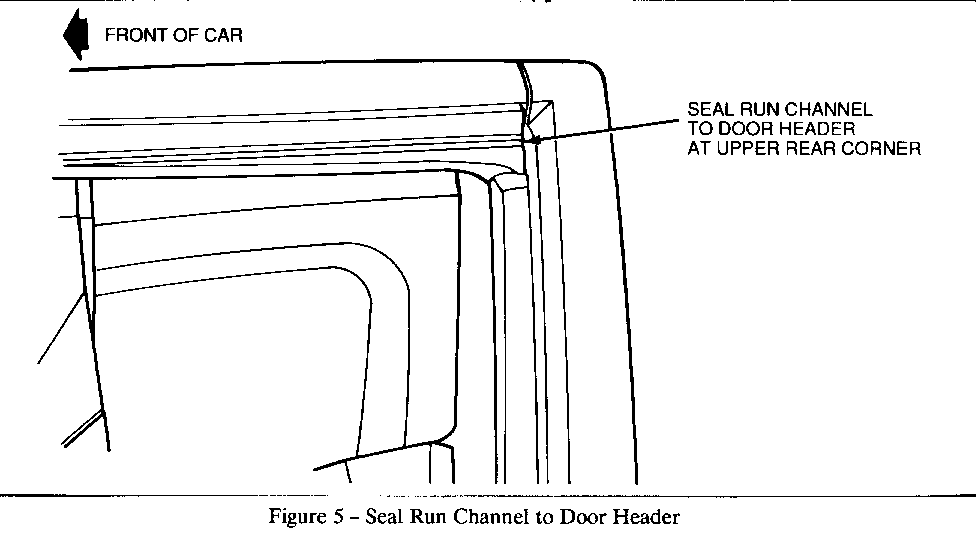
4. Pull down the front door window run channels and seal to door header with silicon sealer. Pay close attention to the areas around the blow out clips to obtain a good seal. Refer to Figure 5.
5. Seal the front and rear door upper frame mouldings to the door header with silicon sealer. Refer to Figure 5.
6. Verify door hem flanges are sealed to door inner panel around entire periphery of door. Fill any voids with thumb grade sealer. Refer to the 1990 Service Information Manual, page 10-1-10, Figure 10-1-19.
7. Remove rear door upper frame 7mm screw that retains rear vent divisional channel to door header. Force clear silicon sealer into the screw hole to fill the pocket between the door upper frame and divisional channel.
Centre Pillar:
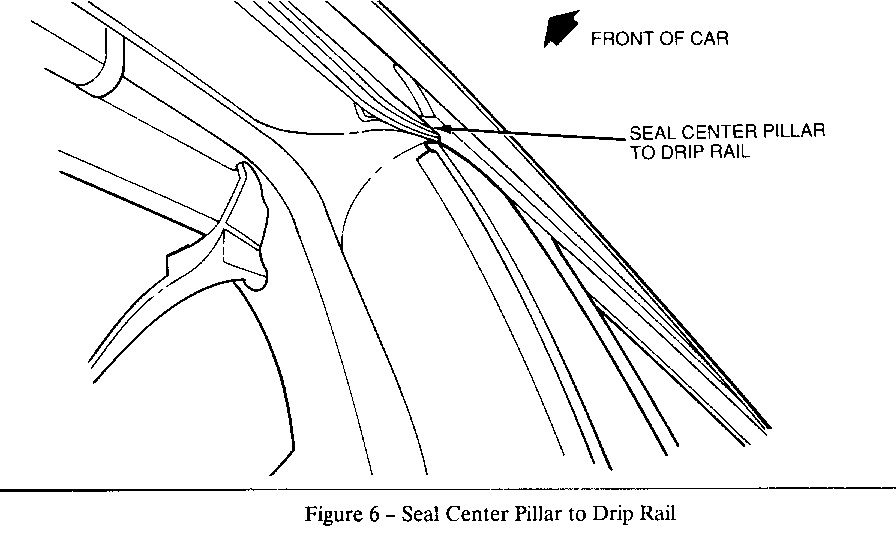
1. Seal the centre pillar to drip rail with silicone sealer. Refer to Figure 6.
Vehicles being repaired under warranty use: Labour 1.2 hours.
General Motors bulletins are intended for use by professional technicians, not a "do-it-yourselfer". They are written to inform those technicians of conditions that may occur on some vehicles, or to provide information that could assist in the proper service of a vehicle. Properly trained technicians have the equipment, tools, safety instructions and know-how to do a job properly and safely. If a condition is described, do not assume that the bulletin applies to your vehicle, or that your vehicle will have that condition. See a General Motors dealer servicing your brand of General Motors vehicle for information on whether your vehicle may benefit from the information.
