REAR DOOR MOLDING OUT OF ALIGNMENT (REALIGN MOLDING)

SUBJECT: REAR DOOR MOLDING OUT OF ALIGNMENT (REALIGN MOLDING)
VEHICLES AFFECTED: 1993 CADILLAC D-MODEL
CONDITION:
--------- Rear door molding out of alignment with front door and rear quarter moldings.
CAUSE:
----- Fastener attaching holes on the rear door for the molding are positioned too high when the molding is installed.
CORRECTION:
---------- 1. Apply (2.54 cm) 1" wide masking tape to the painted door surface along the length of the door just above the door molding. This will help protect the painted surface from scratches while removing and installing the molding.
2. Remove rear door molding from door per Service Manual procedures, Section 10-6-33.
NOTICE: Door molding retaining clips do not have to be removed.
3. Clean door panel surface using a 50/50 mixture of rubbing alcohol and water.
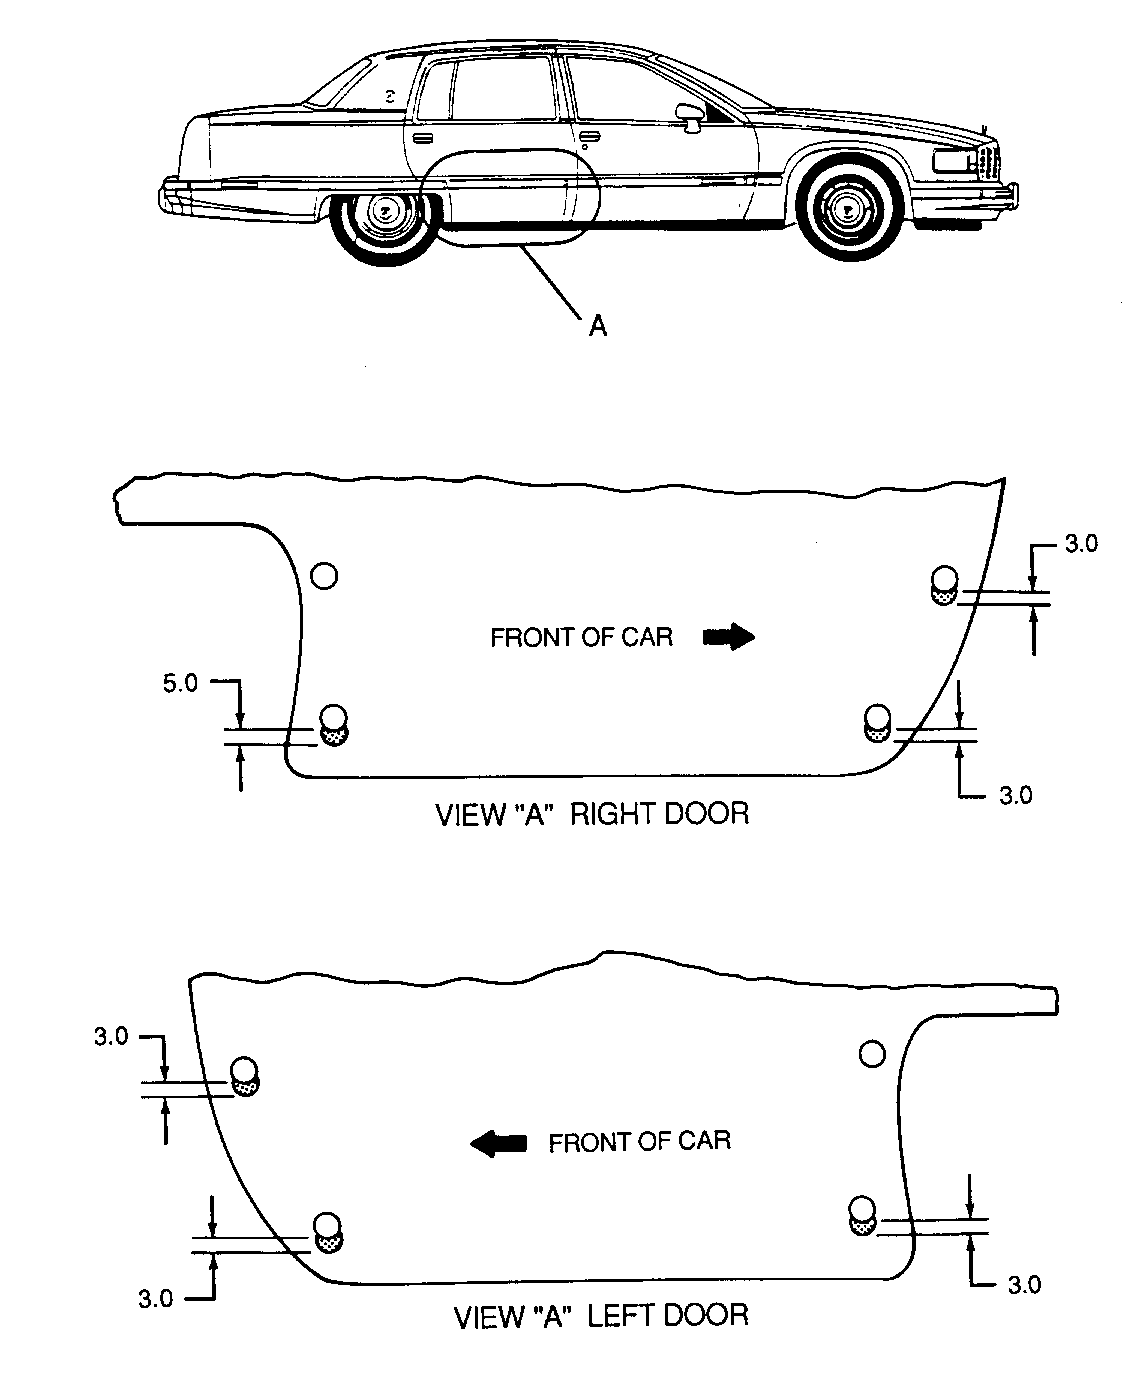
4. Refer to VIEW "A" and slot the attaching fastener holes downward as shown. Dimensions are in millimeters. (5.0 mm = 3/16"; 3.0 mm = 1/8").
NOTICE: Only three of the four fastener attaching holes in each door are slotted. One hole on the right door is slotted 5.0 mm.
5. Clean up any burrs and treat the slotted holes with primer and allow to dry.
6. Apply Primer wax spray, P/N 12345116, to the slotted holes for added corrosion protection.
7. Clean and install the door molding per Service Manual procedures, Section 10-6-33. Before tightening the fasteners, make sure the molding is in alignment with the front door and rear quarter molding.
8. Remove the masking tape from the door.
For vehicles repaired under warranty use:
Labor Time: 0.5 Hr. Each Door
General Motors bulletins are intended for use by professional technicians, not a "do-it-yourselfer". They are written to inform those technicians of conditions that may occur on some vehicles, or to provide information that could assist in the proper service of a vehicle. Properly trained technicians have the equipment, tools, safety instructions and know-how to do a job properly and safely. If a condition is described, do not assume that the bulletin applies to your vehicle, or that your vehicle will have that condition. See a General Motors dealer servicing your brand of General Motors vehicle for information on whether your vehicle may benefit from the information.
