'LOOSE LUMBER' NOISE REAR SUSP REPLACE LOWER BALL JOINTS,ETC.

VEHICLES AFFECTED: 1985-86 DEVILLES AND FLEETWOODS
Some 1985 and 1986 front wheel drive DeVilles and Fleetwoods may experience a "thumping", "clunking" or "loose lumber" noise from the trunk or rear suspension areas when driving over small bumps (i.e., washboard road surfaces, broken pavement, etc.). This noise may be more pronounced in colder ambient temperatures (less than 0 degrees celsius).
If this condition is encountered, first inspect the rear suspension components and fasteners for proper installation and that they are. tightened to torque specifications. Check the electronic level control (ELC) system for proper operation. If all suspension components are properly installed and the ELC system is working properly, the following steps should be taken:
A. NON-SLEEVED LOWER CONTROL ARM BALL JOINT (1985 MODELS ONLY)
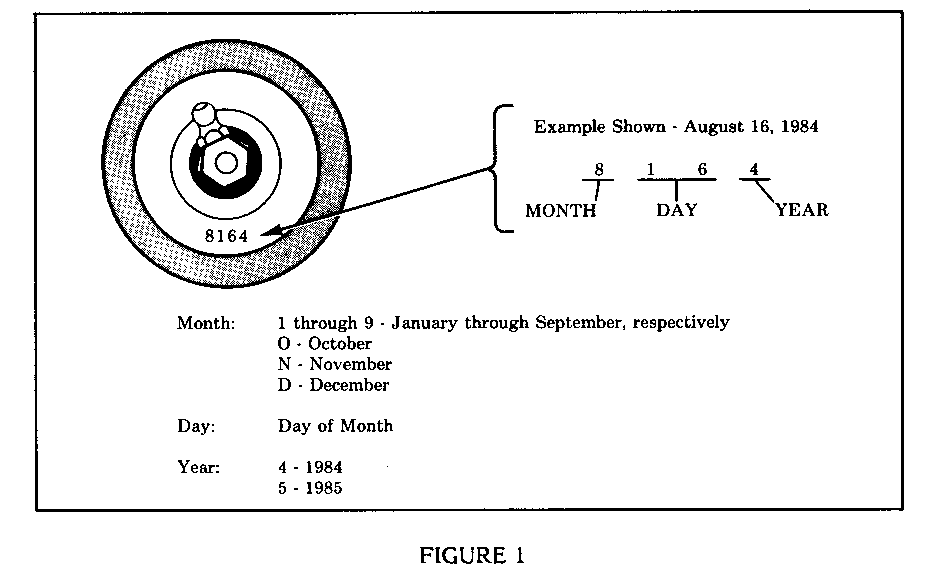
1. Inspect both rear lower control arm ball joint date codes.Each ball joint is stamped with a four-digit date code, located on the lower ball joint cover near the grease fitting. The date code. Describes the month, day and year the ball joint was manufactured, and may be interpreted as shown in Figure 1.
2. Ball joints with date codes 6204 (June 20, 1984) and later were produced with a nylon sleeve for noise reduction. Ball joints with date codes earlier than 6204 should be replaced with service ball joint kit, P/N 9769581. Except for date code information, there is no visible difference between sleeved and non-sleeved ball joints.
B. UPPER STRUT MOUNT NOISE
Replace both rear strut and mount assemblies using 1987 strut and mount assemblies (verify that mounts have not already been replaced, 1985 and 1986 mounts are unpainted, 1987 mounts are black). Use P/N 22047978 for vehicles with standard suspensions and P/N 22047979 for vehicles with touring suspension (option code FE2).
The following procedure should be used for strut replacement:
REMOVAL
1. Raise car on hoist. Supfiort rear control arms. 2. Remove wheel and tire assemblies. 3. Disconnect ELC air tube from strut fitting. 4. If car is equipped with the Delco-Bose premium sound system, remove the spare tire (1985 only) and lower speaker enclosures from inside the trunk. 5. Remove left and right inside trunk trim as required to gain access to top nuts and remove nuts. 6. Remove strut anchor bolts at knuckle. 7. Remove strut.
INSTALLATION
1. Redrill the two Bmm diameter holes in the strut tower to 12MM diameter. Remove all chips after drilling.
CAUTION:
SUITABLE EYE PROTECTION SHOULD BE WORN WHEN REDRILLING THE TOWER MOUNT HOLES. IF SUITABLE PROTECTION IS NOT WORN PERSONAL INJURY COULD RESULT.
2. Position strut in strut tower. 3. Install strut anchor bolts at knuckle. Tighten to 195 N.M (144 ft. lbs.). 4. Install new upper strut mount nuts and washers (included with strut). Tighten to 25 N.M (18 ft. lbs.). 5. Install trunk trim. 6. Install ELC air tube. 7. Install wheel and tire assemblies. Tighten lug nuts to 140 N.M (100 ft. lbs.). 8. Lower car. 9. Pressurize the air adjustable rear struts by grounding the yellow test lead at the ELC compressor. Allow compressor to run for approximately 15 seconds. This ensures that the strut air sleeves are filled with residual pressure. 10. Align rear suspension.
For warranty purposes, use the following labour operations:
DESCRIPTION OPERATION HOURS
REPLACE REAR STRUTS - INCLUDES T6180 2.4 REAR ALIGNMENT
REPLACE REAR BALL JOINTS AND T6181 4.0 STRUTS - INCLUDES REAR ALIGNMENT*
*USE FOR 1985 MODELS WITH BALL JOINT DATE CODES BEFORE 6204.
General Motors bulletins are intended for use by professional technicians, not a "do-it-yourselfer". They are written to inform those technicians of conditions that may occur on some vehicles, or to provide information that could assist in the proper service of a vehicle. Properly trained technicians have the equipment, tools, safety instructions and know-how to do a job properly and safely. If a condition is described, do not assume that the bulletin applies to your vehicle, or that your vehicle will have that condition. See a General Motors dealer servicing your brand of General Motors vehicle for information on whether your vehicle may benefit from the information.
