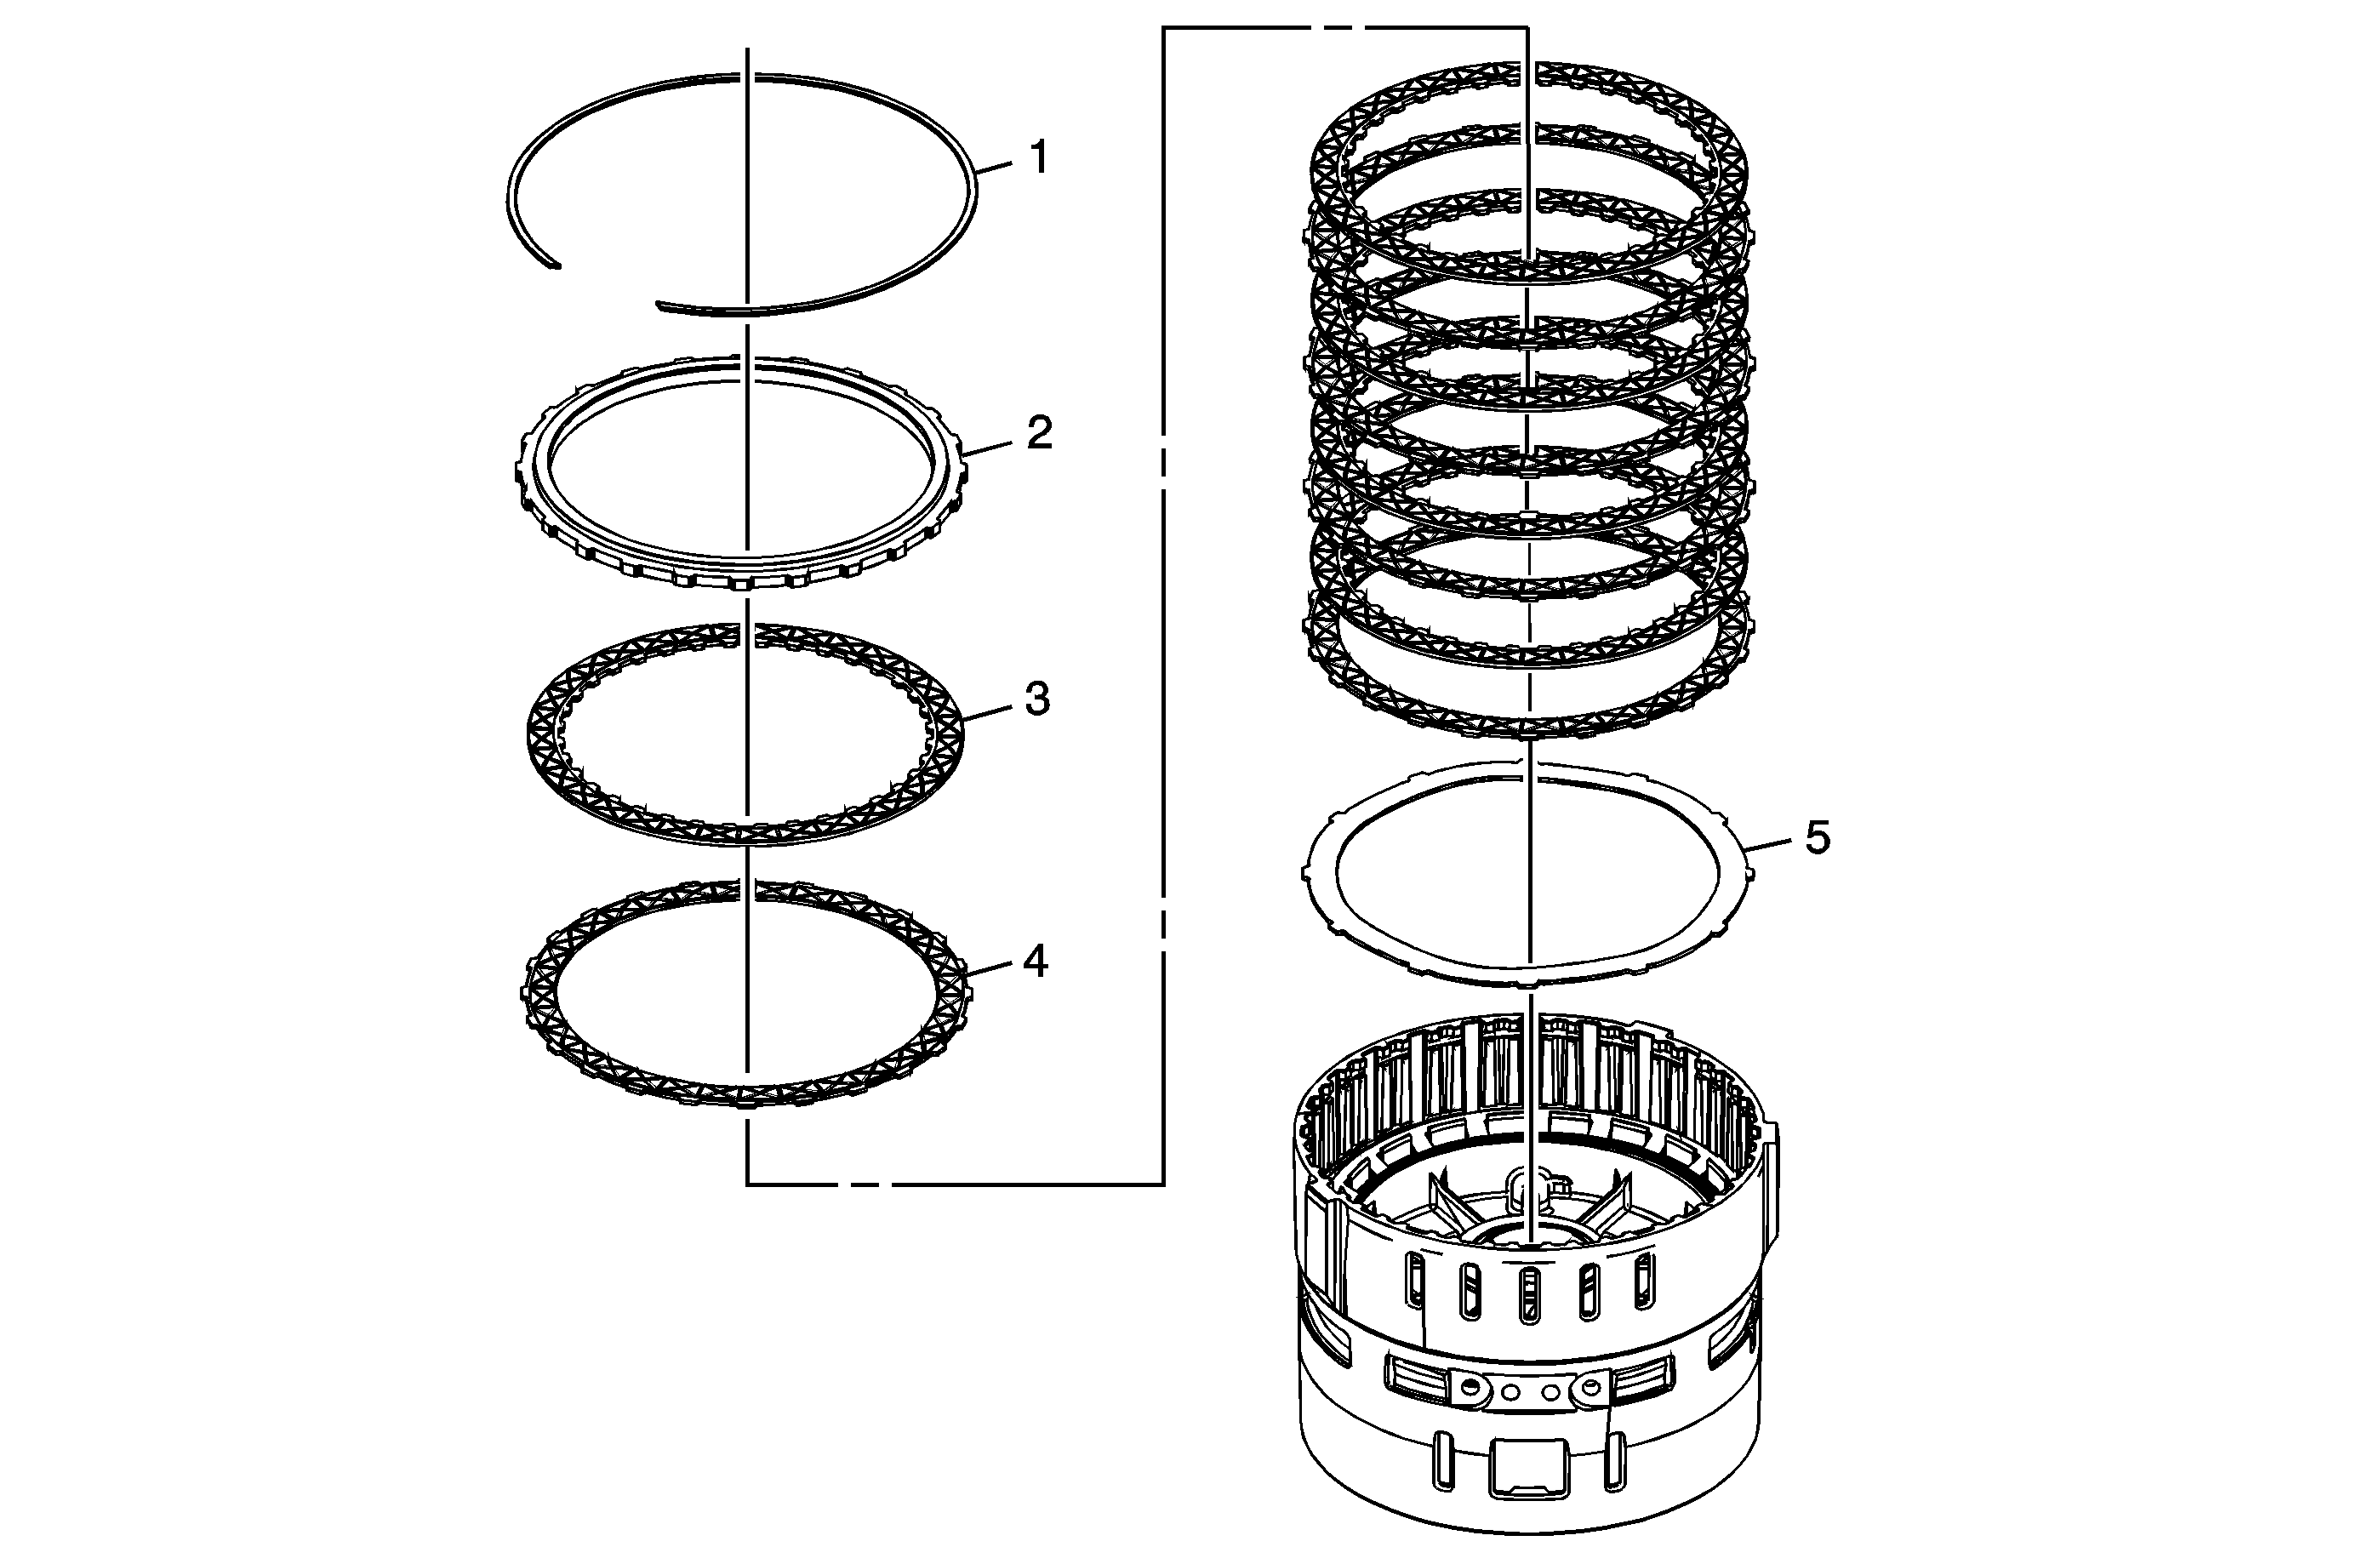
| Table 1: | 2-6 Clutch Plates Removal |
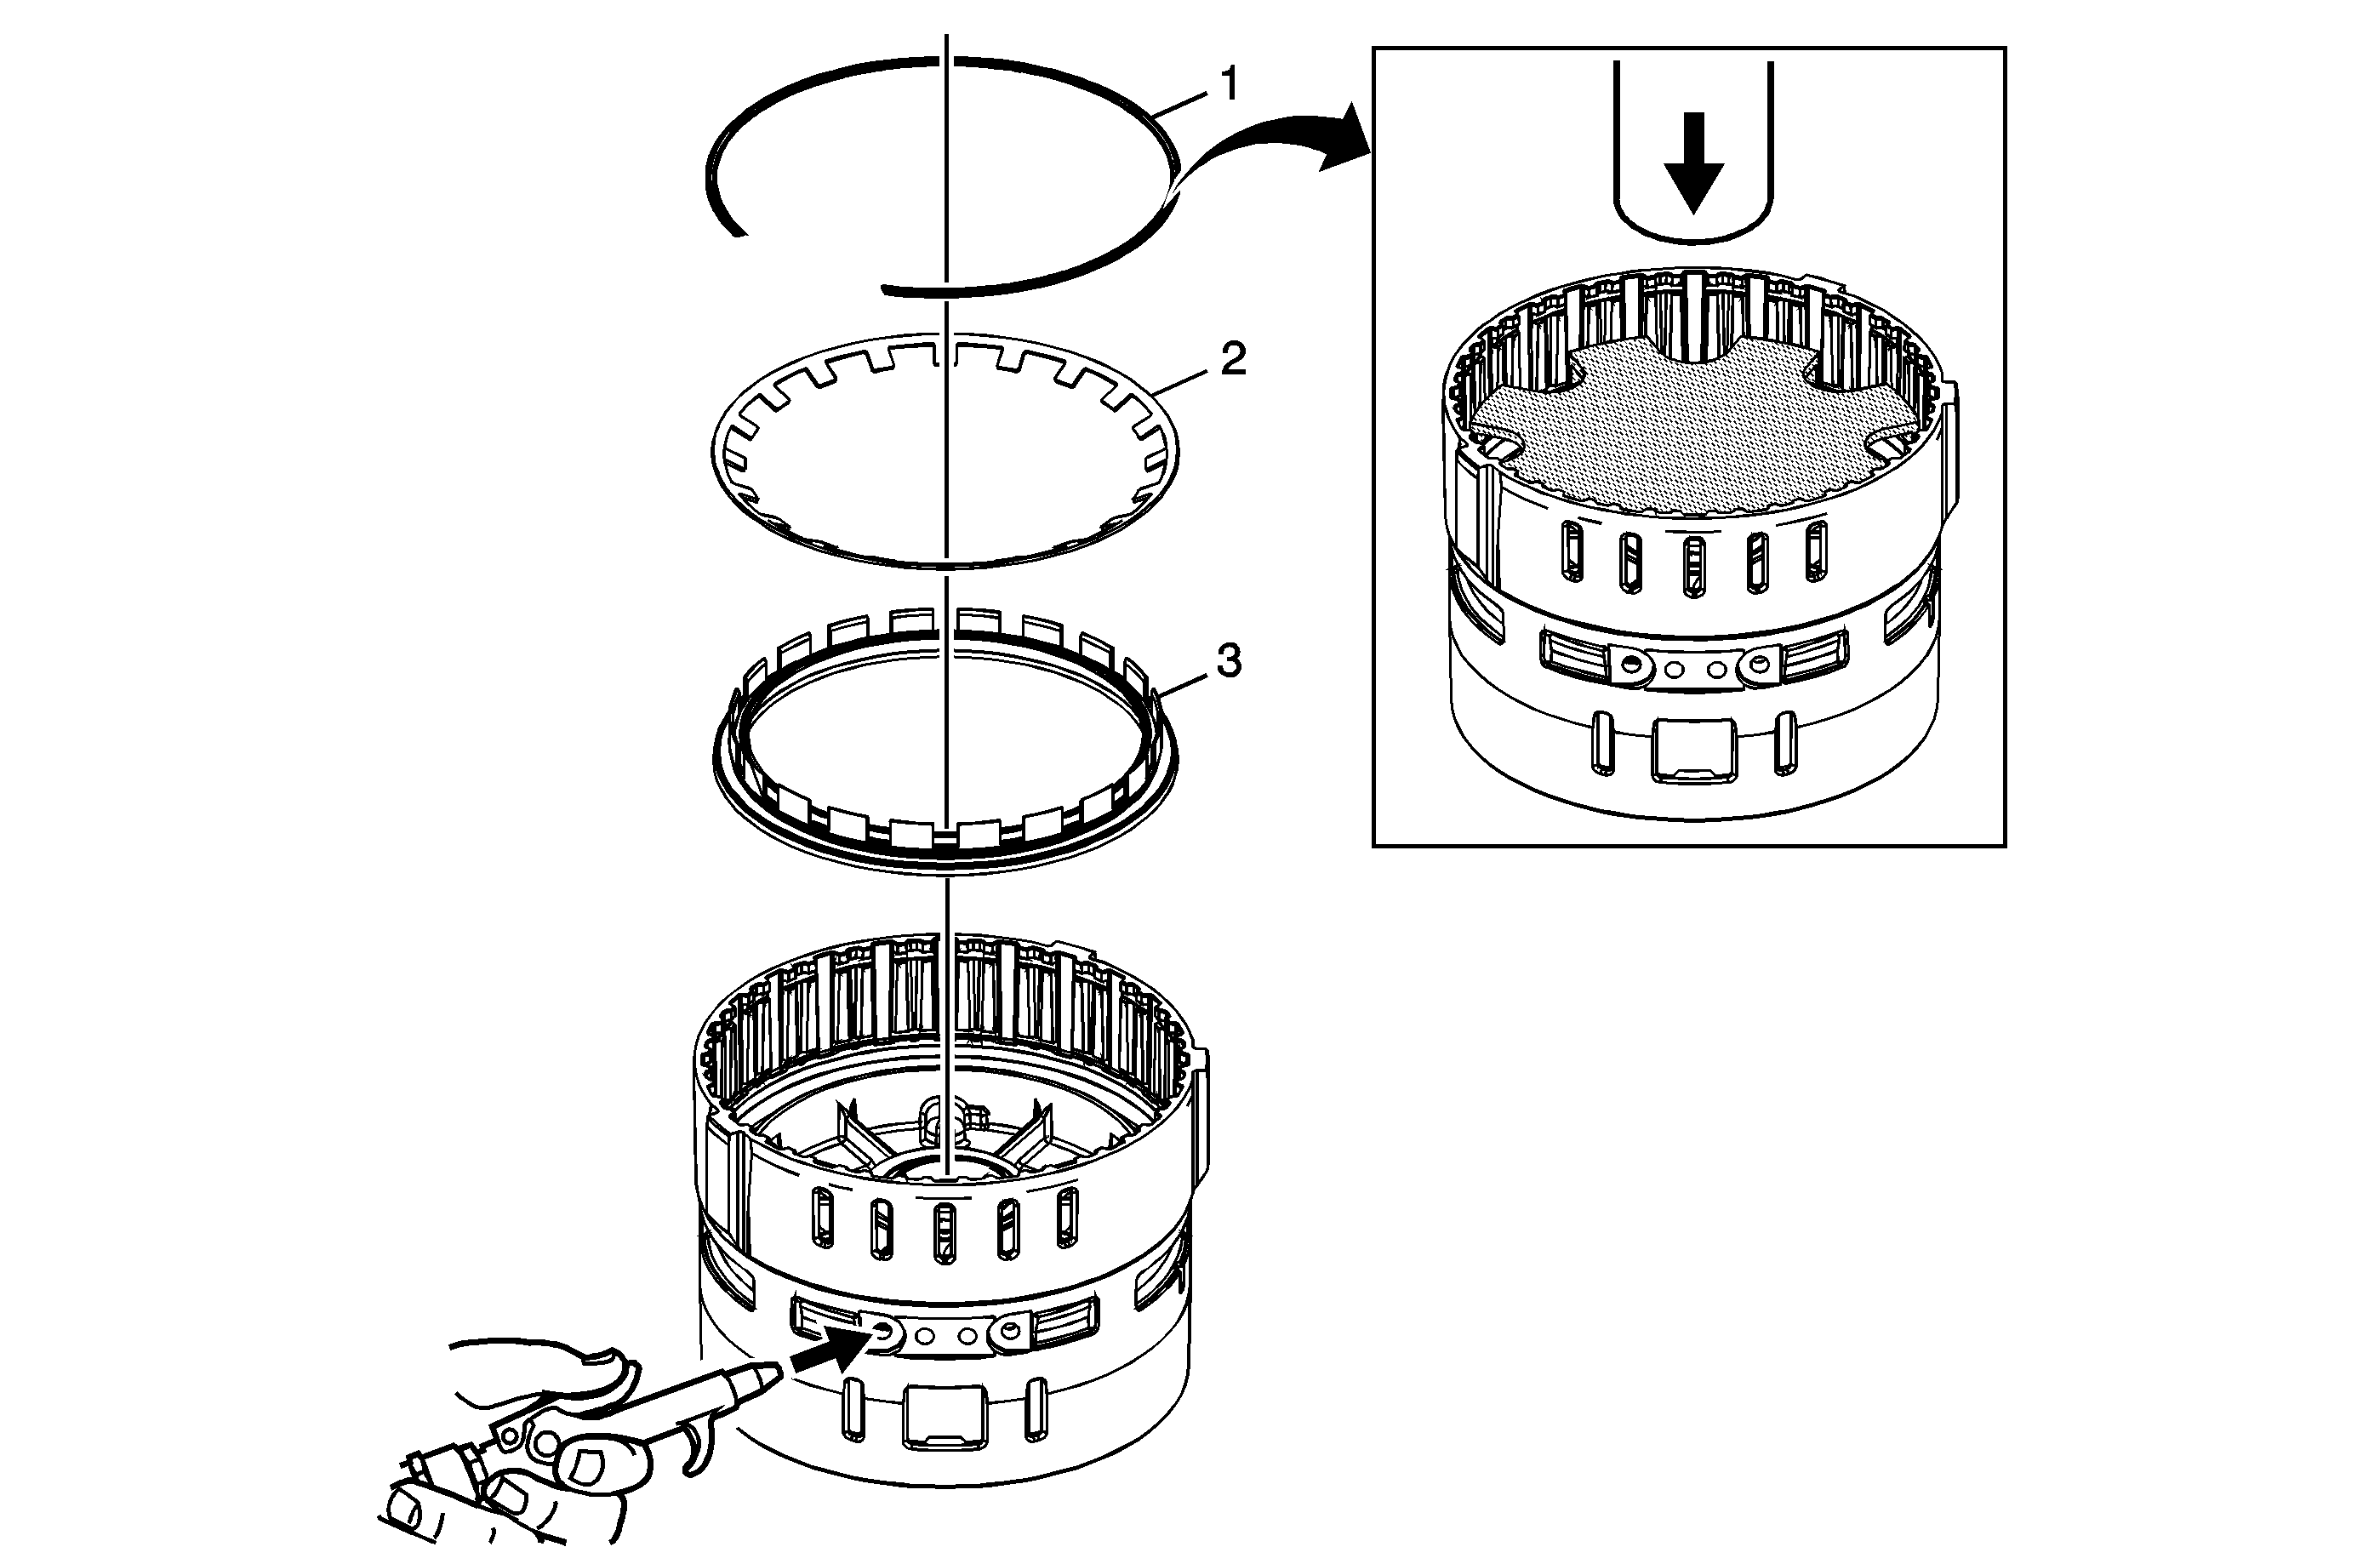
| Table 2: | 2-6 Clutch Piston Replacement |
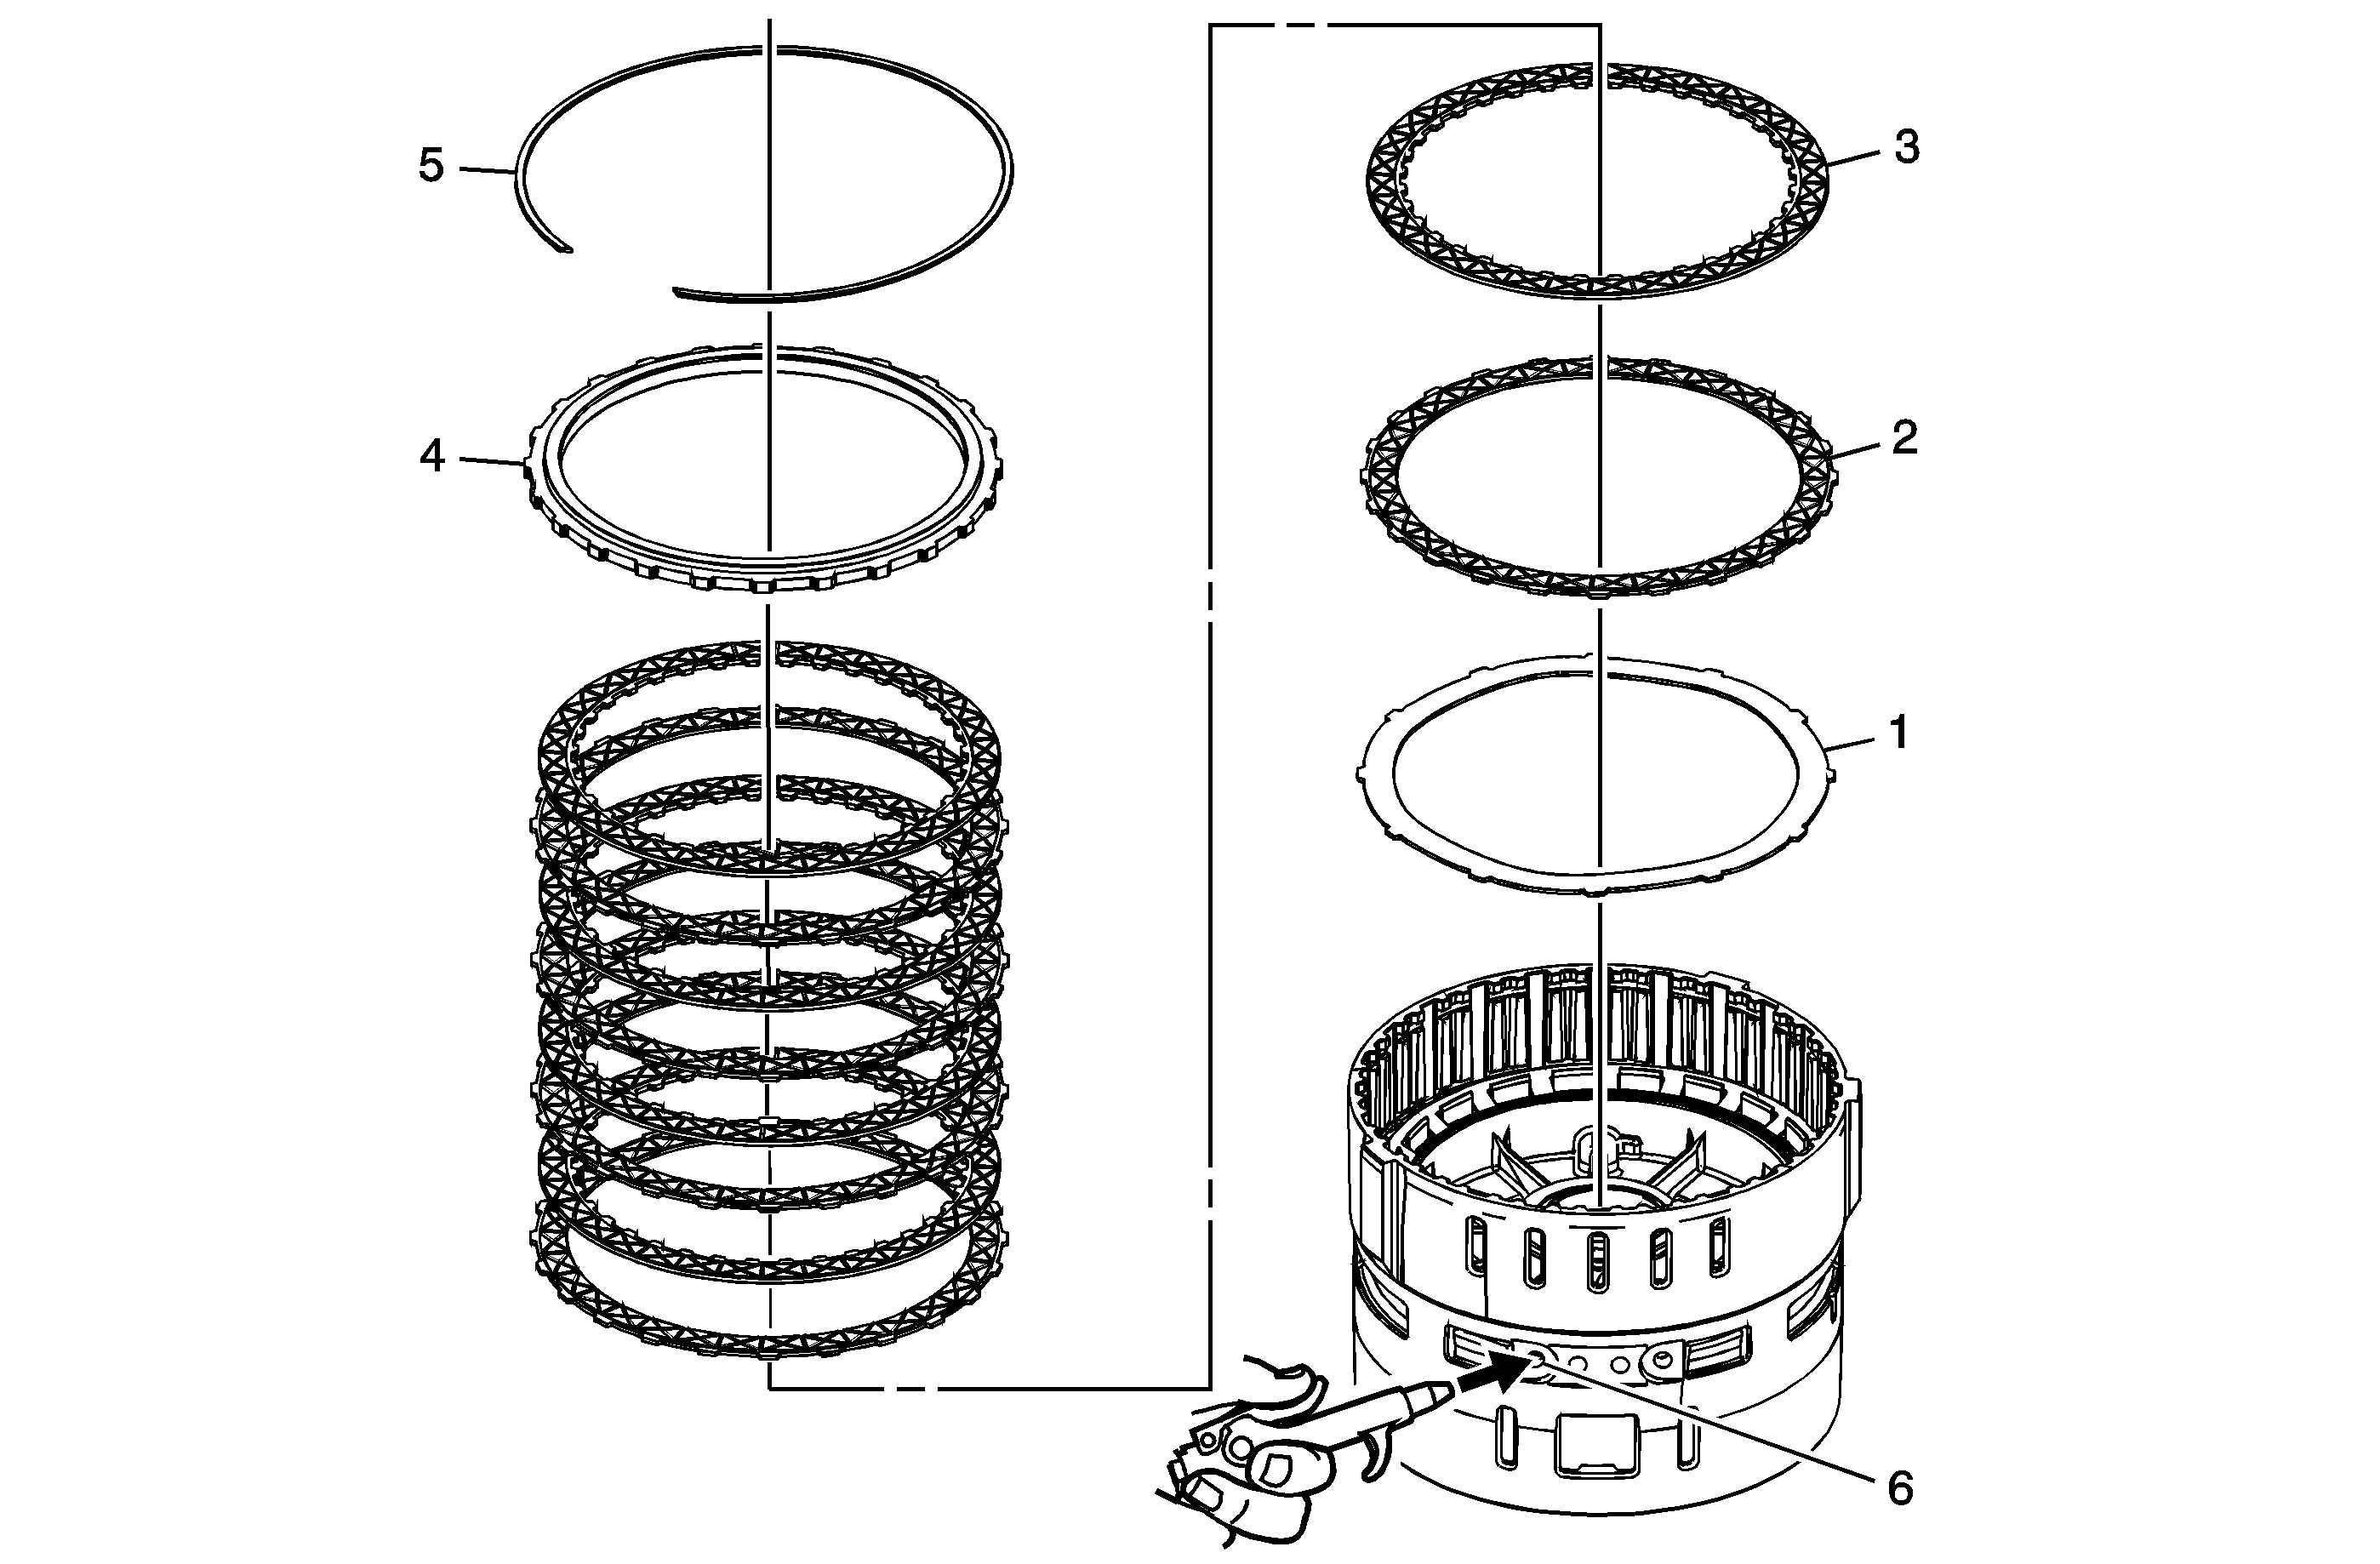
| Table 3: | 2-6 Clutch Plates Installation |
2-6 Clutch Plates Removal

Callout | Component Name |
|---|---|
1 | 2-6 Clutch Backing Plate Retaining Ring |
2 | 2-6 Clutch Backing Plate |
3 | 2-6 Clutch Plate Assembly (Qty: 5) |
4 | 2-6 Clutch Plate (Qty: 5) |
5 | 2-6 Clutch (Waved) Plate |
2-6 Clutch Piston Replacement

Callout | Component Name |
|---|---|
1 | 2-6 Clutch Spring Retaining Ring Tip Special ToolsDT-48065 Clutch Spring Compressor |
2 | 2-6 Clutch Spring Notice: Ensure the spring tabs are facing down during installation and that the tabs fit between the teeth on the piston. Failure to do so may cause damage to the clutch assembly. |
3 | 2-6 Clutch Piston Assembly Tip |
2-6 Clutch Plates Installation

Callout | Component Name |
|---|---|
1 | 2-6 Clutch (Waved) Plate |
2 | 2-6 Clutch Plates (Qty: 5) Tip |
3 | 2-6 Clutch Plate Assembly (Qty: 5) Tip |
4 | 2-6 Clutch Backing Plate |
5 | 2-6 Clutch Backing Plate Retaining Ring |
6 | 2-6 Clutch Apply Passage Tip |
