For 1990-2009 cars only
Removal Procedure
- Raise and support the vehicle. Refer to Lifting and Jacking the Vehicle .
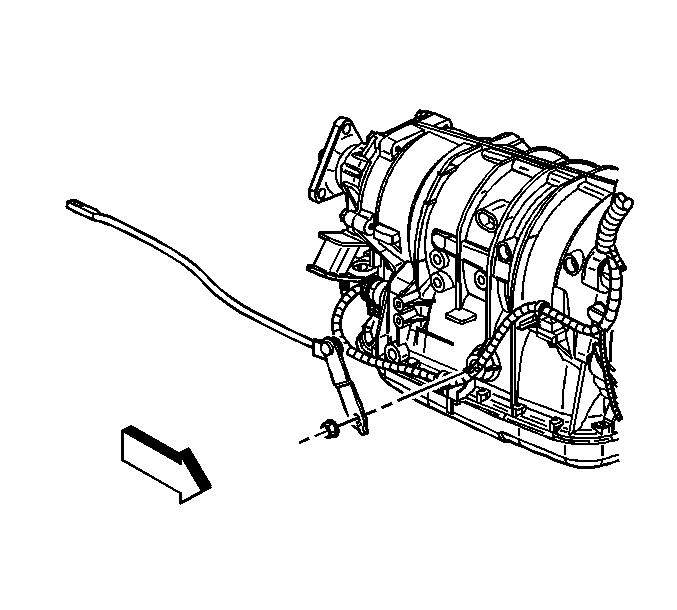
- Remove the transmission manual shift shaft nut.
- Disconnect the shift linkage from the transmission.
- Place the transmission in neutral by rotating the transmission shift shaft clockwise 2 clicks.
- Remove the exhaust system. Refer to Exhaust System Replacement .
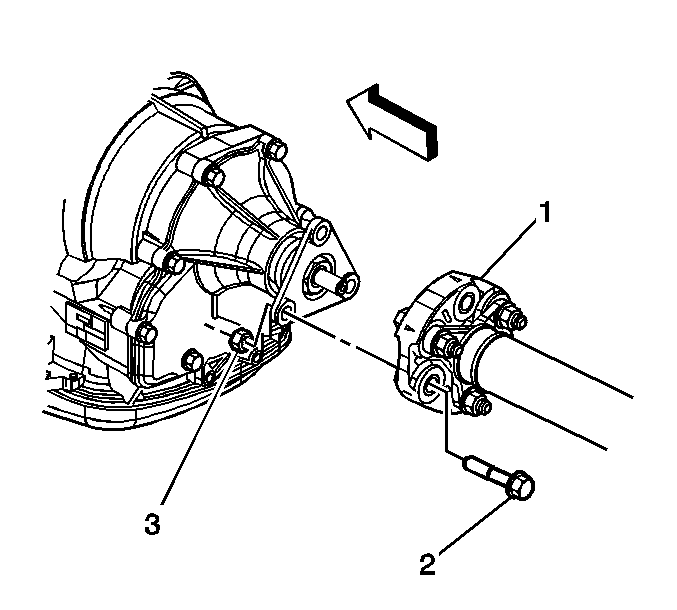
- Disconnect the propeller shaft coupler (1) from the transmission flange. Refer to Rear Propeller Shaft Replacement .
- Push the front propeller shaft toward the rear of the vehicle in order to release the propeller shaft coupler (1) from the transmission flange.
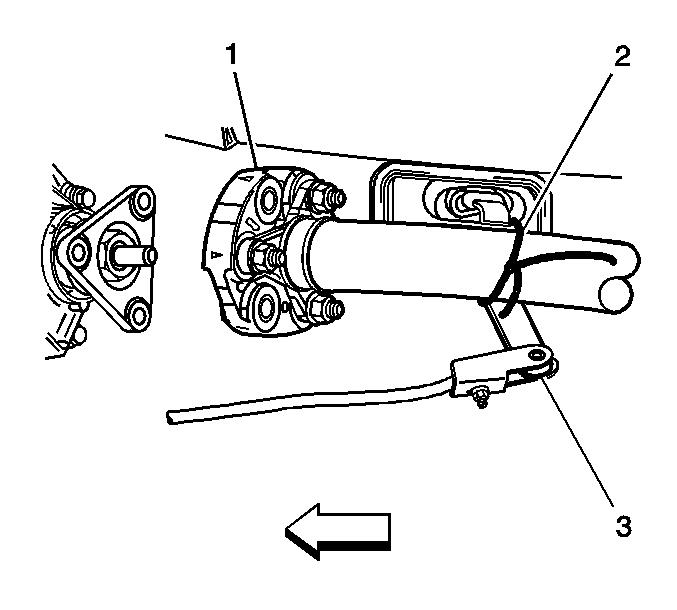
- Secure the front propeller shaft (1) to the shift control lever (3) with a piece of mechanics wire (2).
- Remove the transmission fluid pan. Refer to Automatic Transmission Fluid and Filter Replacement .
- Using a transmission jack positioned under the transmission pan area, support the transmission case on both sides with the 2 similar wood blocks to prevent the transmission internal components from contacting the transmission jack.
- Remove the transmission support. Refer to Transmission Support Replacement .
- Remove the extension housing. Refer to Case Extension and Gasket Replacement .
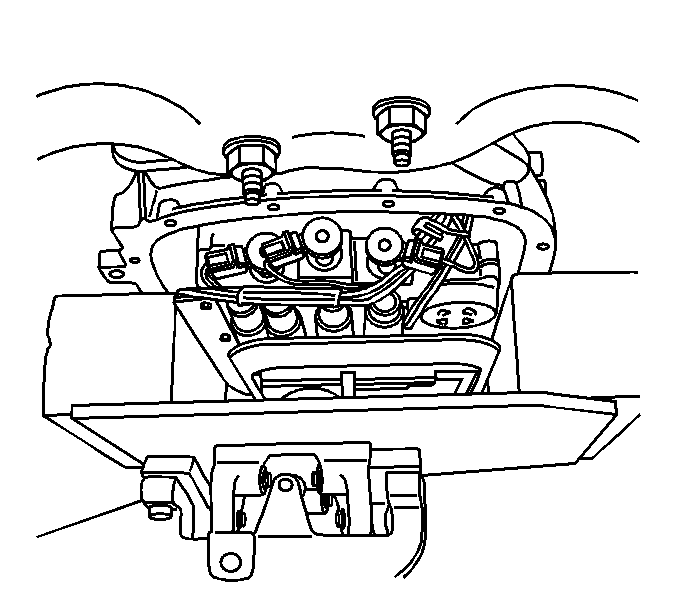
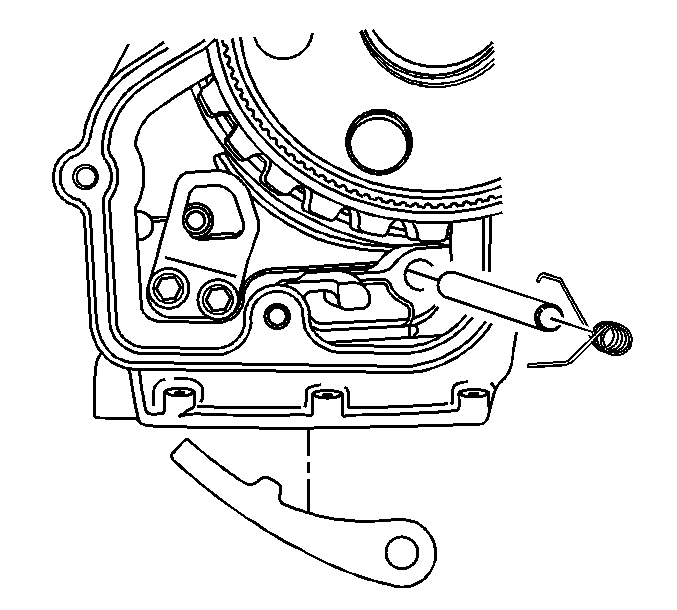
- Remove the parking pawl spring.
- Remove the parking pawl pivot pin.
- Remove the parking pawl.
- Inspect the following components:
| • | The parking pawl tooth for chipping or wear |
| • | The parking pawl spring for over expansion |
| • | The pivot pin for scoring and excessive wear |
Installation Procedure
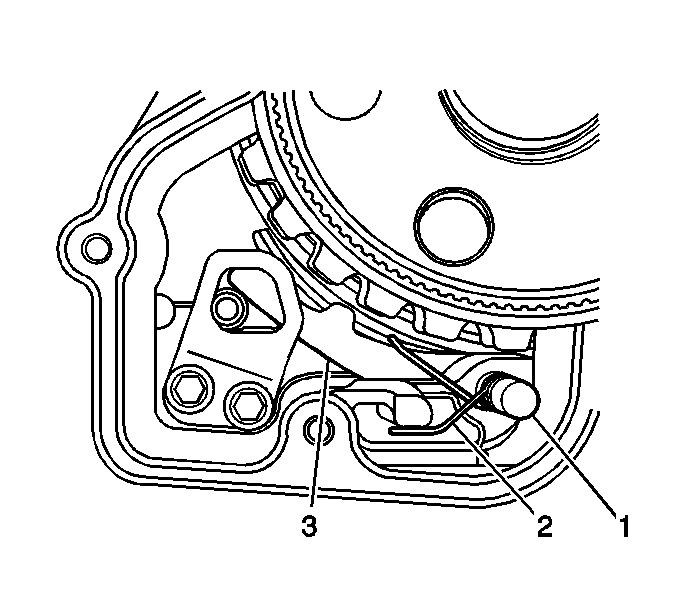
- Install the parking pawl (3).
- Install the pivot pin (1).
- Install the parking pawl spring (2). The straight end of the spring locates against the case and the hooked end locates over the parking pawl.
- Install the extension housing. Refer to Case Extension and Gasket Replacement .
- Install the transmission support. Refer to Transmission Support Replacement .
- Remove the transmission jack.
- Install the transmission fluid pan. Refer to Automatic Transmission Fluid and Filter Replacement .
- Remove the mechanics wire (2) securing the front propeller shaft (1) to the shift control lever (3).
- Install the propeller shaft coupler (1) to the transmission flange. Refer to Rear Propeller Shaft Replacement .
- Install the exhaust system. Refer to Exhaust System Replacement .
- Place the transmission in the park position by rotating the shift shaft fully counterclockwise.
- Connect the shift linkage to the transmission.
- Install the transmission manual shift shaft nut.
- Fill the transmission to the proper level. Refer to Transmission Fluid Check .
- Lower the vehicle.


Notice: Refer to Fastener Notice in the Preface section.
Tighten
Tighten the nut to 16 N·m (142 lb in).
