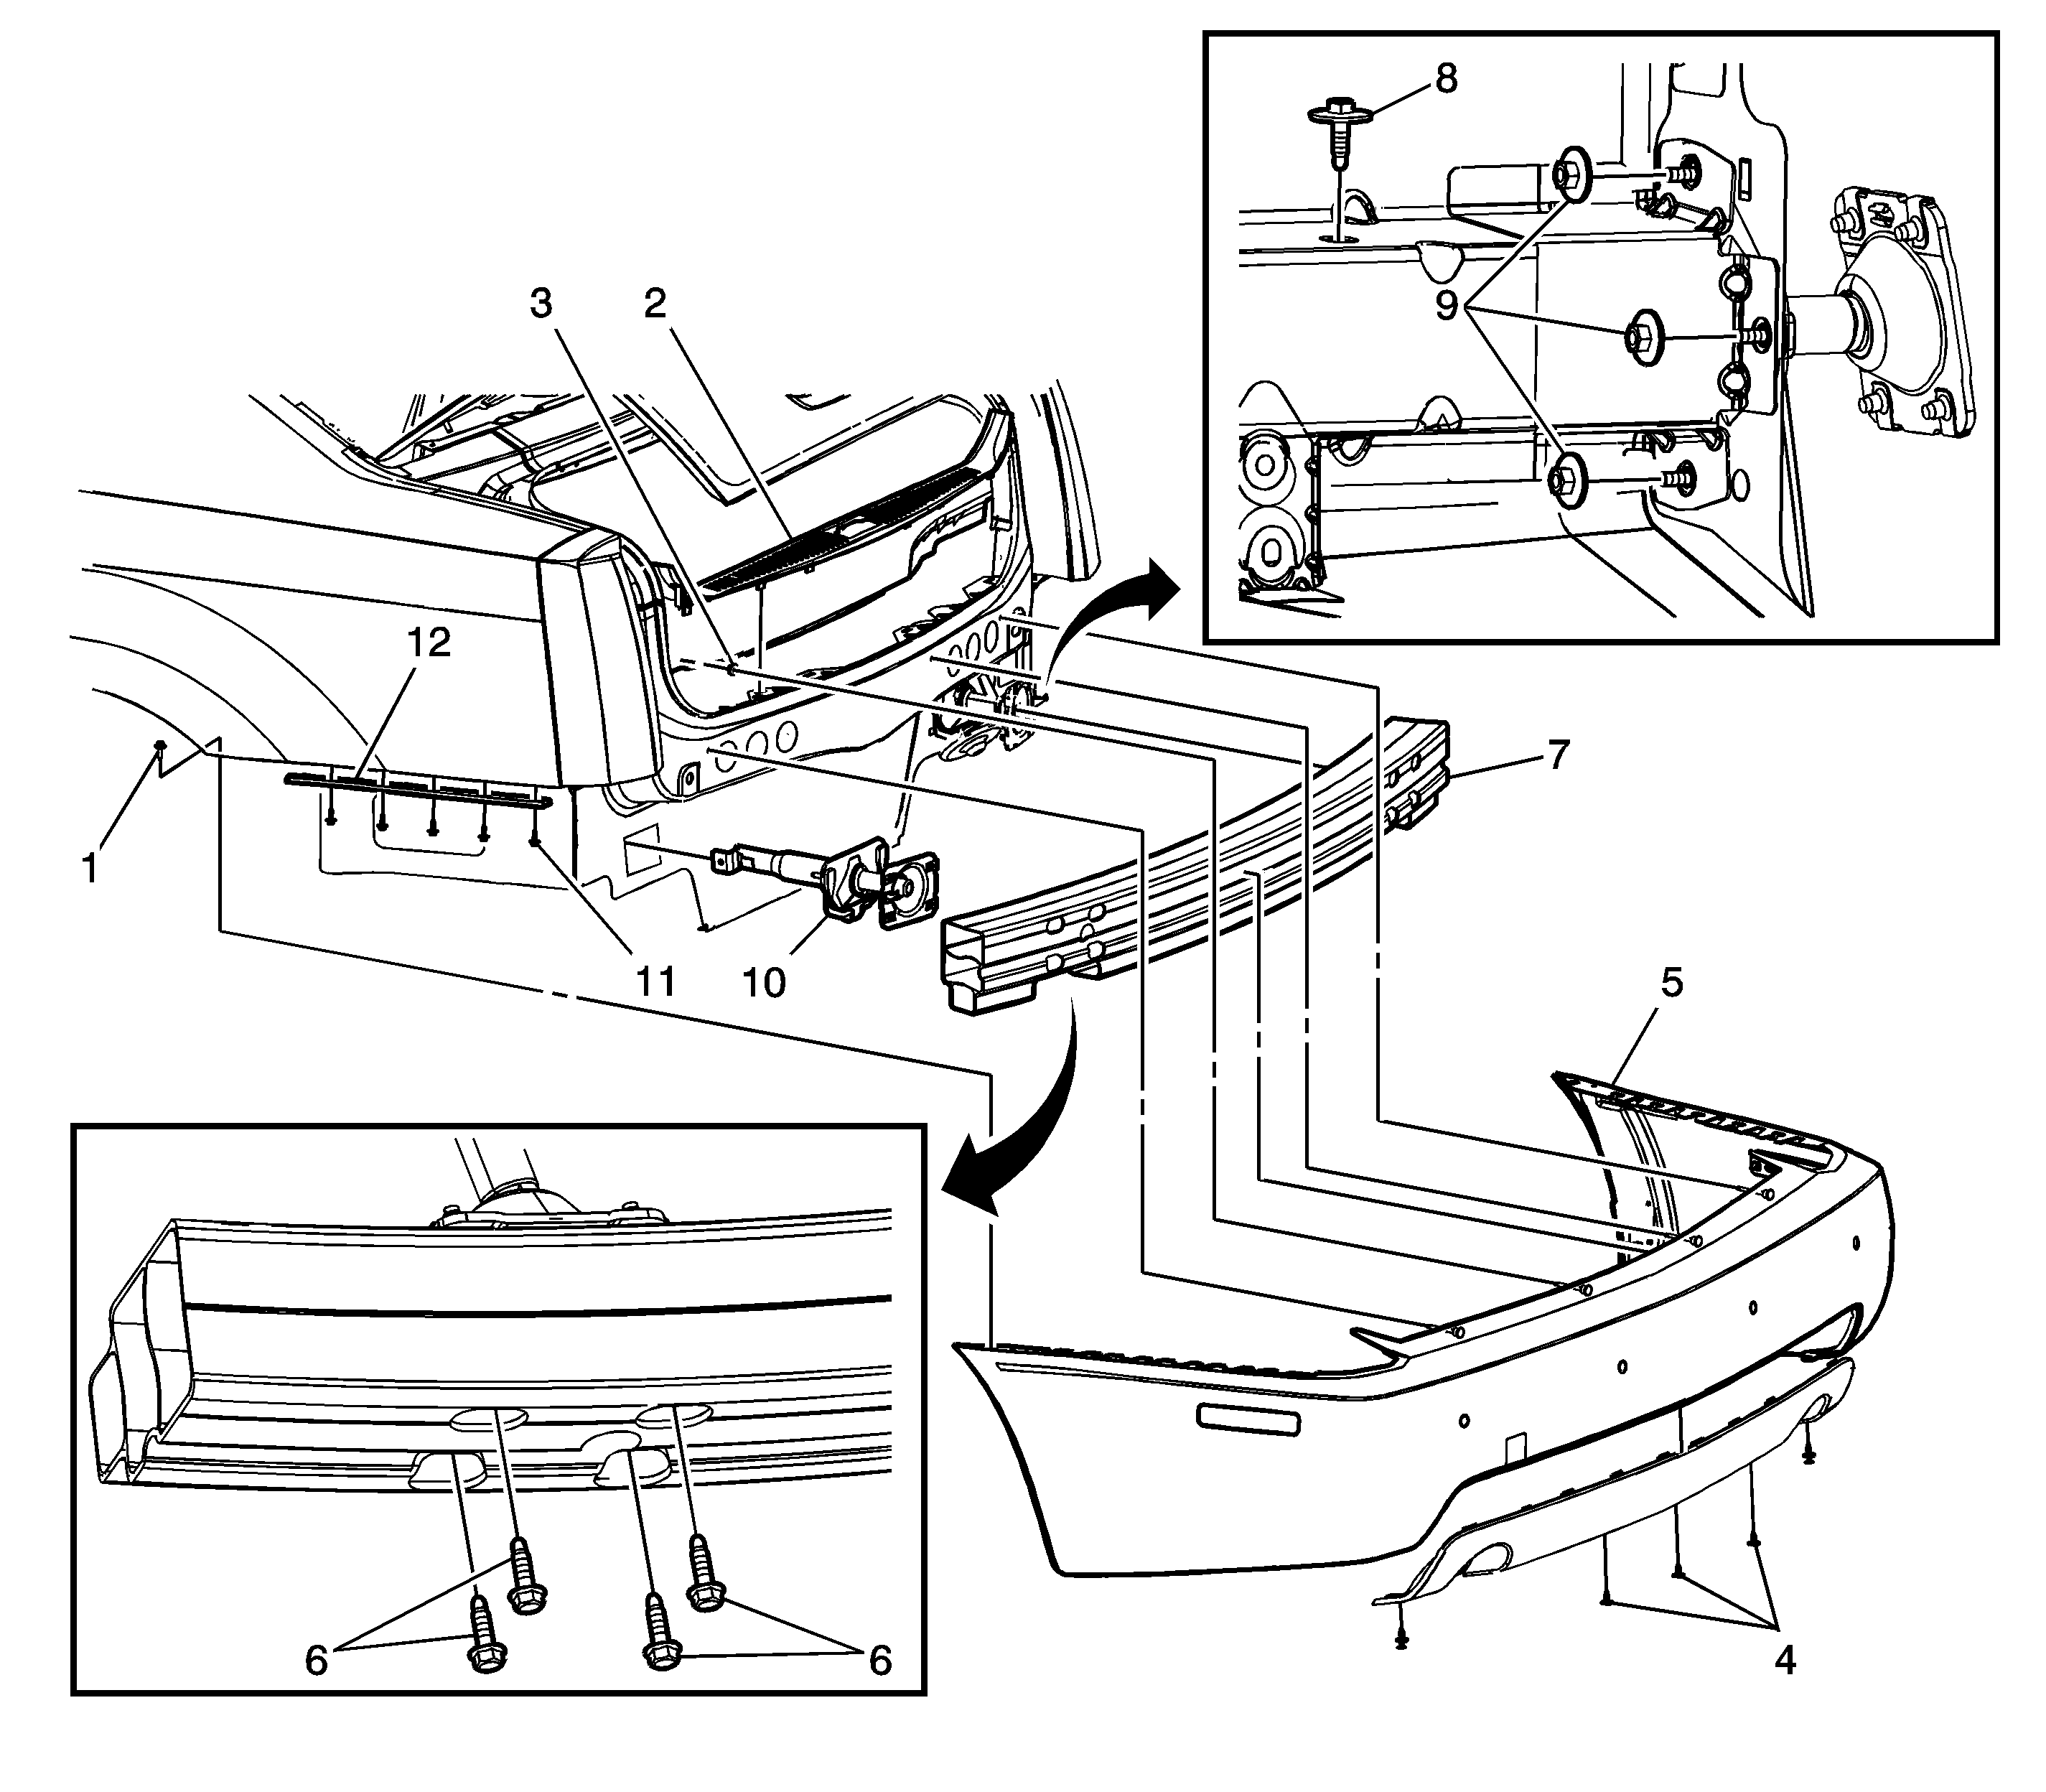
Callout | Component Name |
|---|---|
Rear Bumper Fascia ReplacementPreliminary Procedures
| |
1 | Rear Bumper Fascia Screw Notice: Refer to Fastener Notice in the Preface section. Tip Tighten |
2 | Compartment Sill Trim Plate Assembly |
3 | Rear Bumper Fascia Screw (Qty: 4) Tighten |
4 | Rear Bumper Fascia Retainer (Qty: 3) Tip |
5 | Rear Bumper Fascia Assembly Tighten |
Rear Bumper Impact Bar Assembly ReplacementPreliminary Procedures
| |
1 | Rear Bumper Fascia Screw Tip Tighten |
2 | Compartment Sill Trim Plate Assembly |
3 | Rear Bumper Fascia Screw (Qty: 4) Tighten |
4 | Rear Bumper Fascia Retainer (Qty: 3) Tip |
5 | Rear Bumper Fascia Assembly Tighten |
6 | Rear Bumper Impact Bar Bolt (Qty: 8) Tighten |
7 | Rear Bumper Impact Bar Assembly |
Rear Bumper Energy Absorber AssemblyPreliminary Procedures
| |
1 | Rear Bumper Fascia Screw Tip Tighten |
2 | Compartment Sill Trim Plate Assembly |
3 | Rear Bumper Fascia Screw (Qty: 4) Tighten |
4 | Rear Bumper Fascia Retainer (Qty: 3) Tip |
5 | Rear Bumper Fascia Assembly Tighten |
6 | Rear Bumper Impact Bar Bolt (Qty: 8) Tighten |
7 | Rear Bumper Impact Bar Assembly |
8 | Rear Bumper Energy Absorber Bolt (Qty: 2) Tighten |
9 | Rear Bumper Energy Absorber Nut (Qty: 4) Tighten |
10 | Rear Bumper Energy Absorber Assembly |
Rear Bumper Fascia Bracket ReplacementPreliminary Procedures
| |
1 | Rear Bumper Fascia Screw Tip Tighten |
2 | Compartment Sill Trim Plate Assembly |
3 | Rear Bumper Fascia Bolt (Qty: 4) Tighten |
4 | Rear Bumper Fascia Retainer (Qty: 3) Tip |
5 | Rear Bumper Fascia Assembly Tighten |
11 | Rear Bumper Fascia Bracket Screw (Qty: 10) Tighten |
12 | Rear Bumper Fascia Bracket (Qty: 2) |
Rear Bumper Fascia Insert Replacement | |
13 | Rear Bumper Fascia Insert Locator (Qty: 2) |
14 | Rear Bumper Fascia Insert |
