For 1990-2009 cars only
Removal Procedure
- Remove the front seats. Refer to Driver or Passenger Seat Replacement .
- Remove the center floor console. Refer to Front Floor Console Replacement .
- Remove the instrument panel center air outlet. Refer to Instrument Panel Center Air Outlet Replacement .
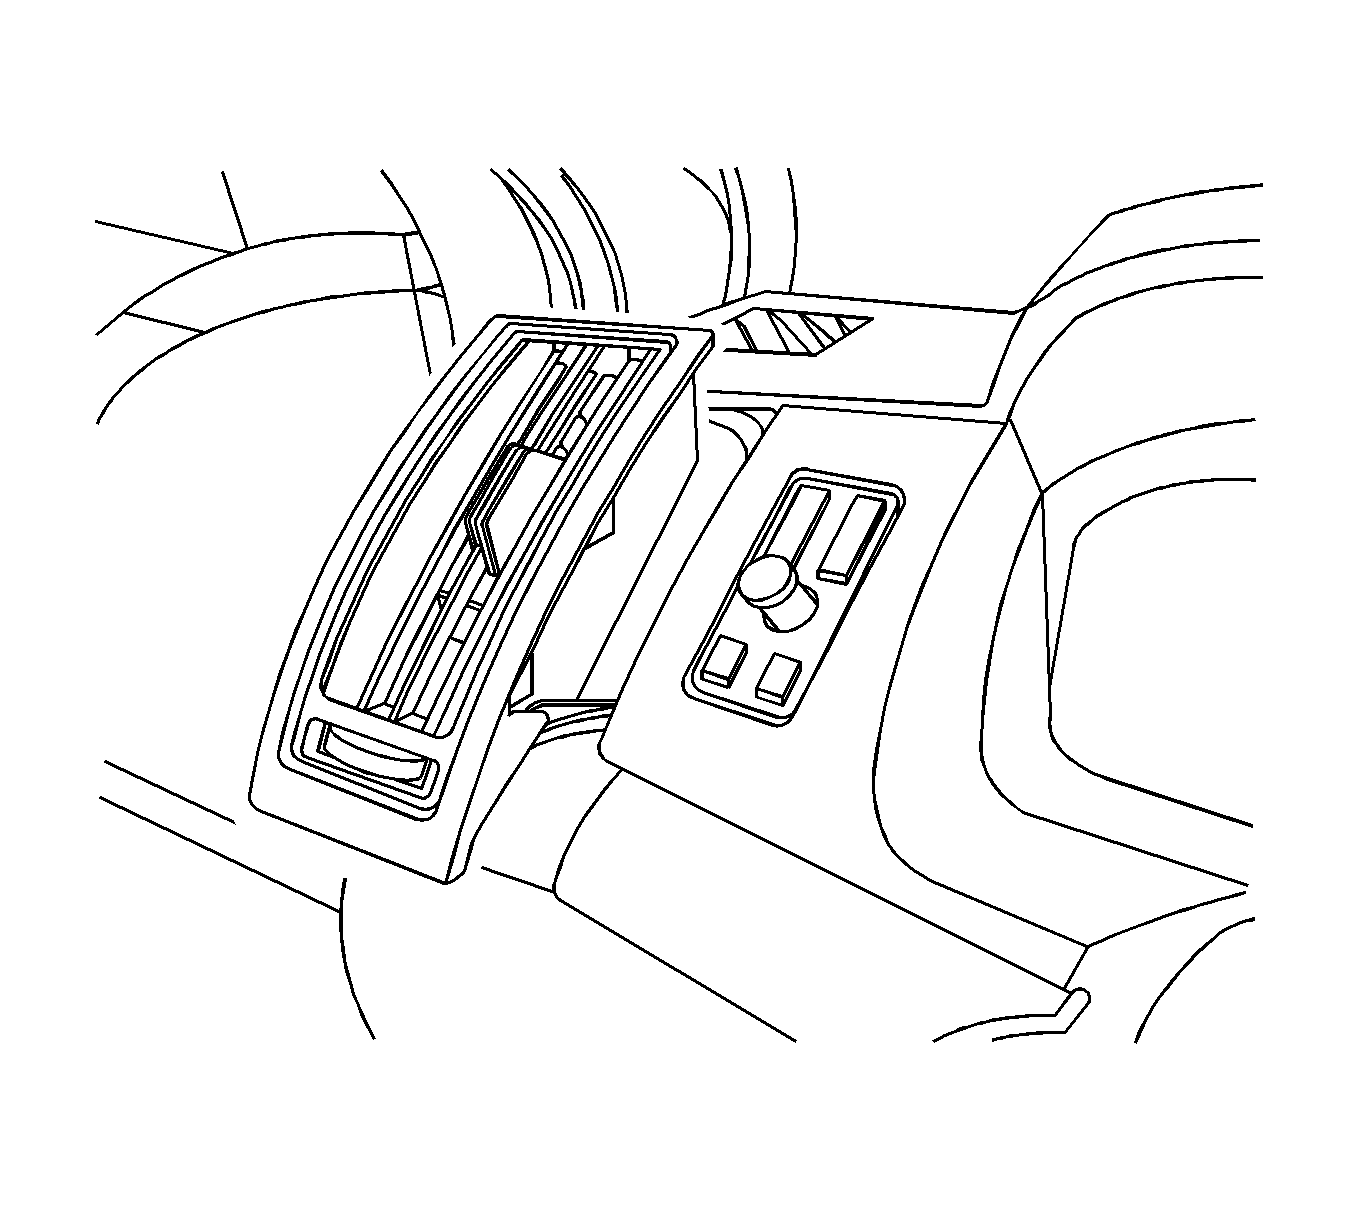
- Remove the HVAC control module. Refer to HVAC Module Assembly Replacement .
- Remove the radio. Refer to Radio Replacement .
- Remove the steering wheel. Refer to Steering Wheel Replacement .
- Remove the combination switch. Refer to Turn Signal Multifunction Switch Replacement .
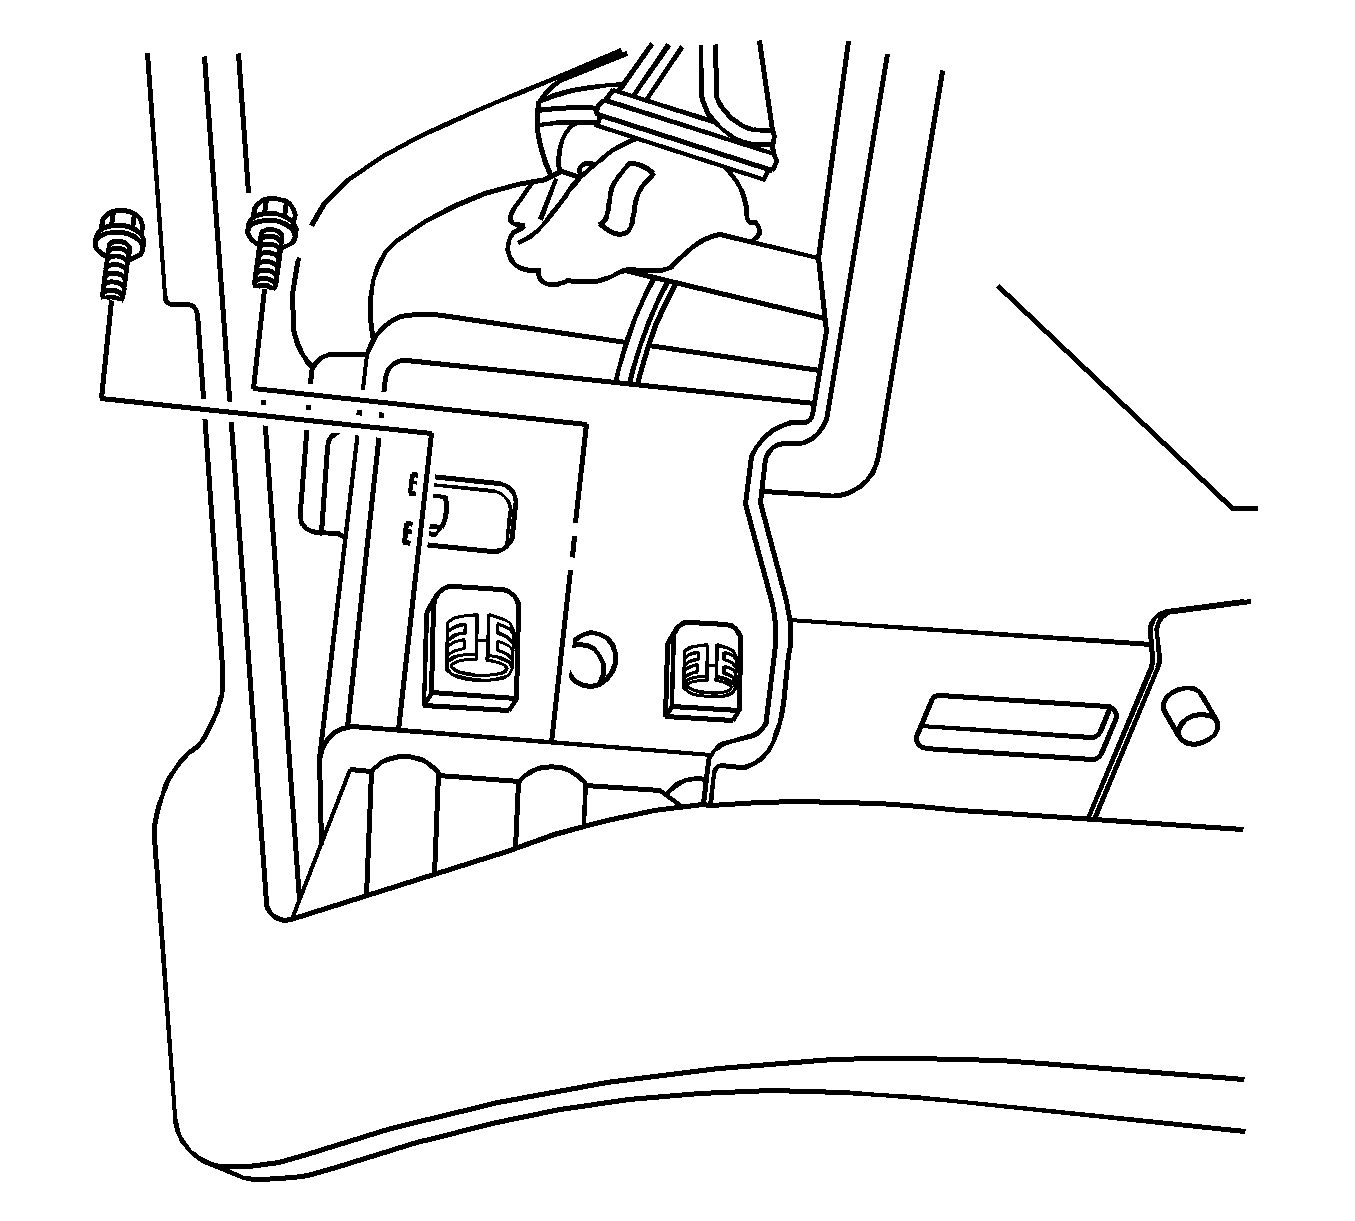
- Remove the left knee bolster bracket. Refer to Knee Bolster Bracket Replacement .
- Remove the I/P storage compartment. Refer to Instrument Panel Compartment Replacement .
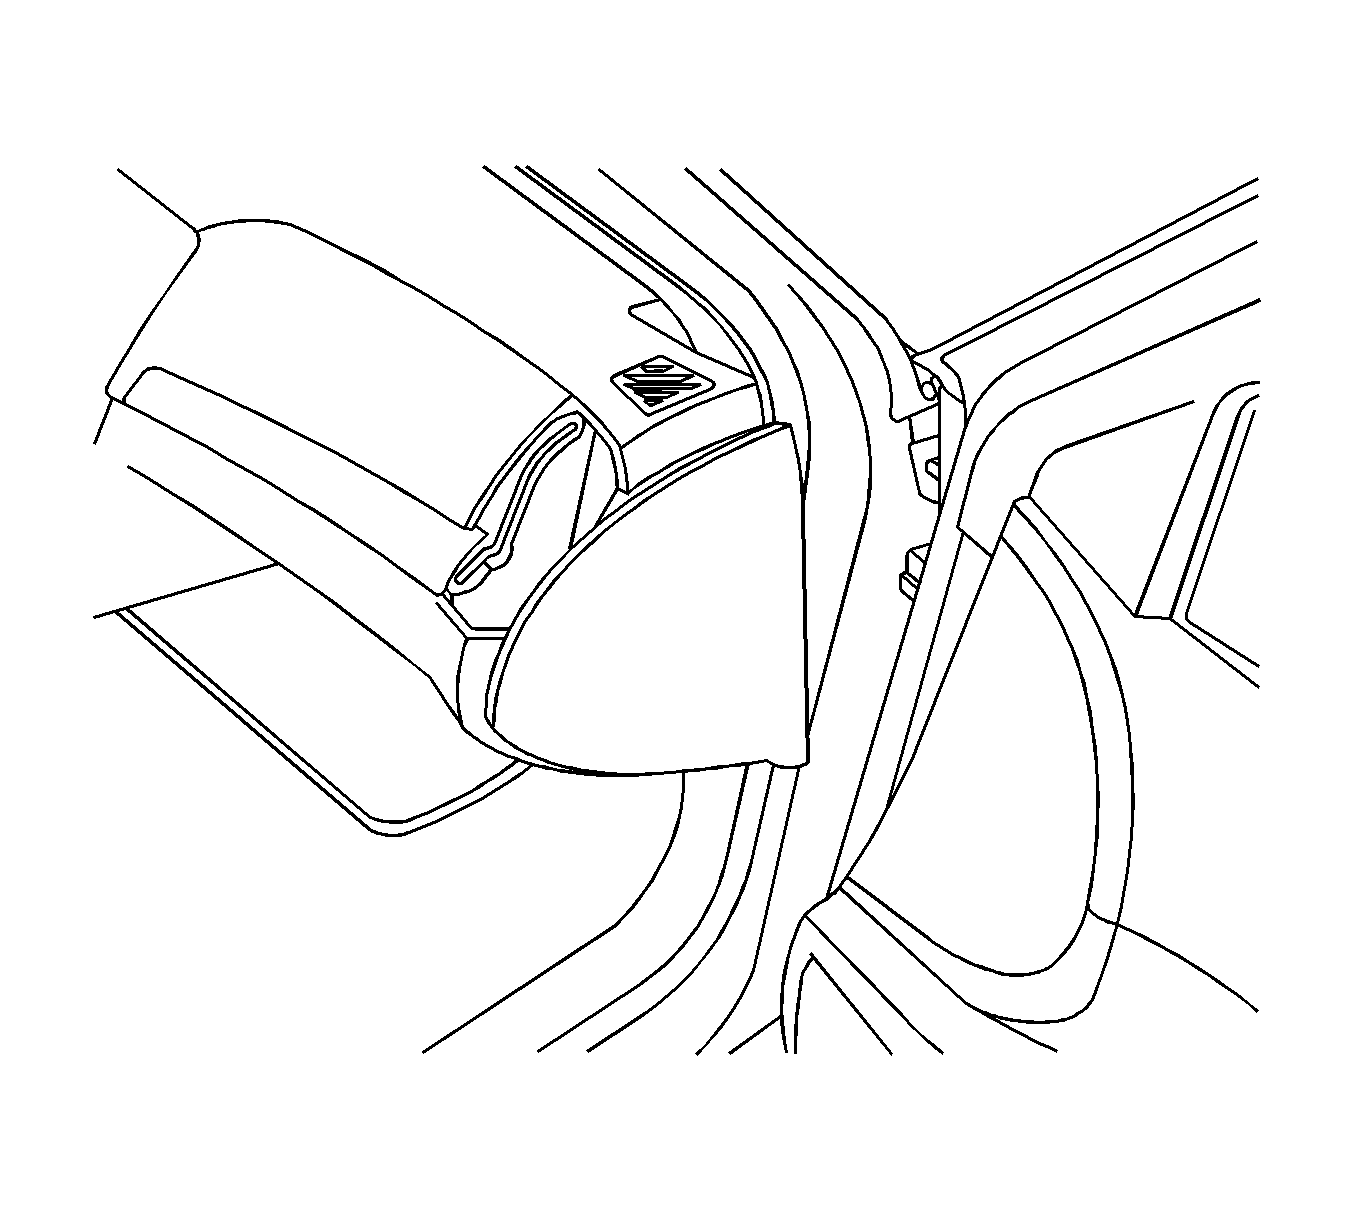
- Remove the left and right trim panels from the instrument panel.
- Remove the left and right air outlets from the instrument panel.
- Remove the instrument cluster trim panel. Refer to Instrument Cluster Trim Panel Replacement .
- Remove the instrument panel cluster (IPC). Refer to Instrument Cluster Replacement .
- Remove the defroster grille. Refer to Defroster Grille Replacement .
- Remove the front speaker from the instrument panel. Refer to Front Upper Speaker Replacement .
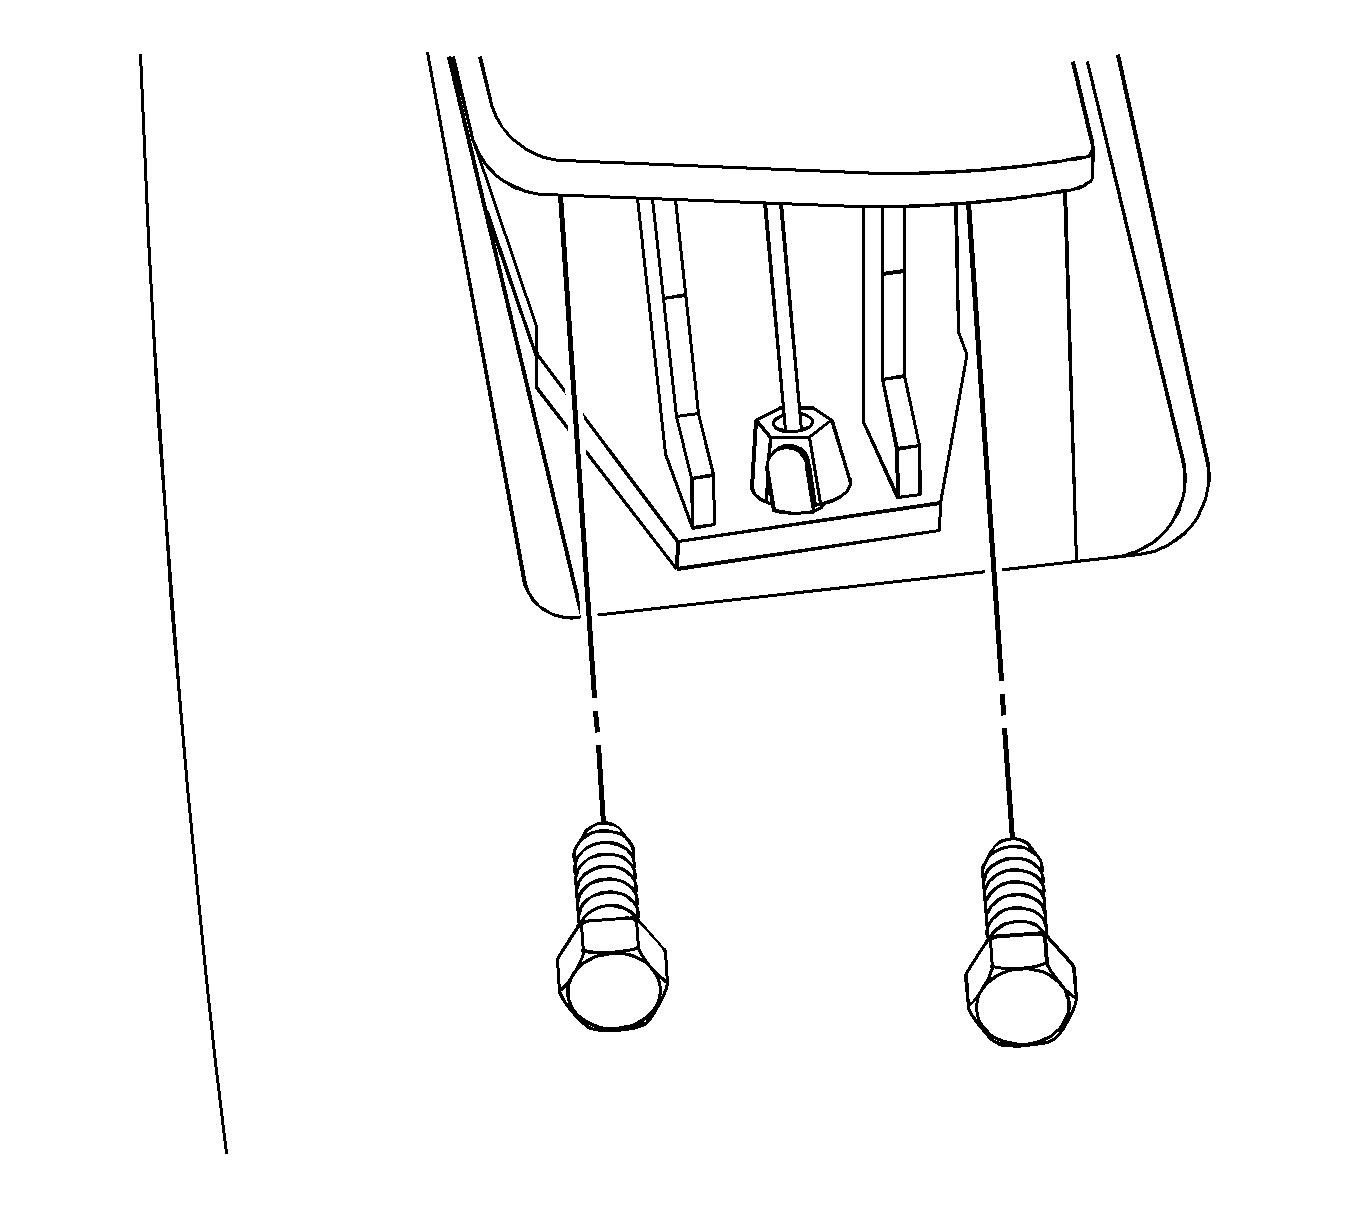
- Remove the bolts securing the engine lid release handle, and remove the engine lid release handle.
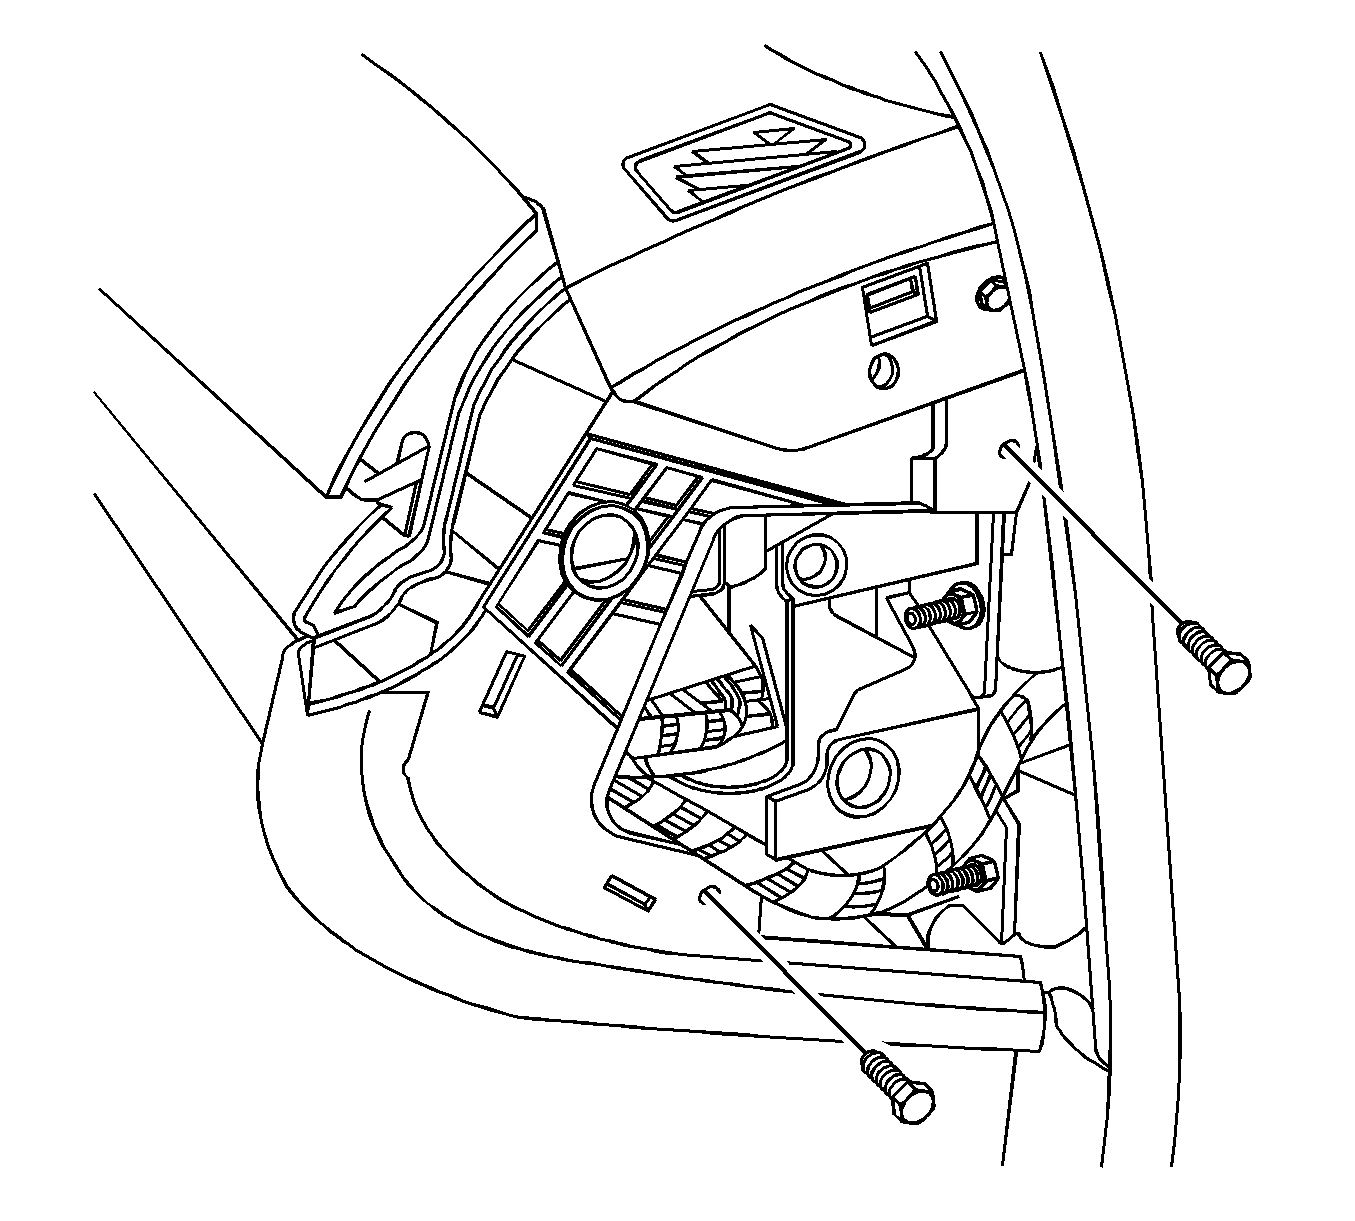
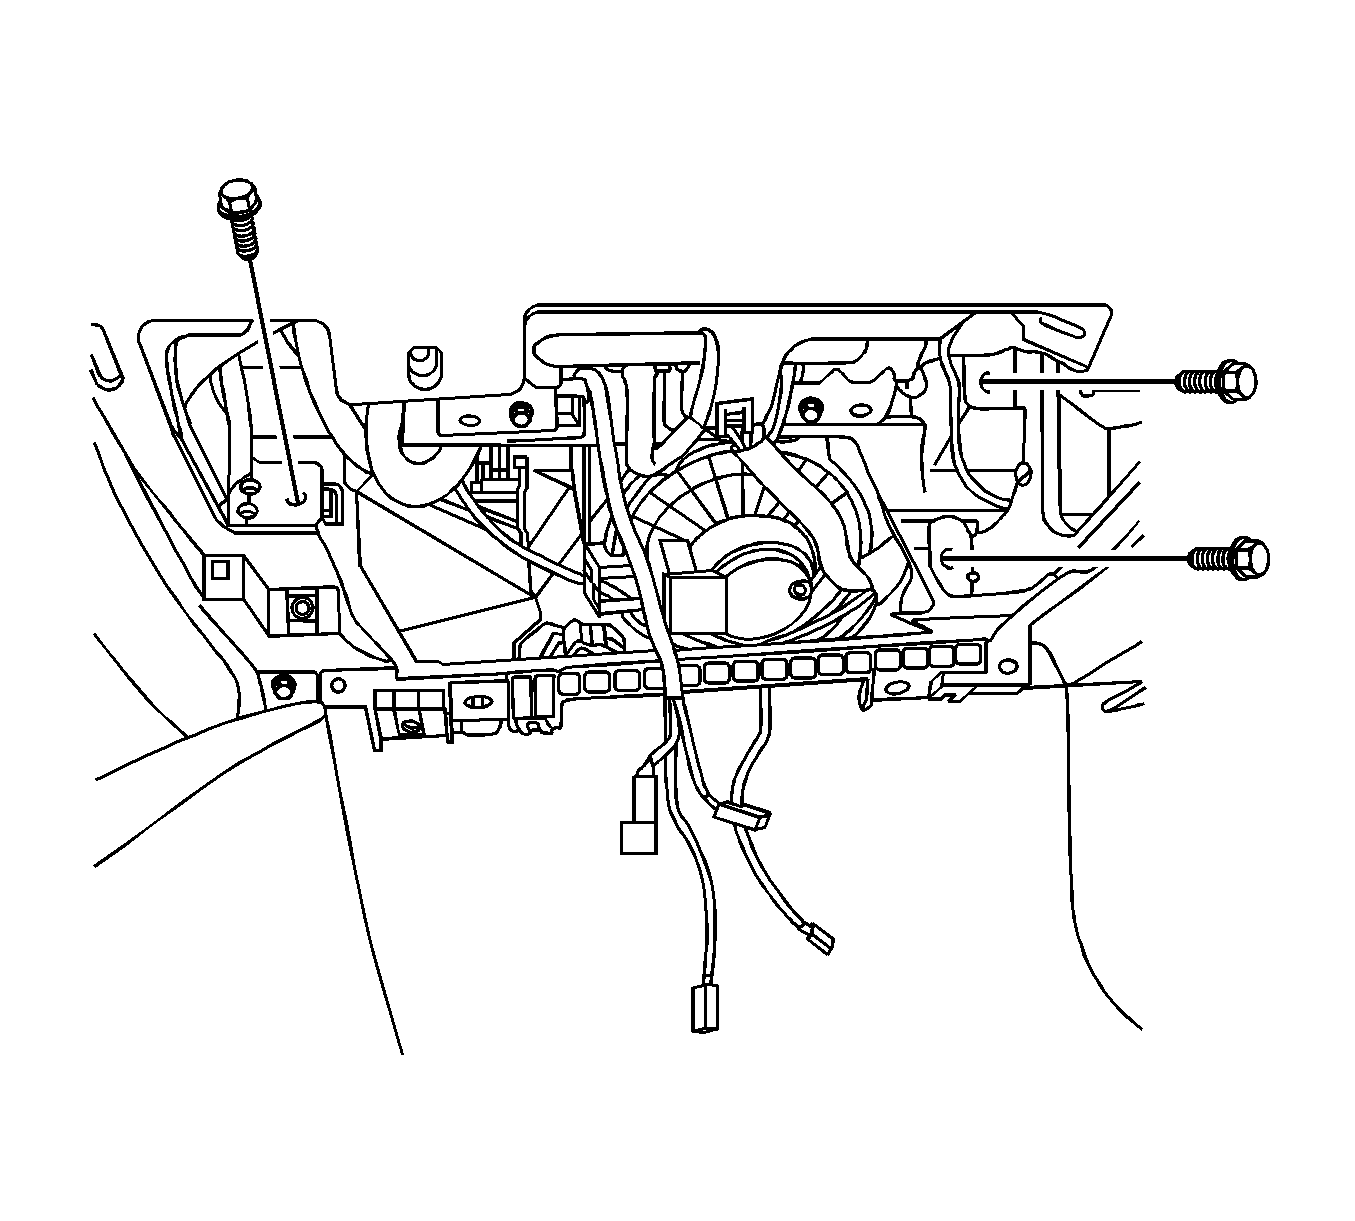
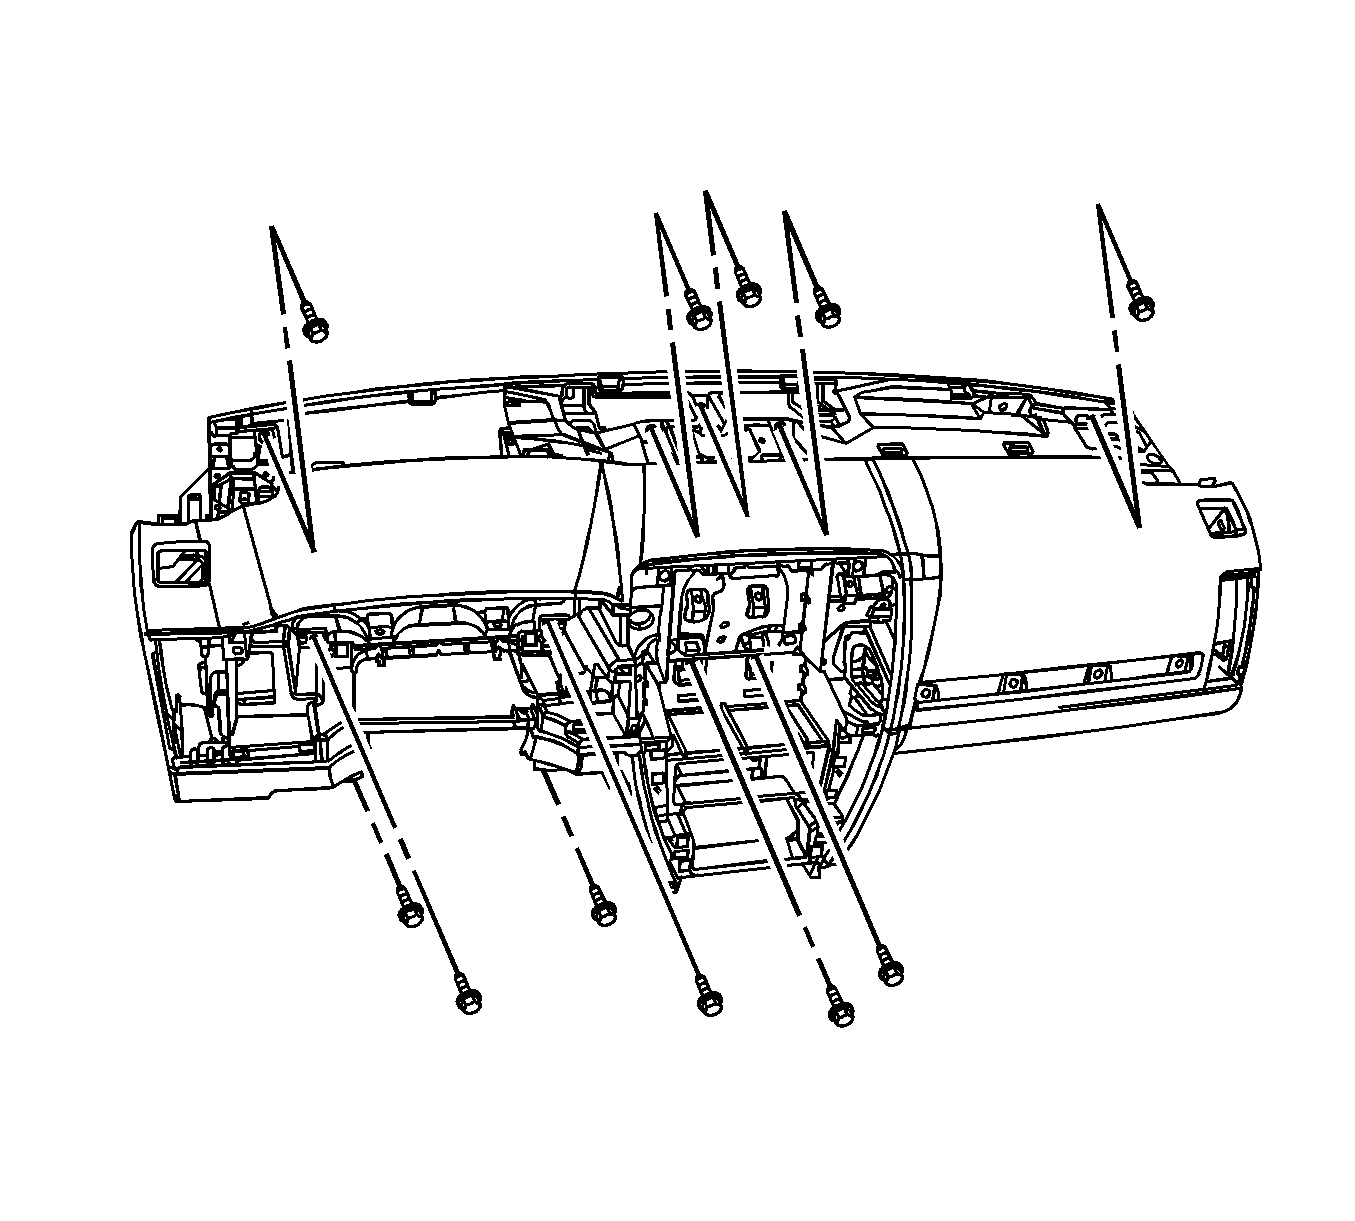
- Remove the bolts securing the left and right ends of the instrument panel retainer to the carrier.
- Remove the bolts securing the passenger side instrument panel retainer.
- Remove the bolts securing the instrument panel behind the engine lid release handle to the bracket.
- Remove the bolts securing the instrument panel retainer to the bracket.
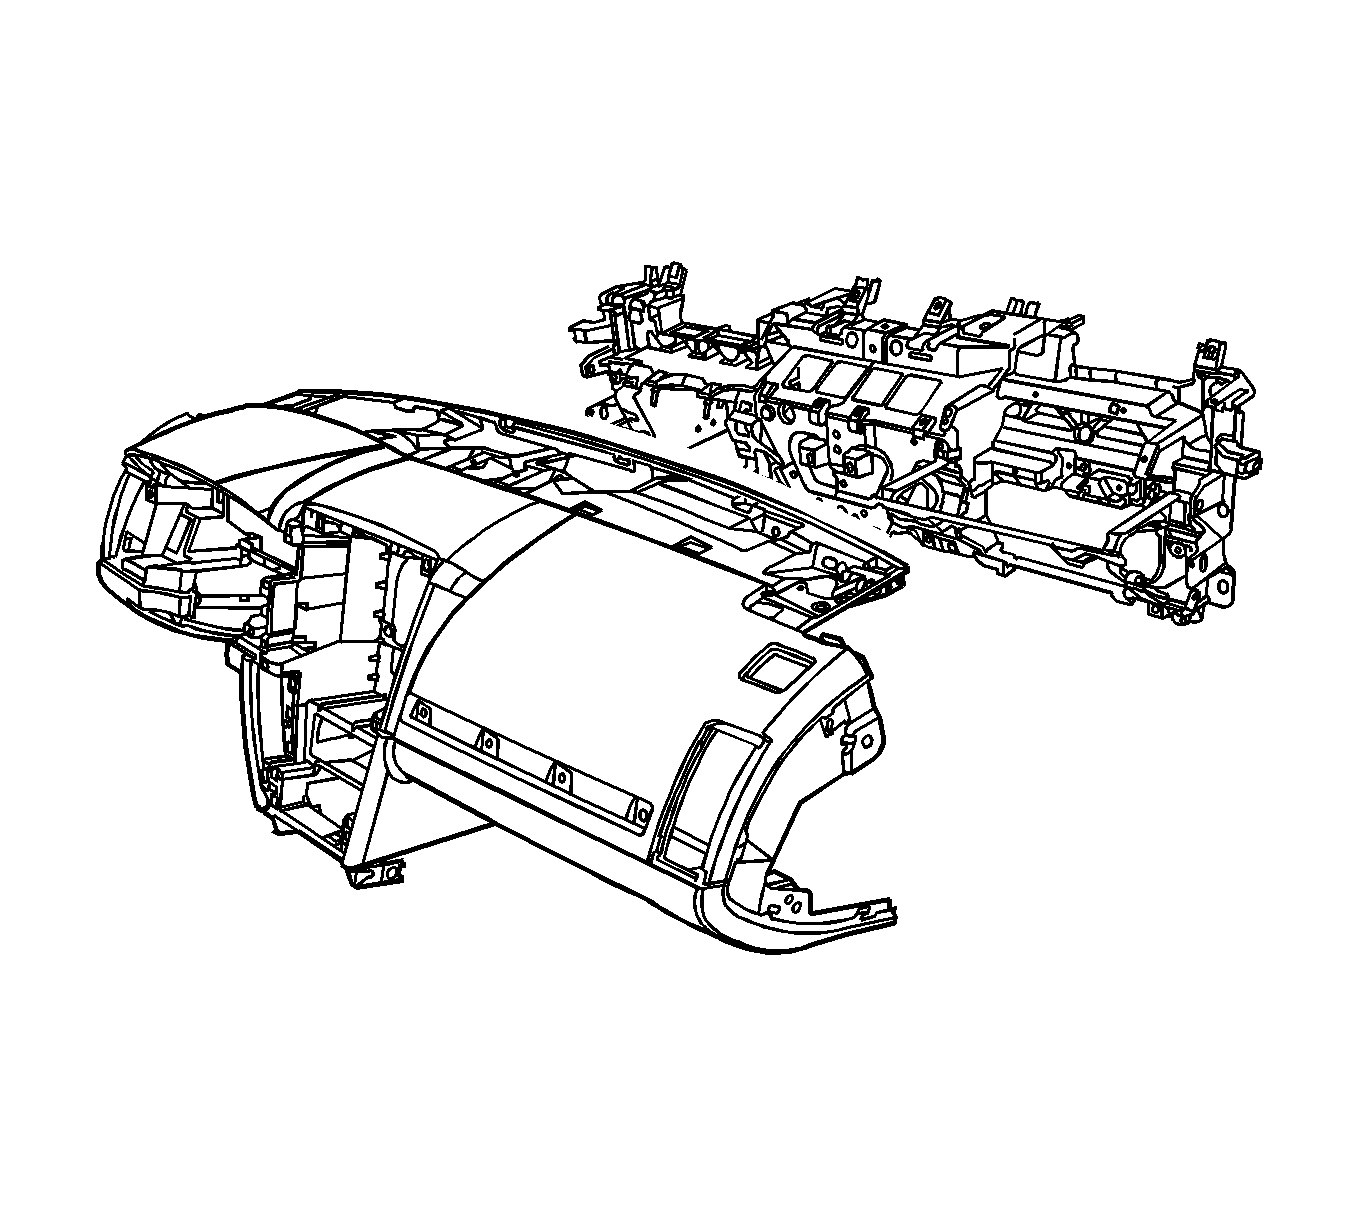
- Remove the instrument panel (I/P).
Installation Procedure
- Locate the instrument panel onto the carrier.
- Install the I/P wiring harness back to the noted position.
- Install the bolts securing the instrument panel retainer to the bracket.
- Install the bolts securing the instrument panel behind the engine lid release handle to the bracket. (2 bolts)
- Remove the bolts securing the passenger side instrument panel retainer.
- Install the bolts securing the left and right ends of the instrument panel retainer to the bracket.
- Install the bolts securing the engine lid release handle in order to install the engine lid release handle.
- Install the front speaker to the I/P. Refer to Front Upper Speaker Replacement .
- Install the defroster grille. Refer to Defroster Grille Replacement .
- Install the I/P cluster (IPC). Refer to Instrument Cluster Replacement .
- Install the instrument cluster trim panel. Refer to Instrument Cluster Trim Panel Replacement .
- Install the left and right air outlets to the instrument panel.
- Install the left and right trim panels to the instrument panel.
- Install the instrument panel compartment. Refer to Instrument Panel Compartment Replacement .
- Install the left knee bolster bracket. Refer to Knee Bolster Bracket Replacement .
- Install the combination switch. Refer to Turn Signal Multifunction Switch Replacement .
- Install the steering wheel. Refer to Steering Wheel Replacement .
- Install the radio. Refer to Radio Replacement .
- Install the HVAC control module. Refer to HVAC Module Assembly Replacement .
- Install the instrument panel center air outlet. Refer to Instrument Panel Center Air Outlet Replacement .
- Install the center floor console. Refer to Front Floor Console Replacement .
- Install the front seats. Refer to Driver or Passenger Seat Replacement .
Notice: Refer to Fastener Notice in the Preface section.
Tighten
Tighten the bolts to 10 N·m (90 lb in).
Tighten
Tighten the screws to 9 N·m (90 lb in).
Tighten
Tighten the screws to 10 N·m (90 lb in).
Tighten
Tighten the screws to 10 N·m (90 lb in).
